
Cute Crochet Lemon Beginner Amigurumi Pattern
This crochet lemon plush is a tiny, happy project that looks adorable on a desk, shelf, or keychain. If you enjoy sweet, simple toys, you’ll love this amigurumi lemon with big eyes, a little smile, and soft pink cheeks. This step-by-step tutorial is written in clear, beginner-friendly English. The shapes are easy, the details are simple, and the finished lemon makes a lovely handmade gift, room decor, or a cute little market item.
An amigurumi crochet lemon is a small stuffed lemon made using tight crochet stitches sewn into a soft plush toy. Amigurumi simply means crocheted (or knitted) stuffed toys, usually with simple shapes and cute faces. They are popular because they are relaxing to make and easy to personalize. This lemon design is small and round, with a plum-like shape. It uses yellow yarn for the main body, plus large black safety eyes that make the face extra cute. The mouth is a tiny embroidered smile, and the cheeks have a gentle pink blush that gives a friendly expression.
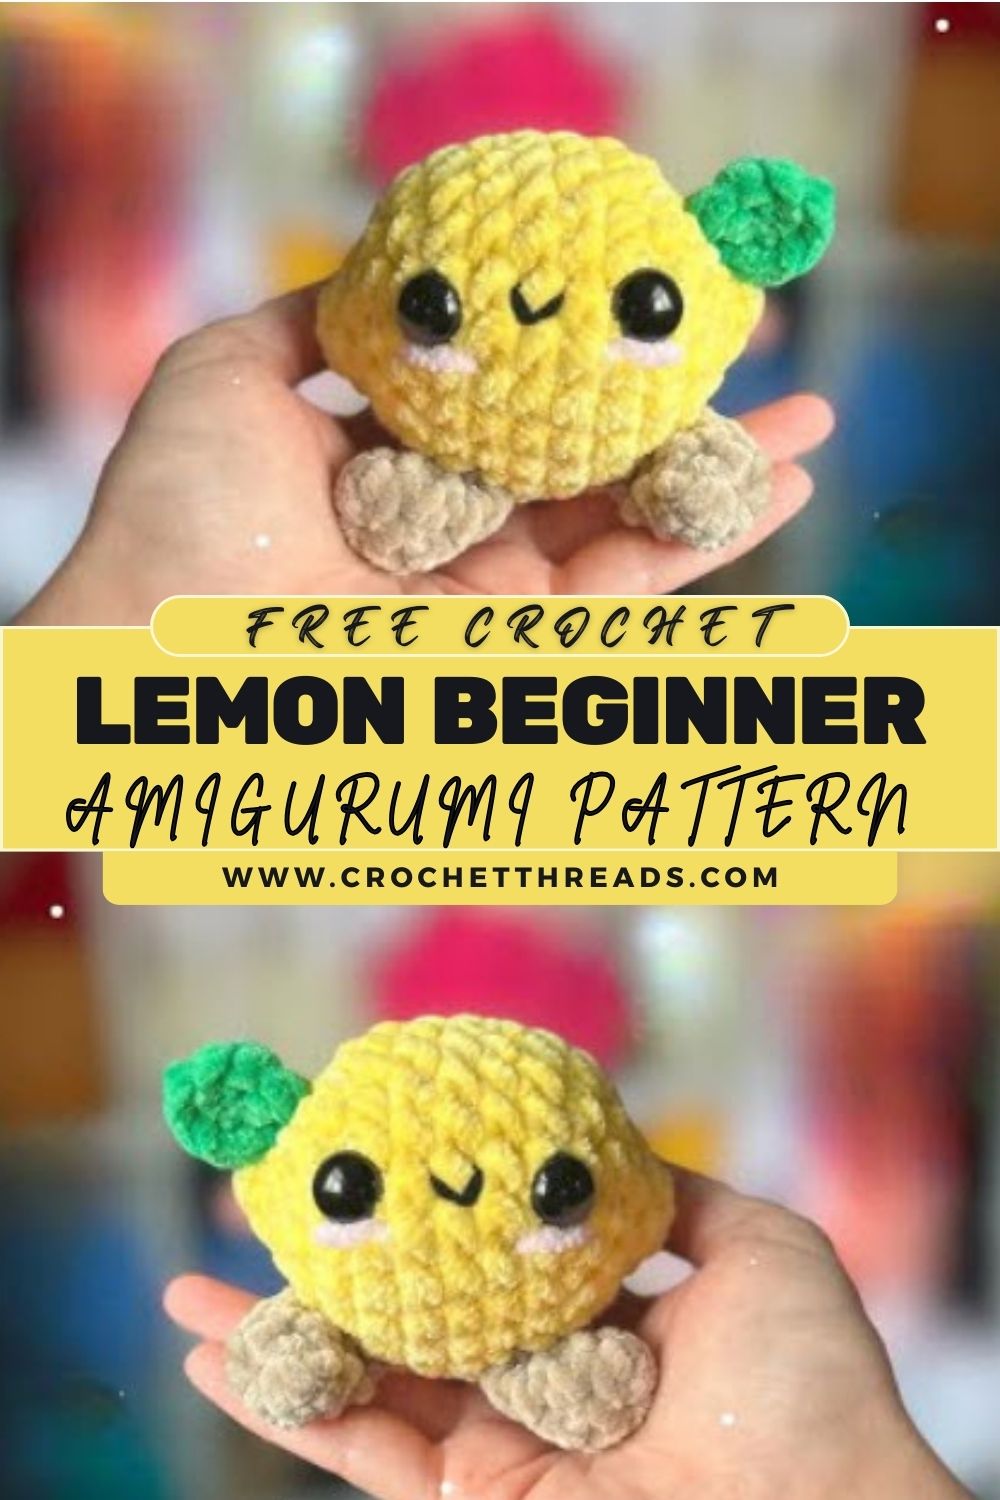
This project is ideal for beginners because it uses basic amigurumi stitches: single crochet, increases, and decreases. It is also a great pattern if you want something quick. You can make it as a toy, a gift, a keychain-style plush, a cute photo prop, or part of a full fruit collection (lime, orange, strawberry, and more).
Materials Needed (With Purpose)
- Yellow yarn: for the lemon body
- Green yarn: for the leaf detail
- Beige or light brown yarn: for the small feet
- Black safety eyes (8–12 mm): for the cute face (bigger eyes = more kawaii)
- Pink yarn / pink embroidery thread / blush fabric or cosmetic blush: for cheeks
- Crochet hook:
- 2.75–3.5 mm for DK/worsted yarn (tight stitches for amigurumi)
- 4.5–6 mm for plush yarn (use the label as a guide)
- Fiberfill stuffing: to make the lemon plush and soft
- Yarn needle: for sewing parts and embroidery
- Stitch marker: to track your rounds
- Scissors: to cut yarn neatly
- Optional keychain ring: if you want to hang it on keys or a bag
Crochet Abbreviations / Terms
- MR (Magic Ring): a way to start a circle and pull it tight so there is no hole
- ch (Chain): the basic starting stitch
- sc (Single Crochet): the main stitch used in amigurumi
- inc (Increase): 2 sc in the same stitch (makes your circle bigger)
- dec (Decrease): crochet 2 stitches together (makes your shape smaller)
- sl st (Slip Stitch): a joining stitch, also used to finish edges
- st (Stitch): one stitch
- FO (Fasten Off): cut yarn and secure it
Finished Size and Skill Level
- Finished size: about 8–11 cm (3–4.5 inches) tall (depends on yarn/hook)
- Skill level: Beginner to easy intermediate
- Time needed: about 1.5–4 hours
Pattern Overview
This lemon plush is made in simple parts:
- Main lemon body (yellow): crocheted in rounds, stuffed to keep it round
- Feet (beige/light brown): two small pieces attached at the bottom
- Leaf (green): one small leaf sewn on top or side
- Face details: safety eyes, embroidered smile, and blush cheeks
- Final assembly: sew feet, leaf, and add face details neatly
The main body is a single piece, so beginners do not have to assemble multiple parts.
Step-by-Step Crochet Pattern (Important Notes)
- Work in continuous rounds (do not join rounds).
- Put a stitch marker in the first stitch of each round.
- Keep stitches tight so stuffing does not show.
- Count stitches at the end of every round.
Optional lemon texture (easy ridges)
If you want a natural lemon look, crochet a few rounds in BLO (back loop only). This creates soft ridges like lemon segments. If you want a smooth lemon, just crochet a normal sc.
Lemon Body Pattern (Yellow Yarn)
Round 1: 6 sc in MR (6)
Round 2: inc in each st around (12)
Round 3: (sc, inc) around (18)
Round 4: (2 sc, inc) around (24)
Round 5: (3 sc, inc) around (30)
Round 6: (4 sc, inc) around (36)
Round 7: sc around (36)
Round 8: sc BLO around (36) (optional ridge)
Round 9: sc around (36)
Round 10: sc BLO around (36) (optional ridge)
Round 11: sc around (36)
Now we shape the lemon a little (so it is not a perfect ball):
Round 12: (10 sc, dec) repeat 3 times (33)
Round 13: sc around (33)
Round 14: (9 sc, dec) repeat 3 times (30)
Round 15: sc around (30)
Add eyes (recommended time)
Place safety eyes between Rounds 9 and 10 about 7–8 stitches apart.
Start stuffing
Stuff the lemon firmly but not too hard.
Round 17: sc around (24)
Round 18: (2 sc, dec) around (18)
Stuff more, push stuffing into the sides to keep it round.
Round 20: (sc, dec) around (12)
Final stuffing and shaping: gently press the bottom slightly flat.
FO, close the hole and weave in ends.
Shaping tip: For a lemon look, keep the top and bottom slightly flatter than the sides, but do not flatten too much.
Feet Pattern (Make 2) – Beige/Light Brown
Round 1: 6 sc in MR (6)
Round 2: sc around (6)
Round 3: (sc, inc) around (9)
FO, leave a long tail for sewing.
Stuffing: Usually, no stuffing for feet. Keep them flat and cute.
Attach: Sew at the bottom front, spaced evenly so the lemon sits nicely.
Leaf Pattern (Green)
Simple leaf (beginner-friendly)
Ch 6
In 2nd ch from hook: sc
Next: hdc
Next 2: dc, dc
Next: hdc
Now work on the other side of the chain:
hdc, dc, dc, hdc, sc
sl st to finish
FO, leave a tail for sewing.
Attach: Sewa leaf at the top near the closing circle, or slightly to the side.
Optional decoration: Add a leaf vein with a simple straight stitch.
Face Detailing
Eyes
- Place between Rounds 9 and 10
- 7–8 stitches apart
- Make sure they are level
Mouth (embroidery)
- Use black thread/yarn
- Make a small curved smile centred below the eyes
- Keep it small for a kawaii look
Pink blush cheeks
- Embroider small pink lines under each eye, or use felt circles
- Cheeks should be slightly lower than the eyes
Balance tip: Look at the plush from a distance to check face placement before tying off embroidery.
Assembly Instructions
- Finish stuffing the lemon body and close the final hole.
- Attach feet: pin first, then sew each foot securely and evenly.
- Attach leaf: sew at the top or side with neat, small stitches.
- Add face details: eyes (if not already), mouth embroidery, blush cheeks.
- Final check: make sure the emon sits straight and the face is centred
Pattern Notes / Pro Tips
- Use a stitch marker every round.
- Do not overstuff; overstuffing can stretch stitches.
- Keep tension consistent for a smooth surface.
- Place eyes early, before closing the body.
- Use invisible decreases for a cleaner finish.
- Check symmetry before sewing the feet and the leaf.
Common Mistakes to Avoid
- Uneven stuffing → add small stuffing pieces and shape slowly
- Eyes too high/low → place between rounds 9–10 for best balance
- Losing stitch count → count every round, use a marker
- Loose stitches → use a smaller hook and tighter tension
- Crooked feet → pin and test sitting position first
- Leaf too big → reduce starting chain to 5
- Messy embroidery → use embroidery thread and keep stitches short
CustCustomizationas
- Add a loop for a keychain
- Use a thicker yarn to make a bigger lemon
- Add two leaves instead of one
- Add a tiny flower next to the leaf
- Change the face (wink, closed eyes, small tongue)
- Make a full fruit set: lime, orange, strawberry
- Use as nursery/desk decor or gift toppers
Why This Pattern Is Great for Beginners
This crochet lemon is beginner-friendly because it is mostly one simple shape worked in rounds. The pattern repeats in a calm, predictable way, and the small extra pieces (feet and leaf) are quick to make. You also learn important amigurumi skills like shaping, stuffing, and face placement without needing advanced stitches.
Conclusion
Making a cute crochet lemon plush is a fun way to practice amigurumi and create something bright and cheerful. This little lemon is quick to crochet, easy to customize, perfect as a handmade gift or a happy desk buddy. Take your time, count your stitches, enjoy the process, and you’ll have a sweet kawaii lemon plush you can proudly display or gift.


