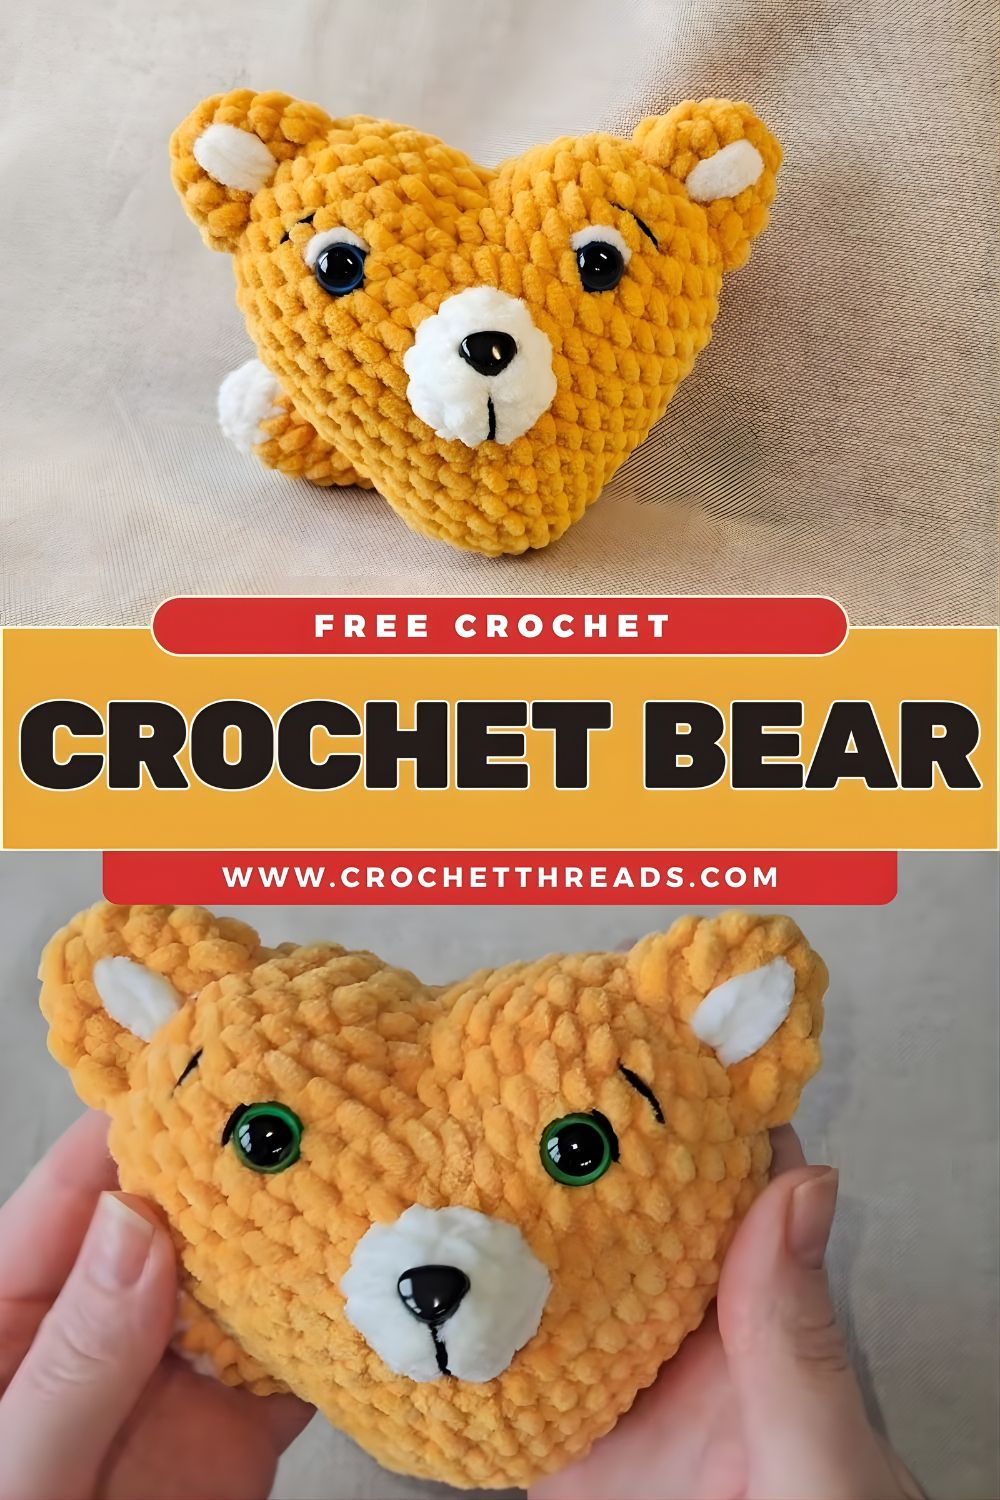
Make a Cute Crochet Bear in Simple Steps – Perfect for Beginners
Make a cute crochet bear plush with this free crochet pattern! Beginner-friendly amigurumi bear tutorial with step-by-step crochet teddy bear pattern.
If you’ve been looking for a beginner crochet project that’s equal parts quick, cute, and giftable, this crochet bear pattern is for you. In this amigurumi bear tutorial, you’ll create a soft crochet plush toy with a classic teddy look—perfect as a baby shower gift, a desk buddy, or a cozy handmade keepsake.
- Skill level: Confident beginner (you’ll practice increases, decreases, and working in the round)
- Final size: 6–8 in (15–20 cm) tall, depending on yarn and hook
- Keywords you’ll see throughout: bear amigurumi pattern, crochet teddy bear pattern, DIY crochet toy, cute crochet bear, free crochet pattern
Materials Needed
To make this crochet plush toy, gather:
- Yarn: Worsted weight (Category 4) acrylic or cotton (main color + optional muzzle accent)
- Hook: 3.5 mm or 4.0 mm (use a smaller hook than the label suggests to avoid gaps)
- Safety eyes: 8–10 mm (or embroider eyes for babies)
- Safety nose: 10–12 mm (optional) or black embroidery floss
- Fiberfill stuffing
- Yarn needle (tapestry needle)
- Scissors
- Stitch marker (highly recommended)
Tip: If you want a mini crochet teddy bear pattern, use DK yarn + a 3.0 mm hook.
Stitch Abbreviations
This free crochet pattern uses standard amigurumi terms:
- MR = magic ring
- sc = single crochet
- inc = increase (2 sc inthe same stitch)
- dec = decrease (single crochet 2 together; use invisible decrease if possible)
- sl st = slip stitch
- st(s) = stitch(es)
- rnd = round
Step-by-Step Pattern Instructions (Crochet Bear Pattern)
Notes Before You Start
- Work in continuous rounds unless stated otherwise.
- Use a stitch marker to mark the first stitch of each round.
- Stuff firmly but not so hard that the stitches stretch.
Head (Bear Amigurumi Pattern)
In the main color
- Rnd 1: MR, 6 sc (6)
- Rnd 2: inc x6 (12)
- Rnd 3: (sc, inc) x6 (18)
- Rnd 4: (2 sc, inc) x6 (24)
- Rnd 5: (3 sc, inc) x6 (30)
- Rnd 6: (4 sc, inc) x6 (36)
- Rnd 7–11: sc around (36) — 5 rounds
- Rnd 12: (4 sc, dec) x6 (30)
- Rnd 13: (3 sc, dec) x6 (24)
- Rnd 14: (2 sc, dec) x6 (18)
- Add safety eyes between Rnds 9–10, about 6–7 sts apart (center them).
- Rnd 15: (sc, dec) x6 (12)
- Rnd 16: dec x6 (6)
- Fasten off, close opening, weave in end.
Body (Crochet Teddy Bear Pattern)
In the main color
- Rnd 1: MR, 6 sc (6)
- Rnd 2: inc x6 (12)
- Rnd 3: (sc, inc) x6 (18)
- Rnd 4: (2 sc, inc) x6 (24)
- Rnd 5–8: sc around (24) — 4 rounds
- Rnd 9: (2 sc, dec) x6 (18)
- Rnd 10–11: sc around (18) — 2 rounds
- Rnd 12: (sc, dec) x6 (12)
- Rnd 13: sc around (12)
- Stuff the body firmly.
- Fasten off with a long tail for sewing to the head.
Ears (Make 2)
In the main color
- Rnd 1: MR, 6 sc (6)
- Rnd 2: (sc, inc) x3 (9)
- Rnd 3: (2 sc, inc) x3 (12)
- Rnd 4: sc around (12)
- Fasten off, leave a tail for sewing.
- Lightly flatten (do not stuff) or add a tiny pinch of stuffing if you like rounded ears. Arms (Make 2)
Inthe main color
- Rnd 1: MR, 6 sc (6)
- Rnd 2: (sc, inc) x3 (9)
- Rnd 3–6: sc around (9) — 4 rounds
- Lightly stuff the bottom half only.
- Flatten opening and sc through both layers across to close (4–5 sc, depends on your tension).
- Fasten off, leave a long tail for sewing.
Legs (Make 2)
In the main color
- Rnd 1: MR, 6 sc (6)
- Rnd 2: inc x6 (12)
- Rnd 3: (sc, inc) x6 (18)
- Rnd 4: sc around (18)
- Rnd 5: (sc, dec) x6 (12)
- Rnd 6–8: sc around (12) — 3 rounds
- Stuff firmly.
- Flatten opening and sc through both layers across to close (6 sc).
- Fasten off, leave a tail for sewing.
Face Details (Muzzle + Nose)
Simple Muzzle (Optional, adds extra “teddy” cuteness)
In a lighter accent color (cream/tan) or use the main color.
- Rnd 1: MR, 6 sc (6)
- Rnd 2: inc x6 (12)
- Rnd 3: (sc, inc) x6 (18)
- Fasten off, leave a long tail for sewing.
Nose & Smile
- If using a safety nose, place it centered on the muzzle piece before sewing (between Rnds 2–3).
- If embroidering: stitch a small triangle/oval nose with black floss, then add a short vertical line and a gentle “V” smile.
Assembly Guide (DIY Crochet Toy)
Use pins or stitch markers to position pieces before sewing.
1) Attach the Head to the Body
- Center the body under the head.
- Sew using whip stitch or mattress stitch through both layers.
- Add a bit more stuffing right before closing the seam for a stable neck.
2) Sew on the Ears
- Place ears on top/sides of the head, roughly around Rnds 4–7 of the head.
- Angle slightly forward for a sweeter cute crochet bear look.
- Stitch securely around the ear base.
3) Add Arms and Legs
- Legs: Sew to the lower sides of the body so the bear can sit (position them toward the front).
- Arms: Sew around the upper sides of the body, just under the head seam.
4) Add the Muzzle and Face
- Sew the muzzle centered below the eyes.
- Lightly stuff the muzzle before finishing the stitches (optional).
- Add/secure the nose and embroider the smile.
Safety note: For children under 3, replace safety eyes/nose with embroidered features.
Tips & Tricks (Beginner Crochet Project Friendly)
- Avoid gaps (“stuffing showing”):
- Use a smaller hook (3.5–4.0 mm for worsted).
- Keep tension snug and consistent.
- Use invisible decreases for smoother shaping.
- Count stitches every round: Amigurumi looks best when stitch counts stay accurate.
- Neat color changes:
- Change color on the last yarn-over of the last sc in the round/row.
- Weave in ends by hiding them inside the stuffed body/head.
- Smooth shaping: Stuff in small pieces, pushing stuffing into curves (cheeks, belly).
- Even eye placement: Insert eyes first, then step back and check symmetry before locking backs.
Finishing Touches (Make Your Crochet Plush Toy Unique)
Personalize your DIY crochet toy with any of these:
- Tiny bow tie (red or pastel yarn ribbon)
- Mini scarf (chain 45–60, sc back across)
- Blush cheeks (a tiny bit of pink yarn embroidery or fabric-safe blush)
- Initials on the foot (embroidered letter)
- Sleepy eyes (embroider curved lines instead of safety eyes)
- Add a tail: small pom-pom or MR 6 sc, fasten off, and stitch on
Conclusion
You’ve just made an adorable crochet teddy bear pattern that’s perfect for gifting, decorating, or building your amigurumi collection. This free crochet pattern is a great stepping stone to more animal patterns. Once you’re comfortable with this amigurumi bear tutorial, try a bunny, cat, or puppy using the same body shapes.
If you enjoyed this crochet bear pattern, save it, share it, and come back to make a whole set of cute crochet bear friends in different colors.