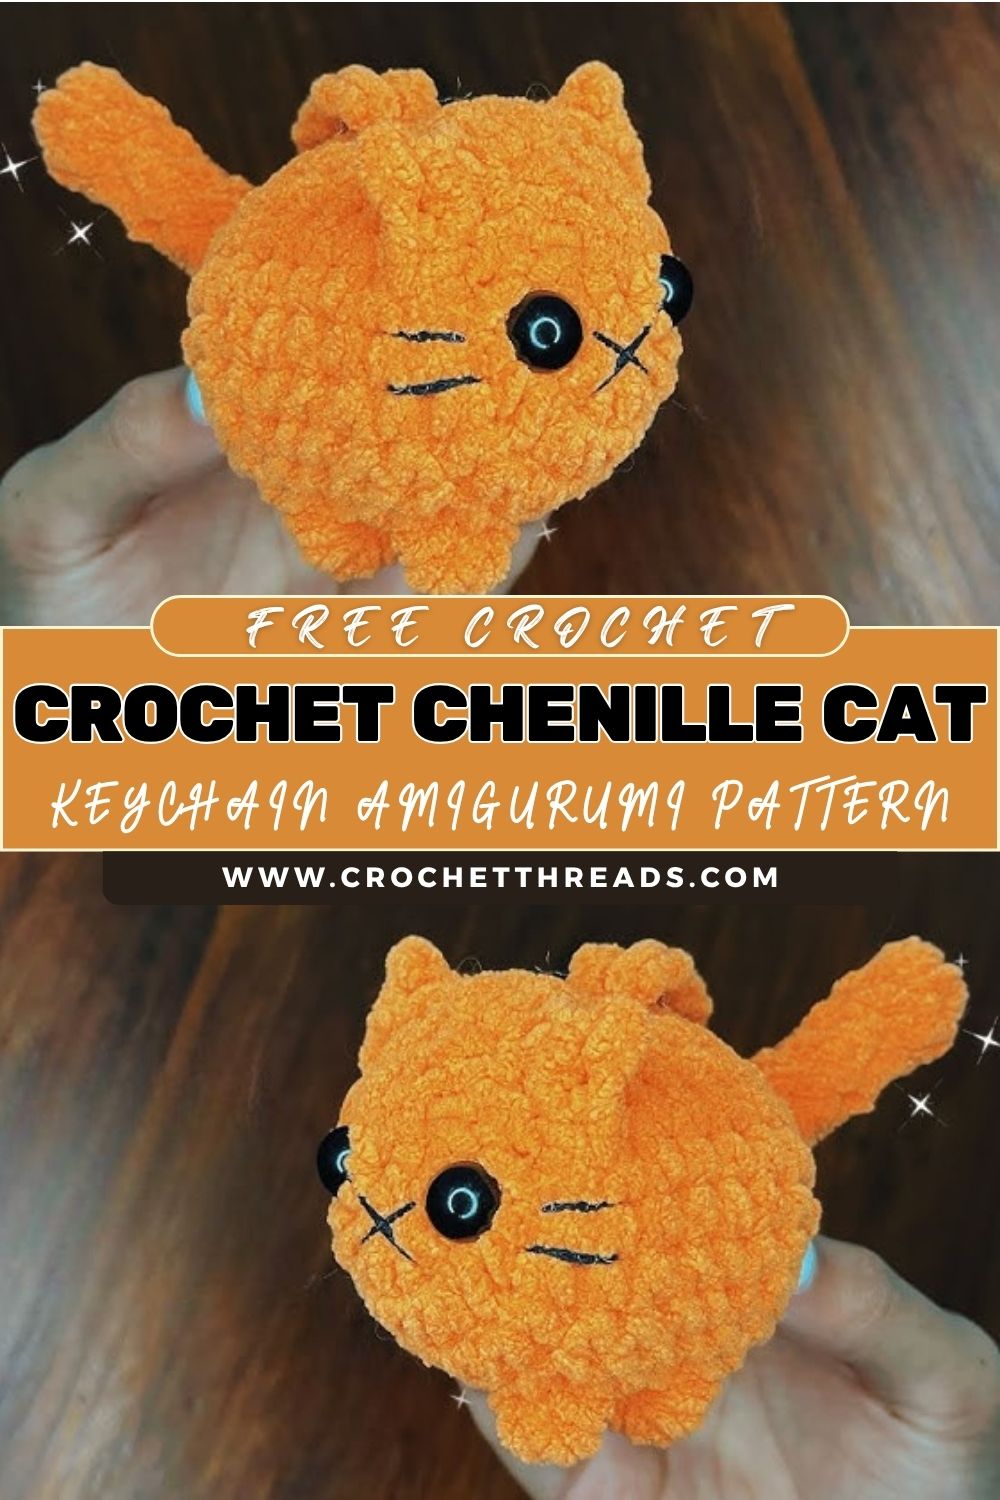
Flawless Crochet Chenille Cat Keychain Amigurumi Pattern for Beginners Step-by-Step
A chenille crochet cat keychain (llavero de gatito) is one of those tiny amigurumi projects that looks instantly adorable the moment the ears go on. The plush, velvety texture of chenille yarn makes the cat feel extra soft and squishy, perfect for anyone who loves cute handmade accessories.
This DIY amigurumi keychain is also a sweet little gift idea: quick to make, easy to customize, and small enough to tuck into a present, party favor bag, or happy mail. Keep one on keys, clip it to a backpack, or add it to a growing collection of tiny crochet friends.
This post walks through a complete Crochet Chenille Cat Keychain pattern with beginner-friendly steps, from the first magic ring to the final keychain hardware. Everything is organized into clear rounds with stitch counts, plus tips for stuffing, shaping, and keeping chenille stitches neat.
The instructions are written as a step-by-step breakdown inspired by the linked video tutorial.l Along the way, you’ll find a full materials list, standard crochet abbreviations, assembly help, and troubleshooting advice. So, even first-time amigurumi makers can confidently inish a sweet little cat knkeychain
Materials Needed (exact items)
- Chenille yarn (super bulky #6)
- Main color (cat body): 20–30 g
- Accent color (optional muzzle/belly): 5–10 g
- Crochet hook: 4.0 mm (use 3.5 mm for tighter stitches if needed)
- Safety eyes: 8 mm (recommended for a chubby mini cat)
Alternative: 6 mm for a smaller/softer look - Stuffing: polyester fiberfill (a small handful)
- Stitch marker: 1 (or a scrap yarn piece)
- Yarn needle (blunt tip) for sewing
- Small scissors
- Keychain hardware:
- 25–30 mm split ring
- Jump ring (optional but helpful)
- Or a lobster clasp if preferred
- Embroidery thread/yarn: black or dark brown (for nose/mouth) + optional white for highlights
Crochet Abbreviations (with quick explanations)
- MR = Magic ring (adjustable starting loop)
- ch = chain
- sc = single crochet
- inc = increase (2 sc in the same stitch)
- dec = invisible decrease (decrease over 2 stitches)
- sl st = slip stitch
- FO = fasten off
- ( ) = repeat what’s inside
- [ ] = stitch count at end of round
Notes fChenille Yarn
- Chenille can hide stitches, use a stitch marker, and count carefully.
- Crochet tight enough to prevent stuffing showing through.
Step-by-Step Instructions (Rounds with Stitch Counts)
(Beginner-friendly written pattern for a plush mini cat keychain.)
Part 1: Body + Head (one piece)
Round 1: MR, 6 sc [6]
Round 2: inc x6 [12]
Round 3: (sc, inc) x6 [18]
Round 4: (2 sc, inc) x6 [24]
Round 5: (3 sc, inc) x6 [30]
Rounds 6–8: sc around [30] (3 rounds)
Add safety eyes (before shaping closed):
- Place eyes between Rounds 7–8, about 6–7 stitches apart.
- Check position before securing backs (chenille is hard to redo).
Round 9: (3 sc, dec) x6 [24]
Round 10: (2 sc, dec) x6 [18]
Round 11: (sc, dec) x6 [12]
Start stuffing firmly, shaping into a smooth ball.
Round 12: dec x6 [6]
FO, close the hole, weave in the end.
Making time: ~45–70 minutes (chenille counting slows things slightly)
Part 2: Ears (make 2)
Round 1: MR, 4 sc [4]
Round 2: (sc, inc) x2 [6]
Round 3: sc around [6]
FO, leave a long tail for sewing.
Optional: pinch the base slightly to make a sharper ear point.
Attach ears:
- Position on top of the head, slightly forward for a cute look.
- Sew neatly through the ear edges and head stitches.
Making time: ~15–25 minutes total
Part 3: Tail
Round 1: MR, 5 sc [5]
Round 2: sc around [5]
Round 3: (sc, inc) around [7–8] (either size is fine)
Round 4: sc around [7–8]
FO, leave sewing tail. Lightly stuff or leave unstuffed for a flatter tail.
Attach tail:
- Sew to the cat’s lower back so it “peeks out.”
Making time: ~10–15 minutes
Face Details (Eyes + Nose + Mouth)
Safety Eyes
- Already placed between Rounds 7–8 (recommended).
- If using felt eyes instead (for children under 3), stitch them on securely.
Nose + Mouth (embroidery)
- Thread black/dark yarn on a needle.
- Stitch a tiny triangle or rounded nose centered under the eyes.
- Add a short vertical line downward.
- Stitch a small curve to each side for a simple smile.
Tip: When using chenille, use a smoother yarn (cotton or acrylic) for embroidery so the details stay crisp.
SAssembly& Assembly (neat beginner method)
- Stuff gradually: small pieces, push into shape with the blunt end of the hook or needle.
- Firm but not stretched: overstuffing can make gaps.
- Pin parts first (ears/tail) using stitch markers before sewing.
- Hide ends cleanly: run the yarn tail through the body, pull slightly, and snip; the end will retract inside.
Adding the Keychain Hardware
Option A: Yarn loop (simple + sturdy)
- Attach yarn at the top of the head (between ears).
- ch 12–18 (depending on ring size).
- sl st back into the same spot to form a loop.
- Knot securely, weave the tail inside.
- Add a keychain ring through the loop.
Option B: Jump ring attachment (more “professional”)
- Insert a jump ring through several stitches at the top of the head.
- Close the ring tightly.
- Attach a split ring or a clasp to the jump ring.
Important: Do not attach the keychain with only one stitch—the chenille can snap when pulled. Anchor through multiple stitches.
Finishing Touches
- Add tiny white eye highlights (optional) with embroidery thread.
- Brush the surface gently with fingers to fluff chenille fibers.
- Double-check all seams (ears and keychain loop) and reinforce if needed.
Tips & Troubleshooting (plus variations)
Helpful Tips
- Count every round using a marker, chenille hides stitch definition.
- Use a smaller hook if holes show (3.5 mm works well for many chenille brands).
- Sew with matching yarn for invisible seams, but embroider with smoother yarn for clean facial lines.
- Test eye placement before locking back, and move them around until the expression feels right.
Common Mistakes to Avoid
- Skipping stitch count leads to lopsided shaping fast.
- Overstuffing: makes stitches spread and the cat look bumpy.
- Loose keychain attachment: can break during daily use.
- Ears too far apart: can make the top look slightly flat, forward, and closer; usually looks cuter.
Creative Variations
- Colors: cream, gray tabby, black cat, pastel “kawaii” shades.
- Bigger size: use thicker chenille, a 5.0 mm hook, and add 1 extra increase round (go up to 36 stitches).
- Different faces: sleepy eyes, embroidered lines, tiny “:3” mouth, or blush cheeks with pink thread.
- Accessories: mini bow, tiny scarf (ch 25–30), or a bell charm on the key ring.
Conclusion for( Crochet Chenille Cat Keychain )
A plush chenille crochet cat keychain is a small project with a big payoff: soft texture, quick stitches, and an instantly giftable result. This little llavero de gatito is perfect for practicing amigurumi, learning assembly, and experimenting with cute facial expressions.