
Polished Crochet Mooncake shaped body Amigurumi Pattern Step‑by‑Step
If you’re searching for a crochet amigurumi pattern that’s cute, quick, and beginner-friendly, this project is a great choice. With a rounded head, simple ears, sweet face details, and a soft mooncake-shaped body, it’s the kind of plush you can finish in a weekend.
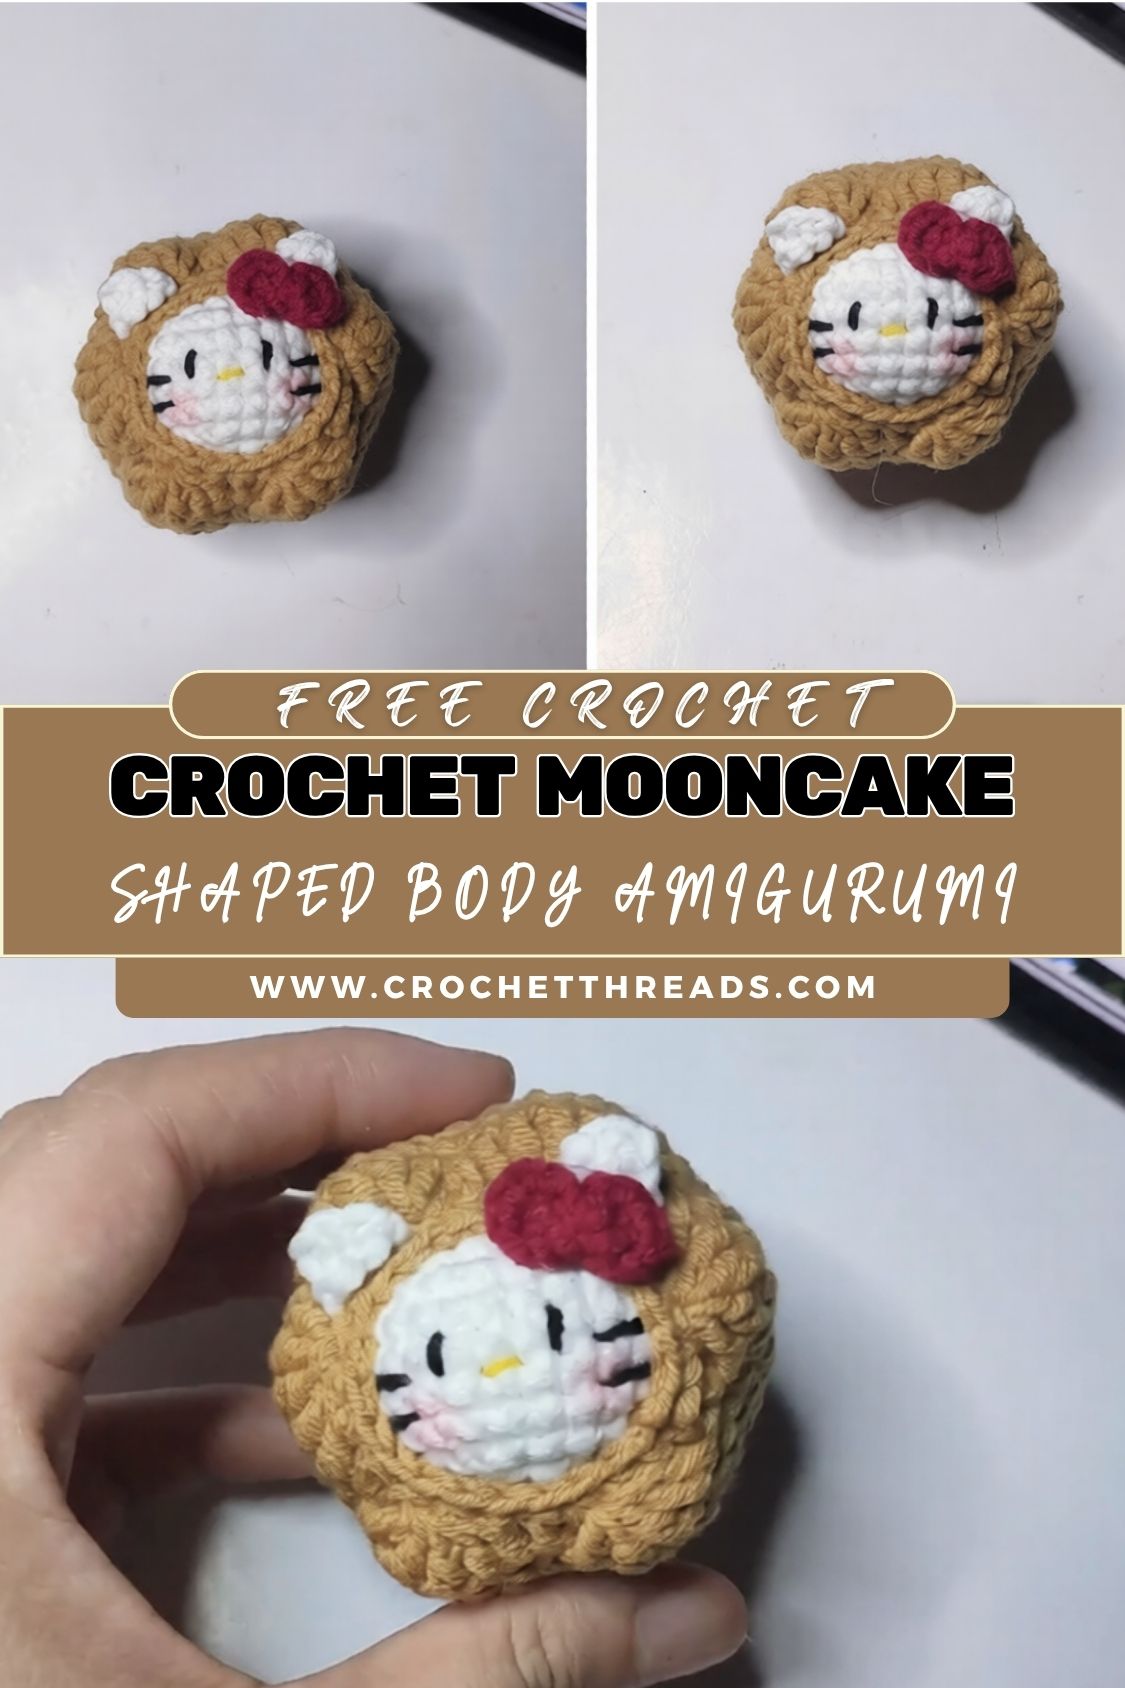
This crochet amigurumi pattern focuses on clean, simple shapes: a ball-like head, small ears, and a flattened, rounded “mooncake” body that looks like a cute dessert bun. The charm comes from the details, embroidered cheeks, tiny mouth, safety eyes (optional), and embellishments like a bow or colorwork accents.
Materials & Tools
Use whatever yarn size you’re comfortable with,h just keep your hook slightly smaller than the yarn label suggests to get tight stitches.
Yarn (suggested)
- Main color: cream/white/beige (mooncake “bun” color)
- Accent color(s): pink (cheeks/bow), brown (mouth/eyebrows), optional pastel for decorative top
- Yarn type: smooth acrylic or cotton blend
- Weight: DK (3) or Worsted (4)
Hook + Notions
- Crochet hook: 2.5–3.5 mm (DK yarn) or 3.5–4.0 mm (worsted)
- Safety eyes: 6–10 mm (optional)
- Alternative: black yarn to embroider eyes
- Fiberfill stuffing
- Stitch marker (highly recommended)
- Yarn needle/tapestry needle
- Scissors
- Optional:
- Blush or pink pastel/chalk for cheeks
- Small ribbon (if not crocheting a bow)
- Keychain hardware (if making it a bag charm)
Skill Level
Beginner (Confident Beginner).
You should be comfortable with:
- Working in the round (spiral)
- Single crochet (sc)
- Increase (inc)
- Decrease (dec)
- Basic sewing/assembly
Step‑by‑Step Pattern Instructions (Clear Rounds + Stitch Counts)
Abbreviations (US terms)
- MR = magic ring
- sc = single crochet
- inc = increase (2 sc in the same stitch)
- dec = decrease (single crochet 2 together; use invisible dec if possible)
- sl st = slip stitch
- ch = chain
- FLO/BLO = front/back loop only
Work in a continuous spiral unless noted. Use a stitch marker to mark the first stitch of each round.
Head (Round ball)
Rnd 1: MR, 6 sc (6)
Rnd 2: inc x6 (12)
Rnd 3: (sc 1, inc) x6 (18)
Rnd 4: (sc 2, inc) x6 (24)
Rnd 5: (sc 3, inc) x6 (30)
Rnd 6: (sc 4, inc) x6 (36)
Rnd 7–11: sc around (36) for 5 rounds
Place eyes (optional):
- Insert safety eyes between Rnd 9 and Rnd 10, about 6–7 stitches apart (adjust to your look).
Rnd 12: (sc 4, dec) x6 (30)
Rnd 13: (sc 3, dec) x6 (24)
Rnd 14: (sc 2, dec) x6 (18)
Start stuffing firmly, then shape into a smooth sphere.
Rnd 15: (sc 1, dec) x6 (12)
Rnd 16: dec x6 (6)
Fasten off, close the hole, and weave in the end.
Face Details (Eyes, mouth, cheeks)
You can do all embroidery even if you use safety eyes.
Embroidered mouth (simple “w” or smile)
- With brown/black yarn, stitch a tiny “V” or curved smile centered 1–2 rounds below the eyes.
- For a “kawaii” look: add a tiny vertical stitch under the smile.
Cheeks
- Use pink yarn to stitch two small ovals, or
- Lightly apply blush/pastel under each eye.
Optional eyebrows/highlights
- Small straight stitches above the eyes = sleepy/cute expression.
- White yarn highlights in the eyes (if embroidered) add sparkle.
Ears (Make 2)
Small, rounded ears suit a mooncake plush style.
Rnd 1: MR, 6 sc (6)
Rnd 2: (sc 1, inc) x3 (9)
Rnd 3: sc around (9)
Flatten ear and sc through both layers across the top to close (4–5 sc).
Fasten off,f leaving a long tail for sewing.
Variation: For pointy ears, increase less and pinch the top when sewing.
Body / “Mooncake Shape” (Flattened bun)
This is formed into a wide circle, slightly built up, and stuffed to resemble a thick, soft cookie/bun.
Rnd 1: MR, 6 sc (6)
Rnd 2: inc x6 (12)
Rnd 3: (sc 1, inc) x6 (18)
Rnd 4: (sc 2, inc) x6 (24)
Rnd 5: (sc 3, inc) x6 (30)
Rnd 6: (sc 4, inc) x6 (36)
To keep it “mooncake-like” (a bit flatter), don’t make it too tall:
Rnd 7–9: sc around (36) for 3 rounds
Now begin shaping inward:
Rnd 10: (sc 4, dec) x6 (30)
Rnd 11: (sc 3, dec) x6 (24)
Stuff firmly aims for a plump disc, not a ball.
Optional ridge (mooncake edge detail):
Rnd 12 (BLO): sc around (24)
This creates a subtle “edge line.”
Continue closing:
Rnd 13: (sc 2, dec) x6 (18)
Rnd 14: (sc 1, dec) x6 (12)
Add more stuffing as needed.
Rnd 15: dec x6 (6)
Fasten off and close.
Embellishments (Bows, colorwork, decorative top)
Option A: Tiny crochet bow (classic kawaii)
With pink yarn:
- ch 12
- In 2nd ch from hook: sc across (11)
- ch 1, turn: sc across (11)
Fasten off.
Wrap a short strand around the center tightly 4–5 times, knot in the back.
Sew a bow onto the head or body.
Option B: Colorwork “mooncake stamp” circle
With a contrasting yarn:
- MR, 6 sc
- inc x6 (12)
Fasten off, sew on the top center of the body like a little stamp.
Option C: Surface slip stitches (simple pattern)
Use a contrasting yarn and surface sl st in a small spiral or “flower” on the top of the body.
Assembly (Sewing Pieces Together)
Attach ears to the head
- Pin ears first: typically between Rnd 5–7 of the head.
- Sew securely with small whip stitches. Attach the head to the body.
- Center the head on the body.
- Sew around the neck seam with tight, even stitches.
- Add a bit more stuffing to the neck area if it seems wobbly.Add bow / top decorati.on
- Sew the bow slightly off-center for extra charm.
- If adding a “stamp” circle, place it at the top center of the mooncake body.Final face check
- Make sure cheeks are even.
- Gently tug the embroidery to center it before weaving the ends inside.
Tips & Tricks (Beginner Best Practices)
- Use a smaller hook than normal. Tight stitches prevent stuffing from showing.
- Count every round. Most “lumpy” shapes come from missed increases/decreases.
- Invisible decreases (FLO dec) look cleaner than standard dec.
- Stuff in layers. Add a little stuffing, shape, then add more, especially for the mooncake body, so it stays flat and plump.
- Pin before sewing. Pins (or spare stitch markers) help align ears and head placement.
- Color changes: finish the last yarn-over of the last stitch with the new color for a neat transition.
- Avoid overstuffing the head if you plan detailed embroidery; too tight can distort the face.
Conclusion
This mooncake-style crochet amigurumi pattern is perfect for customizing: change the “stamp” on top, swap pastel palettes, add a tiny bow tie, or turn it into a seasonal plush (matcha green, strawberry pink, or chocolate brown). It also makes a sweet handmade gift for birthdays, baby showers, desk decor, or as a cute keychain charm when made with thinner yarn. If you upload the image or share the real pattern details from the video (even rough notes), I can revise this article to match the exact character, colors, and stitch counts shown.


