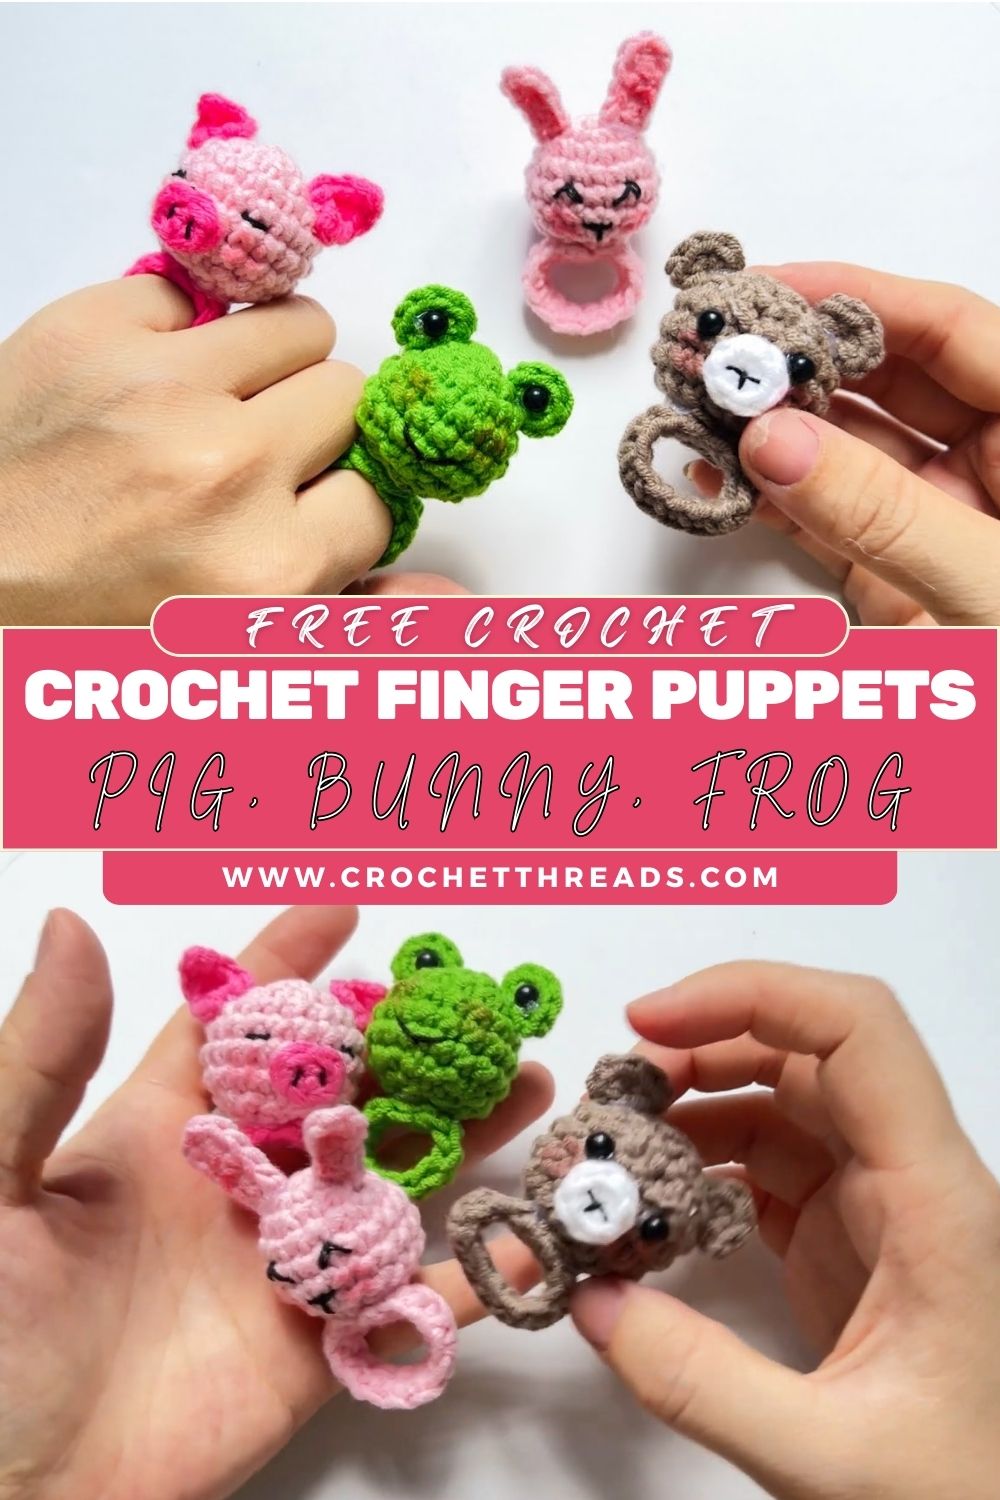
Crochet Animal Finger Puppets Pattern for Pig, Bunny, Frog, and Bear
Crochet animal finger puppets are a quick, joyful project that turns a few rounds of single crochet into adorable mini characters. In this step-by-step crochet finger puppet pattern, you’ll learn how to make a pig, bunny, frog, and bear, perfect for playtime, storytelling, gifts, and craft fairs.
Crochet finger puppets are small amigurumi-style characters with hollow bodies that fit over a finger like a tiny sleeve. Because they’re fast to make and use small amounts of yarn, they’re ideal for beginners who want to practice shaping without committing to a big plush toy.
These crocheted animal finger puppets are wonderful for kids’ pretend play, bedtime stories, classroom activities, and “quiet-time” entertainment on the go. They also make charming handmade gifts, party favours, and popular items for selling, especially when you offer themed sets (farm animals, woodland friends, pond animals, and more).
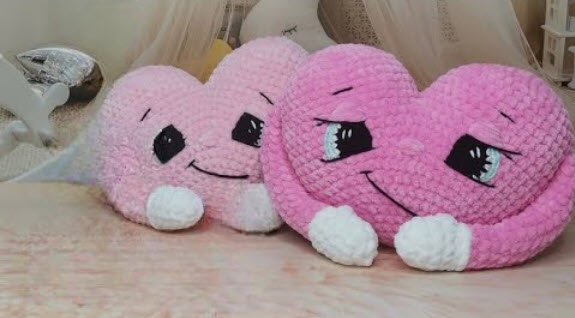
Animal designs are especially beginner-friendly because they use the same simple base shape: a rounded head that smoothly transitions into a tube. Then you add personality with small details—ears, a snout, embroidered smiles, or raised eyes. In the image analysed, the four puppets (pink pig, pink bunny, green frog, and brown bear) all share the same cosy structure: a smooth, domed head, a hollow finger body, and minimal yet expressive faces.
Materials Needed
- Yarn (worsted/DK recommended):
- Pink (pig + bunny)
- Green (frog)
- Brown (bear)
- Small amounts of white/cream (bear muzzle)
- Optional accent colours (black for embroidery, rosy cheeks, etc.)
- Crochet hook: 2.75 mm–3.5 mm (choose one that gives tight stitches)
- Safety eyes (6–8 mm) or small beads (optional)
- Tapestry needle (for sewing and weaving in ends)
- Stitch marker (or scrap yarn)
- Stuffing (optional): a tiny pinch for muzzle/snout only (not the finger tube)
- Scissors
- Embroidery thread (black/dark brown/pink for facial details)
Basic Skills Required
You don’t need advanced amigurumi experience, just a few core skills:
- Magic ring (magic circle): for a tight, neat start at the top of the head.
- Single crochet (sc): the main stitch used throughout.
- Increase (inc) and decrease (dec): shaping the head and any facial pieces.
- Slip stitch (sl st): for neat joins and finishing edges.
- Colour change: useful for the bear muzzle (and optional accents).
- Sewing parts: attaching ears, snout, and eye pieces securely.
General Construction Overview
These crochet animal finger puppets are built like tiny amigurumi tubes with character details.
The basic build (what you’re making)
- Start with a magic ring at the very top of the head.
- Increase the number of rounds to form a smooth dome. The increases create a gentle curve—like a little crochet “cap.”
- Work even rounds to add head height and keep the shape rounded.
- Transition into the body by either a slight decrease or simply continuing evenly, depending on your preferred fit.
- Crochet a hollow tube for the body so it slides comfortably onto a finger.
- Leave the bottom open (this is key, no closing rounds).
- Add facial details (eyes, snout, smile) and attach ears (or frog eye bumps).
- Finish cleanly: weave in ends, reinforce attachments, and shape details with light stitching.
What makes them look like the image
- The heads are rounded and slightly larger than the tube, giving that cute, “baby animal” proportion.
- The bodies are unstuffed, so they stay flexible and fit easily into fingers.
- Faces are simple but expressive: small eyes, tiny stitched mouths, and minimal embroidery.
- Ears are small, slightly flattened shapes sewn onto the head near the top sides.
- The frog has raised eyes that sit above the head’s surface for that classic froggy look.
Base Finger Puppet Pattern (Step-by-Step)
This base pattern creates the head + body. Then you’ll customise it for each animal.
Pattern Notes
- Work in continuous rounds (no joining) unless stated.
- Use a stitch marker to mark the first stitch of each round.
- Tight stitches help prevent gaps.
- Final size depends on yarn/hook and finger size. The goal is a snug-but-comfy fit.
Abbreviations
- MR = magic ring
- sc = single crochet
- inc = increase (2 sc in the same stitch)
- dec = decrease (invisible decrease recommended)
- sl st = slip stitch
- st(s) = stitch(es)
Base HeadBody
Round 1: MR, 6 sc (6)
Round 2: inc in each st (12)
Round 3: (sc, inc) x6 (18)
Round 4: (2 sc, inc) x6 (24)
Round 5: (3 sc, inc) x6 (30)
This gives a nicely rounded head size for most finger puppets. If you want a smaller puppet, stop at 24 sts.
Rounds 6–8: sc around (30)
These even rounds build height and smooth the dome.
Round 9: (3 sc, dec) x6 (24)
This gently narrows under the head to start the “neck” area.
Round 10: sc around (24)
Rounds 11–16: sc around (24)
This section becomes the hollow finger tube. Adjust the length here:
- Shorter tube: stop at Round 14
- Longer tube: continue to Round 18–19
Finishing Round (optional neat edge): sl st into the next st; fasten off with a long tail for sewing (or weave in).
Leave the bottom open for finger fitting.
Fit Check Tip: Try it on your finger at Round 12–13. If it feels tight, increase hook size or add one increase round (see resizing tips in FAQ).
Individual Animal Variations
A. Pig Finger Puppet
Color Notes
- Main yarn: pink
- Details: darker pink embroidery or black thread for eyes/nostrils
Shape Explanation
The pig in the image has a soft, rounded head with a small, round snout stitched to the front. The ears are small and slightly triangular, more like little folded petals than long ears.
Pig Snout (make 1)
Round 1: MR, 6 sc (6)
Round 2: inc around (12)
Round 3: sc around (12)
Fasten off, leave a tail for sewing.
- Optional: add a tiny pinch of stuffing to puff it slightly.
Pig Ears (make 2)
Round 1: MR, 4 sc (4)
Round 2: (sc, inc) x2 (6)
Round 3: sc around (6)
Fasten off, leave tail.
Flatten the ear and stitch it so it sits like a small triangle.
Facial Detailing
- Eyes: safety eyes between Rounds 6–7, spaced about 4–5 stitches apart; or embroider small sleepy eyes.
- Nostrils: embroider two small vertical stitches on the snout.
- Optional: a tiny mouth line under the snout makes it extra cute.
Assembly Tips
- Sew snout centred on the face, around the area of Rounds 8–10.
- Attach ears near the top sides of the head (around Round 5–6), angled slightly outward.
B. Bunny Finger Puppet
Color Notes
- Main yarn: pink (or white/cream for a classic bunny)
- Details: black embroidery for eyes, pink for nose
Shape Explanation
The bunny in the image looks sweet and minimal: a round head, small face, and long upright ears that give it a clear bunny silhouette.
Bunny Ears (make 2)
Chain 7 (adjust for longer ears: ch 9)
Starting in 2the nd chain from the hook:
- sc 5, 3 sc in last chain (turning corner), sc 5 down the other side of chain (13)
Fasten off, leave tail.
This creates a slim oval ear. For a more “folded” ear look, stitch a small pinch at the base before attaching.
Facial Detailing
- Eyes: small safety eyes or embroidered dots (place slightly lower than the centre for a baby-cute look).
- Nose: tiny pink triangle or a single stitch.
- Optional: stitch a simple “Y” mouth under the nose.
Assembly Tips
- Sew ears to the top of the head (around Round 4–5), slightly closer together than bear ears.
- Keep bunny features minimal. Bunnies look cutest with soft details and lots of clean space.
C. Frog Finger Puppet
Color Notes
- Main yarn: green
- Eyes: white yarn + black pupils (or safety eyes)
- Smile: black embroidery
Shape Explanation
The frog in the image is defined by raised eyes sitting high on the head and a wide stitched smile. The head stays nicely round, and the eye bumps add that classic froggy expression.
Frog Eye Bumps (make 2)
In green (or white for the outer eye look):
Round 1: MR, 6 sc (6)
Round 2: (sc, inc) x3 (9)
Round 3: sc around (9)
Fasten off, leave tail. Lightly stuff if you want them extra raised (optional).
Optional White “Eye Whites” (make 2 small circles)
Round 1: MR, 6 sc (6)
Fasten off, leave tail.
Sew onto the front of the bumps, then add a tiny black stitch for the pupil (or use very small safety eyes).
Facial Detailing
- Smile: embroider a gentle curved line across the face, slightly above the tube start (around Round 9–10).
- You can add tiny cheek stitches at the ends of the smile for a joyful look.
Assembly Tips
- Sew eye bumps on the top of the head, spaced apart, slightly forward rather than perfectly centred. That placement creates the “frog gaze.”
- Keep the mouth wide but not too low;w if it drops into the tube area, it can distort when worn.
D. Bear Finger Puppet
Color Notes
- Main yarn: brown
- Muzzle: white or cream
- Details: dark brown/black embroidery
Shape Explanation
The bear in the image has a warm teddy look: a rounded head, small, round ears, and a contrasting white muzzle that makes the face feel soft and friendly.
Bear Ears (make 2)
Round 1: MR, 6 sc (6)
Round 2: (sc, inc) x3 (9)
Fasten off, leave tail.
Flatten into a half-circle for sewing.
Bear Muzzle (make 1)
In white/cream:
Round 1: MR, 6 sc (6)
Round 2: inc around (12)
Round 3: sc around (12)
Fasten off, leave tail.
Optional: lightly stuff to give it a plush snout.
Facial Detailing
- Eyes: safety eyes or embroidered dots above the muzzle.
- Nose: embroider a small oval/triangle on the muzzle.
- Mouth: stitch a short line down from the nose, then a tiny curve to one side (teddy style).
Assembly Tips
- Attach muzzle centred on the face around Rounds 8–10.
- Place ears on the upper sides of the head (around Round 4–5), evenly spaced for symmetry.
Assembly Instructions
Neat assembly is what makes finger puppets look “finished,” even with simple stitching.
- Test finger fit first
Slide the base puppet onto a finger. The tube should fit comfortably without stretching the stitches too much. If it’s too tight, see resizing in the FAQ. - Place eyes before sewing everything else (best practice)
- If using safety eyes, install them before adding thick facial pieces (snout/muzzle), and adjust spacing.
- If embroidering, pin components first so you can see the expression.
- Attach snout/muzzle (pig/bear)
- Centre the piece on the front of the head.
- Use small whip stitches around the edge.
- Add only a tiny bit of stuffing (optional) so the tube stays hollow and wearable.
- Attach ears
- Pig: small ears, angled slightly outward.
- Bunny: long ears, closer together on top.
- Bear: round ears, placed wider/sideways.
Stitch securely through multiple stitches so little hands can play with them.
- Attach frog eyes
- Sew each eye bump firmly on top.
- Add whites/pupils after the bumps are attached (easier to align).
- Embroider final details
Use embroidery thread doubled for clean lines. Secure ends inside the head and weave through several stitches to lock. - Weave in all ends cleanly.
Run the yarn tail through several stitches inside the puppet, change direction once, and trim.
Customisation Ideas
- Colour variations:
- Purple frog, grey bunny, spotted pig, cinnamon bear, panda bear with black patches
- Accessories:
- Tiny bow (chain 20, tie and stitch), mini scarf, little hat, flower crown
- Themed sets:
- Farm set (pig, cow, chick, sheep)
- Woodland set (bear, fox, deer, owl)
- Pond set (frog, duck, turtle, fish)
- Personalisationn:
- Add initials on the back with embroidery
- Use different smiles (shy, surprised, sleepy)
- Add rosy cheeks with pink thread or a tiny blush stitch
Tips for Beginners
- Use a stitch marker every round. Continuous rounds are easy to lose track of—marking the first stitch saves time.
- Keep even tension. Finger puppets show uneven tension quickly because they’re all smooth.
- Don’t stuff. The tube should stay hollow, and even the snout/muzzle only needs a pinch.
- Count your stitches. Shaping relies on accurate stitch counts, especially the increase and decrease rounds.
- Aim for symmetry. Pin ears/eyes first before sewing; it’s easier to adjust placement with pins than with stitches.
Common Mistakes to Avoid
- Making the finger opening too tight:
Tight stitches + a small hook can create a tube that won’t be comfortable. Size up your hook or add a few stitches (see FAQ). - Uneven head shaping:
Missing an increase (or adding an extra one) creates bumps. Count each round as you go. - Incorrect proportions:
If the head is too tall, the puppet looks like a cone; if too short, it looks flat. Keep those “ev” n” h” ad rounds (Rounds 6–8) balanced. - Loose attachments:
Ears and eye bumps get tugged during play. Stitch through multiple rounds and knot securely inside.
Uses of Finger Puppets
Crochet animal finger puppets are not just cute, they’re genuinely useful:
- Storytelling and pretend play (perfect for bedtime stories)
- Learning tools for preschool/classroom activities (animal sounds, colours, counting)
- Handmade gifts (stocking stuffers, baby shower favours, party bags)
- Selling handmade crafts (quick makes with great profit potential, especially as sets)
FAQ Section
Q1: Is this crochet finger puppet pattern beginner-friendly?
Yes. If you can single crochet in the round and do basic increases/decreases, you can make these. The details are small but manageable.
Q2: What yarn is best for crochet animal finger puppets?
Worsted or DK acrylic/cotton blends work best. Choose a yarn that makes firm stitches so the puppet keeps its shape.
Q3: Can I sell finger puppets made from this pattern?
Usually, ly yes for handmade items, but it depends on the designer’s terms. If you’re publishing your own pattern, clearly state your selling policy. If this is for personal use, you’re set.
Q4: How do I resize the puppet for bigger or smaller fingers?
For bigger: increase the head to 36 sts (add one more increase round) and make the tube 27–30 sts around instead of 24.
For small sizes, stop increasing at 24 sts and keep the tube at 18–21 sts by adjusting early.
Q5: What can I use instead of safety eyes?
Embroidered eyes are the safest for young children. You can also use small felt circles stitched on securely (avoid glue for kids’ toys).
Conclusion
These crochet animal finger ts puppets, tapig, ba unny, fa rog, and ba ear, are the kind of project that feels magical from start to finish. You’re using one simple amigurumi base (a rounded head and a hollow tube), then adding small details that completely change the character. Once you’ve made one, you’ll be able to design dozens more by swapping ears, snouts, and expressions—fast, fun, and wonderfully giftable.