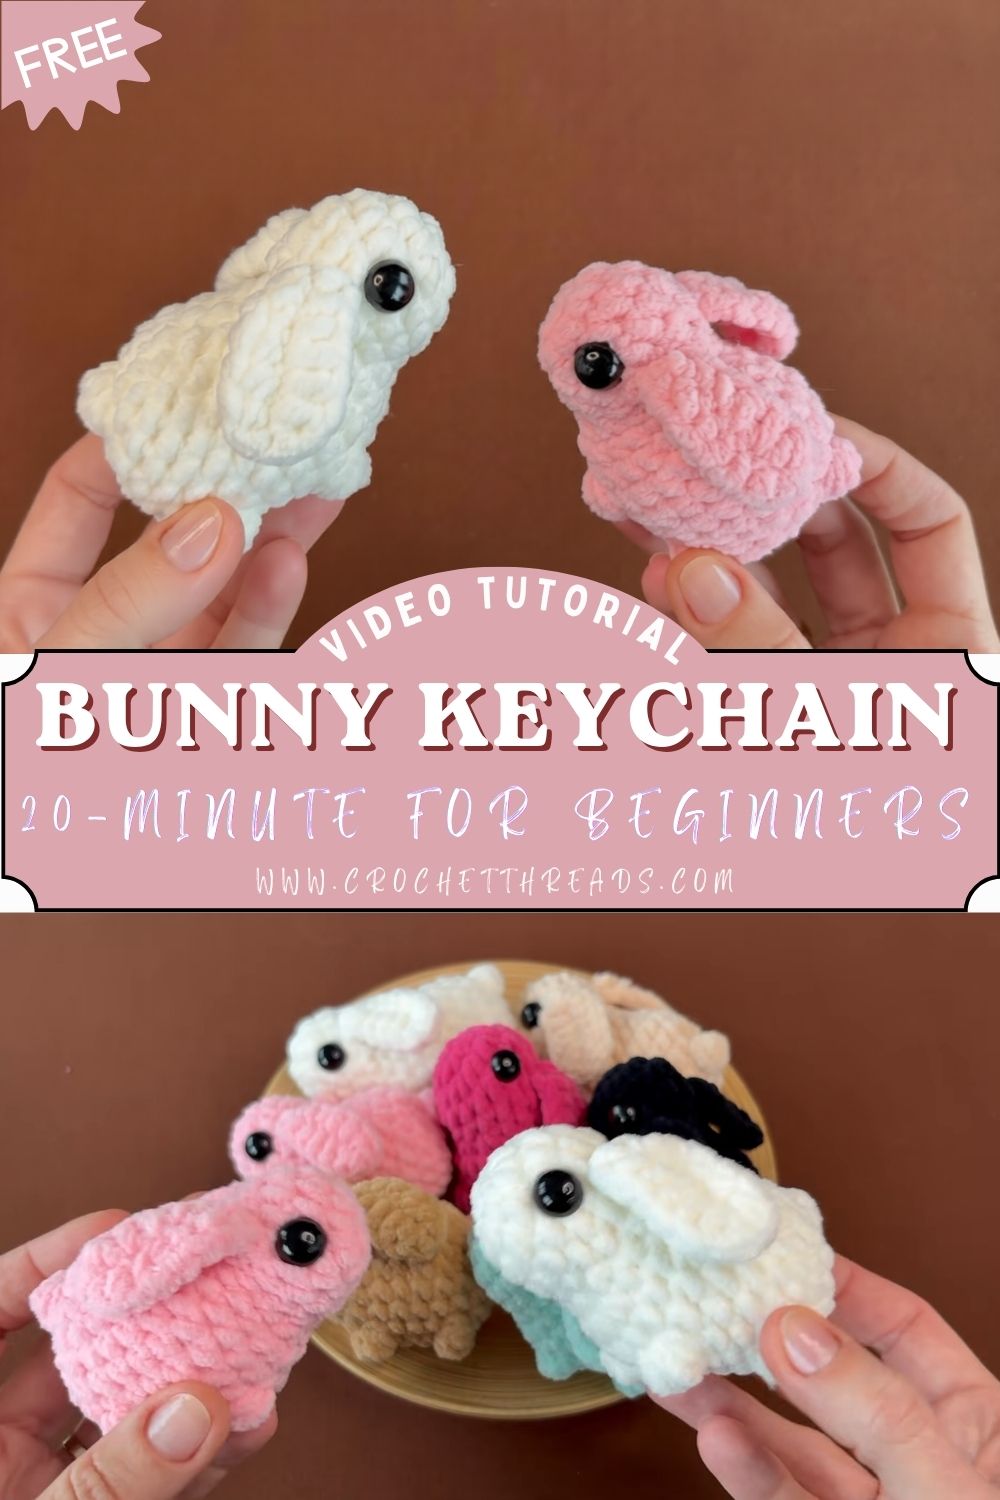
Luxurious Crochet Bunny Keychain 20-Minute for Beginners Pattern
Looking for a quick and adorable Crochet Bunny Keychain project you can finish in no time? These crochet mini bunny amigurumi are the perfect choice for anyone who loves creating soft, charming plushies with minimal effort.
Whether you’re a beginner exploring amigurumi or someone who enjoys making small handmade gifts, these mini bunny crochet plushies are a great addition to your collection. With simple stitches and a cozy design, they are perfect for keychains, decor, or thoughtful handmade surprises.
In recent years, amigurumi crochet has become a favorite among handmade lovers because it turns basic stitches into adorable characters. Amigurumi simply means crocheting small stuffed figures, usually worked in the round, then lightly shaped with stuffing and simple details.
Mini bunny plushies are especially trending right now because they’re quick to make, easy to personalize, and perfect for using up leftover velvet or chenille yarn. You can turn them into keychains, small gifts, desk decor, or gentle kids’ toys. Best of all, this design relies on beginner-friendly stitches like single crochet, simple increases, and decreases.
Materials Needed
- Velvet or chenille yarn (soft, plush texture) pastel & neutral colors
- Crochet hook (3.5mm–4.5mm depending on yarn)
- Safety eyes (6–10mm)
- Polyester fiberfill stuffing
- Stitch marker
- Yarn needle
- Scissors
Abbreviations
- sc = single crochet
- inc = increase (2 sc in one stitch)
- dec = decrease (insert into next 2 sts, single crochet them together)
- sl st = slip stitch
- ch = chain
- st = stitch
Skill Level
Beginner-friendly. If you can crochet in a continuous spiral and count stitches each round, you can make these bunnies. Velvet yarn can feel a little fuzzy, so moving slowly and using a stitch marker helps a lot.
Step-by-Step Pattern
BODY (ONE PIECE – NO SEW STYLE):
Work in continuous rounds. Use a stitch marker to mark the first stitch of each round.
Round 1: Magic ring, 6 sc (6)
Round 2: inc in each st around (12)
Round 3: (sc, inc) repeat around (18)
Round 4: (2 sc, inc) repeat around (24)
Round 5: (3 sc, inc) repeat around (30)
Next, build the height:
Round 6–9: sc in each st around (30)
Then, gently round the top:
Round 10: (3 sc, dec) repeat around (24)
Round 11: sc in each st around (24)
Add stuffing gradually:
After that, start stuffing firmly but not too tight. Aim for a smooth, chubby shape.
Round 12: (2 sc, dec) repeat around (18)
Round 13: (sc, dec) repeat around (12)
Finally: Add a bit more stuffing if needed, then
Round 14: dec around (6)
Fasten off, close the opening, and weave in the end.
EARS (SMALL & SOFT):
Make 2. These are short, rounded ears to match the mini plush style.
Round 1: Magic ring, 6 sc (6)
Round 2: (sc, inc) repeat around (9)
Round 3: sc in each st around (9)
Round 4: (sc, dec) repeat around (6)
Fasten off, leaving a tail for sewing. Light stuffing is optional—usually I leave them unstuffed so they stay small and neat.
LEGS (OPTIONAL BASE SHAPE):
If you want a slightly more “sitting” look, add two tiny base bumps.
Make 2:
Round 1: Magic ring, 6 sc (6)
Round 2: inc in each st around (12)
Round 3: sc in each st around (12)
Fasten off, leaving a tail for sewing. Stuff very lightly so they don’t stick out too much.
Assembly
First, decide the “front” of your bunny (pick the smoothest side).
Next, insert safety eyes between rounds 7 and 8, about 5–6 stitches apart (adjust as needed). Secure the backs firmly.
Then, sew the ears on top of the head, placing them symmetrically with a small gap between them.
After that, if you made the optional legs, sew them to the lower front area so the bunny sits nicely.
Finally, take a moment to adjust: tilt the ears slightly, check the eye spacing, and make sure the face feels centered.
Finishing Touch
Gently shape the bunny with your hands so the body looks evenly rounded.
Hide all yarn ends inside the body with a yarn needle.
Adjust the stuffing by pressing and smoothing—this little step makes a big difference for that perfect chubby plush look.
Tips for Beginners
- Use stitch marker so you don’t lose the start of your round
- Don’t overstuff; too much filling can stretch stitches and show gaps
- Maintain even tension, especially with chenille yarn
- Count stitches carefully at the end of each round
- Use soft yarn for plush effect and a more “huggable” finish
Conclusion
These Crochet Mini Bunny Amigurumi are the kind of project you can make in one cozy sitting, and they’re so fun to repeat in different colors. Try pastels for spring, neutrals for a classic look, or bright shades for a playful surprise—and don’t be shocked if you end up making a whole bunny family. If you create one, share your color choices and let your mini bunny personality shine.