Flawless Crochet Little Bear Amigurumi Pattern Step by Step
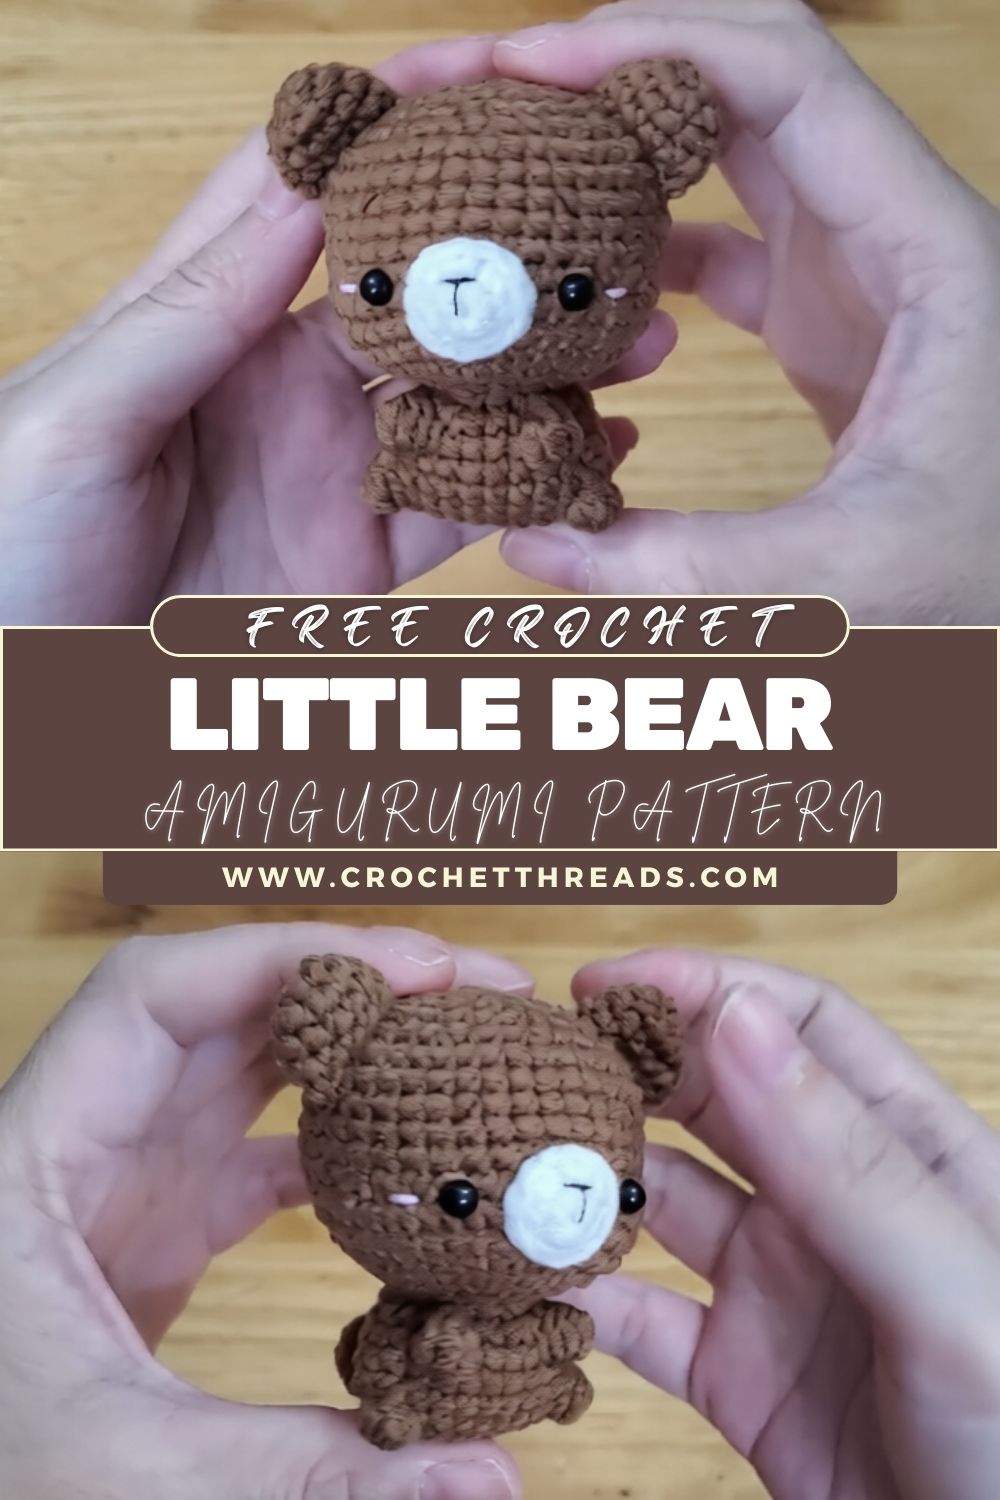
This Crochet Little Bear project is a tiny, kawaii-style teddy that works up fast and looks perfectly giftable. With a round head, sweet white muzzle, and simple embroidered features, this Little Bear Amigurumi is beginner-friendly and irresistibly cute. If you’ve been searching for a Teddy Bear Crochet Pattern that’s small enough for desk decor or a keychain-style collectable, this is the one. Grab your brown yarn and let’s make a mini bear you’ll want to crochet again and again.
A Little Bear Amigurumi is the ultimate “small make, big charm” project. This pattern creates a minimal, cuddly teddy bear with a smooth, round head, tiny ears, a soft muzzle, and compact limbs, perfect for a polished, handmade look without complicated shaping. Crocheters love mini teddy bear projects because they’re quick, portable, and endlessly giftable. They also make fantastic craft-fair items and heartfelt keepsakes: one small bear can feel just as special as a larger plush, especially en d when customising, expressing, or adding a tiny accessory.
Crocheters love mini teddy bear projects because they’re quick, portable, and endlessly giftable. They also make fantastic craft-fair items and heartfelt keepsakes: one small bear can feel just as special as a larger plush, especially when you customise the expression or add a tiny accessory.
Finished Bear Description
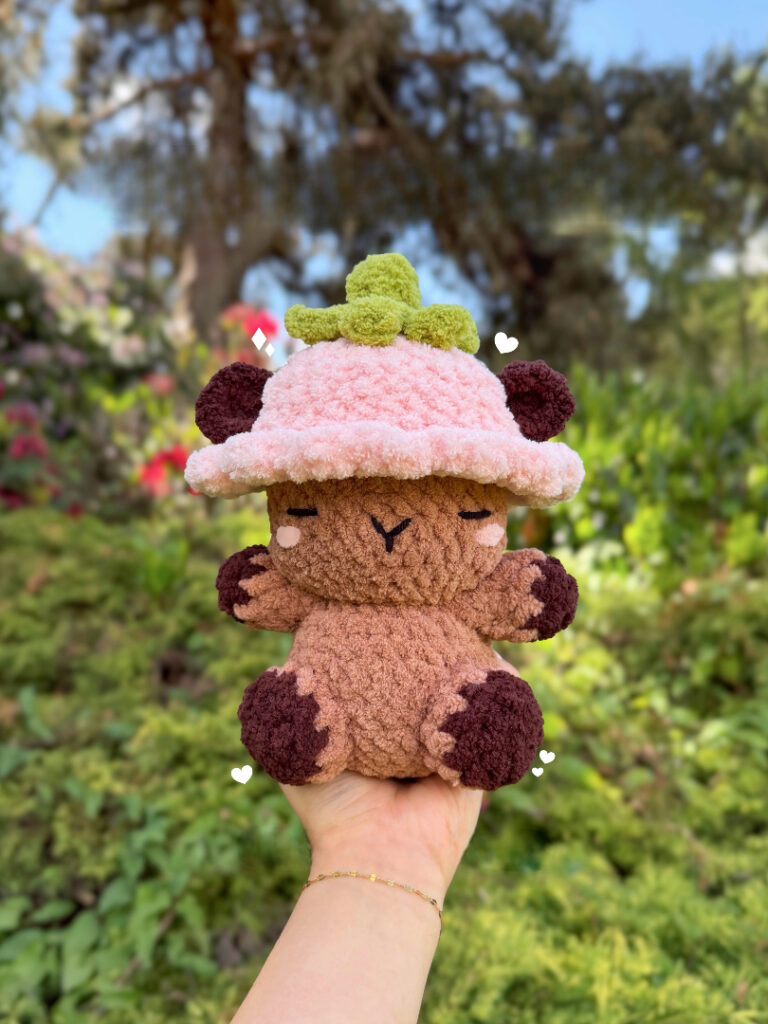
Your finished bear has a smooth, round, brown head with two small, rounded ears placed evenly on top for that classic teddy silhouette. The white (or cream) muzzle sits centred on the lower face, creating a soft contrast that makes the tiny features stand out beautifully.
The face is sweet and minimal: tiny black safety eyes, a small embroidered nose, and a short mouth line for a gentle expression. Light blush cheeks add an extra kawaii touch without overwhelming the design.
The body is compact and slightly seated, with short,t little legs/feet that make the bear look stable and cuddly. Optional tiny arms and a small tail complete the teddy look.
Approximate finished size: 3.5–4.5 in (9–11.5 cm) tall using DK/light worsted yarn and a 3.0–3.5 mm hook (size varies with yarn and tension).
Materials Needed
- Yarn (DK or light worsted recommended):
- Brown (main bear)
- White or cream (muzzle)
- Black embroidery thread or black yarn (nose, mouth, optional brows)
- Pink thread or powder blush (cheek details)
- Safety eyes: 6 mm (or 7–8 mm for a slightly bigger face)
- Crochet hook: 3.0 mm or 3.25 mm (use a smaller hook for tighter stitches)
- Stuffing/fiberfillll
- Yarn needle (tapestry needle)
- Stitch marker
- Scissors
- Optional: keychain ring + small ribbon, bow, or mini scarf
Crochet Abbreviations (US Terms)
- MR = magic ring
- sc = single crochet
- inc = increase (2 sc in same st)
- dec = decrease (sc 2 together; use invisible dec for neatness)
- sl st = slip stitch
- ch = chain
- st(s) = stitch(es)
- FLO = front loop only
- BLO = back loop only
- rep = repeat
- FO = fasten off
- ( ) = repeat instructions inside parentheses
- [ ] = stitch count at end of round
Skill Level
Beginner-friendly (Advanced Beginner).
This pattern uses simple rounds in single crochet, basic increases/decreases, and small pieces that sew on easily. It’s ideal for learning clean shaping, neat stuffing, and balanced facial placement.
Step-by-Step Crochet Pattern
Pattern Notes
- Work in continuous rounds unless stated.
- Use a stitch marker in the first stitch of each round.
- Stuff firmly for a smooth finish, but don’t stretch stitches.
- For the cleanest look, use invisible decreases.
Part 1 – Head (Brown)
Round 1: MR, 6 sc. [6]
Round 2: inc around. [12]
Round 3: (sc, inc) rep around. [18]
Round 4: (2 sc, inc) rep around. [24]
Round 5: (3 sc, inc) rep around. [30]
Round 6: (4 sc, inc) rep around. [36]
Rounds 7–10: sc around. [36] (4 rounds)
Place Safety Eyes
- Insert eyes between Rounds 8 and 9, about 6 stitches apart (adjust slightly to suit your muzzle size).
- If using washers, attach washers now.
Round 11: (4 sc, dec) rep around. [30]
Round 12: (3 sc, dec) rep around. [24]
Round 13: (2 sc, dec) rep around. [18]
Start stuffing. Shape the head into a smooth ball.
Round 14: (sc, dec) rep around. [12]
Add a bit more stuffing, focusing on the cheeks.
Round 15: dec around. [6]
FO, close the opening, weave in ends.
Part 2 – Muzzle (White/Cream)
A small oval-like round that sits centred in the lower face.
Round 1: MR, 6 sc. [6]
Round 2: inc around. [12]
Round 3: (sc, inc) rep around. [18]
Round 4: sc around. [18]
Round 5: (sc, dec) rep around. [12]
FO, leave a long tail for sewing. Lightly stuff (optional) for a puffy muzzle.
Attach Neatly
- Position the muzzle centred under the eyes, with its top edge sitting just below the eye line.
- Sew around with small whip stitches.
Nose & Mouth Placement
- Embroider a nose near the upper centre of the muzzle.
- Mouth is a short line down from the nose, then a small split “Y” or a tiny curved smile.
Part 3 – Ears (Make 2, Brown)
Round 1: MR, 6 sc. [6]
Round 2: inc around. [12]
Round 3: sc around. [12]
FO, leave a tail for sewing.
Shaping:
- Flatten each ear into a semicircle.
- Optionally stitch 1–2 small securing stitches across the base to keep the ear slightly cupped.
Attachment:
- Sew the ears onto the top of the head around Rounds 3–5, spaced evenly.
Part 4 – Body (Brown)
Compact body with a gentle seated shape.
Round 1: MR, 6 sc. [6]
Round 2: inc around. [12]
Round 3: (sc, inc) rep around. [18]
Round 4: (2 sc, inc) rep around. [24]
Rounds 5–7: sc around. [24] (3 rounds)
Round 8: (2 sc, dec) rep around. [18]
Round 9: sc around. [18]
Stuff firmly, keeping the bottom slightly flatter for a seated look.
Round 10: (sc, dec) rep around. [12]
Round 11: dec around. [6]
FO, close and weave in ends.
Part 5 – Legs / Feet (Make 2, Brown)
Tiny feet that help the bear sit.
Round 1: MR, 6 sc. [6]
Round 2: inc around. [12]
Round 3: sc around. [12]
Round 4: (2 sc, dec) rep around. [9]
Lightly stuff the foot.
Round 5: sc around. [9]
FO, leave a long tail for sewing.
Attachment:
- Sew feet to the lower front of the body, symmetrical and slightly angled outward.
- Use the same round placement on both sides so the bear sits evenly.
Part 6 – Arms (Make 2, Brown)
Small, simple arms (optional but recommended for a teddy look).
Round 1: MR, 6 sc. [6]
Round 2: (sc, inc) rep around. [9]
Rounds 3–5: sc around. [9] (3 rounds)
Lightly stuff only the lower half.
Flatten the opening and sc through both layers across (4 sc) to close.
FO, leave a tail for sewing.
Attachment:
- Sew arms to the sides of the body just under the neck area.
Part 7 – Tail (Optional, Brown)
Round 1: MR, 5 sc. [5]
Round 2: inc around. [10]
FO, leave a tail. Lightly stuff (optional) and sew centred on the back of the body.
Part 8 – Assembly
- Muzzle first: Sew muzzle onto the head, centred under the eyes.
- Embroider face: Add nose and mouth on the muzzle (details below).
- Cheeks: Add blush details after embroidery to balance the expression.
- Attach ears: Sew them evenly onto the top of the head; check symmetry from the front before knotting off.
- Join head to body: Sew the head centred on top of the body using tight whip stitches. Add extra stitches around the front and back for stability.
- Attach legs/feet: Sew feet to the lower body, matching height and distance.
- Attach arms: Sew arms to the sides, slightly forward for a hugging pose.
- Shape the bear: Gently squeeze and roll the body to settle stuffing. If needed, add a couple of hidden stitches at the neck to slightly “chin tuck” the head for extra cuteness.
Detailed Face Styling Guide
- Eye spacing: A cute, gentle look comes from moderate spacing about 6 stitches apart for a 36-stitch head round.
- Eye height: Place between Rounds 8–9 so the cheeks look full under the eyes.
- Muzzle placement: Centred and slightly low; the top of the muzzle should sit just under the eyes.
- Nose embroidery: A small triangle or rounded satin stitch at the upper centre of the muzzle. Keep it tiny.
- Mouth style: Stitch a short line down from the nose, then a tiny “Y” split or a small curved smile.
- Cheek blush: Place blush dots slightly below and outside each eye (not too close to the mouth). Keep both sides even for a balanced kawaii face.
Beginner Tips
- Even stitches: Keep consistent tension and pull each stitch to the same snugness—amigurumi looks best with tidy rows.
- Avoid overstuffing: Stuff firmly, but stop when the stitches start to stretch and show gaps.
- Align facial features: Use pins or spare yarn strands to mark eye and muzzle placement before sewing.
- Neat sewing: Use the same yarn colour as the piece you’re sewing onto, and stitch through stitch “legs” for invisible seams.
- Stitch marker habit: Move your marker every round. This prevents spiralling mistakes and crooked placement.
Customization Ideas
- Yacoloursige beaa r, polbearr (white wigreyray nose), or a honey bear in golden yellow.
- Muzzle size: Add or remove one round on the muzzle to create a smaller baby bear face or a chubbier teddy look.
- Facial expression: Try sleepy eyes (embroidered arcs), a tiny tongue, or raised eyebrows for extra personality.
- Ear size: Add one more increase round for oversized “baby bear” ears.
- Body size: Add 1–2 extra straight rounds on the body for a taller bear.
- Accessories: Crochet a mini scarf, sew on a bow, add a heart appliqué, or attach a keychain loop at the top of the head.
Common Mistakes to Avoid
- Gaps between stitches: Use a smaller hook and keep tension tight—gaps make stuffing show.
- Lopsided face: Always pin the muzzle and measure eye spacing before finalising.
- Ears placed too far back: Teddy ears look cutest slightly forward; check from the front view.
- Overstuffed head/neck wobble: Stuff firmly but leave a tiny bit of “give,” and sew head on with extra passes for stability.
- Feet misalignment: Sew both feet using the same reference points (count stitches/rows) so the bear sits evenly.
FAQs
1) Is this little bear amigurumi good for beginners?
Yes, this is a beginner-friendly teddy bear with simple shapes, basic stitches, and clear assembly.
2) What yarn works best for a mini bear amigurumi?
DK or light worsted yarn is ideal. Cotton gives crisp definition; acrylic creates a soft plush feel.
3) Can I make this teddy bear bigger?
Absolutely. Use thicker yarn and a larger hook, or add a few more rounds to increase the head/body to make a larger finished bear.
4) Can I use embroidery instead of safety eyes?
Yes. Embroidered eyes are a great option for baby-safe gifting and give a very soft kawaii expression.
5) How do I keep the head perfectly round?
Use correct stitch counts, invisible decreases, and stuff gradually while shaping with your hands.
6) Can I turn this bear into a keychain?
Yes, add a small loop of chain stitches (or a strong thread loop) at the top of the head before closing, then attach a keyring.
7) How do I stop the muzzle from looking crooked?
Pin it in place, sew with small, even stitches, and secure the centre first, then stitch around the edges.
Conclusion
This Flawless Crochet Little Bear Amigurumi Pattern Step by Step is a sweet, minimal teddy that’s quick to crochet and adorable in any colour. With a round head, soft muzzle, and tiny limbs, it’s the perfect project for building amigurumi confidence while creating something genuinely giftable. Make one for your shelf, your desk, or a special person—then try a whole set with different expressions and accessories.