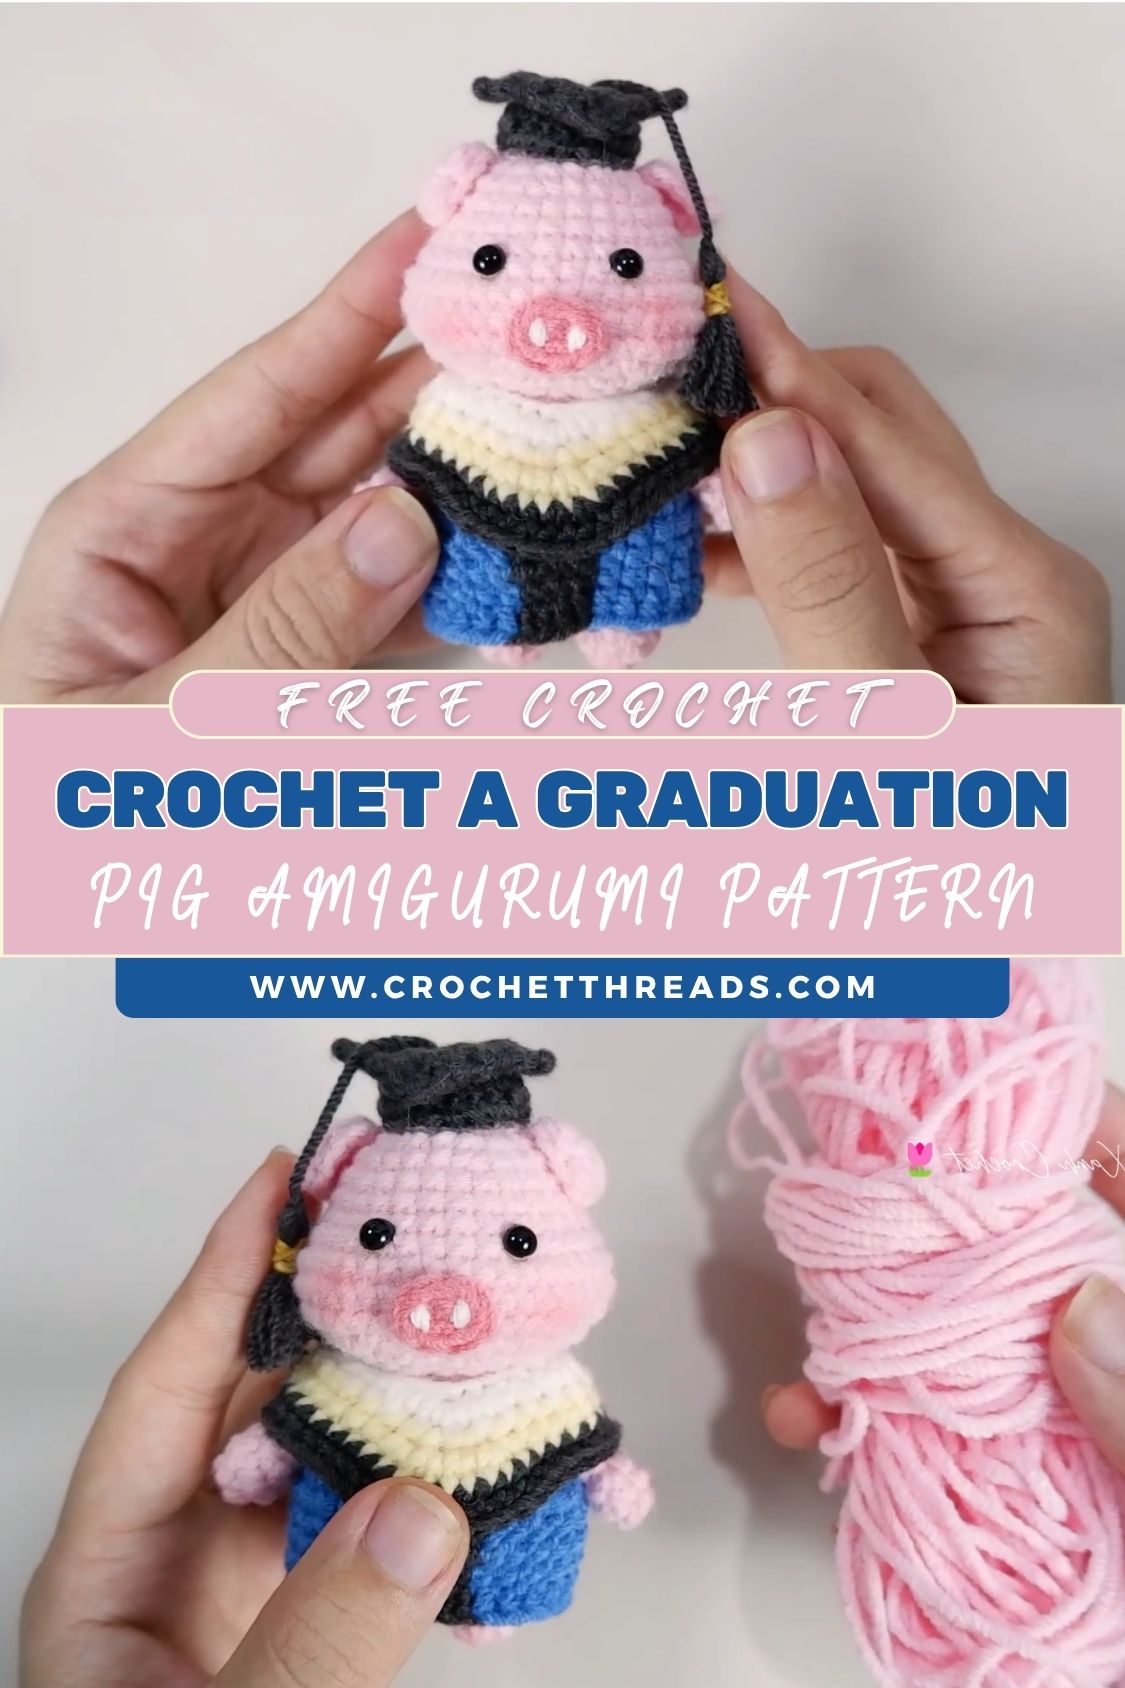
Delightful Crochet a Graduation Pig Amigurumi Pattern Step‑by‑Step
Making this sweet little crochet graduation pig amigurumi feels like creating a tiny celebration with your own hands. The soft yarn, simple stitches, and cute details like the graduation cap and outfit bring so much personality to this project. It’s one of those designs that instantly makes you smile, whether you’re crafting it as a gift or just enjoying a relaxing crochet session. Even if you’re new to amigurumi patterns, this step-by-step guide keeps things easy and enjoyable.
This easy crochet pig pattern is perfect for making something meaningful without spending too much time or effort. The small size makes it great for gifts, keepsakes, or even desk décor for someone who just graduated. If you love making cute crochet animals or are looking for a beginner-friendly amigurumi project, this delightful graduation pig is a lovely way to turn simple yarn into something truly special.
Materials List
Here’s what you’ll need to make your graduation pig:
- Yarn colors
- Pink (main pig body)
- Black (graduation cap + optional facial embroidery)
- Blue (gown accent or collar detail, I use the color shown, or customize)
- White or cream (collar, trim, or little details)
- Optional: a tiny amount of contrasting color for blush cheeks
- Crochet hook: 2.5 mm–4.0 mm (use a smaller hook for tighter stitches)
- Safety eyes: 6–10 mm (or black embroidery thread/yarn)
- Stuffing: polyester fiberfill
- Tapestry/yarn needle
- Stitch markers
- Scissors
Optional extras
- Keychain ring (if you want it as a bag charm)
- Fabric glue (tiny dots for securing tassel/trim, optional)
- Cardboard square (to stiffen the cap top—optional)
Shortcuts / Abbreviations
- MR — magic ring
- sc — single crochet
- ch — chain
- inc — increase (2 sc in same stitch)
- dec — decrease (sc 2 together; invisible decrease recommended)
- sl st — slip stitch
- st(s) — stitch(es)
Pattern notes
- Work in continuous rounds (spiral) unless stated otherwise.
- Use a stitch marker to mark the first stitch of each round.
- Numbers in parentheses at the end of the round = total stitch count.
Step‑by‑Step Crochet Pattern (Graduation Pig Amigurumi)
Head (Pink)
Rnd 1: MR, 6 sc (6)
Rnd 2: inc x6 (12)
Rnd 3: (sc, inc) x6 (18)
Rnd 4: (sc 2, inc) x6 (24)
Rnd 5: (sc 3, inc) x6 (30)
Rnd 6: (sc 4, inc) x6 (36)
Rnd 7–10: sc around (36) for 4 rounds
Place eyes + face
- Insert safety eyes between Rnd 8 and Rnd 9, about 6–7 sts apart.
- If embroidering eyes: stitch small oval eyes with black yarn later.
Rnd 12: (sc 3, dec) x6 (24)
Begin stuffing firmly, then shape the head into a smooth ball.
Rnd 14: (sc, dec) x6 (12)
Add a bit more stuffing.
Fasten off, close the hole, weave in ends.
Head-shaping tip: Stuff in small amounts and press gently around the eye area to keep the face smooth.
Body (Pink)
The body is a small, rounded shape that supports the gown/collar.
Rnd 1: MR, 6 sc (6)
Rnd 2: inc x6 (12)
Rnd 3: (sc, inc) x6 (18)
Rnd 4: (sc 2, inc) x6 (24)
Rnd 5–7: sc around (24) for 3 rounds
Slight shaping:
Rnd 8: (sc 2, dec) x6 (18)
Stuff the body.
Rnd 9: (sc, dec) x6 (12)
Add more stuffing for a firm body.
Rnd 10: dec x6 (6)
Fasten off and close.
Ears (Make 2, Pink)
Small, rounded‑triangle ears look adorable on a pig.
Rnd 1: MR, 4 sc (4)
Rnd 2: (sc, inc) x2 (6)
Rnd 3: sc around (6)
Fasten off, leave a sewing tail, and gently flatten.
Attach ears: Sew to the top sides of the head, slightly forward, symmetrical.
Arms & Legs (Pink)
Arms (Make 2)
Rnd 1: MR, 6 sc (6)
Rnd 2–4: sc around (6) for 3 rounds
Lightly stuff the hand end (optional). Flatten and fasten off with a long tail.
Legs (Make 2)
Rnd 1: MR, 6 sc (6)
Rnd 2: (sc, inc) x3 (9)
Rnd 3: sc around (9)
Lightly stuff. Fasten off, leaving a long tail.
Attach limbs
- Sew arms to the sides of the body, just under where the collar/gown will sit.
- Sew legs to the bottom front area so the pig can “sit” nicely.
Snout (Pink)
The snout is a separate little circle and gives the pig its signature look.
Rnd 1: MR, 6 sc (6)
Rnd 2: inc x6 (12)
Rnd 3: sc around (12)
Fasten off, leave a sewing tail.
Nostrils
With black yarn, embroider two small vertical stitches (or tiny French knots) centered on the snout.
Attach snout: Sew to the lower center of the face, beneath the eyes. Add a tiny bit of stuffing behind the snout before closing if you want it more 3D.
Graduation Cap (Black)
A classic mortarboard: band + flat top.
Cap band (black)
Rnd 1: MR, 6 sc (6)
Rnd 2: inc x6 (12)
Rnd 3: (sc, inc) x6 (18)
Rnd 4: sc around (18)
Fasten off, leave a tail.
(If the cap feels too small/large for your head size, adjust by adding or removing an additional round.)
Cap top (square)
Chain a small square panel. Example:
- Ch 9
- Row 1: sc in 2nd ch from hook and across (8), ch 1 turn
- Row 2–8: sc across (8), ch 1 turn
Fasten off.
Optional stiffening: Slip a small square of felt/cardboard inside or sew the square more tightly.
Tassel
- Attach yarn to the center of the square top.
- Ch 12–18, then fasten off.
- Add a small knot or wrap yarn near the end to create tassel fringe.
Assemble cap
- Sew the square onto the round band.
- Sew the cap to the top of the pig’s head (centered), or tack it lightly so it can be removed.
Graduation Gown / Collar (Blue + White/Cream)
There are many gown styles—here’s a simple, cute version that pairs well with a small amigurumi.
Collar (white/cream)
Make a small collar piece that sits around the neck.
- Ch 16–20 (enough to fit around the neck area)
- Row 1: sc across, ch 1 turn
- Row 2: sc across
Fasten off, sew into a loop, then attach around the neck like a collar.
Gown panel (blue)
You can make a simple “cape” look:
- Ch 18–24 (width across the back/shoulders)
- Row 1: sc across, ch 1 turn
- Row 2–5: sc across (4 rows total)
Fasten off.
Sew the top edge to the back of the neck/collar area so it drapes like a mini gown. Add a tiny front opening by leaving the front edges unattached.
Optional trim: Add a white border with sl st or sc around the gown edges for contrast.
Assembly (Putting It All Together)
- Sew head to body: Align the pieces at the center; use strong stitches because this is the main join.
- Add ears: Make sure they match height and angle.
- Attach arms and legs: Check symmetry by pinning first.
- Sew snout and embroider nostrils (if not done already).
- Add gown/collar: Wrap, adjust, then stitch in place with small hidden whip stitches.
- Place the graduation cap: Center it; sew or tack lightly.
- Final shaping: Roll the doll in your hands gently to smooth the stuffing.
Stuffing tip: A small toy looks best with firm, even stuffing—but avoid stretching stitches, especially around the face.
Tips & Tricks (Make It Cleaner, Cuter, and More “Gift‑Ready”)
- Adjust size easily:
- Use thicker yarn + bigger hook for a larger graduation pig amigurumi
- Use thinner yarn + smaller hook for a mini version
- Tighter stitches = better amigurumi:
If you see gaps, go down a hook size and keep tension steady. - No safety eyes? No problem:
Embroider eyes using black yarn: small ovals, sleepy curves, or tiny dots for a kawaii look. - Personalize it for the graduate:
- Stitch initials on the gown
- Match school colors
- Add a tiny diploma (rolled white felt tied with yarn)
- Add blush cheeks with pink embroidery or soft pastel yarn
- Make it extra secure for keychains or backpacks:
Double‑knot all joins and stitch the cap firmly so it won’t fall off.
Conclusion
This Graduation pig amigurumi is a joyful, beginner-friendly way to celebrate a big achievement. With this crochet pig pattern and step by step crochet tutorial, you can create a sweet keepsake that’s perfect as a handmade graduation giftcute, personal, and made with love. If you try this amigurumi tutorial, share your finished pig (and your color choices!) with fellow crafters. And if you’d like more beginner patterns like this, consider subscribing or bookmarking your favorite crochet sources so you never miss the next fun project.