Free Crochet Bunny Head Keychain Easy Amigurumi Pattern
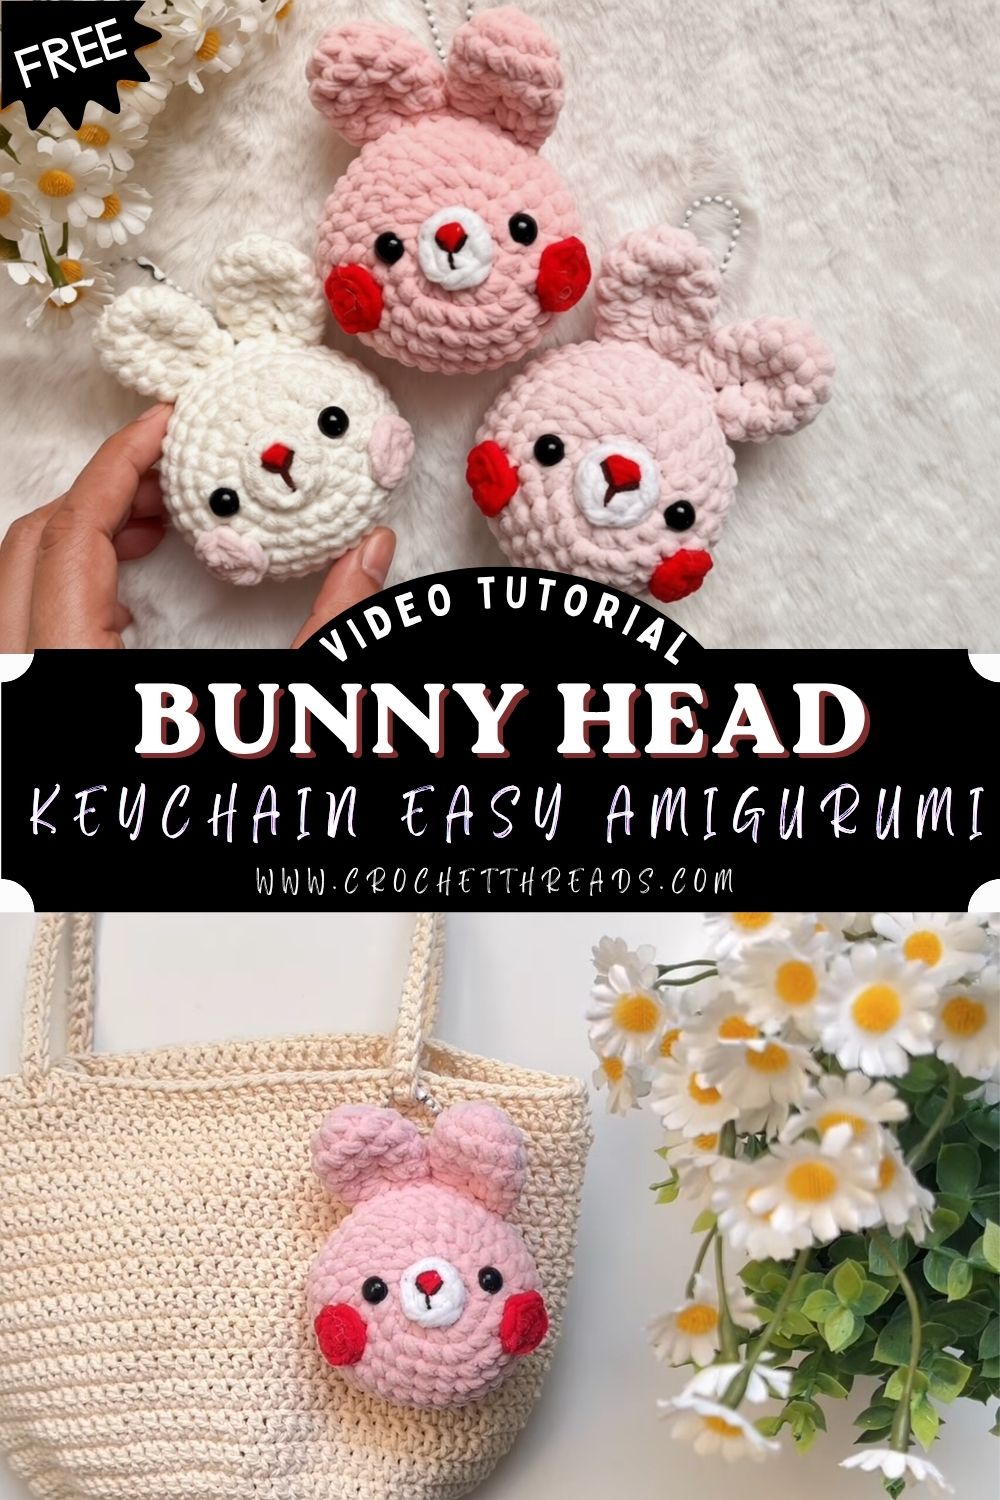
Project Details
- Skill Level: Beginner
- Finished Size: Approximately 2–2.5 inches (5–6 cm) in diameter
- Estimated Time Required: 1–2 hours
- Recommended Yarn Weight: Worsted weight (Medium, #4) or DK weight for a smaller finished piece
- Crochet Hook Size: 3.5mm (E/4) for worsted weight, or 3.0mm for DK weight
Materials Needed
- Worsted weight yarn in white, cream, or light gray (main color)
- Small amount of pink yarn for the inner ears and nose detail
- 3.5mm crochet hook
- 6mm safety eyes (or black embroidery thread for safety-conscious gifts involving children)
- Polyester fiberfill stuffing
- Tapestry needle for weaving in ends and sewing pieces together
- Stitch marker to track the start of each round
- Scissors
- Keychain clip or split ring hardware
- Small amount of pink or black thread for nose embroidery
Crochet Stitches & Techniques
This Crochet Bunny Head Keychain pattern relies on just a few foundational techniques, which is exactly why it suits newer crocheters so well.
- Magic Ring: Forms a tight, adjustable starting loop with no visible hole at the center.
- Single Crochet (sc): The main stitch used throughout the head and ears.
- Increase (inc): Two single crochets worked into the same stitch, used to widen the head.
- Invisible Decrease (inv dec): Reduces stitch count smoothly while keeping the surface neat.
- Slip Stitch (sl st): Used to close rounds on the ears and join sections.
- Fastening Off: Securing the final loop and weaving in the yarn tail.
- Sewing Pieces Together: Attaching the ears to the head using a tapestry needle.
Pattern Instructions
Creating the Head
Begin with a magic ring and work 6 single crochets into it, pulling the loop closed to form Round 1. From there, increase every stitch in Round 2 to reach 12 stitches, then continue increasing every other stitch in Round 3 to bring the count to 18. Round 4 spaces increases even further apart, landing at 24 stitches, and Round 5 pushes the total to 30. This gradual widening is what gives the head its rounded, chubby shape rather than a flat disc.
Work several rounds evenly, without any increases or decreases, until the head reaches the desired depth; typically four to five rounds of 30 stitches produce a nicely proportioned keychain size. Insert the safety eyes around this point, spacing them a few stitches apart on either side of the front center.
Shaping and Closing the Head
Secure the eyes before adding the stuffing. Add the fiberfill gradually instead of all at once. Too much stuffing early can make the decrease rounds harder to work. Start the decreases by making an invisible decrease every fifth stitch. This brings the stitch count down to 24. Continue adding small amounts of stuffing as the opening narrows. Check that the shape stays round and even.
Decrease every fourth stitch to reach 18 stitches. Then decrease every third stitch until you have 12 stitches. Add the final amount of stuffing at this stage. Continue with decreases every other stitch until 6 stitches remain. Work two more decrease rounds to close the opening. Fasten off and leave a long tail to close the remaining gap.
Making the Ears
Two ears give this keychain its recognizable silhouette, and they’re worked flat rather than in the round. Chain 6, then work a row of single crochets back down the chain, followed by a couple of half double crochets at the rounded tip for extra shaping. Repeat to create a second identical ear.
For a two-tone look, add a smaller inner ear piece using pink yarn, worked slightly narrower than the outer piece so a thin border of white shows around the edges. Fold each ear gently to create a natural curve before setting them aside.
Facial Features
A simple nose embroidered in pink or dark thread, stitched just below and between the eyes, finishes the face without adding bulk. Small straight stitches worked in a short vertical line, topped with a slightly wider horizontal stitch, create a convincing bunny nose shape. Whiskers are optional, but three or four short stitches on each cheek add extra personality if desired.
Joining All Pieces
Position the ears toward the top of the head, angled slightly outward rather than straight up, since this small adjustment makes a noticeable difference in the finished expression. Pin them in place first if possible, then sew along the base of each ear using a whipstitch, tucking the yarn tails through the head and trimming them close to the surface.
Final Assembly
Attach the keychain hardware last, threading it through a sturdy point at the top of the head — either through the closed opening or through a small loop of yarn reinforced with a few extra stitches. Give the whole piece a gentle squeeze and shape check before calling it finished, adjusting stuffing through any remaining gaps if the head feels uneven.
Tips for Success
- Count stitches at the end of every round, especially during increase rows where it’s easy to lose track.
- Move a stitch marker up with each new round instead of guessing where the round begins.
- Stuff a little at a time rather than cramming fiberfill in during the final rounds.
- Keep tension consistent throughout, since tight and loose stitches side by side create a lumpy texture.
- Weave in ends by running the tail through several stitches in different directions for extra security.
Personalization Ideas
Changing the main color creates endless possibilities. Try brown or gray for a woodland rabbit. Pastel shades are perfect for an Easter-themed version. Replace the standard ears with floppy ones for a lop-eared bunny. Add a small pom-pom tail for extra charm.
Seasonal details are easy to add. Stitch a tiny flower crown for spring. Make a simple scarf from a short chain and single crochet strip for winter. Use thread-weight yarn for miniature stitch markers. Bulky yarn creates a larger bunny that works well as an ornament or nursery decoration.
Common Mistakes to Avoid
New crocheters often skip counting stitches during increase rounds, which throws off the entire shape by the time the head is halfway finished. Placing safety eyes too early, before the increase rounds are complete, is another common misstep that leaves them positioned incorrectly once the head reaches full width.
Overstuffing before the decrease rounds begin makes it nearly impossible to close the opening neatly, so it helps to underestimate slightly and add more as needed. Rushing the ear attachment without pinning first can also leave them crooked, which is easy to fix by taking an extra minute to position them evenly before sewing.
Frequently Asked Questions
Can I make this without safety eyes?
Yes, embroidered eyes using black thread work well as a safer alternative for keychains intended for young children.
What yarn weight gives the best results?
Worsted weight yarn produces a classic keychain size, while DK weight creates a slightly smaller, more delicate version.
How much yarn do I actually need?
A single skein of worsted weight yarn typically makes four to six bunny heads, making this an economical project for batch gifting.
Can I felt or wash the finished piece?
Acrylic yarn keychains can be spot cleaned but shouldn’t be machine washed, since the stuffing and hardware may shift or rust.
Is this pattern suitable for a first amigurumi project?
Absolutely, the lack of limbs or complex joining makes it one of the more forgiving starting points for new amigurumi crocheters.
How do I keep the keychain hardware from pulling loose?
Reinforce the attachment point with a few extra whipstitches through multiple layers of the closed opening before clipping on the hardware.
Can this pattern be turned into an ornament instead?
Yes, simply replace the keychain clip with a loop of ribbon or yarn threaded through the top of the head.
Conclusion
This Crochet Bunny Head Keychain packs plenty of charm into a small project. It uses very little yarn and works up quickly. Try different color combinations to match your style. Once the ears are sewn in place, your bunny is ready to use or gift. Don’t forget to share your finished keychain with fellow crocheters.