Crochet Carrot Bunny & Pup in Car Amigurumi Pattern
Sweeten your stitches with our Flawless Crochet Carrot Bunny & Pup in Car pattern, kawaii, quick, and crystal-clear. Photo guides, snug shaping, and adorable details deliver picture-perfect cuddles every time.
Turn your hook into a joy ride with the Flawless Crochet Carrot Bunny & Pup in Car Amigurumi Pattern. This charming, beginner-friendly make combines crisp, step-by-step instructions, stitch counts, and photo cues for smooth shaping and adorable details, no guesswork, minimal sewing, maximum cute.
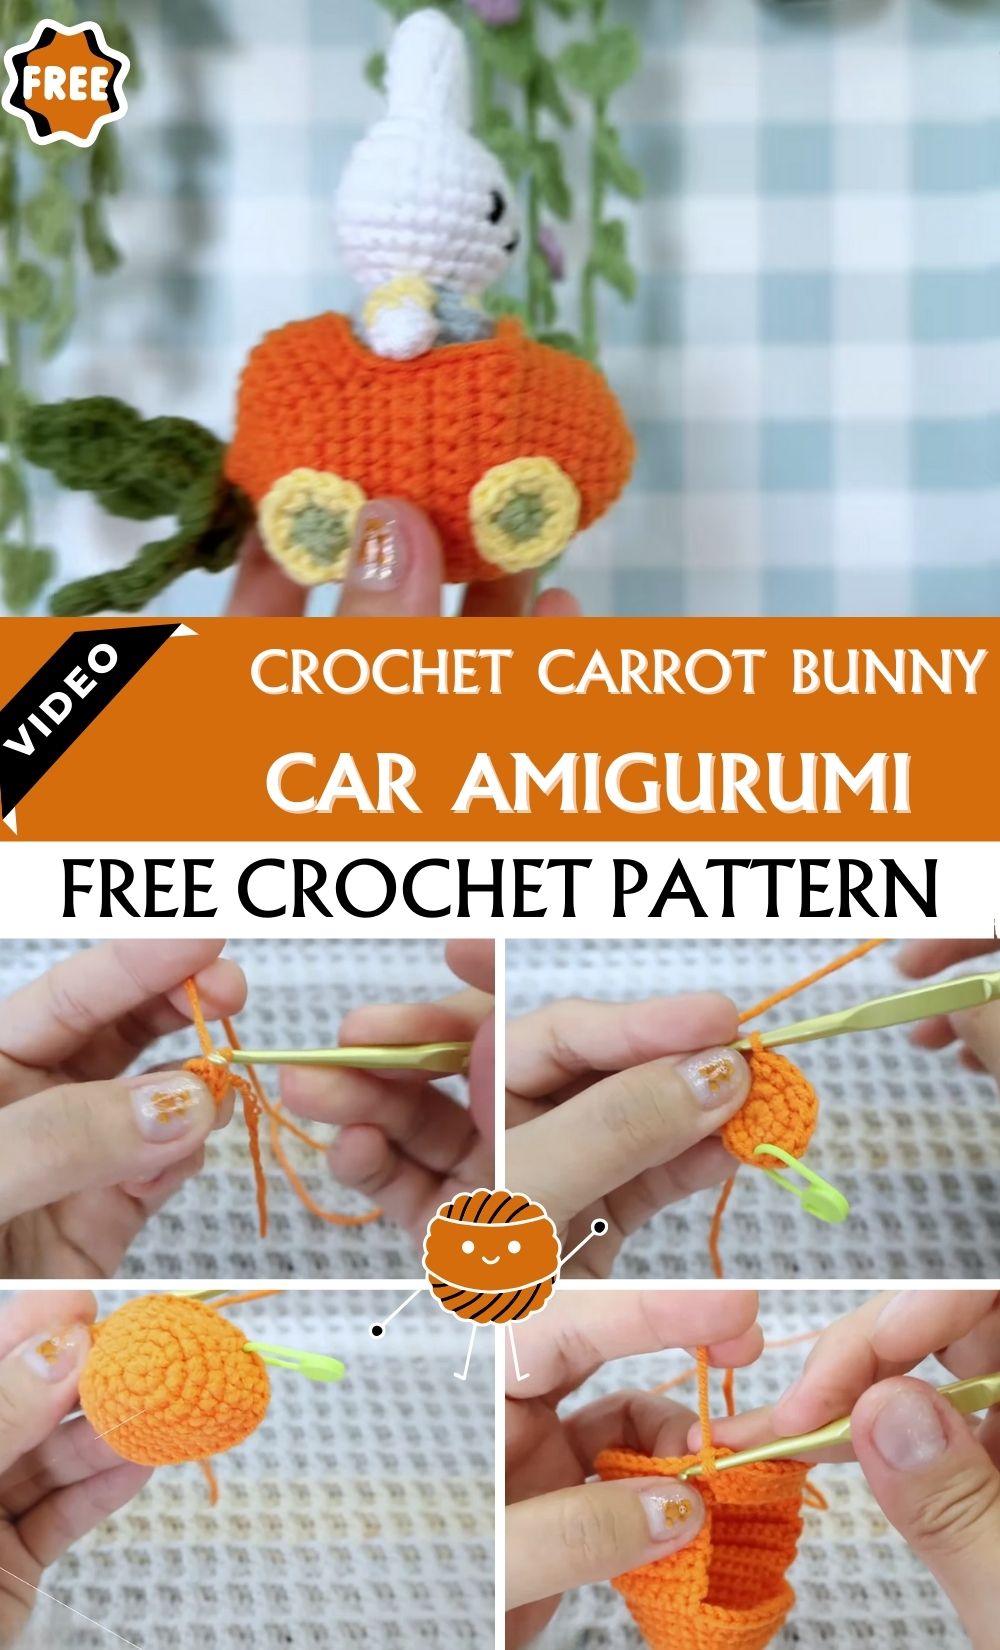
Customize colors, swap accessories, and whip it up as a quick weekend project or a standout gift. The compact design is great for stash-busting and delivers polished, snuggly results every time. Sized for small hands and shelves, it’s irresistibly kawaii and photo-ready.
Uses:
- Sweet Easter basket surprise, baby shower gift, or nursery decor
- Charming dashboard buddy or desk mascot
- Eye-catching craft-fair bestseller or thoughtful thank-you present
Flawless Crochet Carrot Bunny & Pup in Car Amigurumi Pattern
To begin, let’s cruise into cuteness with the Flawless Crochet Carrot Bunny & Pup in Car Amigurumi Pattern, a cheerful, beginner-ready project that balances simple stitches with adorable detail. Additionally, you will find sizing advice, common error fixes, and charming variations so your bunny, pup, and carrot-powered car feel uniquely yours. Consequently, even first-time amigurumi makers can complete this project confidently and enjoyably.
Materials
First, gather everything in one place so your workflow stays smooth.
- Yarn: Worsted/medium weight (4) cotton or acrylic
- Car main color (Color A): 50 g (approx. 100–110 m)
- Car accent/bumper color (Color B): 15 g (approx. 30–35 m)
- Wheels (black): 15 g (approx. 30–35 m)
- Bunny (white or pastel): 25 g (approx. 50–55 m)
- Pup (tan/brown): 20 g (approx. 40–45 m)
- Carrot (orange): 10 g (approx. 20–22 m)
- Carrot tops (green): 5 g (approx. 10–12 m)
- Crochet hook: 3.25 mm (D); alternatively, use 3.5 mm (E) if your tension is tight
- Safety eyes: 6 mm (1 pair for bunny, 1 pair for pup)
- Stitch markers: 2–3 for tracking rounds and alignment
- Stuffing: 60–80 g polyester fiberfill
- Tapestry needle: size 16–18 for seaming and embroidery
- Embroidery thread: black (noses/smiles) and pink (blush), optional
- Felt circles (optional): two 8–10 mm black circles for wheel hubcaps
- Sewing pins/clips: 6–8 for assembly
- Scissors and fabric glue (optional for felt)
Furthermore, with the materials above, the finished car measures about 14–15 cm in length; the bunny stands 12–13 cm tall; and the pup stands 9–10 cm tall.
Skill Level
Overall, this pattern suits beginners to confident beginners. Specifically, if you know the magic ring, single crochet (sc), increase (inc), and invisible decrease (inv dec), you are ready. Additionally, this guide includes refreshers and pacing tips to keep you on track.
Special Features
Importantly, this project emphasizes:
- Seam-light construction for cleaner shaping
- Beginner-friendly color changes and minimal sewing
- Kawaii faces with easy embroidery and safety eyes
- Stash-busting accents for efficient yarn use
- Clear step timings to help you plan your session
Stitches and Abbreviations
Before you start, confirm these basics: MR (magic ring), sc (single crochet), inc (increase), dec or inv dec (invisible decrease), sl st (slip stitch), ch (chain), BLO (back loop only). Moreover, work in continuous rounds unless stated otherwise.
Step-by-Step: Body and Build (with making times)
- Car Base and Sides (45–60 minutes)
To begin the structure, start with the car base so the characters have a sturdy ride.
- Round 1: 6 sc in MR (6)
- Round 2: inc around (12)
- Round 3: (sc, inc) x6 (18)
- Round 4: (2 sc, inc) x6 (24)
- Round 5: (3 sc, inc) x6 (30)
- Round 6: (4 sc, inc) x6 (36)
- Round 7: (5 sc, inc) x6 (42)
- Round 8: BLO sc around (42) to create a crisp base edge.
- Rounds 9–16: sc around (42); additionally, stuff lightly as you go to stabilize shaping.
- Round 17: (5 sc, dec) x6 (36) to taper the front.
- Round 18: sc around (36)
- Round 19: (4 sc, dec) x6 (30)
- Round 20: sc around (30)
Finally, sl st to the next stitch, fasten off, and leave a long tail for joining the bumper later. Additionally, for a convertible look, you may skip the last two decrease rounds for a shallower front.
- Bumper and Seat Detail (15–20 minutes)
Next, attach Color B to the front rim to define the bumper.
- With Color B, sc around the front third of the car; then sl st to join and fasten off.
- For a seat ridge, surface crochet a short horizontal line across the mid-back.
Consequently, you will get a clean separation between the bumper and the body.
- Wheels (25–30 minutes total)
Meanwhile, prepare the wheels so the car sits evenly.
- Round 1: 6 sc in MR (6)
- Round 2: inc around (12)
- Round 3: (sc, inc) x6 (18)
- Round 4: sc around (18); then sl st and leave a long tail.
- Make 4 wheels; additionally, lightly stuff or leave flat for a snug profile.
Optionally, add felt hubcaps for extra charm.
- Bunny Head and Ears (35–45 minutes)
After the car parts, build the bunny so you can test seat placement early.
- Head
- Round 1: 6 sc in MR (6)
- Round 2: inc around (12)
- Round 3: (sc, inc) x6 (18)
- Round 4: (2 sc, inc) x6 (24)
- Round 5: (3 sc, inc) x6 (30)
- Rounds 6–10: sc around (30)
- Place 6 mm eyes between Rounds 8–9, spaced 6–7 sts apart; then adjust for symmetry.
- Round 11: (3 sc, dec) x6 (24)
- Round 12: (2 sc, dec) x6 (18)
- Round 13: (sc, dec) x6 (12); additionally, stuff firmly and evenly.
- Round 14: dec around (6); then fasten off and close.
- Ears (make 2)
- Round 1: 5 sc in MR (5)
- Round 2: (sc, inc) x2, sc (7)
- Rounds 3–10: sc around (7); afterward, pinch and sew closed at the base.
Therefore, you will get upright ears with a neat finish.
- Pup Head and Ears (30–40 minutes)
Subsequently, stitch the pup to complete the adorable duo.
- Head
- Round 1: 6 sc in MR (6)
- Round 2: inc around (12)
- Round 3: (sc, inc) x6 (18)
- Rounds 4–8: sc around (18)
- Place 6 mm eyes between Rounds 6–7, 5–6 sts apart; then verify alignment.
- Round 9: (sc, dec) x6 (12); then stuff.
- Round 10: dec around (6); finally fasten off and close.
- Ears (make 2)
- Chain 5; starting in 2nd ch: sc 4, turn, sc 4, dec, sl st to finish.
Additionally, sew them low on the head for a floppy, friendly look.
- Chain 5; starting in 2nd ch: sc 4, turn, sc 4, dec, sl st to finish.
- Carrot (10–15 minutes)
Next, add the carrot for playful balance.
- Body
- Round 1: 4 sc in MR (4)
- Round 2: (sc, inc) x2 (6)
- Round 3: sc around (6)
- Round 4: (2 sc, inc) x2 (8)
- Rounds 5–6: sc around (8)
- Round 7: (sc, dec) x2 (6); then lightly stuff, sl st, and fasten off.
- Leaves
- With green, ch 6 and sl st back; then repeat 2–3 times for sprigs.
Consequently, the carrot adds color and movement to the scene.
- With green, ch 6 and sl st back; then repeat 2–3 times for sprigs.
- Assembly and Placement (25–35 minutes)
After all parts are ready, assemble carefully for a polished look.
- Wheels: Evenly space two per side, centered along the lower body; then pin, check alignment, and whipstitch with black tails.
- Bunny: Seat at the driver’s side; then sew head to car rim and attach ears slightly angled.
- Pup: Place beside the bunny; then sew head to rim and attach floppy ears low.
- Carrot: Stitch into the bunny’s paw or position between the duo.
- Embroidery: With black thread, add small triangle noses and a soft smile; additionally, add pink blush or felt cheeks.
Therefore, your set will read clearly and photograph beautifully.
- Face and Finish Details (10–15 minutes)
Because faces define personality, finalize placement before locking backs.
- First, pin eyes and adjust spacing until it feels right.
- Next, hide knots inside the head and weave ends through stuffing to secure.
- Finally, steam-block lightly to relax curls (while avoiding direct heat on safety eyes).
As a result, every detail will look tidy and intentional.
Common Mistakes and Easy Fixes
- Loose fabric or visible stuffing: If holes appear, use a smaller hook (3.25 mm) or tighten tension; additionally, mark the first stitch of each round to stay consistent.
- Lopsided car: If counts drift, add or subtract one stitch at the back center; consequently, the front remains symmetrical.
- Gaps at decreases: Instead of standard dec, use invisible decreases for smoother fabric.
- Eye placement regret: Always test with pins first; otherwise, cover with tiny felt “eyelids” and re-place creatively.
- Overstuffing small parts: Rather than packing firmly, stuff ears and carrots lightly to avoid bulging seams.
Variations to Personalize
- Car colors: For seasonal vibes, try mint, pastel pink, or sunny yellow; alternatively, choose bold brights with racing stripes via surface crochet.
- Convertible car: For an open-top look, skip the last car decrease; then add a tiny ch-10 steering wheel ring at the front rim.
- Seasonal costumes: For extra charm, add a scarf, Santa hat, or flower crown; moreover, embroider freckles or a patch over the pup’s eye.
- Keychain mini: To shrink the project, use sport-weight (2) yarn and a 2.5–3.0 mm hook; then attach a keyring to the car’s back.
Tutor Suggestions for Beginners
- Before you begin, practice the magic ring and invisible decrease for five minutes on scrap yarn; consequently, you will frog less later.
- During each round, place a stitch marker at the first stitch and count aloud; additionally, keep a tally on paper to prevent drift.
- While stitching, keep your grip relaxed and roll the hook head slightly; as a result, tight stitches will glide more easily.
- As you build, stuff lightly in stages rather than at the end; consequently, shaping stays consistent.
- For visual reference, pause at each milestone and snap a quick photo; furthermore, symmetry becomes easier to match.
Sizing Tips
- To size up, move to a 4.0 mm hook and bulky (5) yarn; consequently, expect roughly 1.4× size.
- Conversely, to size down, use sport (2) with a 2.5–3.0 mm hook for a palm-sized set.
- For the best fabric, aim for a firm gauge of about 10 sc x 10 rows = 5 cm with a 3.25 mm hook; otherwise, size down if you see holes.
- To keep proportions, scale the car, heads, and wheels together; therefore, the overall look remains balanced.
Finishing Touches
- To secure ends, weave in multiple directions; additionally, massage the stuffing to remove lumps.
- For a display-ready finish, add a tiny felt license plate, embroidered initials, or a heart patch on the bumper.
- For child safety, replace safety eyes with embroidered eyes for recipients under three years old.
Consequently, your amigurumi will be both durable and adorable.
Time Planning at a Glance
- Car base and sides: 45–60 minutes
- Bumper and seat: 15–20 minutes
- Wheels (4): 25–30 minutes
- Bunny head + ears: 35–45 minutes
- Pup head + ears: 30–40 minutes
- Carrot: 10–15 minutes
- Assembly and finish: 35–50 minutes
In total, plan approximately 3.5–4.5 hours, depending on pace and experience.
Ultimately, if you are searching for the Flawless Crochet Carrot Bunny & Pup in Car Amigurumi Pattern, this refined guide delivers a clear, transition-rich roadmap you can finish in an afternoon. Furthermore, for a music-led visual companion. Finally, happy hooking and enjoy the cutest ride in town!