Free Crochet Babydoll Bow Top Pattern with Ruffle Using
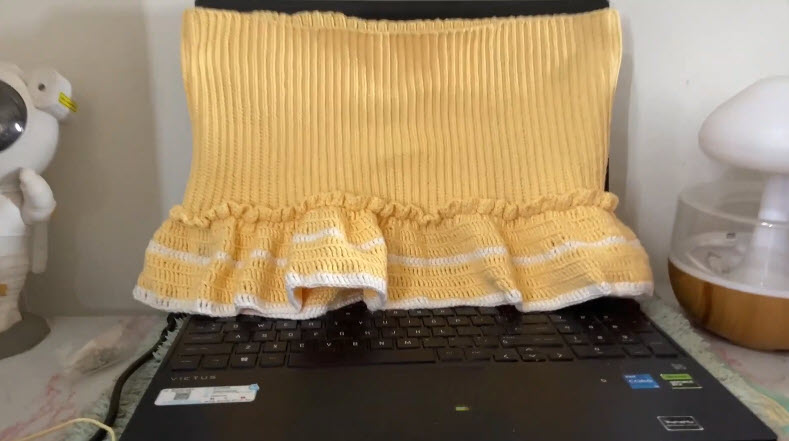
Pale butter-yellow ribs run top to bottom on the Free Crochet Babydoll Bow Top Pattern with Ruffle, then burst into a gathered ruffle trimmed with white stripes. The stretchy bodice hugs gently while the peplum swings freely below.
Two sideways-worked panels of knit-look ribbing form a stretchy tube, and a gathered ruffle peplum grows straight from the bottom edge, so there’s almost no sewing. You’ll learn how to size the crochet babydoll bow top to your own bust, keep slip-stitch rows even, stripe the ruffle cleanly, and tie a matching bow for the neckline.

Pattern Overview
The bodice is two rectangles worked flat in back-loop slip stitch. Their chain length sets the height, and their row count sets the width. Once the side seams are joined, you work the ruffle in the round from the bottom edge, doubling stitches so it gathers naturally. A small ribbed bow finishes the front.
Materials
- DK or light worsted cotton or cotton blend: pale yellow (about 550–700 yd for S–M) and white (about 60–80 yd)
- 4 mm hook for the bodice, 4.5 mm hook for the ruffle
- 4–6 locking stitch markers
- Tapestry needle and scissors
- Measuring tape
- Optional: clear elastic thread for the top edge
Yarn Selection
Cotton blends give the ribs crisp definition and keep the ruffle from drooping. Pure acrylic stretches more across the bust, so plan a little extra negative ease. Very slippery bamboo yarns can make the ruffle hang flat instead of flaring.
Hook Size and Gauge
A suggested gauge is 18–20 slip stitches and 28–32 rows = 4 in (10 cm) in back-loop slip stitch with a 4 mm hook. Slip-stitch ribbing is tight by nature, so if your hook drags, go up half a size rather than loosening your hand.
Abbreviations (US Terms)
- ch – chain
- sl st – slip stitch
- BLO – back loop only
- sc – single crochet
- dc – double crochet
- st(s) – stitch(es)
- rnd – round
Time Box
- Prep and swatching: 45 minutes
- Bodice panels: 6–8 hours
- Seaming and ruffle: 3–4 hours
- Bow and finishing: 1 hour
Construction and Instructions
Step 1: Start the First Panel
- Measure from your underarm down to where you want the ruffle to begin (about 8–10 in for most sizes). Chain enough stitches to match that length.
- Row 1: Sl st in the 2nd ch from the hook and in each ch across. Ch 1, turn.
- Row 2: Sl st in the BLO of each st across. Ch 1, turn.
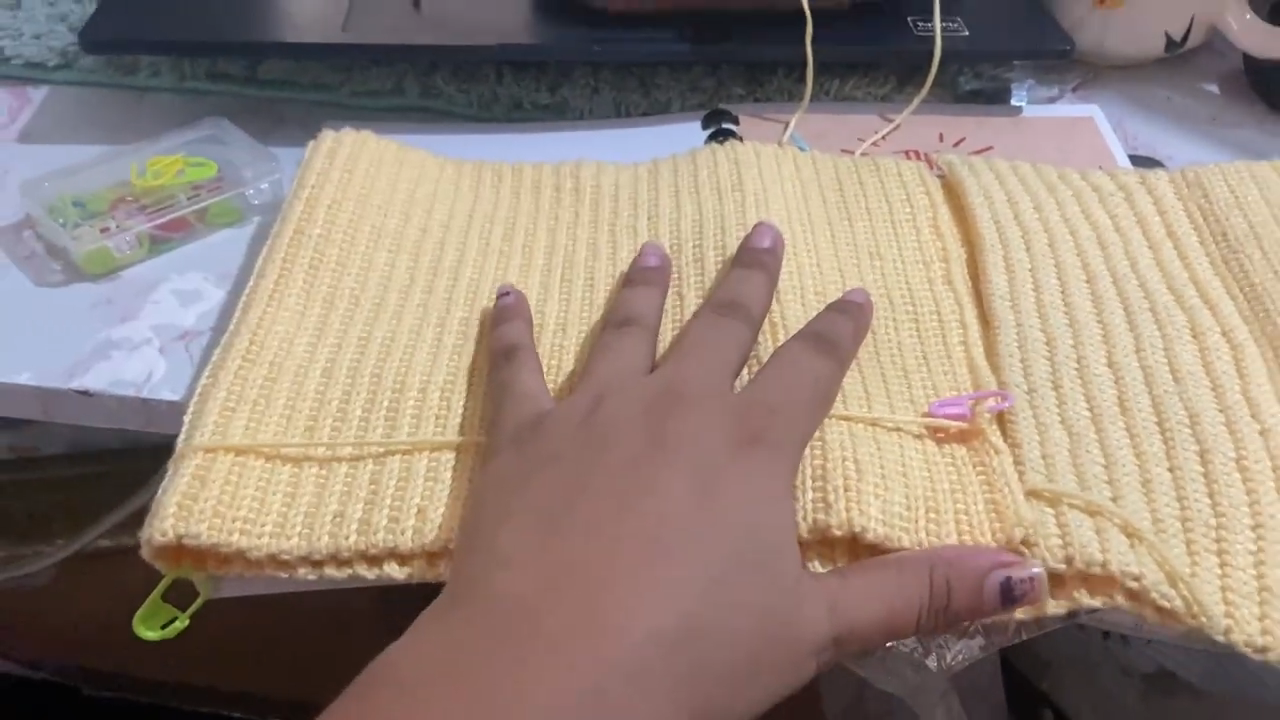
- Clip a marker to the first stitch at each end, just like the safety pins in the photo.
Markers matter here because slip-stitch rows hide their last stitch, and missing it shortens every row that follows.
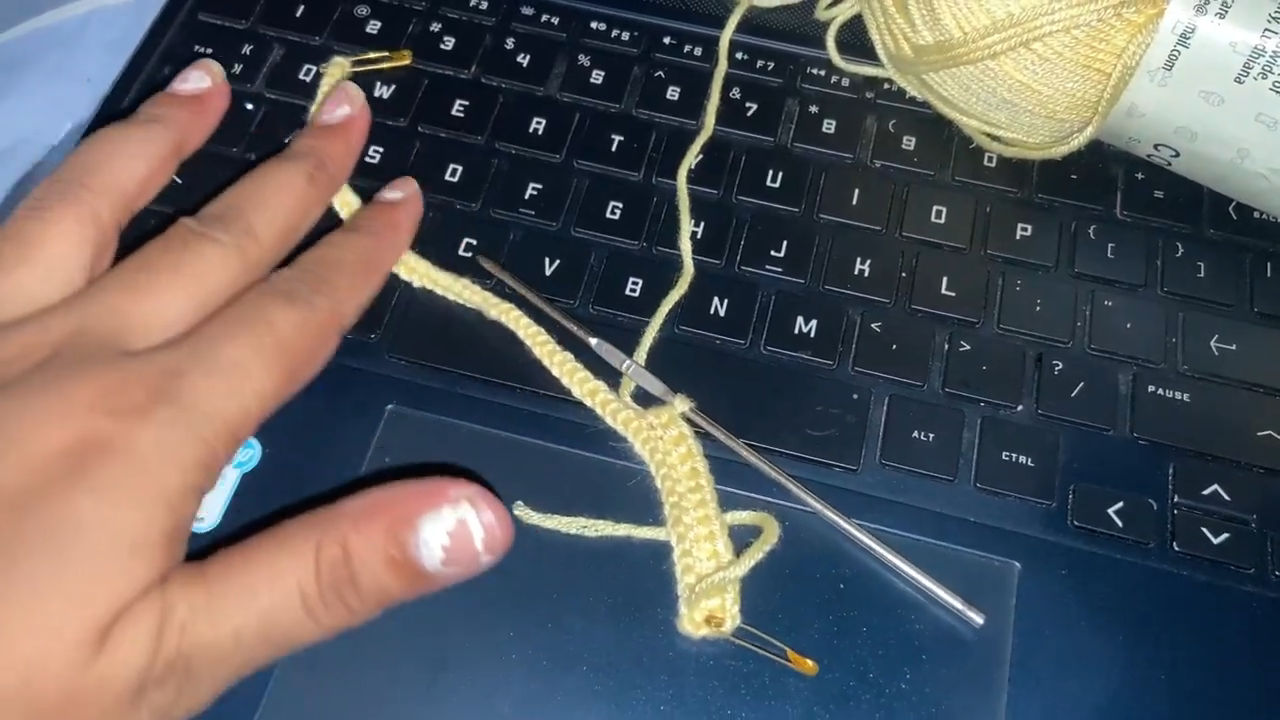
Step 2: Build the Rib Texture
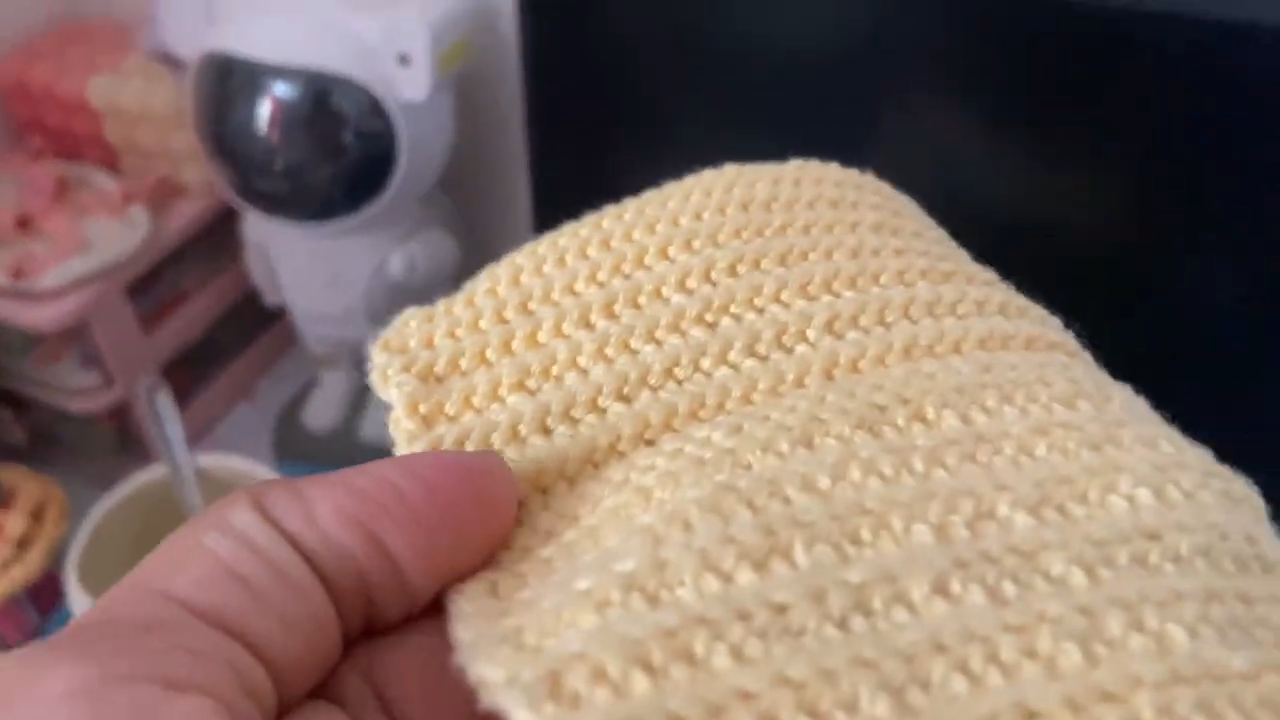
- Repeat Row 2 again and again. Ridges will appear after about 6 rows.
- Keep your hook moving through a relaxed loop. Pulling each sl st snug makes the next row nearly impossible to enter.
Stitch check: Count your stitches every 10 rows. Your count should match your starting chain minus one.
Step 3: Size and Repeat the Panel
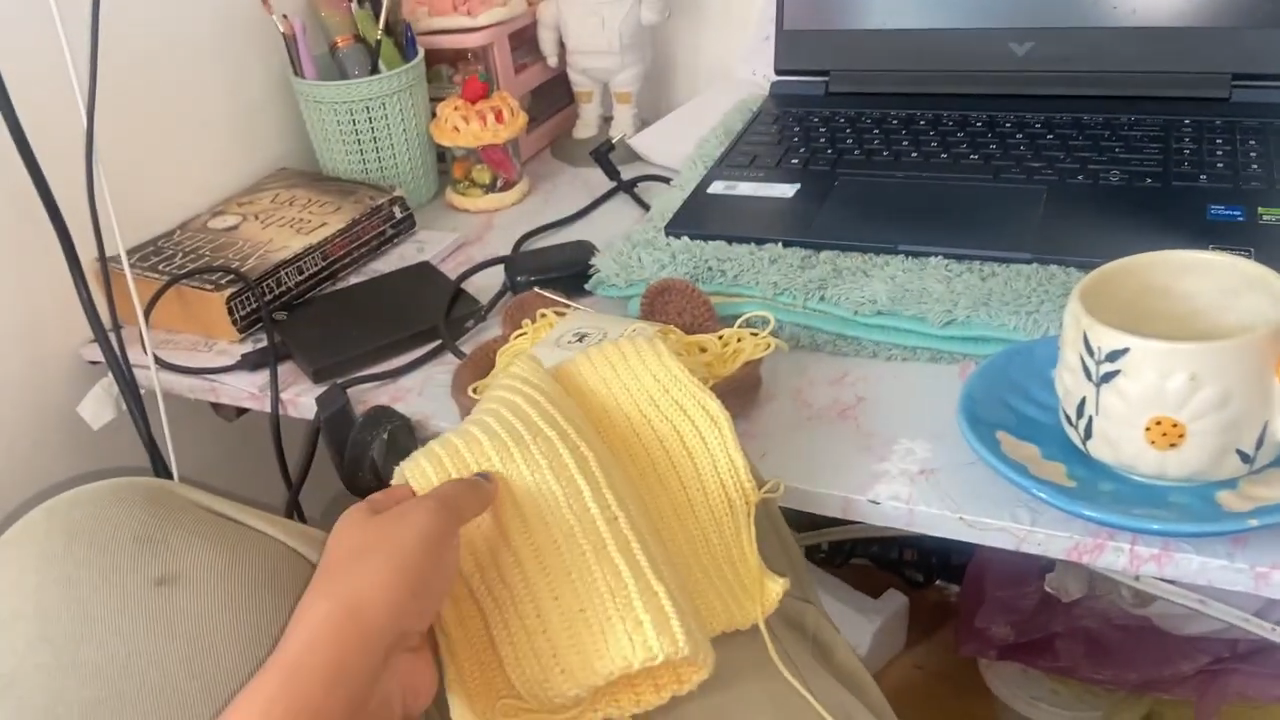
- Keep working until the panel measures half of your full bust minus 1–1.5 in. Ribbing stretches widthwise, and that negative ease keeps the strapless top in place.
- Fasten off, leaving a 20 in tail for seaming.
- Make a second panel with the same row count.
Measure now: Lay both panels on top of each other. Any difference over half an inch will show at the side seams.
Step 4: Seam Into a Tube
- Place the panels right sides together, with the chain edges lined up.
- Sl st through both layers along each short side, working into the row ends.
- Turn the tube right side out.
Fit check: Pull the tube on now. It should sit firmly under the arms without rolling down when you lift your arms.
Pro Tip: Mark the bottom edge with a yarn strand before seaming, like in Pic 4. Once the tube is closed, it’s easy to forget which edge gets the ruffle.
Step 5: Gather the Ruffle
- Switch to the 4.5 mm hook. Join yellow at a side seam along the bottom row ends.
- Rnd 1: Ch 1, work 1 sc into every ridge (every 2 rows) around. Join with a sl st.
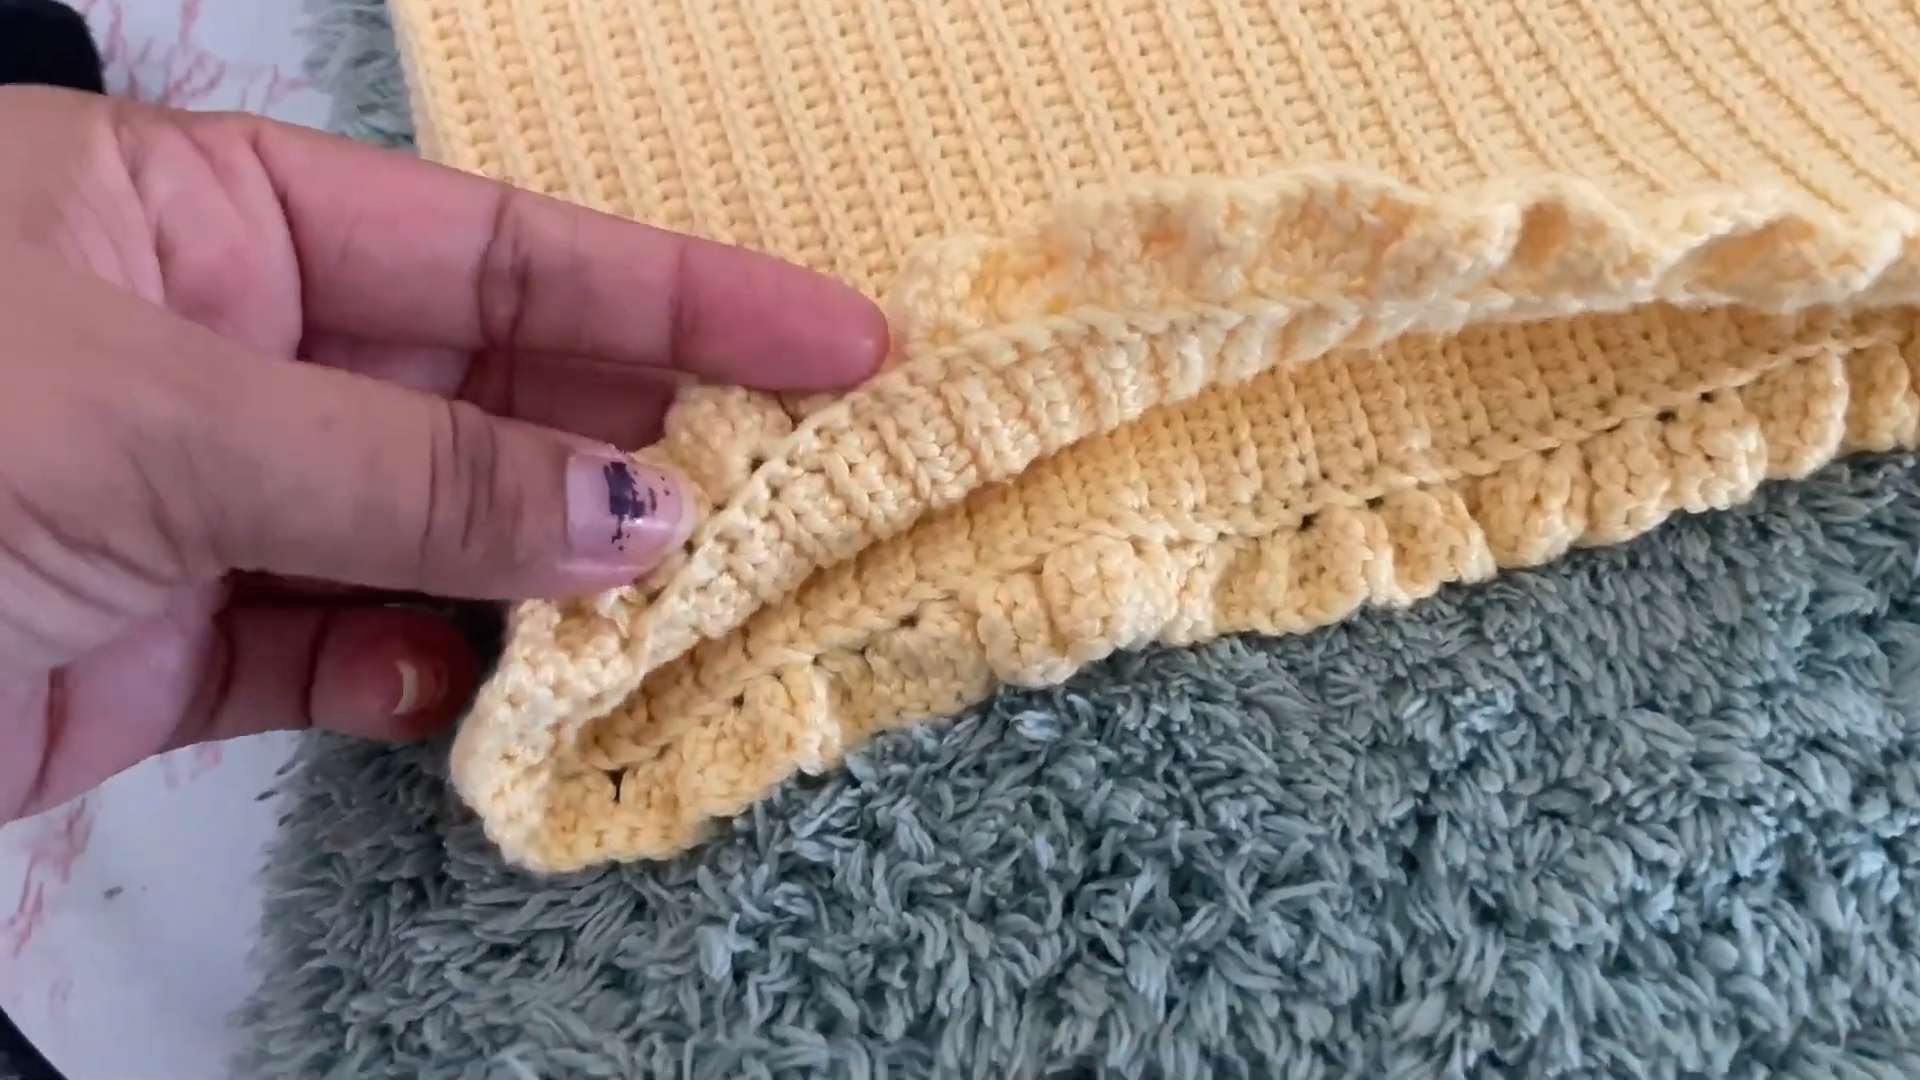
- Rnd 2: Ch 3 (counts as dc), dc in the same st, 2 dc in each st around. Join.
- Rnds 3–4: Ch 3, dc in each st around. Join.
The doubled round is what creates the gathered, bumpy seam line in the photo. Skip it, and the ruffle hangs straight.
Round count check: Rnd 2 should have exactly double the stitches of Rnd 1.
Step 6: Add Stripes and the Edge
- Rnd 5: Change to white. Dc in each st around. Join and cut white.
- Rnds 6–8: Rejoin yellow and dc around.
- Rnd 9: White dc round.
- Rnd 10: Yellow dc round.
- Rnd 11: White sc in each st around. Fasten off.
- Top edge: Join yellow and work 1 sc per ridge around the top opening. Weave elastic thread through the round if you want extra grip.
Length check: Hold the top up to your body before Rnd 11. Add yellow rounds if you want a longer peplum.
Bow
- With the 4 mm hook, ch 16. Work Row 1 and Row 2 as for the bodice.
- Repeat until the piece measures about 5 in long, then fasten off.
- Wrap a 20-in yellow tail tightly around the center about 10 times to pinch it into a bow.
- Sew the bow to the center front of the top edge.
Sizing and Fit Guidance
Since everything is made to measure, your own body is the gauge. Aim for 1–1.5 in of negative ease at the bust. For a fuller bust, make the chain slightly longer so the bodice reaches below the fullest point before the ruffle starts.
Common Mistakes
- Rows shrinking: Usually caused by skipping the last hidden sl st.
- Wavy side seams: Seaming too tightly across the row ends.
- Flat ruffle: Forgetting the doubling round.
- Visible stripe jogs: Joining new colors at a random point instead of the side seam.
Troubleshooting
- Top slides down after wear? Add elastic thread or one more sc round on the top edge.
- Ruffle flips upward? Block it damp and let it dry hanging.
- Bow droops? Stitch through its center twice instead of once.
Color Variations
- Sage green with cream stripes
- Soft pink with white trim
- Lilac body with a darker lilac bow
- White body with pale blue stripes for a beachy look
Care Instructions
Hand wash in cool water and gently press out moisture with a towel. Dry flat for the bodice so the ribs don’t stretch out of shape, then hang the top briefly to help the ruffle relax.
Personalization Ideas
Add Straps
Chain two strips or work narrow rib bands and stitch them inside the top edge.
Move the Bow
Place it at the center back instead for a softer front.
Try Scalloped Trim
Swap the white sc edge for a simple shell border.
FAQs
Can a beginner make it?
Yes. Slip stitch, sc, and dc are the only stitches, though the ribbing takes patience.
Can I use hdc instead of slip stitch?
Yes. Hdc in the BLO works up faster but looks bulkier. Remeasure your panel width after switching.
How do I make it a dress?
Keep adding dc rounds to the ruffle until you reach your desired length.
Will the top stay up without straps?
With negative ease and a stabilizing edge, usually yes. Elastic thread adds security.
Checking the Ruffle Balance Before Finishing
Before working the final white edge, lay the top flat and fold it at the side seams. Both halves of the ruffle should have the same fullness. If one side looks heavier, your Rnd 1 pick-up was uneven. Frogging back three rounds now is much faster than living with a lopsided peplum.
Ready to Wear It Out
A ribbed bodice, a soft white-striped peplum, and one little bow add up to a top that feels handmade in the best way. Measure twice, count your slip stitches, and enjoy seeing it take shape round by round.