Crochet Baby Planter Keychain With a Tulip
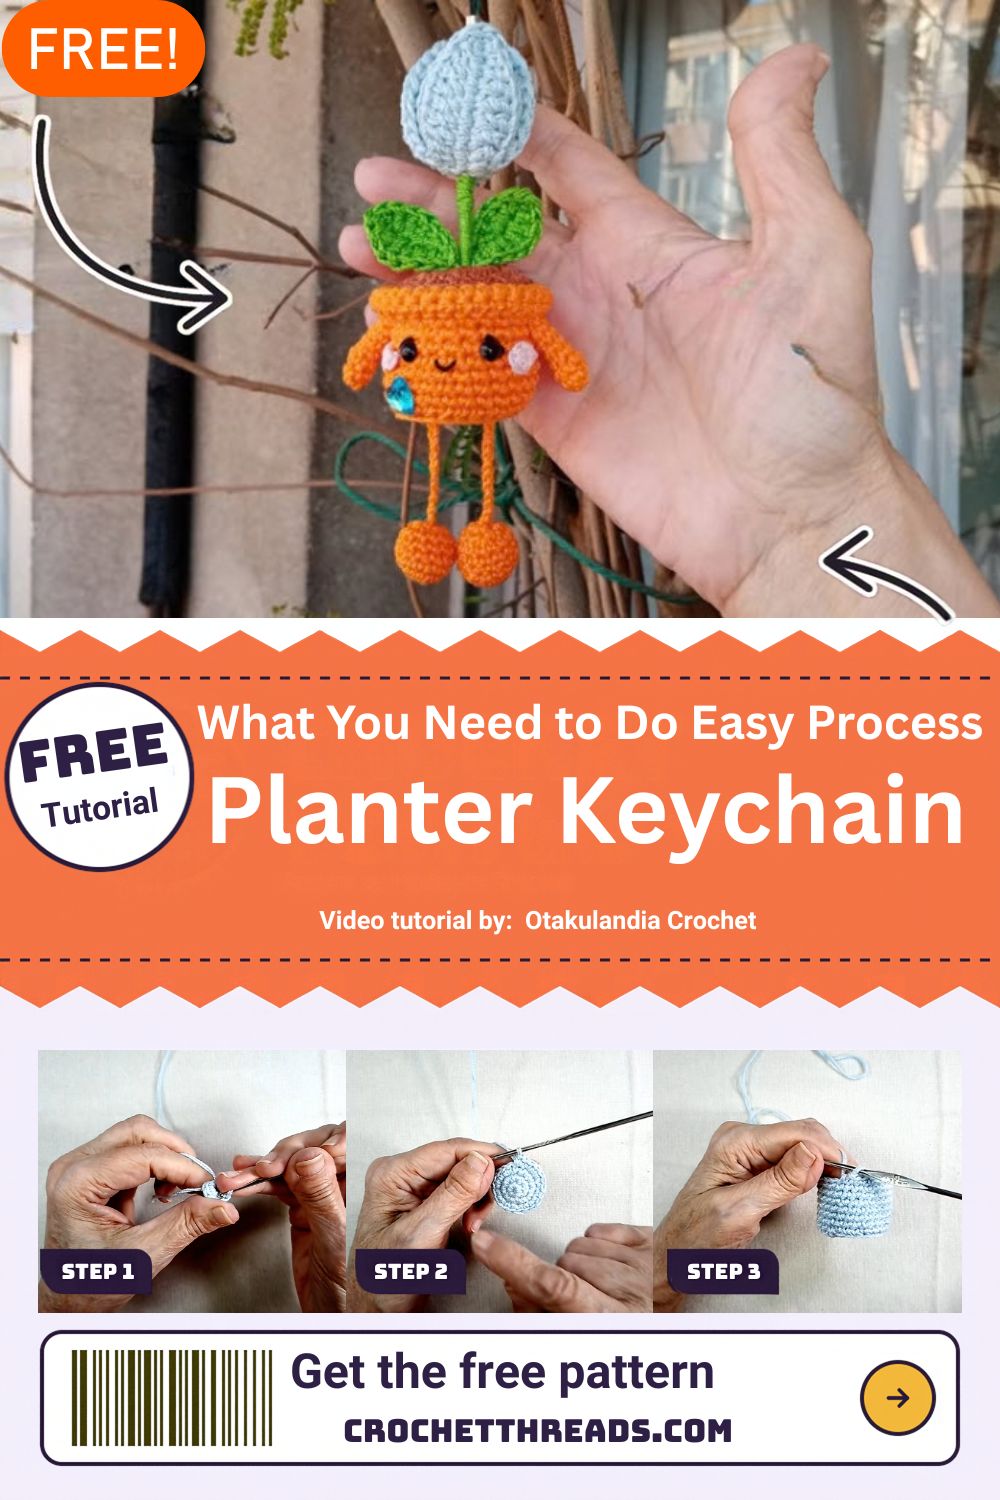
Light blue walls, a flat spiral base, and a rust-brown circle of crocheted “soil” tucked inside the rim give the Crochet Baby Planter Keychain With a Tulip its tiny flowerpot look. The step photos follow the mini crochet planter from the very first round, a small circle held between the fingertips, through the flat base, the straight walls, and the finished rim around the brown center.
What makes the crochet baby planter keychain fun to follow is how clean the shapes stay at such a small scale. The base lies flat with neat concentric rings, the walls rise evenly from its edge, and the soil sits a little below the rim. As a result, the piece already reads as a crochet flowerpot keychain before the tulip goes in, and it makes a sweet handmade keychain gift.
How the Crochet Baby Planter Keychain Comes Together
Before you pick up the hook, look over the full construction. The pot comes together in clear stages, and each stage sets up the next:
- A small starting circle in light blue, worked with a metal crochet hook.
- A flat base that grows outward in rounds until it forms a solid disc.
- Straight walls that rise from the edge of the base and turn the disc into a short cylinder.
- A top edge that you shape into a rim with a sewing needle.
- A brown soil piece that you pin into the opening and sew in place inside the blue rim.
- The tulip and keychain hardware, which complete the project.
The pot and the soil are separate pieces. You crochet the pot as one continuous shape from base to walls, while you make the soil on its own and join it later by hand. Because of that, the soil has to fit the opening of your crochet baby planter keychain, so keep an eye on the pot’s width as you go.
What You’ll Need for the Crochet Baby Planter Keychain
The step photos show the following tools and materials:
- Light blue yarn for the pot
- Brown (rust-toned) yarn for the soil
- A metal crochet hook
- A long sewing needle for finishing and joining
- Straight pins to hold the soil in place before sewing
- Keychain hardware to finish the piece
- Yarn for the tulip, following the video tutorial
For exact yarn, hook size, and stitch counts, work alongside the video tutorial below. In a project as small as a crochet baby planter keychain, the finished size depends heavily on matching the materials the tutorial uses.
How to Crochet the Baby Planter Keychain Step by Step
Step 1: Start the Base With a Small Ring
The project begins at its smallest. In the first photo, one hand pinches a little ring of light blue stitches between the thumb and fingers while the hook works into it from the other side. Meanwhile, the working yarn runs up and away from the piece, and a short tail hangs off to the left.
At such a small size, stitches are hard to see and easy to miscount, so a few habits help:
- Hold the circle close to your fingertips so you can see each stitch as it forms.
- Keep the tail out of the way so you don’t crochet over it by accident.
- Place a stitch marker in the first stitch of each round once there’s enough fabric to hold one.
The first round decides how tidy the center of the base looks. If it stays loose, the middle of the pot bottom can end up with a visible gap.

Step 2: Build a Flat Circle
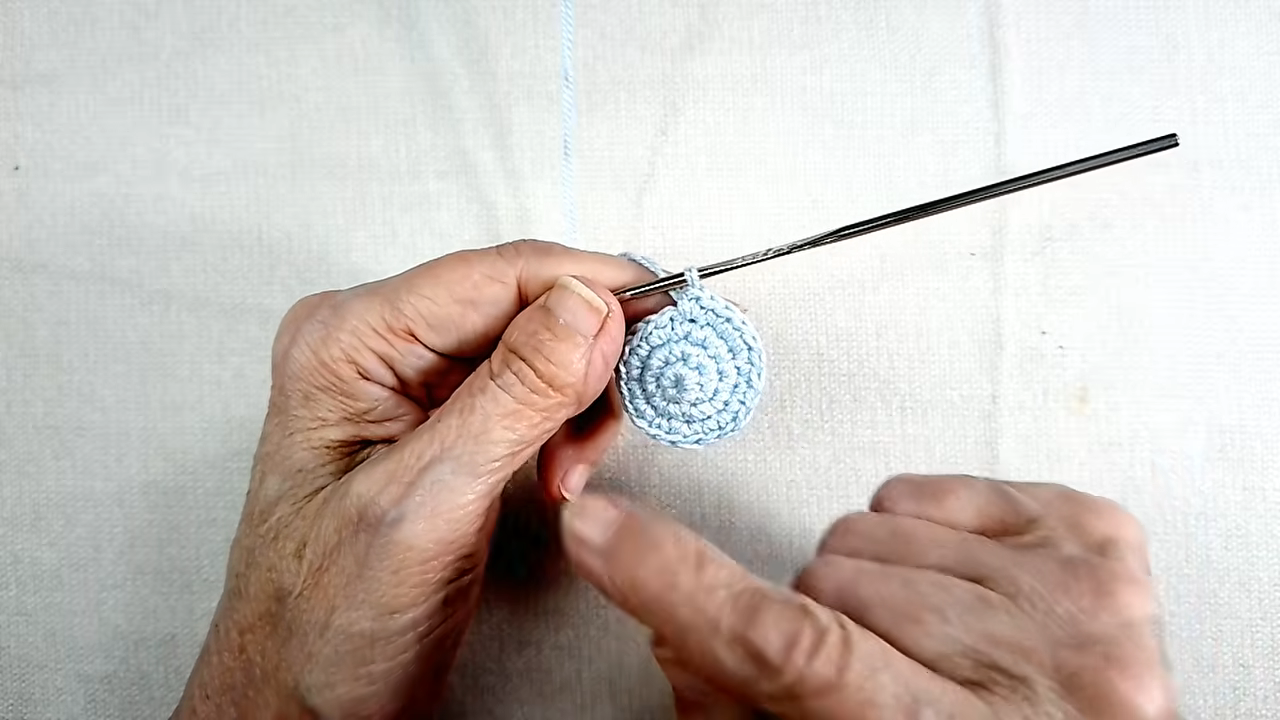
Next, the base grows into a flat light blue disc. You can pick out each round as a concentric ring moving outward from the center, and the hook rests in the last stitch at the top edge, ready to continue.
Before the walls start, lay the disc on a flat surface and check it from the side.
- It should lie flat. The base in the photo sits smoothly, without ripples or a domed center.
- The rings should look even. Consistent rings mean you’ve spread your increases evenly around the circle.
- The edge should be round. A base with corners or a hexagon shape won’t give you a smooth pot wall.
Then count your stitches at the end of the last base round and compare them with the tutorial. Everything that follows builds on that number, including the width of the opening for the soil.
Step 3: Raise the Pot Walls
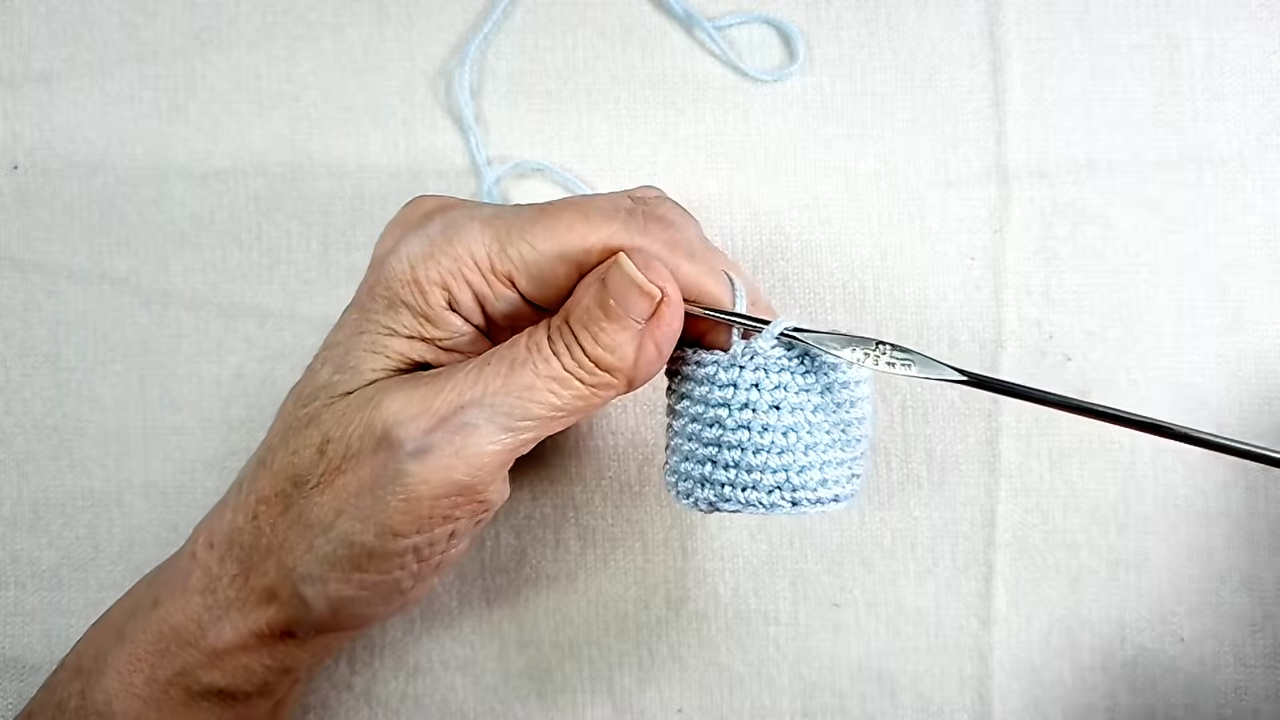
Once the base is done, the flat disc turns into a small cylinder. The walls go straight up with no visible flare, and the rows of stitches stack neatly on top of each other.
The move from a flat base to straight walls is the biggest shape change in the whole pot. From that point on, the rounds stop growing, so the piece rises instead of spreading.
As the walls build, watch for three things:
- Straight sides. Look at the cylinder from the side every few rounds, because the walls shouldn’t lean in or out.
- Consistent stitch height. If your tension changes partway up, you’ll see a band that looks tighter or looser than the rest.
- The round start. Move your stitch marker up each round so you always know where one round ends and the next begins.
Your tension also controls how firm the pot feels. Tighter stitches help the walls stand up on their own, which matters for a crochet baby planter keychain that will hang from a key ring and get handled often.
Step 4: Shape the Top Rim
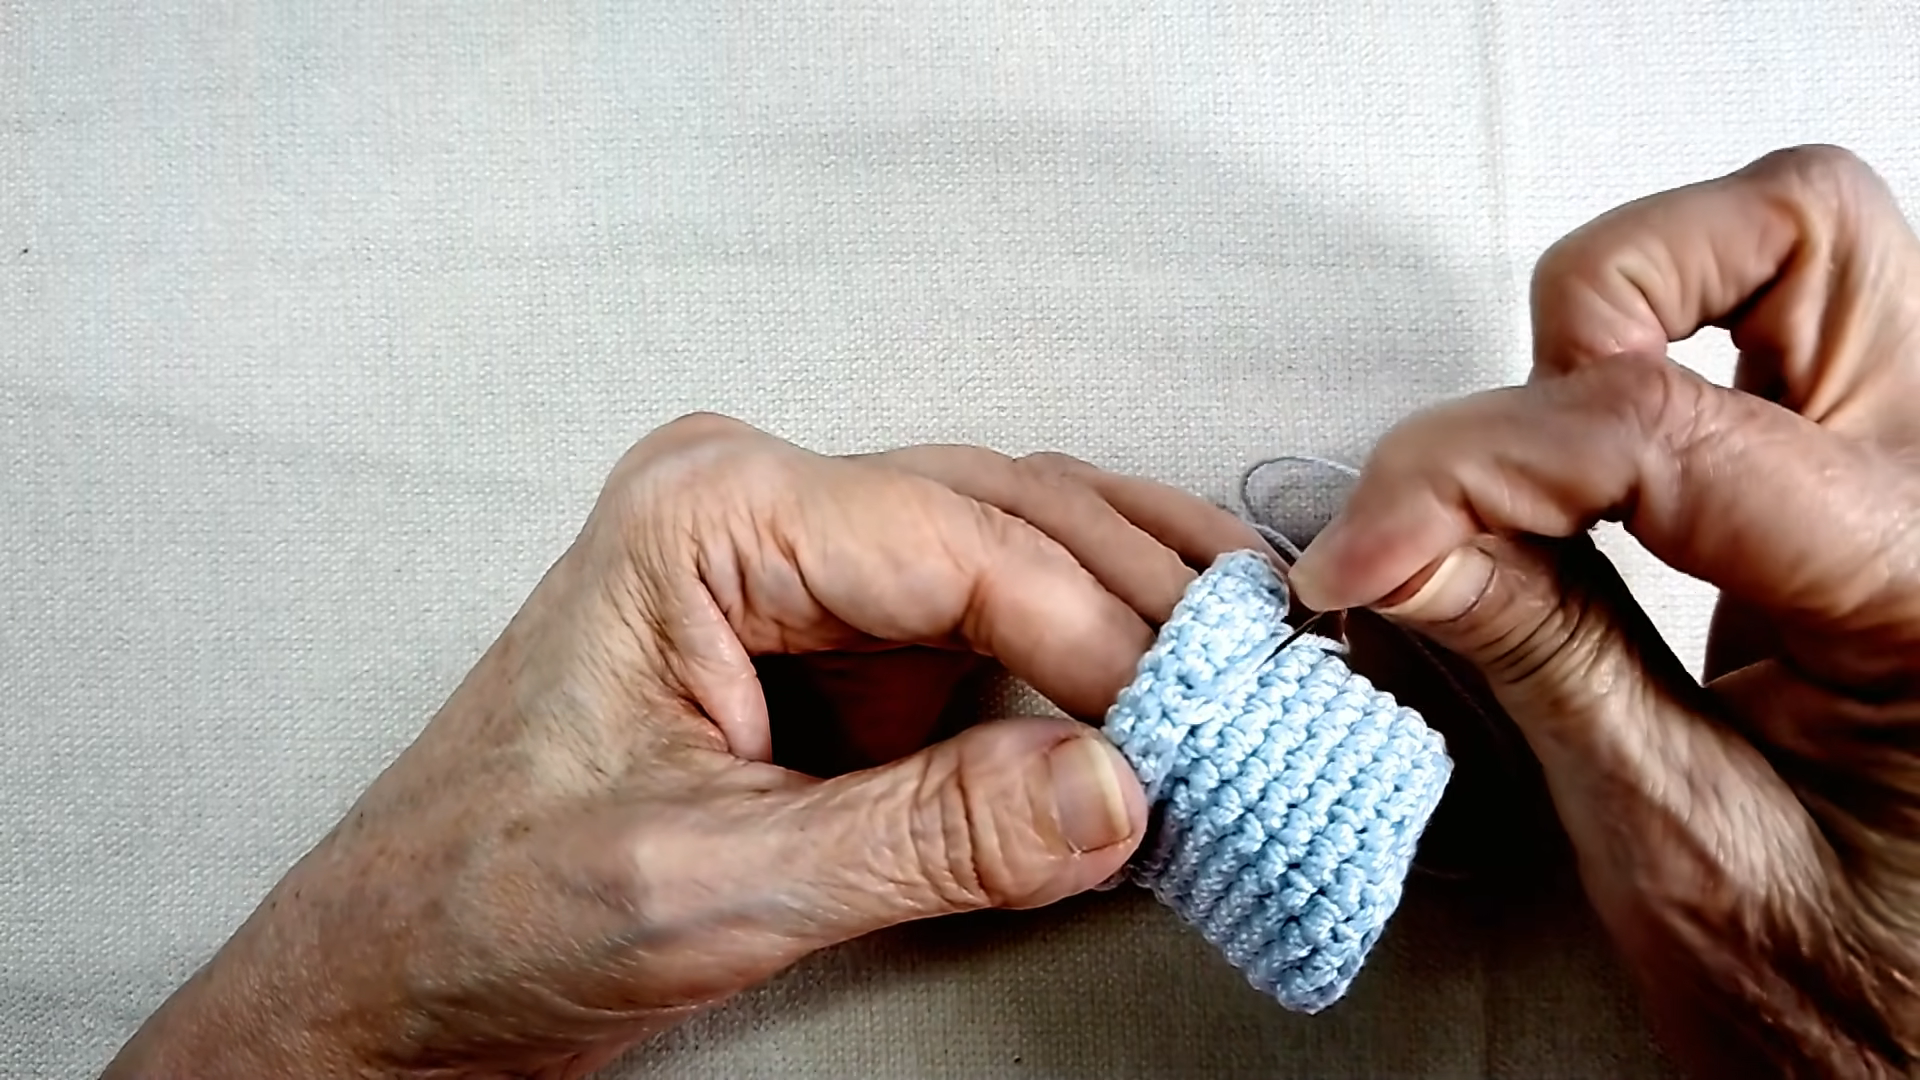
Now set the hook aside and work a needle through the upper edge of the blue cylinder. In the photo, the top of the pot looks slightly different from the walls below it, since the needle shapes the edge into a rim as it passes through the stitches.
Because the photo shows the step from a close angle, follow the video for the exact method. As you work:
- Keep the stitches you sew through close together, so the rim looks even all the way around.
- Turn the pot as you work instead of reaching around it. That way, the needle enters at the same angle each time.
- Check the rim from above when you finish. It should form a smooth, even ring.
The rim frames the soil in the finished pot, so an even rim makes the whole planter look much neater.
Step 5: Crochet the Soil Circle
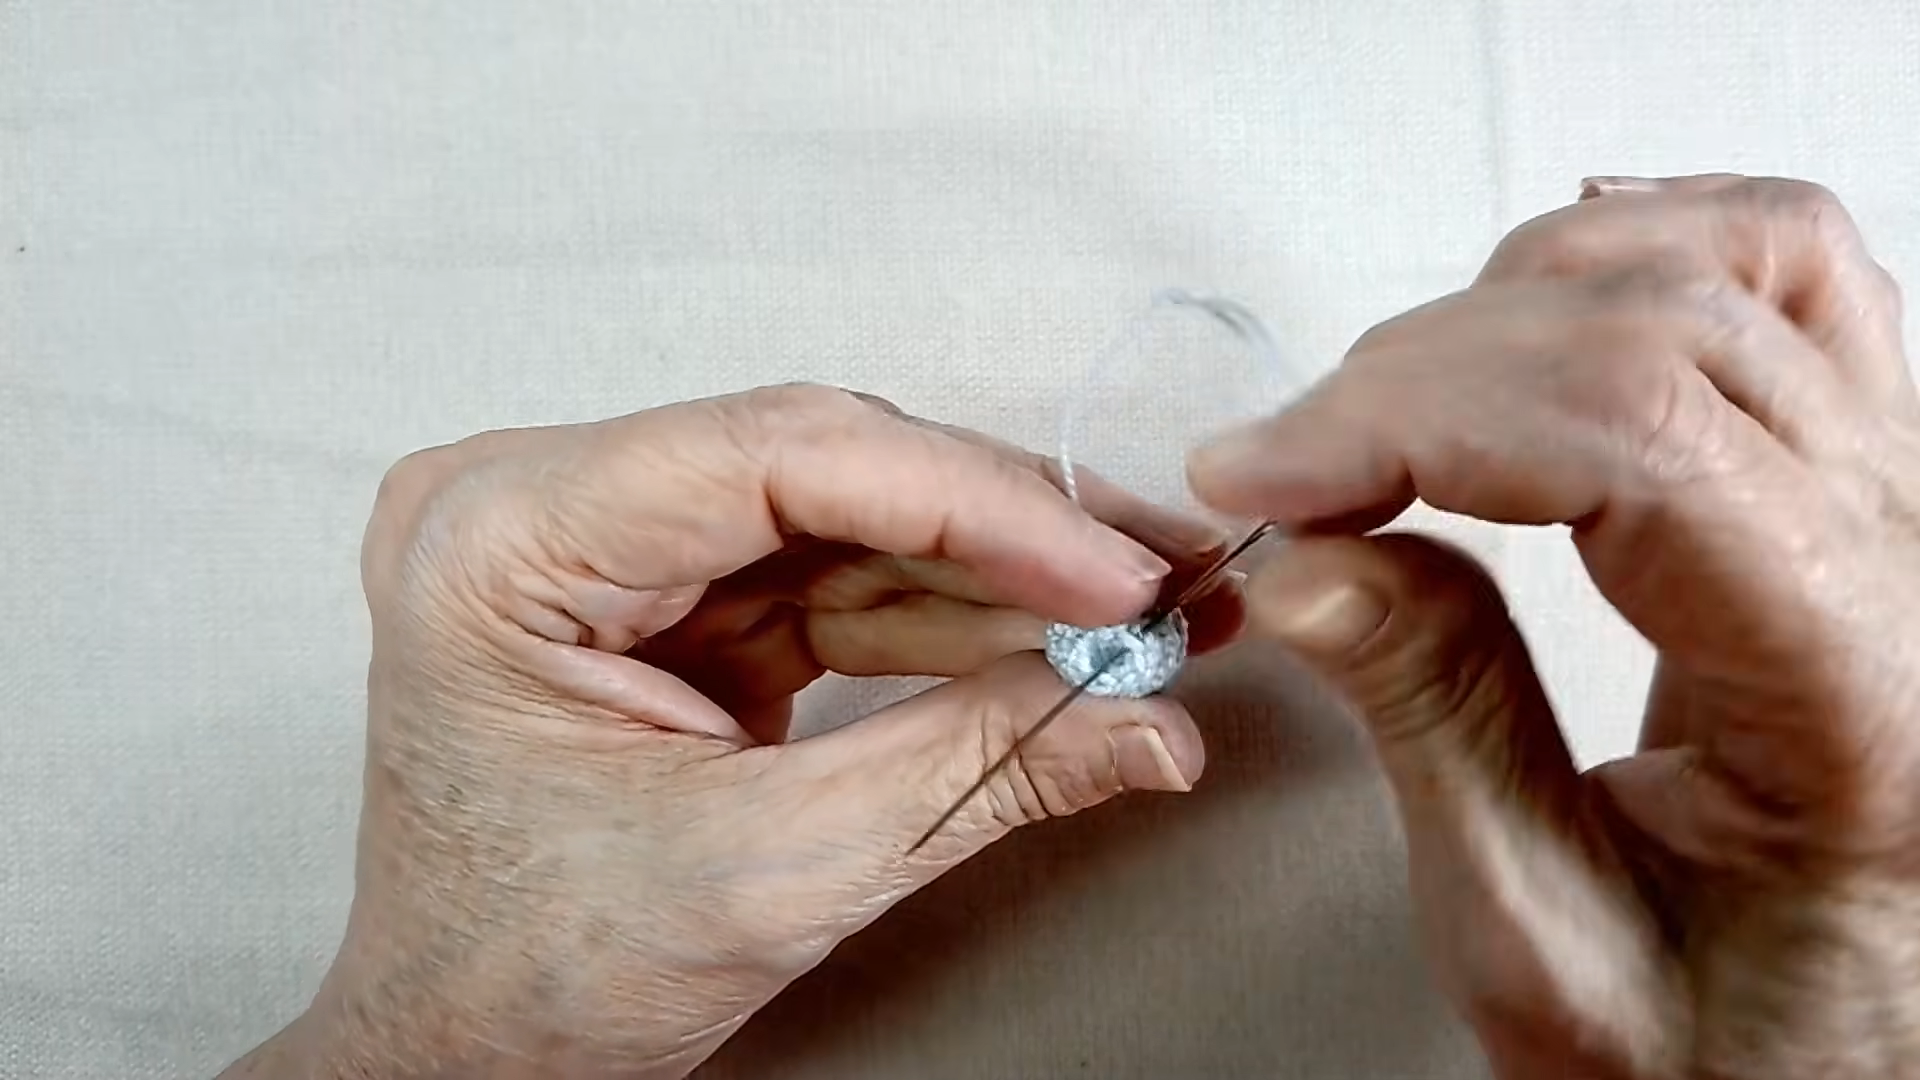
The soil starts as its own small circle, much smaller than the finished base. In the photo, one hand holds the piece between the fingers while a long needle passes through it, and the working yarn trails up toward the other hand.
When you sew through a piece so small, grip it firmly between your thumb and index finger. A long needle also gives you more to hold, so you can guide it through tight stitches without pulling the circle out of shape.
Step 6: Pin and Sew the Soil in Place
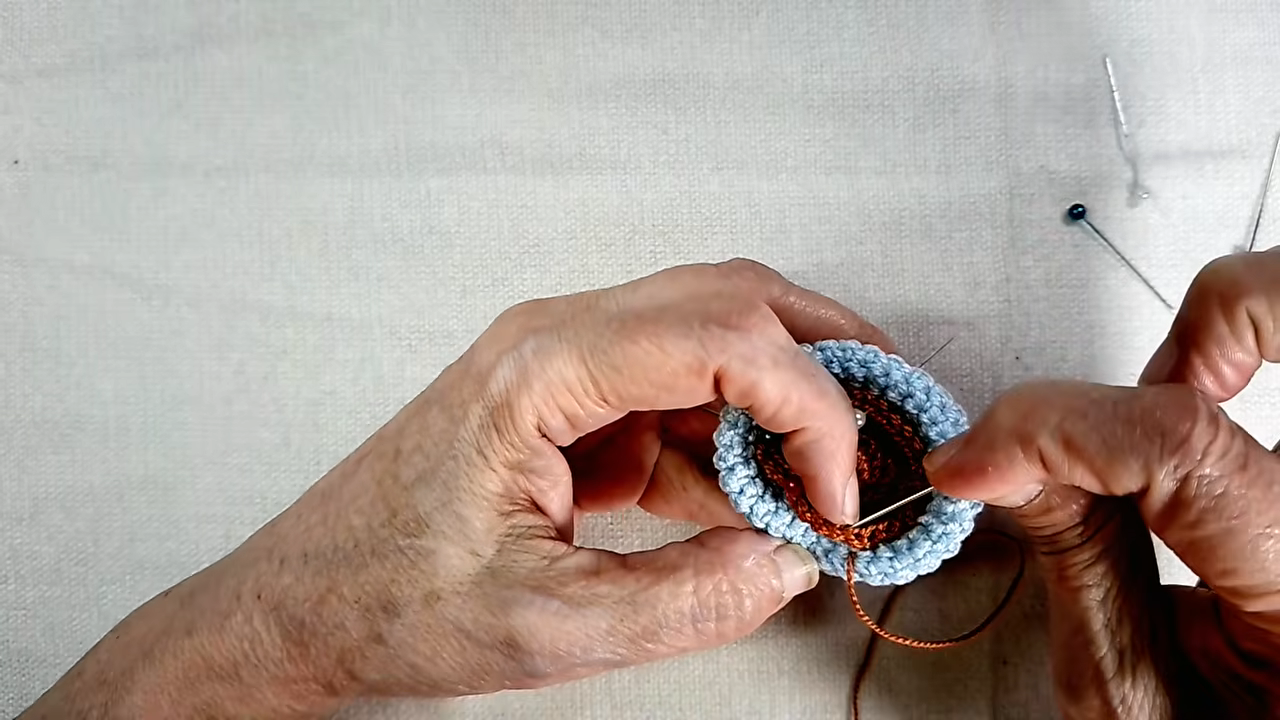
Next, join the soil to the pot. From above, you can see the rust-brown piece sitting inside the opening, slightly below the blue rim, while a needle threaded with brown yarn works along the edge where the two colors meet. Pearl-head pins hold the piece near the edge, and more straight pins rest nearby.
Of all the joining steps, the soil matters most, and the pins make the difference.
Pin before you sew. Place pins around the soil so it sits centered in the opening before your first stitch. Otherwise, the soil tends to slide to one side as you work around.
Sew with the soil color. Brown joining yarn blends into the soil instead of showing up as a line on the blue rim.
Work in a steady circle. Move all the way around the opening with evenly spaced stitches, and take out each pin as you reach it.
Check the depth. The soil should sit a little below the top of the rim, so the blue edge forms a visible border. That recessed look is what makes the piece read as a planted pot.
Step 7: Finish the Crochet Baby Planter Keychain With the Tulip
The photos stop before the tulip and keychain, so follow the video tutorial to make the tulip, set it in the soil, and attach the keychain hardware.
Before you add the flower, look over the pot one last time. Make sure the soil holds firmly all the way around and the pot sits upright without leaning. Any problems are much easier to fix before you sew in the tulip.
Troubleshooting Your Crochet Baby Planter Keychain
Most problems with a crochet baby planter keychain trace back to stitch counts, so start there when something looks off.
The base ripples or waves
What it looks like: The disc won’t lie flat and has a wavy edge, unlike the smooth base in Step 2.
What to check: Your stitch count for each base round against the tutorial.
Possible cause: Too many stitches in a round, the usual reason a flat circle ruffles.
Correction: Undo back to the last round that matched the tutorial count and rework from there.
The base cups upward before the walls begin
What it looks like: The disc curves into a bowl before the wall rounds start.
What to check: Whether you skipped any increases in the base rounds.
Possible cause: Too few stitches for the size of the circle.
Correction: Recount, then rework the round where the count first falls short.
The walls lean or flare
What it looks like: The cylinder widens or narrows as it rises instead of staying straight like the one in Step 3.
What to check: Your stitch count in each wall round, and whether it stays the same all the way up.
Correction: Find the round where the count changed and rework from that point.
The soil doesn’t fit the opening
What it looks like: The brown piece either buckles when you push it into the rim or leaves gaps around the edge.
What to check: Your final stitch counts for both the pot and the soil, compared with the tutorial.
Correction: Remake whichever piece is off. Stretching or bunching the soil to force a fit will show in the finished pot.
The soil sits off-center
What it looks like: One side of the blue rim shows more border than the other.
Correction: Remove the stitches on the uneven side, re-pin the soil so it sits centered, and sew again.
Bonus: Swapping the Pot Color Without Losing the Look
Much of the planter’s charm comes from contrast. The light blue pot and rust-brown soil stand apart clearly, even at keychain size. So if you want a different color, keep that contrast in mind.
- Choose a pot color that is clearly lighter or brighter than the soil, so the rim still frames the center.
- Keep the soil a natural earthy shade so it reads as dirt at a glance.
- Hold the new pot yarn next to your tulip colors before you start, and make sure the flower will stand out against both the soil and the pot.
A matching set in several pot colors also makes it easy to tell keys apart while keeping the same basic design.
Bonus: Making Your Crochet Baby Planter Keychain Last
Your crochet baby planter keychain will take daily tugs, drops, and pocket squeezes, so a little extra care at the finishing stage pays off. Attach the keychain hardware through several stitches rather than just one, and knot the yarn securely before you hide the tail inside the pot.
Also, check the tulip and soil seams every few weeks. If a stitch starts to loosen, tighten or resew it right away, before the gap grows. When the pot looks grubby, spot clean it with cool water and a little mild soap, then let it air dry.
Crochet Baby Planter Keychain FAQs
Do you work the base flat before the walls?
Yes. You finish a flat disc first, then raise the walls straight up from its edge.
How do you attach the soil to the crochet baby planter keychain?
Pin the brown piece inside the opening, then sew it in with a needle and matching brown yarn.
Why should the soil sit below the rim?
The recessed soil leaves a blue border around the edge. That border is what makes the piece look like a filled flowerpot instead of a flat disc.
Why pin the soil if it’s so small?
Even a tiny piece shifts while you sew. Pinning keeps it centered, so the rim border stays even all the way around.
Can I make the soil a different brown?
Yes. Any earthy shade works as long as it stands out from the pot color, as the bonus section explains.
Ready to Clip On and Go
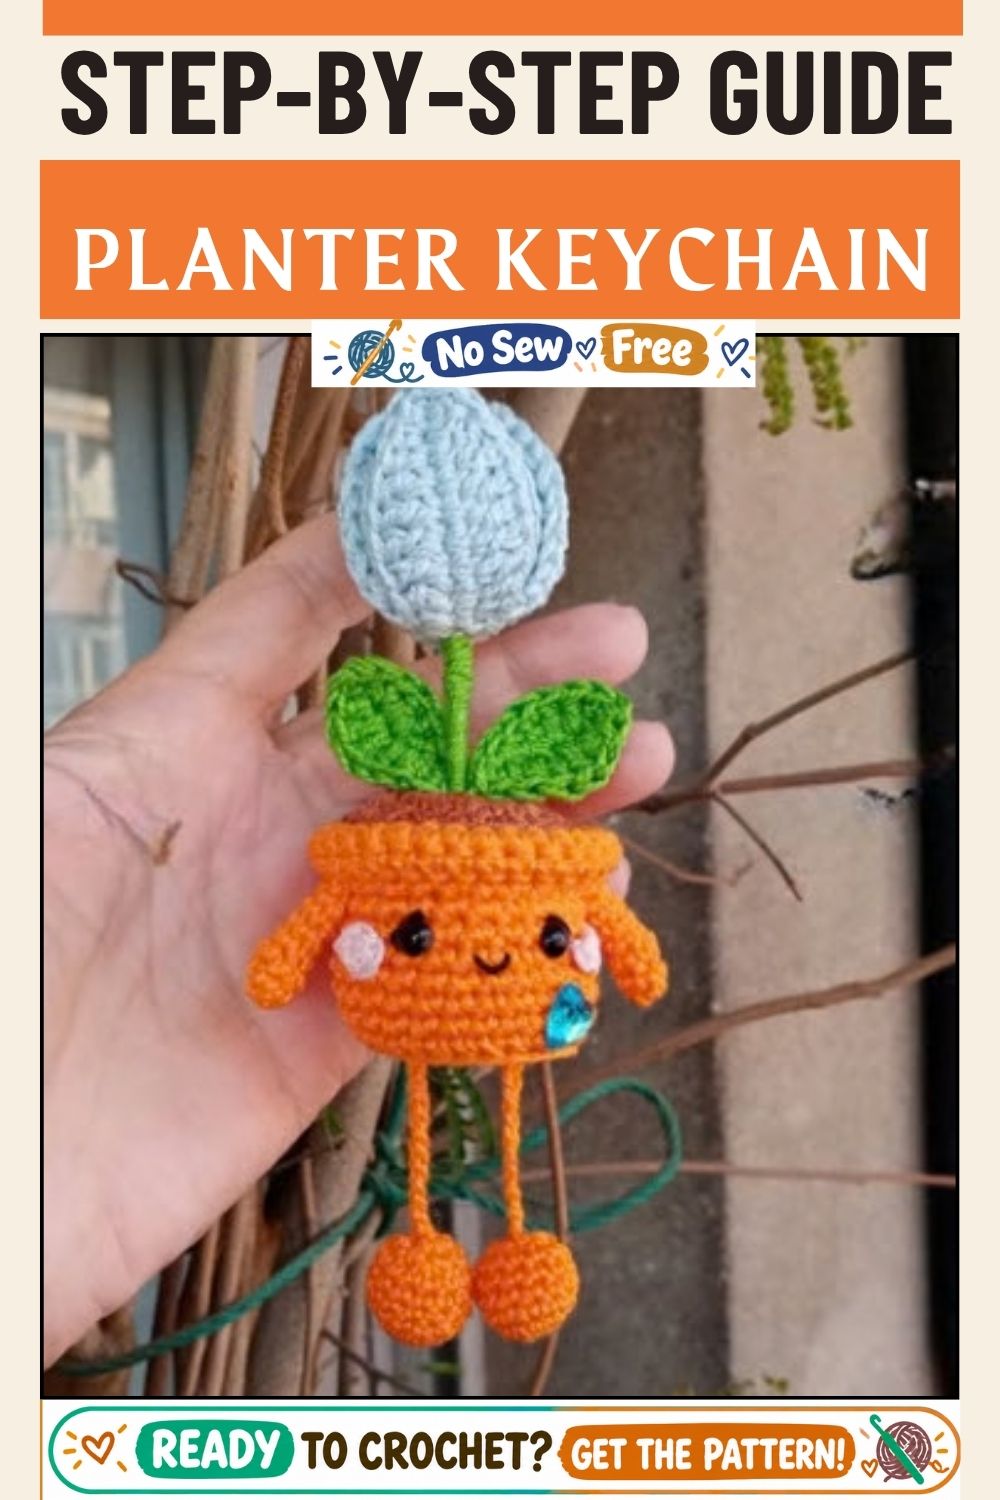
Your crochet baby planter keychain comes together in clear stages: a flat blue base, straight walls, a tidy rim, and pinned brown soil sewn neatly inside. If you check each stage against the photos before moving on, the small parts stay in proportion. Then, once the tulip and hardware go on, the mini pot is ready to clip onto your keys or tuck into a gift bag.