Crochet Baby Beret Pattern with Flower Button
This crochet baby beret pattern makes a sweet green and white hat with a little flower button right on top. First, you work a flat circle. Then you add shells and raised diamond stitches, and finally you finish with a stretchy brim. As a result, the hat looks detailed, yet it works up in simple rounds.
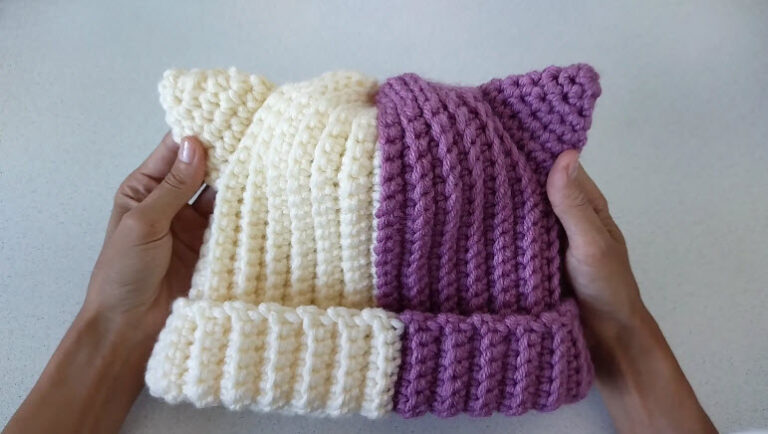
Every step is written out below, so you can follow along without looking anywhere else. In addition, the video next to the first photo shows the stitches in action, which helps if post stitches are new to you. Best of all, this beret makes a thoughtful baby gift, and it only needs a little leftover yarn.
Crochet Baby Beret Pattern Overview
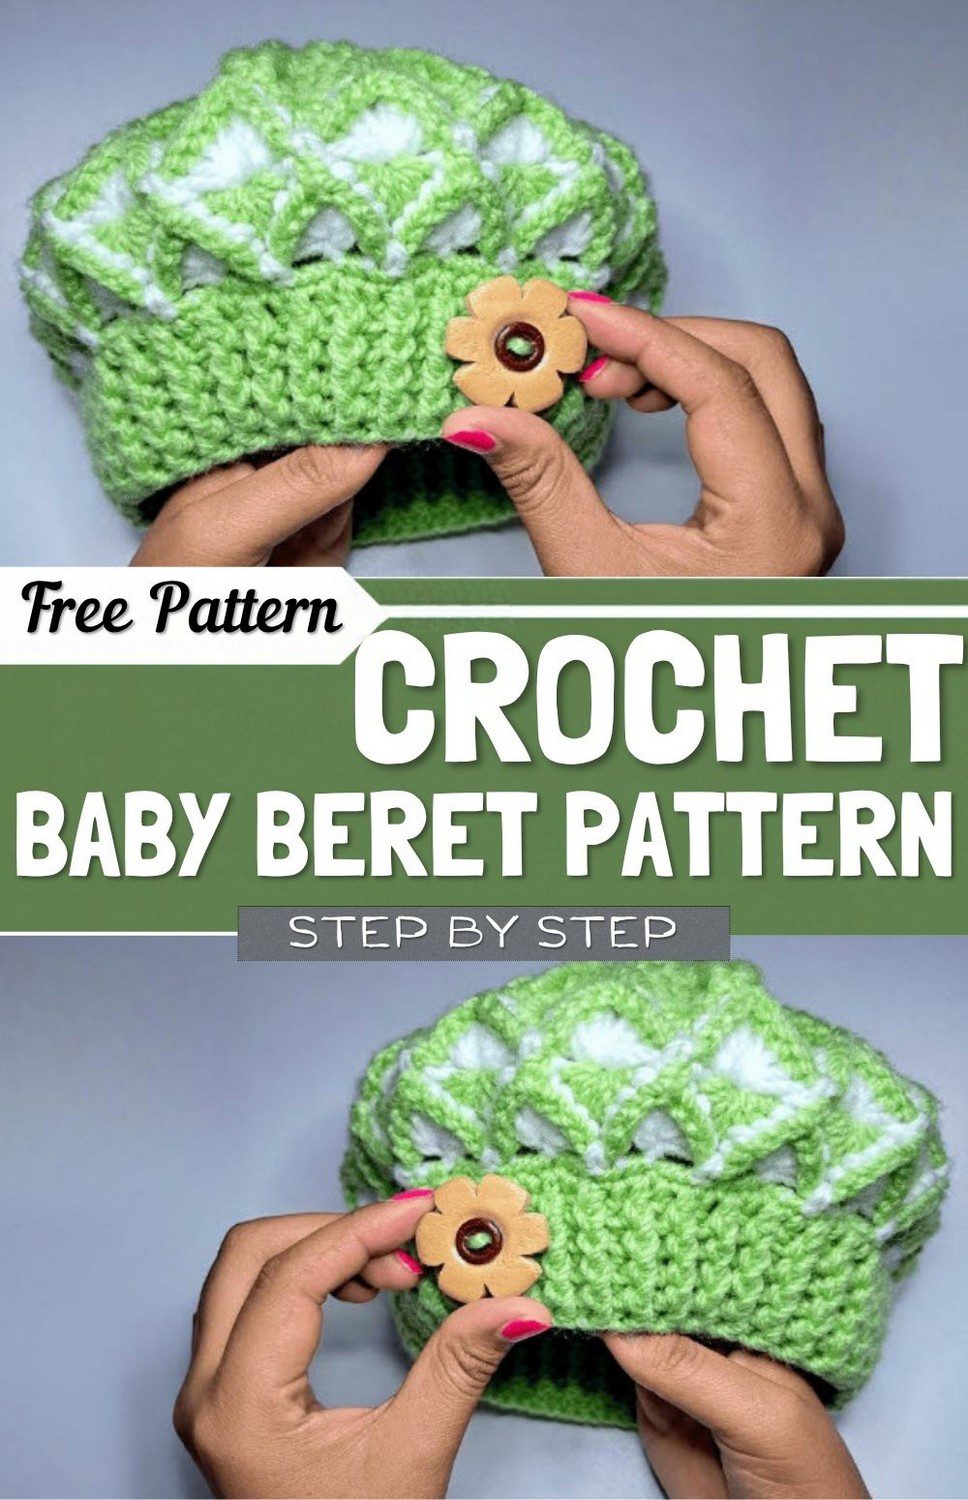
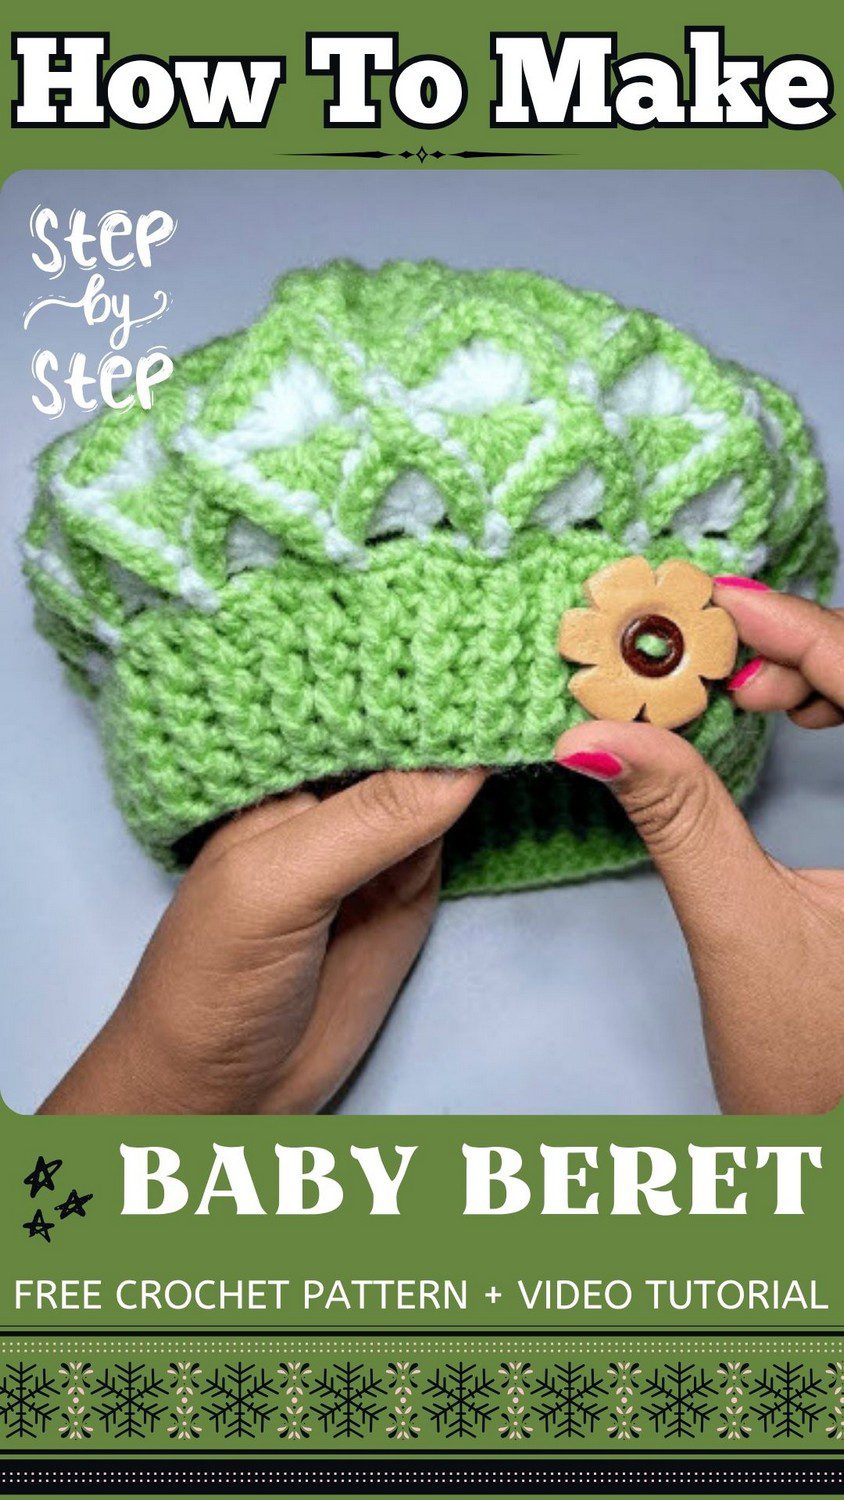
This beret is made for babies 6 to 12 months old. You begin with a flat, round crown that has raised ribs spreading out from the center. Next comes the main body, where two colors take turns to form shells and raised diamond clusters. After that, a smooth band leads into a stretchy ribbed brim, and a small button sits in the center on top.
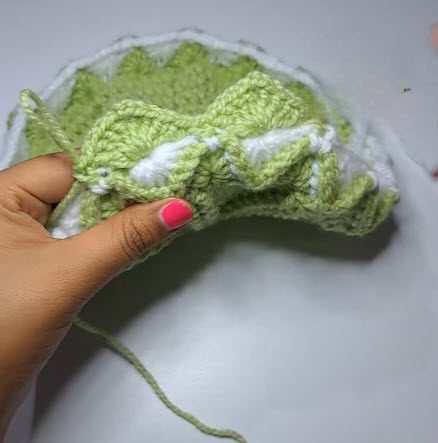
In the photo, the body is green with raised white shell fans and gathered diamond points. Below it, the band is smooth green, and the brim is ribbed.
Skill level: Intermediate, or an advanced beginner. You should feel comfortable with a magic ring, post stitches and gathering several loops together.
Finished size: The crown measures about 19 cm (7.5 inches) across, and the hat fits babies 6 to 12 months.
The beret is worked in these parts:
- Crown base (flat circle with FPdc ribs)
- Textured diamond body rounds
- Transition band (sc round and dc round)
- Ribbed brim (FPdc and BPdc)
- Finishing and button
Materials for the Crochet Baby Beret Pattern
- Yarn in two contrasting colors, both in the same weight
- Yarn weight: sport, light worsted or DK (roughly 4 mm thick)
- Fiber: acrylic or a soft, baby-friendly wool blend
- Yarn amount: small partial skeins or leftovers, under 100 to 150 yards in total
- 4.0 mm crochet hook
- Tapestry needle
- Scissors
- Tape measure
- Stitch markers
- 1 small decorative button (a tiny handmade crochet flower works too)
Color A is used for the crown and the diamond gathering rounds, while Color B is used for the shell rounds. The brim can be worked in Color B or in a third accent color, such as green.
Abbreviations
This pattern uses US terms.
- ch: chain
- sl st: slip stitch
- sc: single crochet
- dc: double crochet
- FPdc: front post double crochet
- BPdc: back post double crochet
- st(s): stitch(es)
- inc: increase (two stitches worked into the same stitch or space)
Special Stitches for This Crochet Baby Beret Pattern
A few stitches here may be new to you, so read this part once before you pick up the hook.
Magic Ring
Wrap the yarn around your fingers to make a loop. Then put the hook into the center, pull up a loop and chain to lock it. As a result, you get a closed center with no hole.
Double Crochet (dc)
Yarn over, then put the hook into the stitch or space. Next, yarn over and pull up a loop, which leaves 3 loops on the hook. Finally, [yarn over, pull through 2 loops] two times.
Front Post Double Crochet (FPdc)
Yarn over. Put the hook in from front to back and out to the front again, around the upright post of the stitch. After that, yarn over and pull up a loop. Then [yarn over, pull through 2 loops] two times.
Back Post Double Crochet (BPdc)
Yarn over. This time, put the hook in from back to front and out to the back again, around the upright post of the stitch. Next, yarn over and pull up a loop. Then [yarn over, pull through 2 loops] two times.
Increases
Work two dc, or two FPdc, into the same stitch or space.
Shell (Fan)
Work (4 dc, ch 2, 4 dc) into the stitch or space the pattern names.
Raised Diamond Gathered Stitch
This stitch makes the diamond points, so take it slowly. In the gathering rounds, you pick up loops from the 4 posts of the shell you are on and the 4 posts of the shell beside it, which makes 8 posts in total. Then yarn over and pull through all the loops on the hook at once. This closes the cluster.
Joining, Turning and Color Changes
Close every round with a sl st into the top of the starting chain. Do not turn your work, because every round is worked on the right side. Change colors at the start of the round the pattern names. In addition, pull the new color through with a sl st so the join stays neat.
Keeping Your Stitch Count Right
Count your stitches at the end of every increase round in the crown. Likewise, in the body, make sure each shell sits right over the gathering points from the round before.
Complete Crochet Baby Beret Pattern
Part 1: Crochet Baby Beret Pattern Crown Base
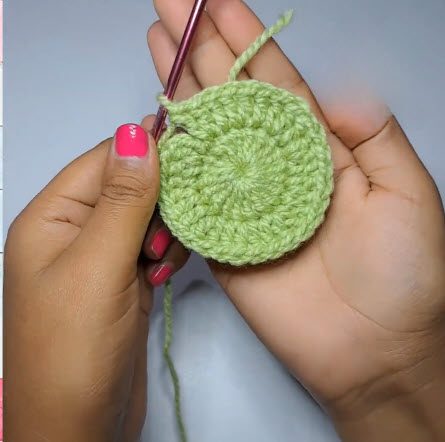
Start with Color A and make a magic ring.
Round 1: Ch 2 (this counts as your first dc). Work 19 dc into the ring. Pull the tail tight to close the ring, then join with a sl st to the top of the starting ch 2. (20 sts)
Round 2: Ch 2. Work 1 FPdc around the next stitch, then 1 dc in the next stitch. Repeat around. This sets up the raised ribs that spread out from the center. Join with a sl st.
Rounds 3 to 8: Keep working in rounds. Keep the FPdc ribs going straight up, and add plain dc stitches between the ribs, with 1 more stitch in each section every round. The sections grow from 1 stitch between the ribs, to 2, then 3, then 4, and so on, until there are 8 stitches between the ribs on Round 8. Join with a sl st after every round.
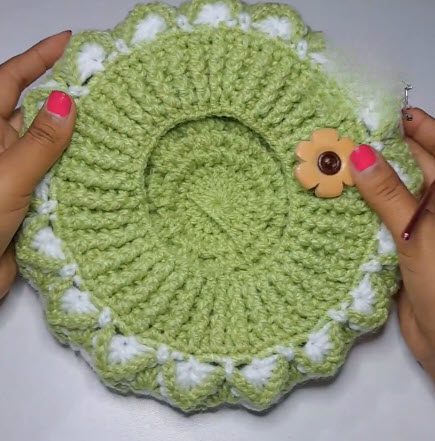
Now measure the flat circle. It should be about 19 cm (7.5 inches) across. Once it does, fasten off Color A.
Part 2: Crochet Baby Beret Pattern Diamond Body
Body Round 1 (Shell Setup, Color B): Join Color B with a sl st. Ch 1, then work 1 sc in the next stitch. Skip 2 sts and work a shell (4 dc, ch 2, 4 dc) in the next st. Then skip 2 sts and work 1 sc in the next st. Repeat around. Join with a sl st.
Body Round 2 (Diamond Gathering, Color A): Join Color A. Slip stitch across to the center of the first shell. Ch 3. Draw up loops from the 4 posts of the shell you are on and the 4 posts of the next shell (8 posts in all). Yarn over and pull through all the loops on the hook to gather. Next, ch 3, then work 1 sc into the ch-2 space of the shell. Repeat around. Join with a sl st.
Body Round 3 (Shells, Colour B): Join Colour B. Ch 1, then work 1 sc into the sc from the last round. After that, work shells (4 dc, ch 2, 4 dc) right into the centre spaces where you gathered the stitches in the last round. Repeat around. Join with a sl st.
Body Round 4 (Diamond Gathering, Colour A): Repeat Body Round 2. Then fasten off both Color A and Colour B.
Part 3: Crochet Baby Beret Pattern Ribbed Brim
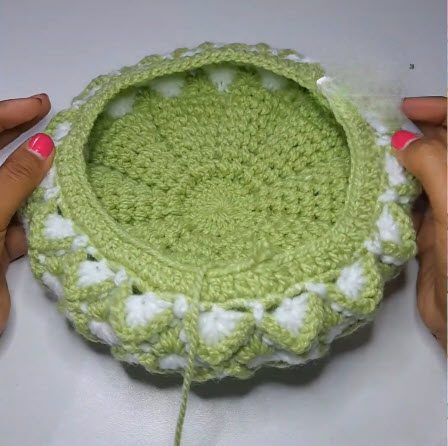
Transition Round 1 (sc): Join your brim colour at any ch-2 space. Ch 1, then work 2 sc in each ch-2 space around, with 1 sc in each stitch in between. Make sure the final count is an even number, because the ribbing needs it. Join with a sl st.
Transition Round 2 (dc): Ch 2, then work 1 dc in every stitch around. Join with a sl st.
Ribbing Rounds: Ch 2. Work 1 FPdc around the next stitch, then 1 BPdc around the next stitch. Repeat around, then join with a sl st. Work this ribbing round 4 to 5 times in total. As a result, the brim turns snug and stretchy, so it hugs the baby’s head. Fasten off and leave a long tail.
Finishing Your Crochet Baby Beret Pattern
Sewing on the Button
Use matching yarn and a tapestry needle. Sew the button firmly onto the top center, right over the magic ring. Because a baby can pull on it, check that it is very secure. For a safer choice, use a small crochet flower instead.
Weaving in Ends
Weave all loose tails into the inside (wrong side) of the stitches with the tapestry needle. Then trim the extra yarn.
Shaping
Lay the beret flat and shape it with your hands. The ribbing will naturally hug the head, so no hard blocking is needed.
Optional Decoration
Instead of a regular button, you can top the hat with a small handmade crochet flower or a fabric button.
Tips and Common Mistakes in the Crochet Baby Beret Pattern
Losing count in the crown. This is easy to do once the ribs start to spread. Therefore, put stitch markers on the FPdc ribs so you can see each section clearly. Also, count your stitches at the end of every increase round before you move on.
Pulling the gathering loops too tight. A tight pull makes the cluster hard to work into later. For that reason, keep your tension loose and even.
Shells that do not line up. In the body, each shell should sit right over the gathering points from the round before. Check this at the start of every shell round.
Uneven ribbing. The ribbing only works with an even stitch count. So, check the number at the end of Transition Round 1 before you continue.
Colour Pairing Ideas for Your Baby Beret
The sample hat uses green and white, but the pattern works with any two colours in the same weight. However, the shells and diamond points only show up well when the two colours contrast clearly. Before you start, lay the two skeins side by side and check that they stand apart.
Moreover, the brim does not have to match the shells. You can work it in Colour B, or in a third accent colour. In that case, pick a shade that goes with the button or flower on top, so the whole hat feels put together.
Caring for Your Crochet Baby Beret Pattern Hat
A hat this small will get messy, so here is how to keep it looking good.
- Hand wash it in cool water with mild soap.
- Press the water out gently, and do not wring it.
- Lay it flat on a clean towel and shape the brim and crown while it is still damp.
- Let it dry fully.
If you used a wool blend yarn, skip the dryer, because heat can shrink it.
Crochet Baby Beret Pattern FAQs
What age does this crochet baby beret pattern fit?
It fits babies 6 to 12 months old. To check the fit as you go, measure your flat crown against the size given in the overview above.
What yarn and hook do I need?
Use two contrasting colours of the same weight. Sport, light worsted, or DK all work, and acrylic or a soft, baby-friendly wool blend is a good choice. Pair the yarn with a 4.0 mm hook. In total, you only need small partial skeins or leftovers, under 100 to 150 yards.
Is this crochet baby beret pattern good for beginners?
It suits an intermediate crocheter or an advanced beginner. You should be comfortable with a magic ring, post stitches and gathering several loops together.
Is the button safe for a baby?
A baby can pull on a button, so sew it on very firmly and check it again from time to time. For a safer choice, use a small crochet flower instead.
Can I make the brim in a different colour?
Yes. The brim can be worked in Colour B or in a third accent colour, like green.
One Last Word Before You Pick Up the Hook
This hat looks fancy, I know. Still, it is only a flat circle, a few shell rounds and a stretchy brim.
The diamond part can feel tricky the first time. If you keep your loops loose, though, you will be fine. Also, put a few stitch markers in the crown so you do not lose your place.
So grab your leftover yarn and try this crochet baby beret pattern. Then sew that little flower button on tight, and you have a lovely baby gift.