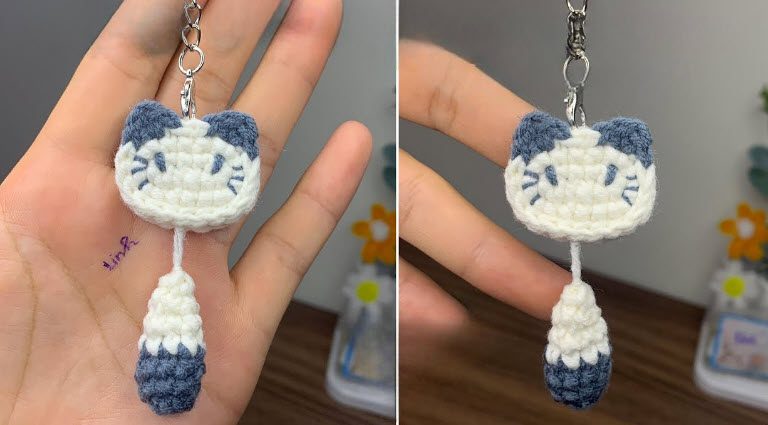
Easy Crochet Cat Amigurumi Pattern Squishy Little Buddy
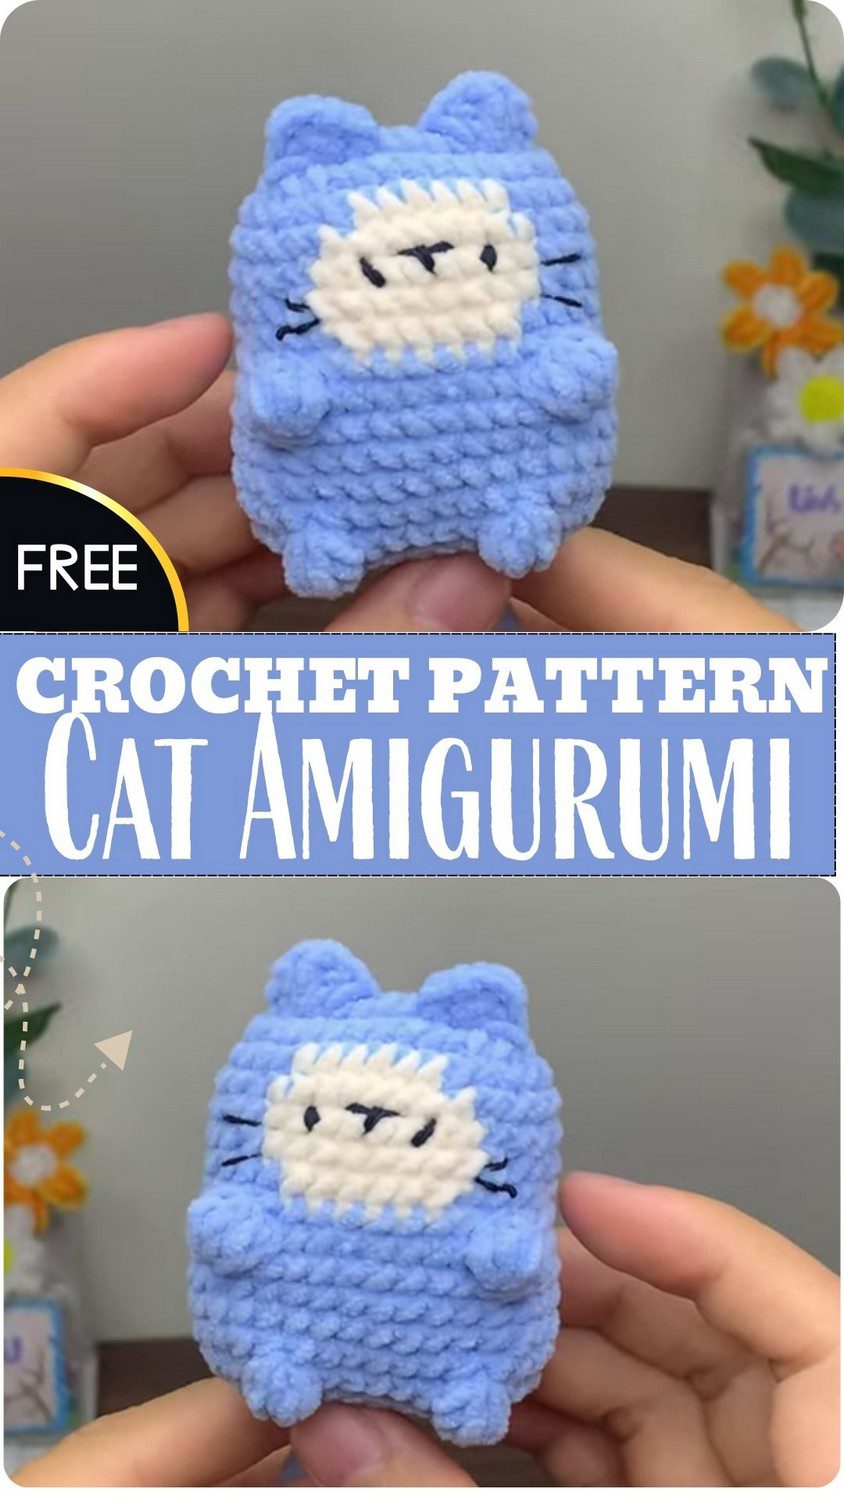
Here is a little blue kitty that feels like a soft pillow. This free Easy Crochet Cat Amigurumi Pattern is very simple to follow, so you can make it for your shelf or give it to a friend. After all, everyone loves a cuddly, chubby plushie.
This chubby blue cat is made in one piece, which means very little sewing. The pattern uses soft velvet yarn for a squishy feel, and the finished toy has a white face patch and two bobble paws. Because it fits in your hand, it makes a nice beginner amigurumi plushie. You can hang it as a crochet keychain charm or simply place it on your desk. Save this free crochet plushie pattern for later.
Crochet Cat Amigurumi Pattern Overview
This chubby plushie is a chunky amigurumi cat that works as a shelf plushie, a crochet keychain charm, or a small gift. The body is pillowy and blue, and the face has a white patch. Meanwhile, two bobble paws sit on the sides above two little feet at the bottom.
Head and body are worked as one piece, so there is hardly any sewing.
Skill level: Beginner-friendly (fuzzy velvet yarn just needs a little patience)
Finished size: About 4 inches (10 cm) tall, palm-sized, plus the tail. Your tension and yarn will change this a little.
Materials and Tools for the Crochet Cat Amigurumi Pattern
- Baby bear velvet yarn (chenille style, very soft and plush) in blue for the body and white for the muzzle
- 2.5 mm crochet hook
- Stitch markers
- Fiberfill stuffing
- Tapestry needle
- Scissors
- Keychain hardware (optional)
Safety eyes are not used in this tutorial. Instead, the face is kept simple with the white patch, and embroidered eyes, nose, and whiskers are optional.
Abbreviations for the Crochet Cat Amigurumi Pattern
US crochet terms are used throughout.
- ch: chain
- sc: single crochet
- inc: increase (2 sc in the same stitch)
- dec: decrease (sc 2 stitches together)
- hdc: half double crochet
- dc: double crochet
- sl st: slip stitch
- FLO: front loop only
- BLO: back loop only
- Bobble: 5 partial double crochets worked into the same stitch, then closed together
Pattern Notes for the Crochet Cat Amigurumi Pattern
- Chain: yarn over and pull through the loop on your hook.
- Slip stitch: put the hook into the stitch, yarn over, then pull through both the stitch and the loop on the hook.
- Single crochet: insert the hook, yarn over, and pull up a loop, so you have 2 loops on the hook. Then yarn over again and pull through both. This is what gives amigurumi its tight, dense fabric.
- Increase: work 2 sc in the same stitch. It adds one stitch.
- Decrease: insert the hook into the front loop of the next 2 stitches, yarn over, and pull through both front loops (2 loops on the hook). Then yarn over and pull through both.
- Bobble: work 5 partial dc into the same stitch, leaving the last loop of each on the hook. Then yarn over and pull through all loops. In this pattern, each bobble counts as 1 stitch.
- Magic ring: wrap the yarn around your fingers to form a loop, insert the hook, yarn over, and draw up a loop. Then ch 1 to secure. Work the stitches into the ring and pull the tail tight. It is used for the tail.
Round Notes for the Crochet Cat Amigurumi Pattern
- Joined rounds (body): start each round with ch 1, work around, and finish with a sl st into the first stitch. In contrast, the tail uses continuous spiral rounds, with no joining and no chaining.
- Changing colors: on the last step of the stitch before the change, stop when you have 2 loops of the old color on the hook. Next, yarn over with the new color, pull through both loops, and carry on in the new color.
- Stitch markers: velvet yarn hides stitches, so place a marker in the first stitch of every round.
The Complete Crochet Cat Amigurumi Pattern
Round 1 is the top of the head, and Round 17 closes the bottom. The white patch from Rounds 4 to 8 ends up in the middle of the face, above the bobble paws.
Step 1: Foundation Chain
Make a slip knot with blue yarn and chain 7.
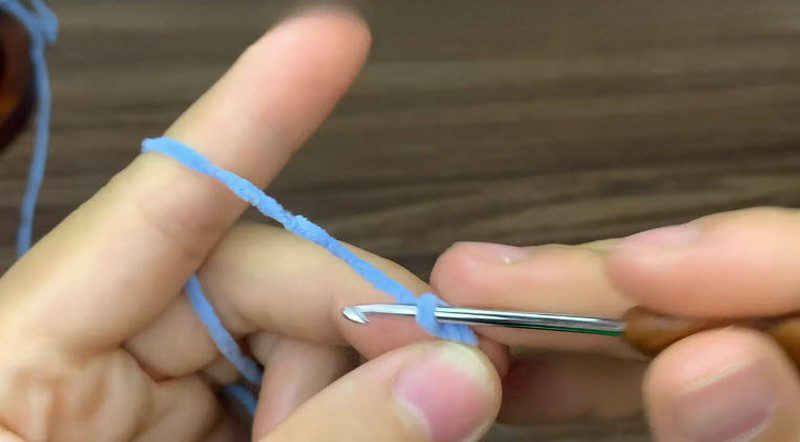
Step 2: Round 1
Skip the first chain next to the hook, and work 2 sc in the next chain. Then place a marker in the first of these stitches. Next, work 1 sc in each of the next 4 chains. After that, work 4 sc in the last chain.
Now turn and work along the other side of the foundation chain: 1 sc in each of the next 4 chains, then 2 sc in the final chain. Finally, join with a sl st to the first stitch. (16 sts)
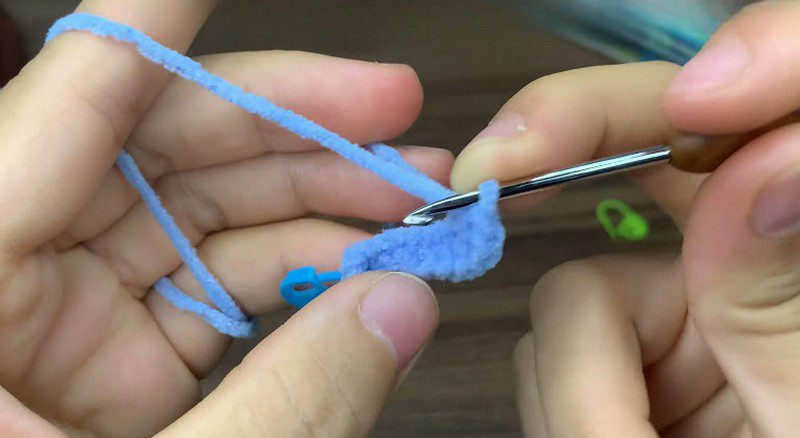
Step 3: Rounds 2 and 3
Round 2: Ch 1. Inc in each of the first 2 stitches, 4 sc, inc in each of the next 4 stitches, 4 sc, inc in each of the last 2 stitches. Sl st to join. (24 sts)
Round 3: Ch 1. [1 sc, inc] twice, 4 sc, [1 sc, inc] 4 times, 4 sc, [1 sc, inc] twice. Sl st to join. (32 sts)
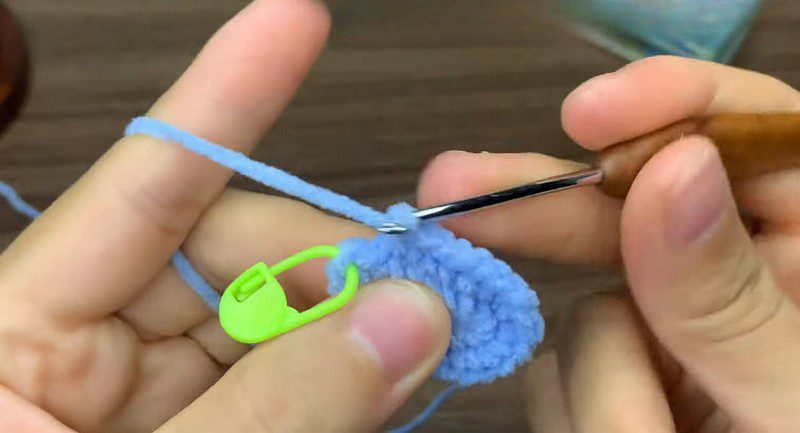
Step 4: Rounds 4 to 8, the White Patch
Round 4: Ch 1. Work 21 sc in blue, then change to white. Work 5 sc in white, then change back to blue. Finish the round in blue. Sl st to join. (32 sts)
Round 5: Ch 1. Work 20 sc in blue, then change to white. Work 7 sc in white, then change to blue. Finish the round in blue. Sl st to join. (32 sts)
Rounds 6 and 7: Repeat Round 5 for both rounds. (32 sts each)
Round 8: Ch 1. Work 21 sc in blue, then change to white. Work 6 sc in white, then change to blue. Finish the round in blue. Sl st to join. (32 sts)
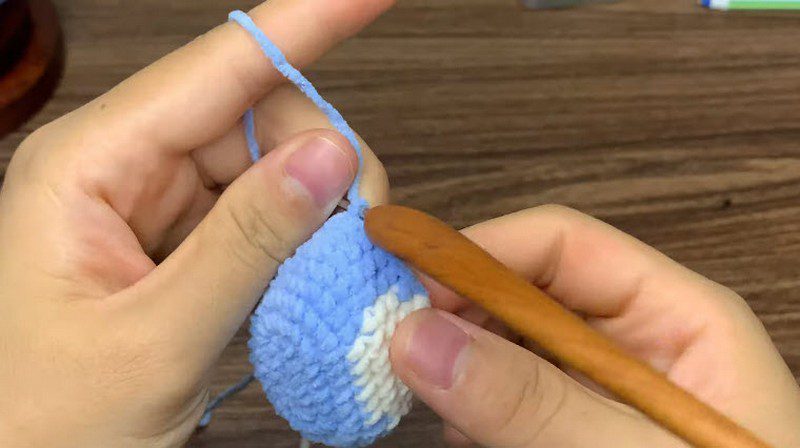
Step 5: Rounds 9 to 17, Paws, Feet, and Closing
Round 9: Ch 1. Work 1 sc in every stitch around, all in blue. Sl st to join. (32 sts)
Round 10 (bobble paws): Ch 1. Work 17 sc, inc, 1 sc, Bobble 1, 8 sc, Bobble 2, 1 sc, inc, 1 sc. Sl st to join. (34 sts)
Round 11: Ch 1. Work around in blue, skipping the small slip stitches over the bobbles. (34 sts)
Rounds 12 to 14: Ch 1 and work 34 sc in each round. Sl st to join each round. (34 sts)
Round 15 (bobble feet): Ch 1. Work 18 sc, dec, 1 sc, Bobble 3, 6 sc, Bobble 4, 1 sc, dec, 2 sc. Sl st to join. (32 sts)
Round 16: Ch 1. Work 1 sc, dec, 1 sc, dec, 4 sc, [1 sc, dec] 4 times, 4 sc, [1 sc, dec] twice. Sl st to join. (24 sts)
Round 17: Ch 1. Work 2 dec, 4 sc, 4 dec, 4 sc, 2 dec. Sl st to join. (16 sts)
Stuff the body firmly with fiberfill before closing. Then fasten off, leaving a long tail. Finally, whipstitch through the front loops of Round 17 with the tapestry needle, and cinch the opening fully closed.
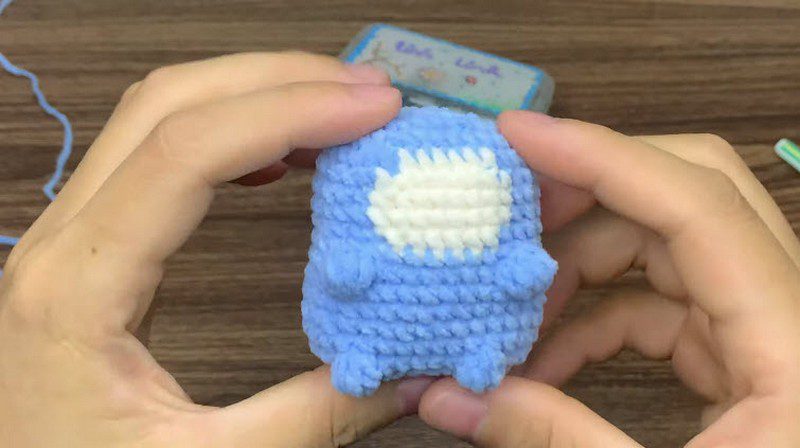
Step 6: Ears
The ears are crocheted straight onto the head using leftover blue yarn. First, pull the yarn up to the ear position on the head. Then ch 1, and work 1 sc, 1 hdc, 1 dc, and 1 hdc into the same stitch space. Finish with 1 sc to anchor the ear shape.
Repeat on the other side for the second ear, and check that both ears sit evenly. The embroidered face is optional.
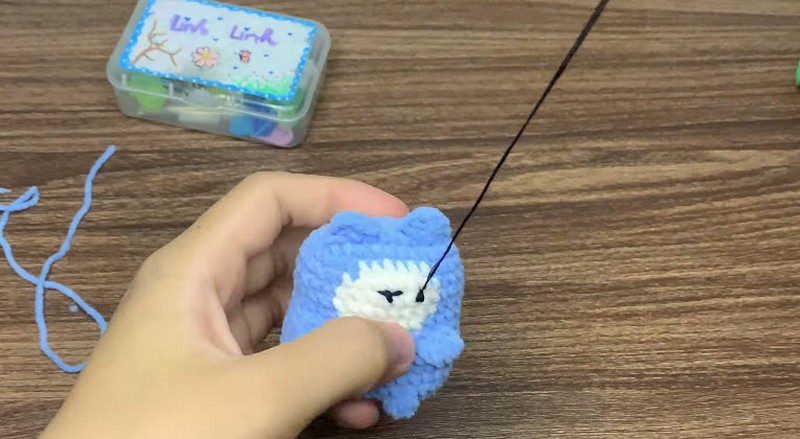
Finishing Your Plushie
- First, make sure the body is stuffed firmly, especially around the chubby cheeks and belly.
- Then close the opening completely, and weave in all ends with the tapestry needle.
- Next, to make a keychain, stitch a loop to the top of the head with leftover yarn.
- Finally, fluff the velvet yarn gently with your fingers.
- Check that both bobble paws match and that the white patch sits in the middle of the face.
- Last of all, trim any loose ends.
Helpful Tips for the Crochet Cat Amigurumi Pattern
- First, use your stitch markers often. Velvet yarn hides the stitch tops, so run a fingertip over them to feel where you are.
- Check your stitch count at the end of every round. It should read 16, 24, 32, 32, 32, 32, 32, 32, 32, 34, 34, 34, 34, 34, 32, 24, 16, and 6 for every tail round.
- Mark the spot where the white section starts in Round 4, then keep it lined up in the rounds that follow.
- Also, stuff firmly, especially around the cheeks and belly.
- Compare the two bobble paws once they are done, so they match.
- If the plushie is for a small child, secure every yarn end.
Caring for and Fluffing Your Velvet Plushie
Velvet yarn gets squashed when it is hugged, carried, or clipped to a bag. Fortunately, a gentle fluff with your fingertips brings the pile back to life.
Bonus: Turning Your Cat Into a Keychain Charm
If you want to carry your cat around, a keychain charm is an easy option. Because a keychain gets pulled often, take a little extra care with these small steps:
- Stitch a loop to the top of the head with leftover yarn.
- Secure every yarn end so nothing comes loose.
- Fluff the velvet gently with your fingers after clipping it on.
FAQs About the Easy Crochet Cat Amigurumi Pattern
Is this crochet cat amigurumi pattern good for beginners?
Yes, it is beginner-friendly. The fuzzy velvet yarn just asks for a little patience, since the stitches are harder to see.
Why does velvet yarn hide the stitches?
The soft, fuzzy surface covers the stitch tops. For that reason, a marker in the first stitch of every round helps.
How firmly should I stuff the crochet cat amigurumi?
Firmly, and before you close the opening.
Why is my cat not exactly 4 inches?
Tension and yarn both change the size a little, so a slightly different result is normal.
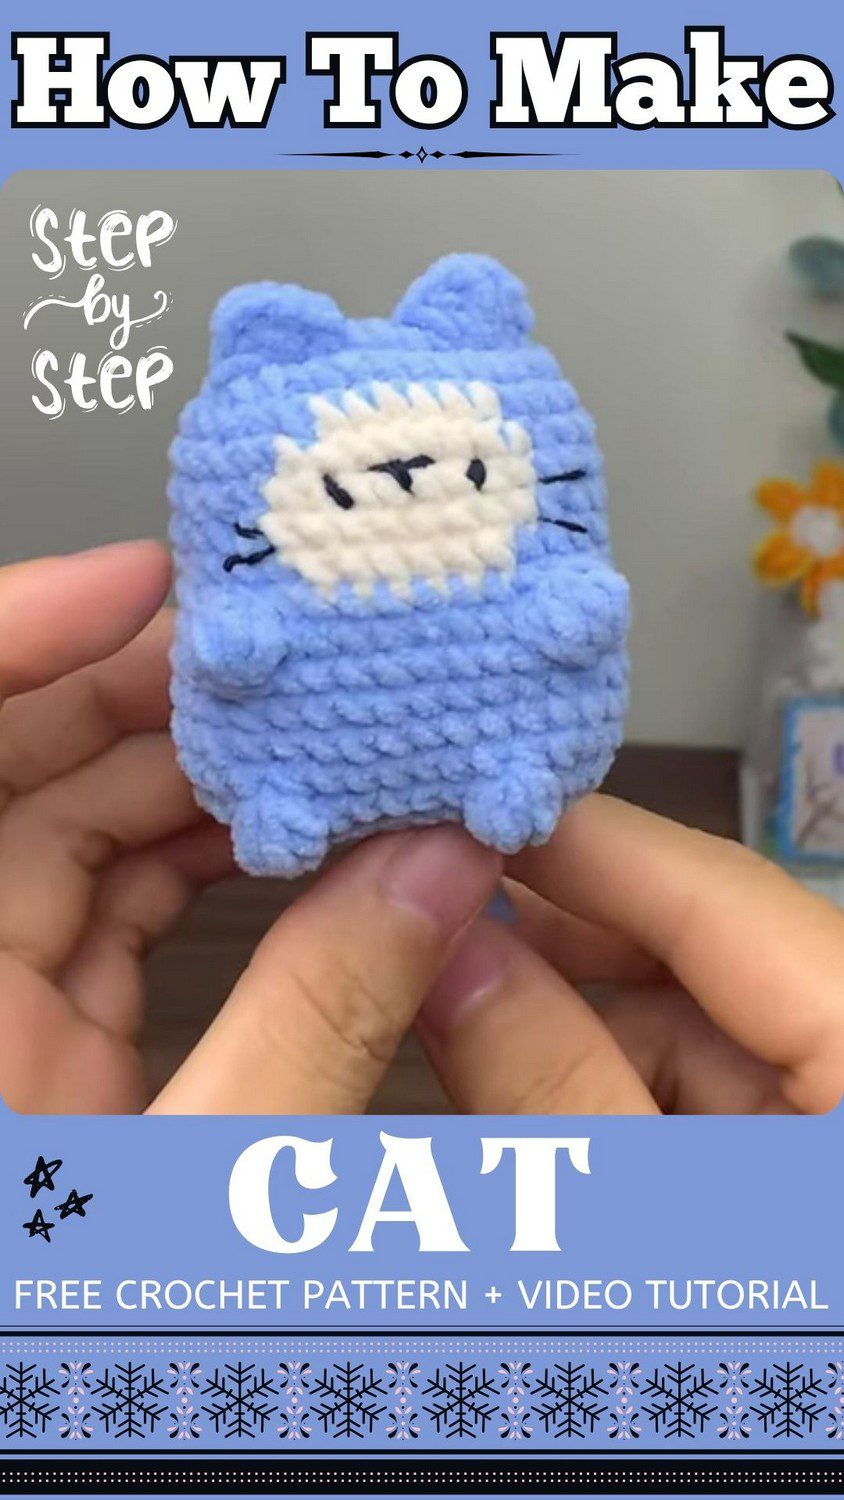
A Few Words on This Chubby Blue Cat
Honestly, this little guy works up fast. He is really squishy too, the kind you keep squeezing without thinking. So the one thing to watch is the white patch. Keep it lined up from round to round, and then it ends up straight in the middle of his face.