Sleepy Crochet Capybara Keychain Pattern – Cute & Chubby Mini Amigurumi
This crochet capybara keychain pattern makes a sleepy little friend for your bag. The finished toy is soft, chunky, and easy to stitch. It is also a cute capybara amigurumi and a handmade gift idea, so grab the free pattern and the video tutorial below.
A sleepy little face and a chubby round body make this keychain so cute. It has tiny brown ears and stubby brown paws. Even a beginner amigurumi fan can make it, because there is very little sewing. You only need leftover scrap yarn and a small hook. Then you can clip the finished keychain onto a bag or a backpack. Follow the pattern along with the step-by-step video.
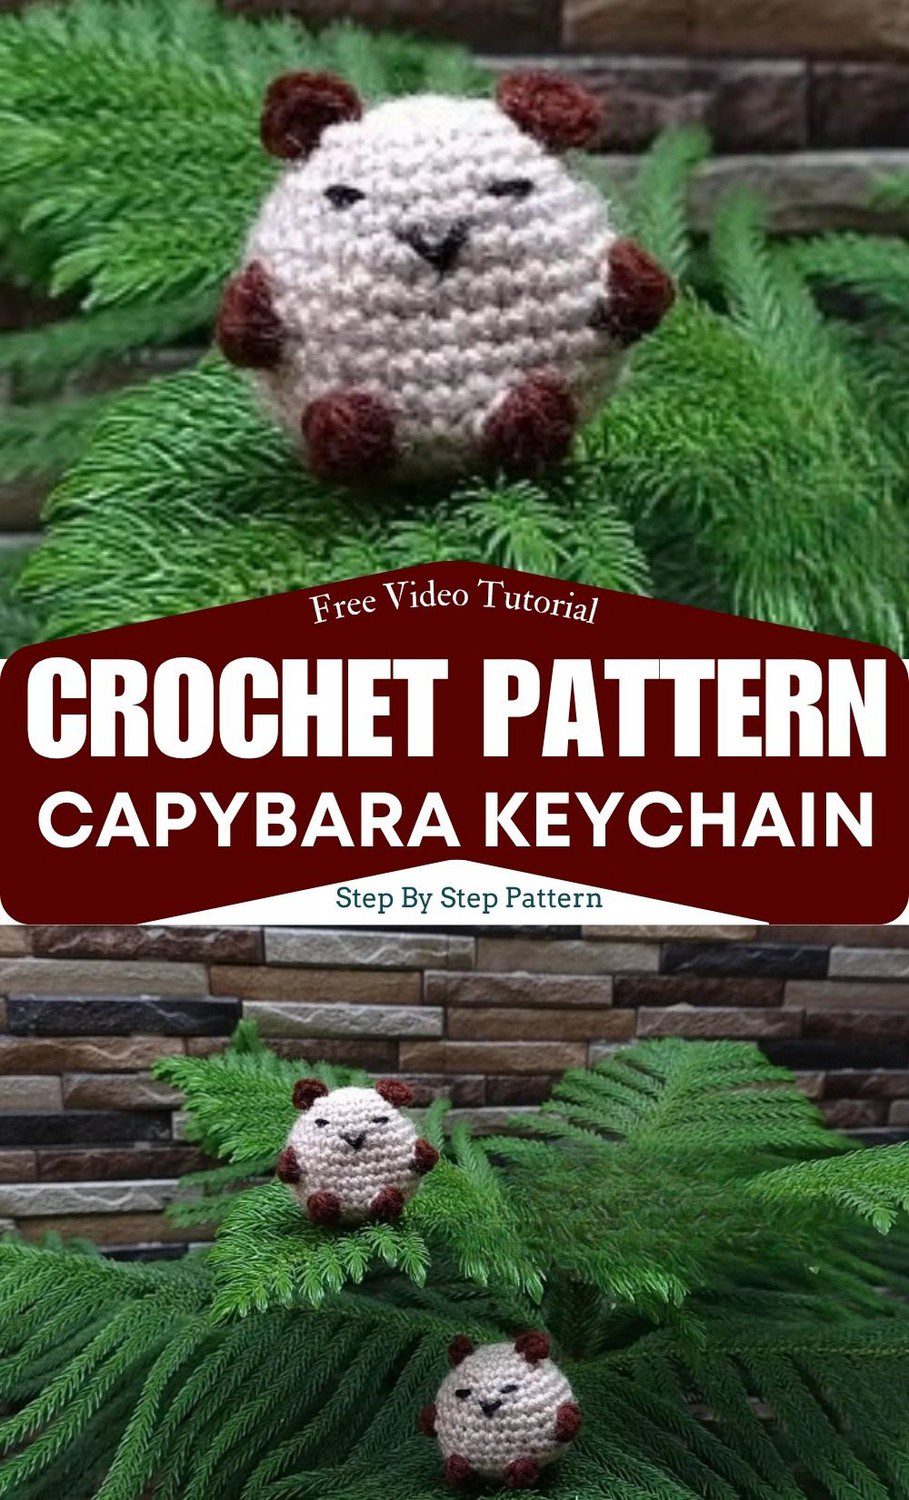
Crochet Capybara Keychain Pattern Overview
Expect a chubby, rounded body with a blunt snout, tiny round ears, and stubby legs. The body comes out light beige, while the ears and paws use dark brown. Then a small embroidered nose and a mouth line finish the calm, sleepy face. Best of all, it suits a first amigurumi keychain. In total, you will make the head and body, 2 ears, a muzzle, and the small legs.
Skill level: Beginner
Finished size: Approximately 3 to 4 inches (7 to 10 cm) tall or long with standard amigurumi yarn and hook
Materials and Tools for the Crochet Capybara Keychain Pattern
- Yarn (less than 50 g in total, scrap friendly): milk cotton or acrylic in sport, DK, or worsted weight
- Body color: a warm caramel or brown shade, or light beige with dark brown accents
- Face details: a little dark brown or black yarn or embroidery floss
- Crochet hook: usually 2.0 mm to 4.0 mm, depending on the yarn
- Stitch markers
- Tapestry (yarn) needle
- Polyester fiberfill stuffing
- Safety eyes in 6 mm to 8 mm, or embroidered eyes
- Scissors
- Keychain ring or other keychain hardware (optional)
A 2.5 mm or 3.0 mm hook is a smart pick. Why? Because tight stitches keep the stuffing from peeking through the fabric.
Abbreviations and Pattern Notes
All terms use US crochet names. First, here are the abbreviations:
- MR – Magic Ring
- ch – Chain
- sc – Single Crochet
- inc – Increase (2 sc in the same stitch)
- dec – Decrease
- sl st – Slip Stitch
- FO – Fasten Off
- FLO – Front Loop Only
- BLO – Back Loop Only
Next, keep these pattern notes in mind:
- Work every piece in continuous spiral rounds.
- Skip the slip stitch at the end of each round unless the pattern asks for one.
- Put a stitch marker in the very first stitch of every round.
- Move straight from the last stitch of one round into the first stitch of the next.
Special Techniques for the Crochet Capybara Keychain Pattern
Magic Ring
Wrap the yarn tail around your index and middle fingers to form a loop. Next, push the hook through the loop, yarn over, and pull up a loop. Then chain 1 to lock it. After that, work the needed sc into the ring. Finally, tug the tail to close the center hole.
Invisible Decrease
First, slip the hook under the front loop only of the next stitch. Straight away, do the same in the following stitch. Yarn over and pull through both front loops, which leaves 2 loops on the hook. Then yarn over and pull through both. As a result, the finish looks neater.
Changing Colors
Finish the last part of the stitch with the new color before the switch. Because of that, the change looks clean.
Fastening Off
Cut the yarn and leave a tail of about 6 inches. Next, pull the tail through the last loop. Finally, pull tight.
Complete Crochet Capybara Keychain Pattern
Head and Body (One Piece)
- Rnd 1: 6 sc in MR (6)
- Rnd 2: [inc] x 6 (12)
- Rnd 3: [sc 1, inc] x 6 (18)
- Rnds 4 to 8: sc in each st around (18)
- Rnd 9: [sc 2, inc] x 6 (24)
- Rnds 10 to 16: sc in each st around (24)
- Rnd 17: [sc 2, dec] x 6 (18)
- Stuff the body firmly now, filling it evenly before the opening gets too small.
- Rnd 18: [sc 1, dec] x 6 (12)
- Rnd 19: [dec] x 6 (6)
- FO and weave the end through the front loops of the last 6 stitches. Pull tight to close the opening completely.
Step-by-Step Crochet Capybara Keychain Pattern Instructions
Step 1: Head and Body Foundation
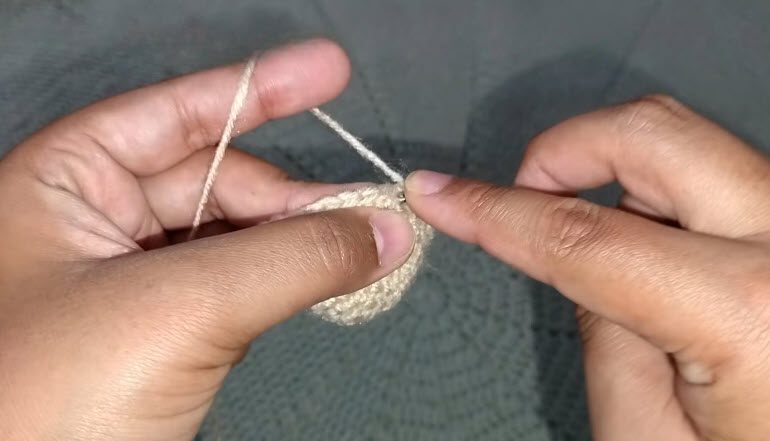
Start with Rnd 1 and make 6 sc in a magic ring (6). Next, pull the yarn tail tight so the center hole closes. Then place a stitch marker in the first stitch, and keep it there as the round grows.
Pro-Tip: Pull the tail with care so the ring does not twist as it closes.
Step 2: Body Structure and Stitch Technique
Turn the stuffed body so the underside faces you. Then thread the tapestry needle with the long tail, and attach the small dark brown legs to the underside of the body. Place them symmetrically so the capybara sits steady. Finally, weave the ends securely inside the toy.
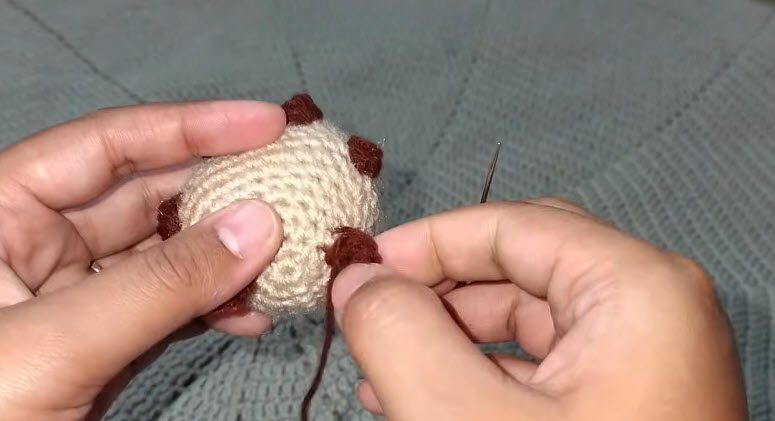
Step 3: Embroidering the Face Details
Thread the tapestry needle with dark brown thread. Next, embroider a small nose and a little mouth line on the muzzle. Keep the stitches small, so the face stays calm and sleepy. Finally, pull the thread gently and weave the end inside the toy.
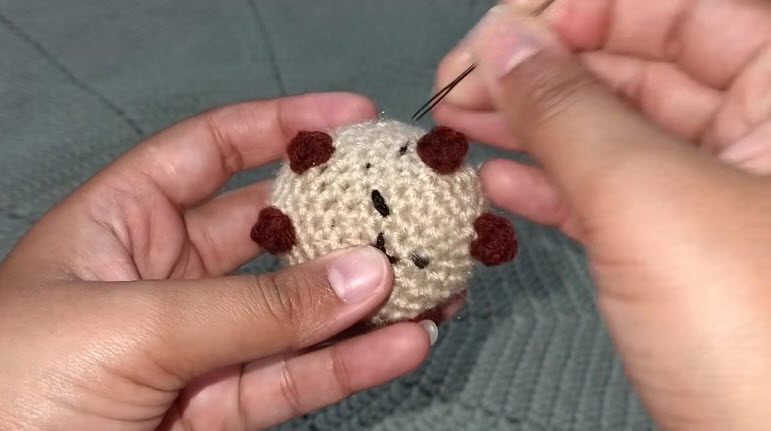
Step 4: Continuation of Body and Finishing
First, weave all the loose ends securely inside the toy, so nothing hangs out. Then attach a jump ring or key ring strap through the top center of the head and body. Anchor it well, because a keychain gets tugged a lot.
Helpful Tips for the Crochet Capybara Keychain Pattern
Keep Stitches and Counts Tidy
Use the marker in every round, since it keeps counts accurate. Also, choose a hook that makes tight stitches, so the stuffing stays hidden.
Stuff and Shape Evenly
Fill the body evenly for a smooth shape. Meanwhile, try the invisible decrease, because it gives a neater finish at the top of the head.
Place Features with Balance
Check the eye height before locking the backs. Likewise, sew both ears the same distance from the center.
Make It Last and Keep It Safe
Anchor the keychain ring well, since a keychain is pulled often. For babies and toddlers, embroider the eyes. Therefore, the toy stays safe for little ones.
Common Mistakes in the Crochet Capybara Keychain Pattern
- Twisting the magic ring: Pull the tail closed with care so the ring stays untwisted.
- Missing the first stitch of a round: Put the marker in that very first stitch, then move straight into it.
- Losing count: Use the marker every round, and check the number in brackets.
- Overstuffing or understuffing: Stuff firmly and evenly before the opening gets too small.
Bonus: Quick Checks Before You Clip It On
Before you attach your capybara to a bag, run through this short list. It only takes a minute, so it is worth doing every time.
- All loose ends are woven in securely, and nothing hangs out.
- The keychain ring or strap is anchored well at the top center.
- The stuffing is firm and even, with no gaps showing through the stitches.
- The eyes are embroidered if the toy is for a baby or toddler.
Fun Ways to Gift Your Capybara Keychain
- Clip it onto a school bag or backpack zipper as a small good luck charm.
- Attach it to a gift box in place of a ribbon bow.
- Stitch a few in different browns and hand them out as party favors.
- Dangle one from a car mirror.
- Hang another from a desk lamp.
FAQs About the Crochet Capybara Keychain Pattern
What yarn works best for the keychain?
Milk cotton or acrylic both work well. Sport, DK, or worsted weight is fine. Scraps are welcome, since less than 50 g is needed in total.
Which hook size works best for the crochet capybara keychain pattern?
Hooks usually range from 2.0 mm to 4.0 mm, depending on the yarn. However, a 2.5 mm or 3.0 mm hook is a good choice. Tight stitches keep the stuffing from peeking through.
Is the crochet capybara keychain pattern good for beginners?
Yes, the skill level is beginner. The toy is worked mostly in one piece in continuous rounds. As a result, there is very little sewing.
Which eyes are safe for a baby?
Embroidered eyes are the safer choice. For an infant or toddler, skip plastic safety eyes, because embroidery removes the choking risk.
How do you attach the keychain?
Use a jump ring or key ring strap, and pass it through the top center of the head and body. Then anchor it well, since keychains get tugged a lot.
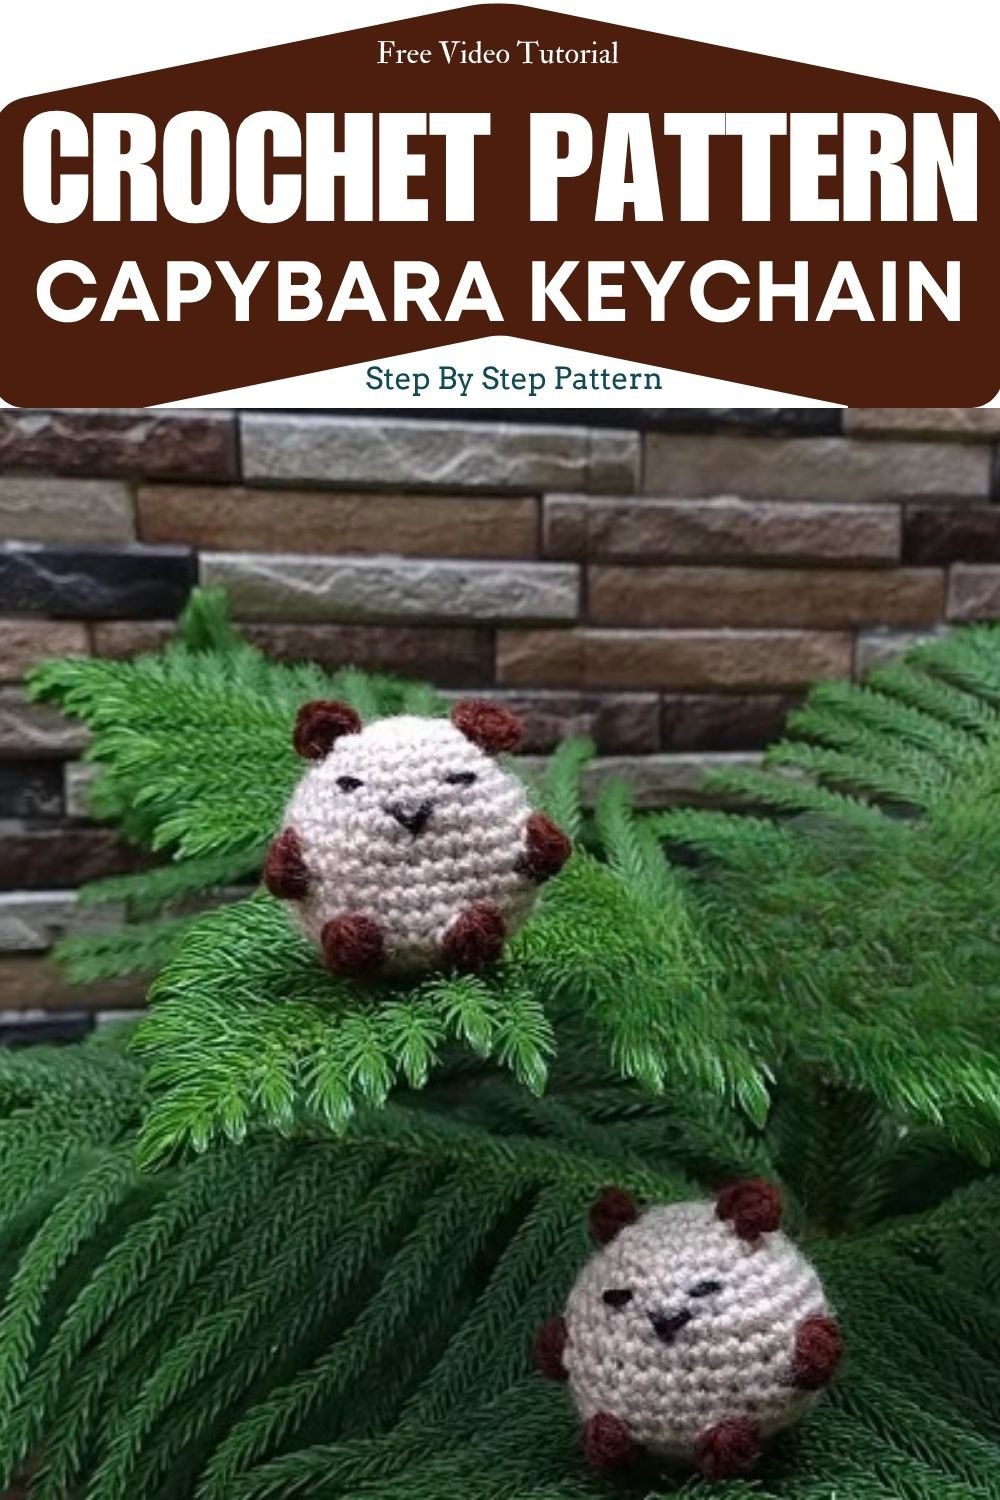
Your Sleepy Capybara Is Ready
So that’s the little capybara. It stitches up pretty quick, and there’s barely any sewing. Once you clip it on a bag, it just sits there looking sleepy. Make a couple in different browns, and then see which one you like best.