Easy Crochet Carrot Buddy Rabbit Amigurumi Pattern
Hop into cuteness with this Easy Crochet Carrot Buddy Rabbit! Beginner-friendly, speedy, and scrap-busting, stitch a cuddly bunny and mini carrot for adorable gifts, decor, or keychains.
Meet a sweet, small rabbit with a tiny carrot, quick to make and friendly for beginners. You’ll practice the magic ring, easy increases and decreases, and tidy finishes with minimal sewing. The head and body are worked mostly in one piece; ears, arms, and the carrot attach in a few quick steps.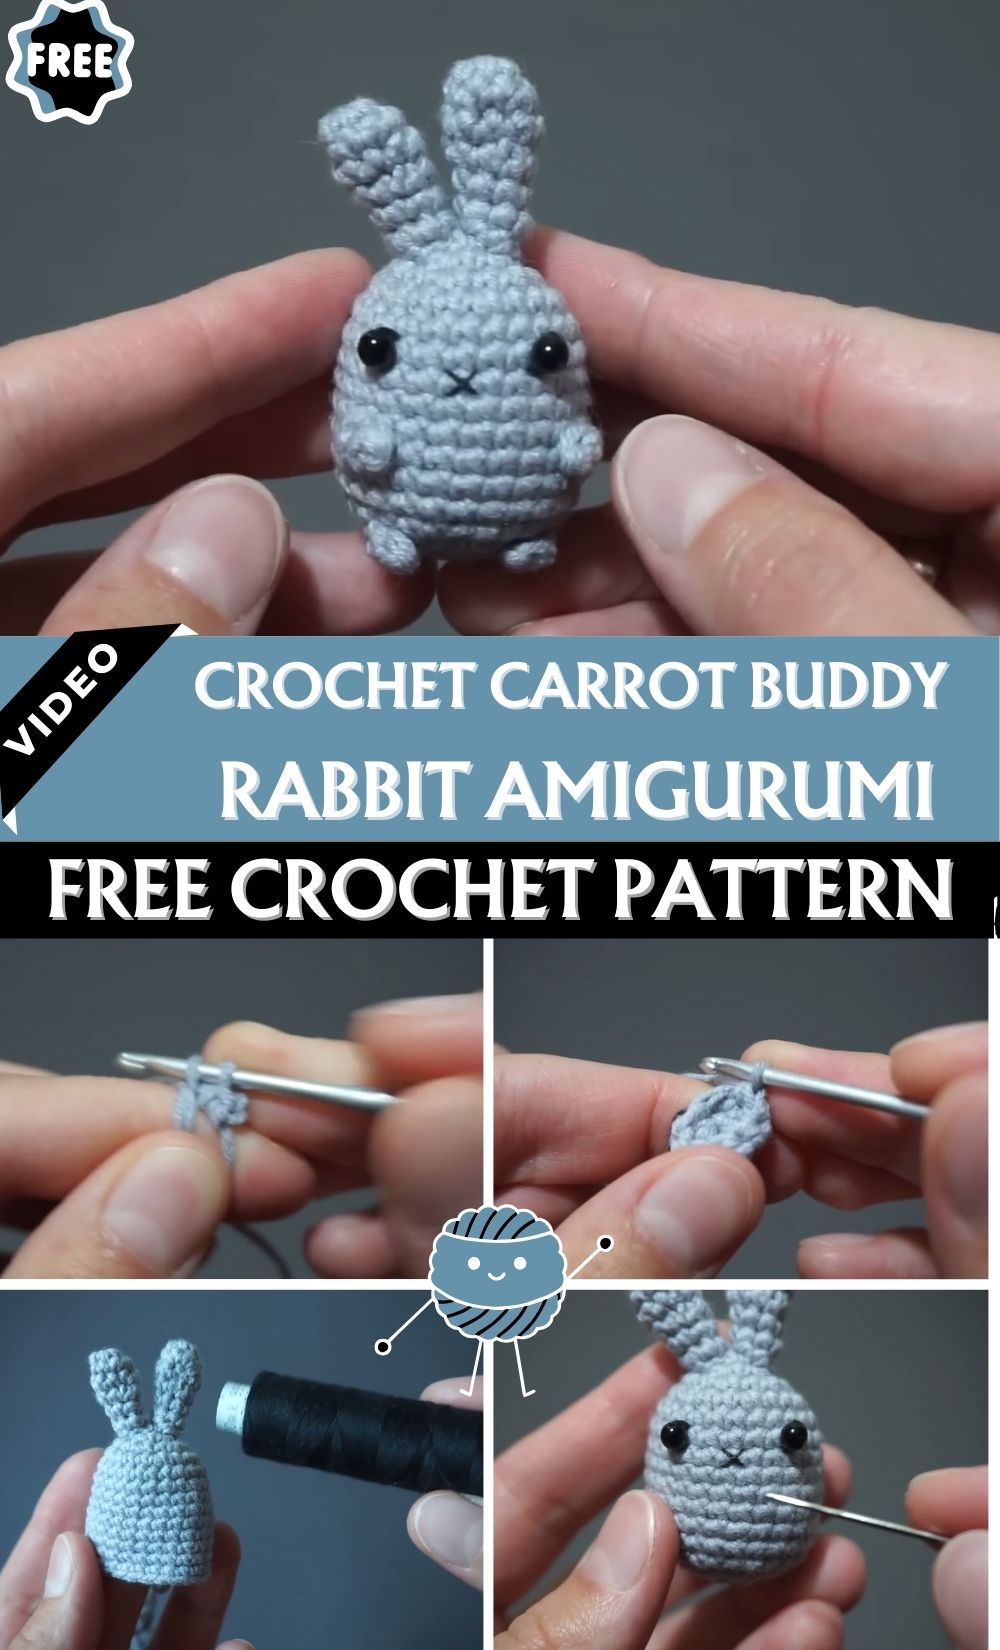
Clear stitch counts and scrap-friendly yarn notes keep things relaxed. Make one in an evening, customize colors, and enjoy a cute result every time, great for gifts or a little self-made cheer.
Uses:
Desk buddy or keychain charm
Easter basket stuffer or party favor
Beginner practice project
Easy Crochet Carrot Buddy Rabbit – Beginner Amigurumi Pattern
Meet your new pocket-sized pal: the Carrot Buddy Rabbit! This fast, friendly amigurumi is perfect for beginners who want a cute win in about an hour. The head and body are worked as a single piece, the ears are quick and floppy, and the tiny paws and tail are sewn on in minutes. Plus, to complete the “carrot buddy” vibe, you’ll also get an easy mini-carrot accessory the rabbit can hold. The result is a simple, squishy, giftable friend that looks great on a desk, in a child’s hand, or as a keychain.
Because this pattern emphasizes no-fuss construction, you’ll practice must-know techniques such as the magic ring, increasing and decreasing in the round, and neat invisible finishing. Let’s hop in!
Level, Size, and Timing
- Skill level: Beginner-friendly
- Techniques you’ll practice: magic ring (adjustable ring), single crochet in the round, increasing, decreasing (invisible preferred), simple embroidery, and hand-sewing
- Finished size: approximately 9–11 cm (3.5–4.25 in) tall using sport-weight cotton blend and a 2.5 mm hook
- Total making time: about 60–90 minutes (with carrot accessor,y add 10–15 minutes)
Materials (Exact Measurements)
- Yarn: Sport-weight cotton blend, e.g., Alize Cotton Gold (55% cotton, 45% acrylic), approx. 100 g/330 m per skein
- Main color (MC) for bunny body and ears: Grey, ~18–25 g (60–85 m)
- Optional carrot orange: ~3–5 g (10–15 m)
- Optional leaf green: ~1–2 g (3–6 m)
- Hook: 2.5 mm
- Stuffing: Polyester fiberfill (sintepone), ~8–15 g for the rabbit; a pinch for the carrot
- Eyes:
- Option A: 2 black beads, 4 mm diameter, sewn on with black sewing thread
- Option B: Safety eyes 5–6 mm (use only for items not intended for small children)
- Option C: Embroidered eyes with black embroidery floss
- Embroidery/Sewing thread: Black fothe r nose and for attaching beads
- Tapestry needle: Size that fits your yarn; one fine sewing needle for beads
- Stitch marker or contrasting thread: 20–30 cm to mark rounds
- Scissors
- Optional: Blush or fabric paint for cheeks; keyring hardware if making a charm
Safety note: If gifting to a child under 3, embroider the eyes instead of using beads or safety eyes.
Abbreviations (US Terms)
- MR: Magic ring (adjustable ring)
- ch: chain
- sc: single crochet
- inc: increase (2 sc in the same stitch)
- dec: decrease (invisible dec recommended: pick front loops of next two stitches and sc them together)
- st(s): stitch(es)
- R#: Round number
- FO: Fasten off
- x n: repeat instructions inside brackets n times
Construction Overview
- The head and body are one seamless piece, worked bottom-up from a magic ring.
- Ears are crocheted separately and sewn to the top.
- The face (nose/mouth and eyes) is embroidered or attached after the main body is complete, before final closing.
- Paws and tail are sewn on.
- Finally, the mini carrot is made and stitched into a paw or left as a separate accessory.
Gauge and Sizing Tips
- For amigurumi, a tighter tension is better to keep stuffing from peeking through. Your fabric should feel firm but still pliable.
- If your stitches look loose or gaps appear, downsize your hook to 2.25 mm.
- If you want a larger rabbit, use a DK or worsted yarn with a 3.0–3.5 mm hook and add a little more stuffing. Expect size increases of 20–40%.

Step-by-Step Pattern
Overview (Read First)
Estimated time: 30–35 minutes (head/body)
Notes:
- Work in a continuous spiral.
- Use a contrasting thread as a running marker for the start of each round.
- If you hold the piece with the magic ring at the top, the face region will sit roughly between R5 and R8. Features are easiest to place once the body tube is formed.
Head + Body (One Piece)
R1: MR, 6 sc into ring (6)
R2: inc in each st around (6 inc) (12)
R3: [sc, inc] x 6 (18)
R4: [inc, 2 sc] x 6 (24)
R5–R13: sc around (24) for 9 rounds total
Pause: Face Placement + Ear Pinning (Optional)
You can sew the ears on now or after closing; many people find it easiest while the top is still open.
Add the nose/mouth and attach eyes now (see sections below). After that, continue crocheting.
Close the Head/Body
R14: [sc, dec] x 8 (16)
Stuff firmly but evenly, shaping the upper portion as the head area and the lower portion as the body.
R15: dec x 8 (8)
Finishing the top:
Cut yarn, leaving a 20–25 cm tail. Thread tail onto a tapestry needle and pick up the front loops of the remaining 8 stitches, then pull tight to cinch closed. Secure with a small knot, weave in, and hide the tail inside.
Ears (Make 2)
Estimated time: 10–12 minutes each
These tapered ears are quick and floppy, and they look best sewn close together at the base.
R1: MR, 6 sc (6)
R2: [2 sc, inc] x 2 (8)
R3: sc around (8)
R4: [2 sc, dec] x 2 (6)
R5–R6: sc around (6)
FO, leaving a 20–25 cm tail for sewing.
Ear Placement
Position both ears centered on the very top, with bases close together at the bottom but tips slightly spread. Stitch around each ear base securely, then weave and knot ends inside.
Eyes
Estimated time: 5–8 minutes
Option A: Beaded Eyes (as in the reference)
Use 4 mm black beads and black sewing thread. Fold the thread double for strength and knot the end.
Placement: From the magic ring center point at the top, count down to about R6 for the nose (see Nose & Mouth below). Place each eye about 2 stitches to either side of the nose center, on the same round or one round above (adjust until the expression feels right). Sew each bead through to the inside, knot securely, and hide the thread tail.
Option B: Safety Eyes (5–6 mm)
Insert on the same horizontal line as above. Add washers inside before stuffing is fully complete. Double-check symmetry before locking.
Option C: Embroidered Eyes
Using black floss, satin stitch, or make simple horizontal ovals 1–2 stitches wide. You can also stitch curved “sleepy” eyes for a softer look.
Nose & Mouth (X-shaped)
Estimated time: 5–7 minutes
Thread black sewing thread or embroidery floss (doubled). Knot the end and secure from the inside.
Placement: Count down to about R6 from the top (magic ring = R1) and find the vertical center front.
Stitch a small diagonal cross/X (about 2 stitches tall/wide):
- Bringthe needle out at the lower left of where the X will sit.
- Insert at the upper right to make the first diagonal.
- Come out at the upper left.
- Insert at lower right to cross the first stitch and form an X.
Tie off inside with a secure knot and hide the tail.
Arms (Front Paws) — Make 4 Tiny Paws
Estimated time: 3–4 minutes each
These are tiny teardrop tabs that sew on quickly.
- Leave a 20–25 cm tail to start (this will be one of your sewing tails).
- ch 3.
- 2 sc in the 2nd ch from the hook. Do not work into the last chain.
- FO, leaving another 20–25 cm tail.
Each paw has two tails; use both to anchor the paw at two points for a neat, flat finish.
To plump: Lightly tug the starting tail to fully close the ring. Weave once around the base (under one loop), then back through the ring to form a tiny puff. A pinch of stuffing is optional.
Sew the tail low on the back so the rabbit sits more stably.
Assembly and Finishing
Estimated time: 15–20 minutes
Sew the Ears
Place both ears at the very top, close together at their bases. Stitch around each ear base through the head stitches. Knot and hide ends inside.
Add Eyes + Embroider the X Nose.
Doing the face before final stuffing/closure is easiest, but it’s still doable afterward. Keep features level and symmetrical.
Attach Paws
Front placement: Use the bottom tail of a paw to stitch into approximately the 2nd round from the center front (left side). Bring the needle out one stitch to the right and pull snug.
Use the top tail to stitch 1 round above the bottom attachment point, then bring the needle out one stitch to the right on the front. Tie the tails together inside with a secure knot, hide, and trim.
Attach the second front paw symmetrically on the opposite side. Attach the other two paws slightly lower and toward the sides/back to suggest sitting hind paws. For balance, place them around R3–R4 from the bottom center.
Sew on Tail + Final Shapin.g
Choose a low point at the back so the bunny sits without tipping. Stitch securely, knot, and hide ends. Roll the piece in your palms to even out stuffing, and pinch the face area slightly to suggest cheeks (optional blush is cute).
Special Features (Design Notes)
- One-piece head and body for less sewing and a clean shape
- Beginner-friendly ears and paws
- X-shaped embroidered nose/mouth for a sweet expression
- Low-placed tail that doubles as a sit-stabilizer
- Optional carrot accessory for instant character
Easy Mini Carrot Accessory
Estimated time: 10–15 minutes
Carrot (worked from tip to top)
With orange yarn:
R1: MR, 4 sc (4)
R2: sc around (4)
R3: [sc, inc] x 2 (6)
R4–R5: sc around (6)
R6: [2 sc, inc] x 2 (8)
R7–R9: sc around (8)
Lightly stuff as you go; keep it firmer toward the base.
R10: [2 sc, dec] x 2 (6)
FO, leave a tail to close the top if needed and to sew to a paw.
Leaves
With green yarn, attach to the top opening or to the closing stitch. Make 2–3 leaf strands:
- ch 6, sl st back through each ch to the base (5 sl sts)
- ch 5, sl st back (4 sl sts)
- ch 7, sl st back (6 sl sts)
Tighten and weave ends into the top. Close any small opening neatly with your yarn tail. Sew the carrot to one front paw or leave it loose.
Making Time Breakdown
- Head/Body: 30–35 minutes
- Ears (2): 20–25 minutes total
- Face (eyes + nose/mouth): 10–15 minutes
- Paws (4): 12–16 minutes total
- Tail + Assembly: 15–20 minutes
- Carrot: 10–15 minutes
Total: approximately 60–90 minutes
Common Mistakes and How to Avoid Them
- Losing your round start: Use a contrasting running thread marker; move it up each round.
- Visible decrease holes: Use invisible decrease (front loops of next two stitches, then sc together).
- Uneven stuffing: Add small tufts gradually, especially before the last round.
- Crooked face: Mark center front with a pin; stitch nose first, then align eyes.
- Odd ear tilt: Pin ears to preview; sew bases close together and angle tips outward.
- Paws sticking out: Anchor each paw at two points; tie tails together on the inside.
- Wobbly sitter: Sethe w tail low and adjust stuffing to create a stable base.
Tutor Suggestions and Helpful Tips
- If the magic ring is tricky, ch 2 and work the first round into the second chain.
- Keep your hook angle low for cleaner invisible decreases.
- Close the final opening by weaving through front loops only, pulling steadily.
- Pin all pieces before sewing and check from multiple angles.
- For toddlers, avoid beads and safety eyes; use embroidered eyes instead.
- If the yarn splits, slow down and rotate the hook so it slides cleanly through stitches.
Variations
- Colors: Cream, blush pink, chocolate brown, or heathered grey.
- Two-tone ears: Switch yarn after R2; carry tail inside.
- Longer floppy ears: Add 2–4 extra rounds of sc (still 6 sts around).
- Expressions: Add a tiny vertical stitch under the X, or curved sleepy eyes.
- Bigger bunny: Use DK yarn with a 3.0–3.5 mm hook; add 1–2 extra body rounds.
- Keychain charm: Add a screw-eye between ears; secure with a dab of fabric glue.
- Rattle: Insert a rattle or mini bell before closing.
- Carrot texture: Add occasional BLO rounds or embroidered horizontal bars.
Troubleshooting Sizing
- Too large: Tension may be loose or the hook may be too big. Try a 2.25 mm hook and a tighter tension.
- Too small/stiff: Tension may be tight. Relax grip or move up to a 2.75 mm hook.
- Head too flat: Add a pinch more stuffing near the top before closing and massage into shape.
Finishing Touches
Weave in ends in small zigzags to lock them inside the body. Steam-block ears very lightly if desired (keep steam several inches away). Add a hint of blush to cheeks for extra character.
Quick Recap for (Crochet Carrot Buddy Rabbit)
Crochet the head/body in one piece (MR 6 → 24 sts, hold for 9 rounds, then decrease to close). Make 2 ears and sew them close together on top. Add an X nose around R6 from the top and place eyes 1–2 stitches to either side. Create 4 tiny paw tabs and anchor each with two tails so they lie flat. Add a small tail low on the back for stability. Make an optional mini carrot to hold or pose.
You’re done—your Carrot Buddy Rabbit is ready to gift or display.