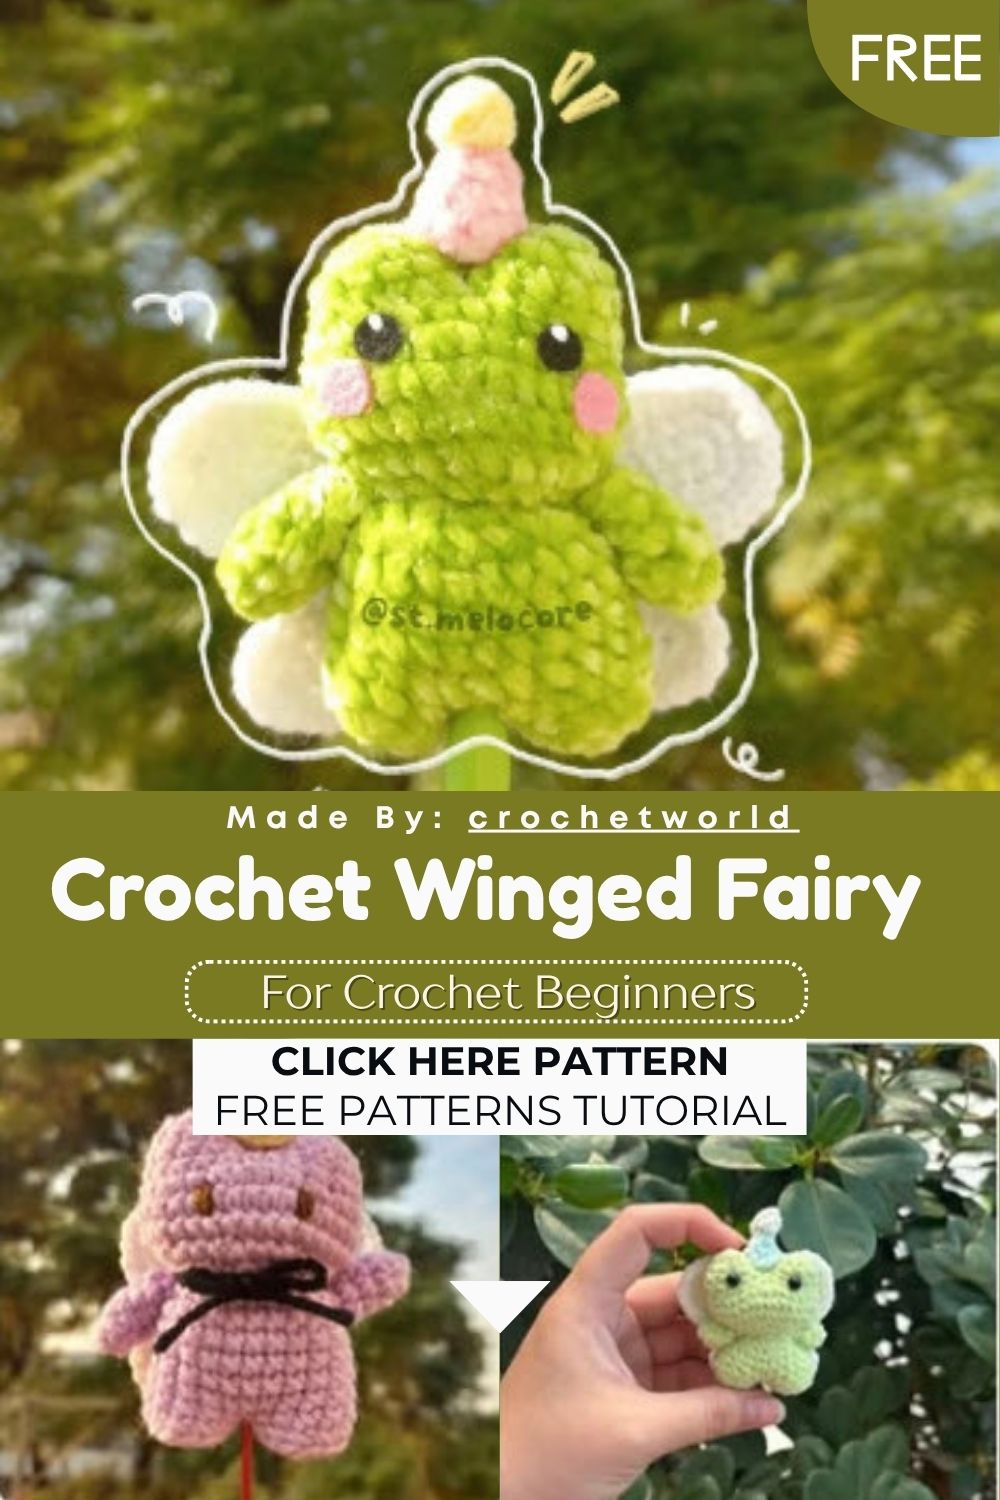
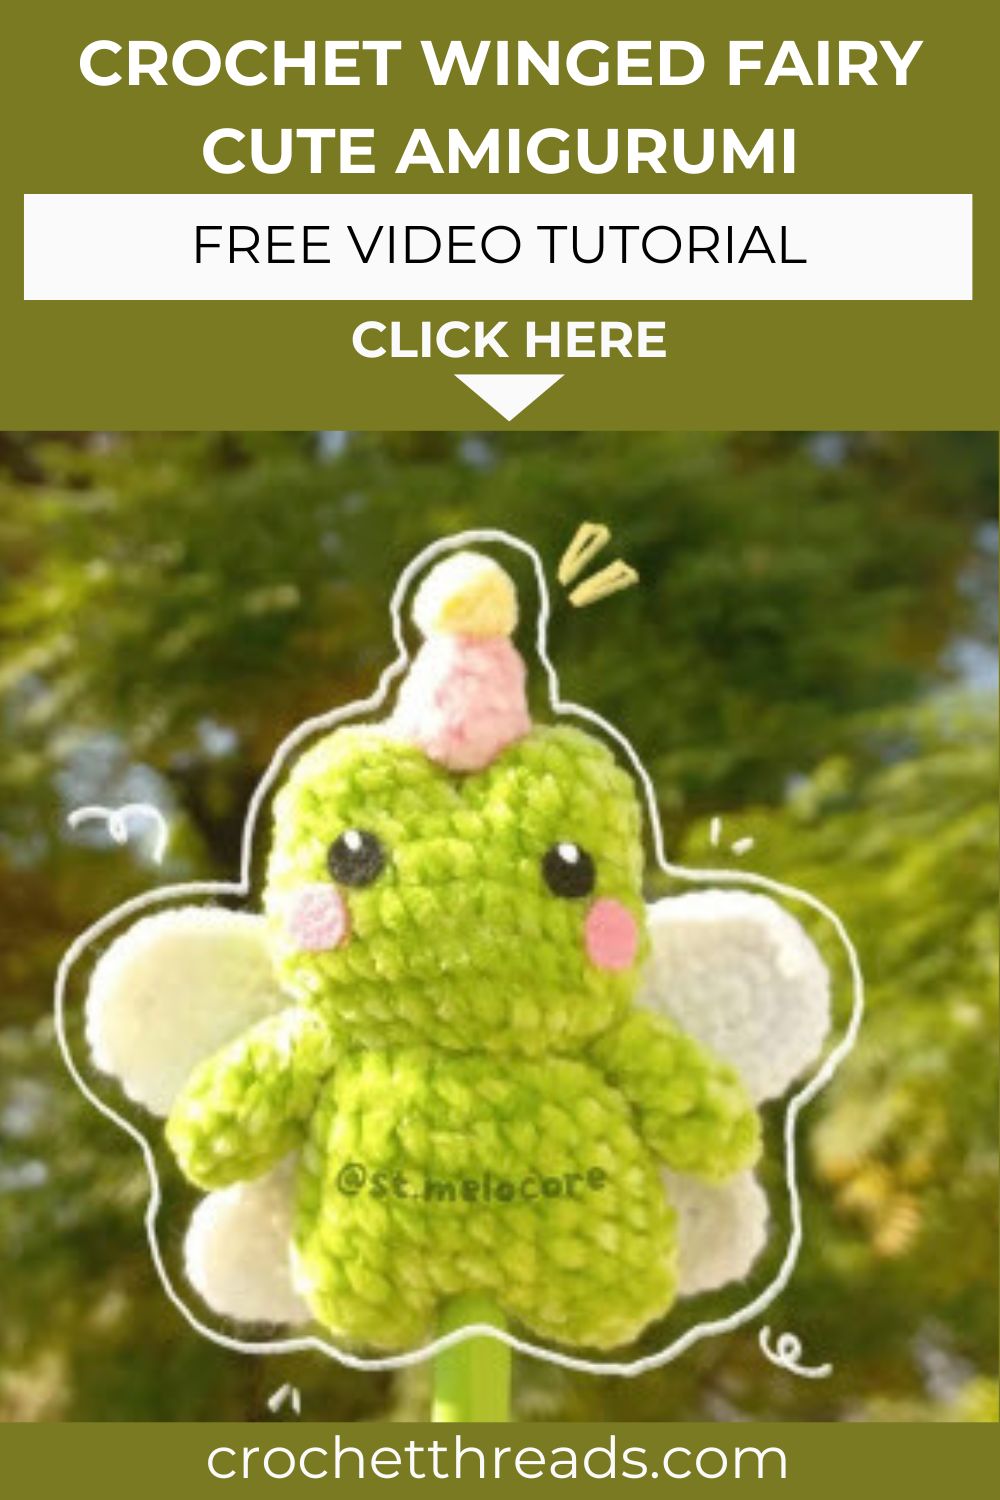
Magical Free Crochet Winged Fairy Amigurumi Pattern
Every craft room needs a touch of magic, and this Free Crochet Winged Fairy is exactly that. Made from soft chenille and airy white wings, she’s a quick, free amigurumi project with a pointed hat, tiny hands, and adorable rosy cheeks.
If you’ve been searching for a small project that feels a little enchanted, you’ve found it. This Free Crochet Winged Fairy works up fast, uses just a handful of yarn scraps, and welcomes beginners with open arms. The chenille keeps her wonderfully soft and squishy, while the white wings give her that light, fairy-tale finish. Let’s grab a hook and start.
Pattern Overview
- This is a small, beginner-to-intermediate amigurumi worked mostly in continuous spiral rounds, so you’ll rarely need to slip-stitch and chain up between rounds.
- The fairy is built in separate pieces a head with attached ears, a joined-leg body, two little hands, big and small wings, a pointy hat, and a tiny pom-pom and everything comes together at the assembly stage.
- The head and ears are crocheted as one continuous piece, which removes the fiddly job of sewing the ears on later.
- Both legs are joined into a single body, giving the figure a sturdy base that sits nicely on a shelf or beside your other makes.
- The finished fairy is roughly palm-sized, though the exact measurement depends on your tension and how thick your chenille yarn is.
- The wings are worked flat in oval shapes, then stitched onto the back so they fan out the way real fairy wings should.
Skill Level
This Free Crochet Winged Fairy pattern suits confident beginners moving toward intermediate. If you can work a magic ring, single crochet, increases, decreases, and sew pieces neatly, you’ll handle this fairy with ease.
Materials
- Thin chenille yarn in green, pink, and yellow
- Acrylic yarn in white (for the wings)
- 2.5mm crochet hook
- Black and pink felt
- Darning needle
- Polyfill stuffing
- Hot glue
- Stitch marker
Abbreviations
- mr — magic ring
- st — stitch
- ch — chain
- sc — single crochet
- inc — increase
- dec — decrease
- bbl — bobble stitch (3 dc in one stitch)
- slst — slip stitch
- r — round
- blo — back loops only
- flo — front loops only
- fo — fasten off
Special Techniques
- Magic ring (mr): nearly every piece begins here, giving you a tight, gap-free center with no hole to weave shut.
- Bobble stitch (bbl): three double crochets worked into one stitch create the fluffy little pom-pom that tops the hat.
- Back loops only (blo) and front loops only (flo): used on the legs and body to form clean ridges and crisp shaping lines.
- Joined construction: the ears join straight into the head and the legs join straight into the body, so you crochet across both pieces at once.
- The “fake stitch” finish: used on the small wings to hide your ending, leaving a smooth, seamless edge.
The Pattern
Ears / Head
(Ears) × 2
- R1: 6sc in mr [6]
- R2: 6inc [12]
- R3: sc around [12]
Repeat rounds 1–3, but do not fasten off this time. Instead, make a sc into the first ear to join both ears together. This counts as the first sc of round 4.
- R4–5: sc around [24] (2 rounds)
- R6: (2sc, inc) × 8 [32]
- R7–8: sc all around [32] (2 rounds)
- R9: (2sc, dec) × 8 [24]
- R10: (sc, dec) × 8 [16]
Stuff the head firmly.
- R11: 8dec [8]
Fasten off and sew the remaining hole closed.
Legs / Body
(Legs) × 2
- R1: 6sc in mr [6]
- R2: 6 in [12]
- R3: flo sc around [12]
Fasten off. Repeat rounds 1–3, but do not fasten off this time. Instead, make a sc into the first leg to connect both legs. This counts as the first stitch of round 4.
- R4–7: sc around [24] (4 rounds)
- R8: (2sc, dec) × 6 [18]
Stuff the body.
Fasten off and leave a long tail for sewing.
Hands × 2
- R1: 5sc in mr [5]
- R2: 4sc, inc [6]
- R3–5: sc around [6] (3 rounds)
Fasten off and leave a long tail for sewing. Stuff the hand if necessary.
Wings (Big) × 2
Chain 9, insert your hook into the 2nd chain, and:
- R1: 7sc, 4sc in the last chain, 6sc on the other side of the chain, 3sc in the last chain [20]
- R2: 7sc, 4inc, 9sc [24]
- R3: 2sc, (sc, inc) × 9, 4sc [33]
Fasten off and leave a long tail for sewing.
Wings (Small) × 2
Chain 5, insert your hook into the 2nd chain, and:
- R1: 3sc, 4sc in the last chain, 2sc on the other side of the chain, 3sc in the last chain [12]
- R2: 3sc, 4inc, 5sc [16]
Fasten off, make a fake stitch, and weave in the ends.
Hat
- R1: 4sc in mr
- R2: (sc, inc) × 2 [6]
- R3: (2sc, inc) × 2 [8]
- R4: (3sc, inc) × 2 [10]
Fasten off and hide the tail.
Pom-Pom (for Hat)
- R1: make a bbl in mr and slip stitch
Fasten off and hide the tail.
Assembly
- Sew the body to round 10 of the head.
- Sew the hands onto the 8th round of the body.
- Sew the big wings across rounds 7–9 of the body (this also reaches the last round of the head).
- Sew the small wings onto rounds 4–6 of the body, sitting just below the big wings.
- Glue the hat between the ears.
- Cut two small circles from black felt for the eyes and two ovals from pink felt for the blush.
- Glue the eyes onto rounds 4–5, about 5 stitches apart.
- Glue the blush onto rounds 6–7, about 8 stitches apart.
Common Mistakes to Avoid
- Forgetting your stitch marker – with continuous spirals it’s easy to lose track of where each round starts, and you’ll end up with a lopsided head before you notice.
- Stuffing too late – always firm up the head and body while the opening is still wide enough to reach into comfortably.
- Over-stuffing the chenille – too much polyfill stretches the stitches and lets the stuffing peek through the gaps.
- Joining the ears or legs on the wrong stitch – this throws off the stitch count for every round that follows, so double-check before you continue.
- Gluing the eyes and blush too soon – measure the rounds and stitches first, hold the felt in place, and only commit once it looks balanced.
- Sewing the wings unevenly – pin them on first and step back to check symmetry, otherwise one wing tends to sit higher than the other.
Important Remarks
- Always count your stitches at the end of each round; the numbers in brackets are your safety check.
- Chenille yarn splits easily, so work slowly and keep your hook movements gentle to avoid snagging.
- A 2.5mm hook keeps the fabric tight enough to hide the stuffing. Going up a hook size may leave noticeable gaps.
- Leave long tails wherever the pattern says “leave a long tail,” since those are exactly what you’ll use during assembly.
- This is a free pattern for personal use. You’re welcome to sell the fairies you make, but please don’t resell or repost the written pattern as your own.
- If the wings curl, lightly steam or block them so they lie flat and fan out neatly against the body.
Conclusion
And there you have it your very own magical Free Crochet Winged Fairy, ready to sprinkle a little handmade charm wherever she lands. The best part of an amigurumi like this is how much personality comes through in the tiny details: the angle of the wings, the placement of those blushing cheeks, and the cheeky tilt of the hat. Don’t worry if your first one looks a touch wonky every stitch teaches your hands something new, and your second fairy will fly together even faster. Make a whole little flock, gift them to friends, or keep one perched on your desk as a reminder that you made magic out of yarn.