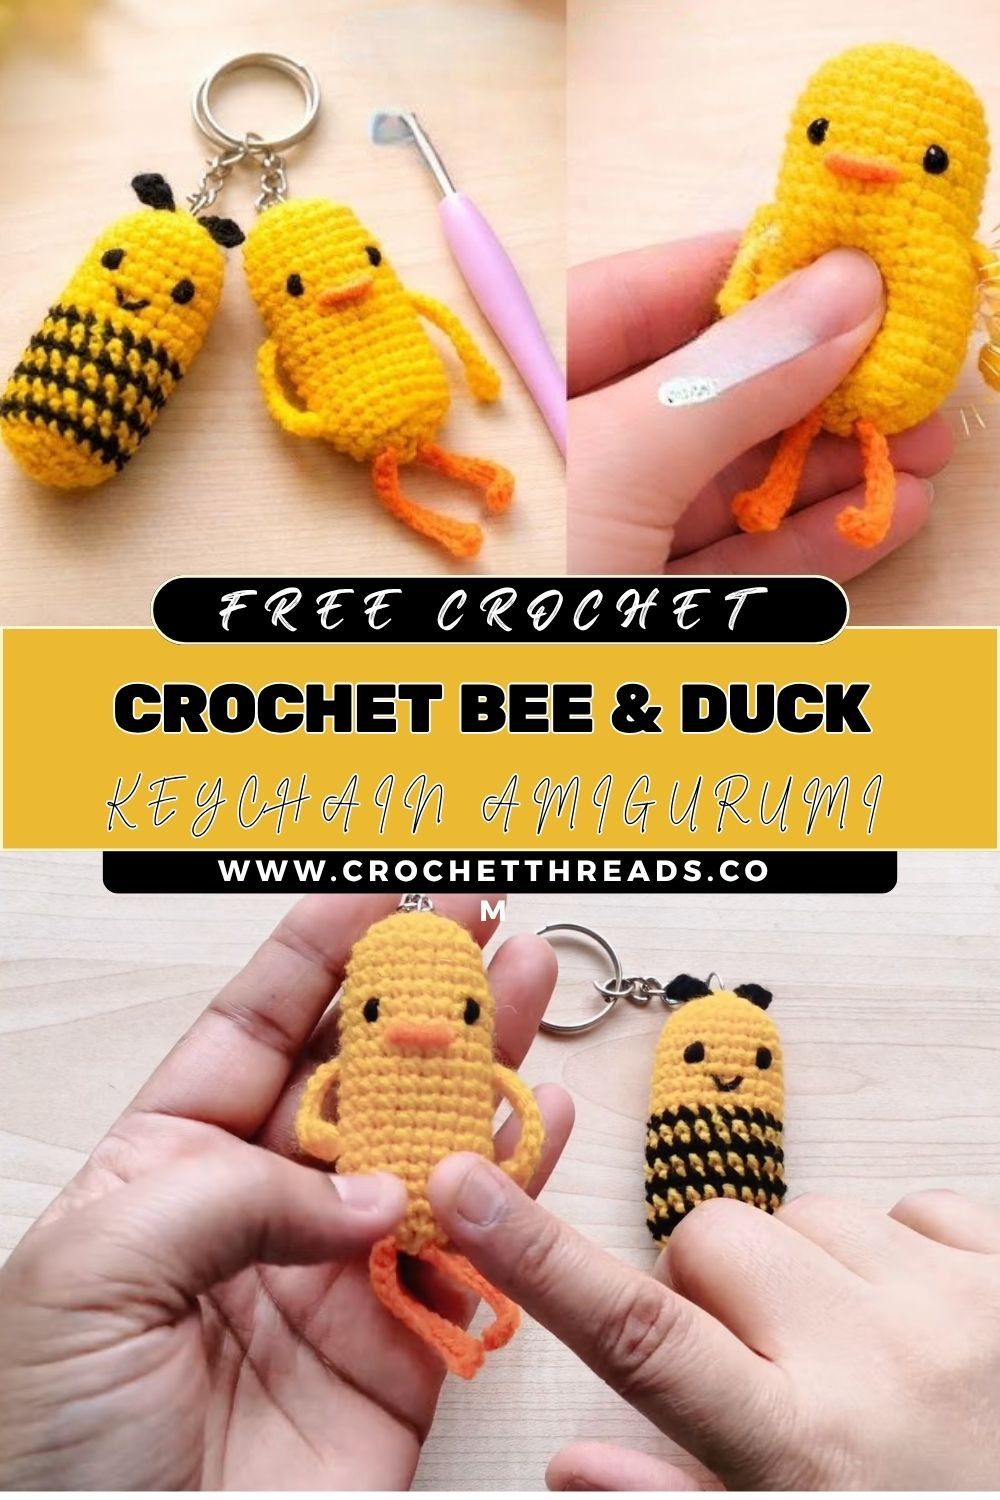
Crochet Bee & Duck Keychain Amigurumi Pattern 10-Minute Project
Little amigurumi charms dangling from a bag or key ring catch the eye instantly with their charming look. Crochet Bee and Duck Keychain Pattern shapes a tiny bee and an innocent duck into a lovely keychain design. Round bodies, small wings, and stitched faces give both characters their own distinct personality, while their small size keeps them light and delightful.
Skill Level
Beginner
This pattern is designed for people who are new to amigurumi or just starting their crochet journey. If you know how to make a magic ring, single crochet, and a few simple increases and decreases, you already have everything you need to finish this project successfully.
Materials and Supplies
Gathering your materials ahead of time makes the whole process smoother. Here is what you will need:
Yarn Colors
- Yellow and black for the bee’s body and stripes
- Yellow or orange for the duck’s body
- Orange for the duck’s beak and feet
- White or light cream for small accent details (optional)
Tools
- Crochet hook: 2.5mm to 3mm, depending on your yarn weight
- Safety eyes: 6mm or 8mm, black
- Stuffing: Polyester fiberfill for a soft, plump shape
- Needle: Yarn needle for sewing pieces together
- Scissors: Small, sharp pair for trimming yarn ends
- Keychain ring or clasp: Metal keyring, lobster clasp, or bag charm hook
- Stitch markers: To track your rounds without losing your place
Crochet Techniques Used
This project relies on a handful of essential amigurumi techniques:
- Magic ring – to start each piece with a tight, gap-free center
- Single crochet (sc) – the main stitch used throughout the pattern
- Increase (inc) – two single crochets in one stitch, used to shape rounded bodies
- Decrease (dec) – invisible decrease, used to close up tops and taper shapes
- Sewing parts together – attaching wings, ears, beaks, and feet neatly with a yarn needle
Step-by-Step Crochet Pattern Instructions
Making the Head
Start with a magic ring and work six single crochets into it to form the base circle. From there, increase evenly around for two or three rounds until the head reaches your desired size, then work several rounds without increasing to build height. Insert the safety eyes while the opening is still wide enough to reach inside, then begin decreasing gradually, stuffing firmly as you go, until the opening closes.
Making the Body
The body follows the same basic shape as the head, just slightly larger or smaller depending on your character. Begin with a magic ring, increase for a couple of rounds to widen the base, work even rounds for the middle section, and decrease at the top to taper it before stuffing and closing. For a rounder look, add stuffing gradually rather than all at once, so the shape stays smooth.
Ears, Wings, and Tail
- Bee wings: Two small oval-shaped pieces made flat, without stuffing, attached to the upper back
- Duck tail: A tiny curved piece, lightly stuffed or left flat, sewn to the back of the body
- Duck feet: Small orange flat pieces stitched underneath the body so the duck can “stand”
Facial Details
Facial charm comes from small, careful touches. Embroider a simple smile using a contrast thread, add tiny pink cheek blushes with a bit of yarn or fabric marker, and position the safety eyes close together for a sweet, youthful expression. For the duck, stitch a small orange beak using two flat triangle pieces or embroidered stitches directly onto the face.
Assembly Process
Once all pieces are complete, lay them out to plan placement before sewing. Attach the head to the body first, keeping the seam hidden along the back or bottom. Next, sew on the wings, tail, and feet, checking symmetry from the front as you work. Weave in all loose yarn ends securely so nothing unravels with handling.
Finishing Touches
Attach the keyring or clasp through a sturdy loop of yarn or a small crochet chain at the top of the head or back of the body. Trim any stray fibers, give the piece a gentle shape with your fingers, and your bee or duck keychain is ready to carry along on any bag or keyring.
Helpful Beginner Tips
- Keep your stitches tight. Amigurumi needs firm, close stitches so stuffing does not peek through the fabric.
- Use stitch markers. Since amigurumi is worked in a continuous spiral, a stitch marker helps you keep track of where each round begins.
- Stuff a little at a time. Adding small amounts of stuffing gradually, especially before closing rounds, keeps the shape even and prevents lumps.
- Match your hook to your yarn. A slightly smaller hook than usual creates denser fabric, which is ideal for small amigurumi pieces.
Design Customization Ideas
Once you have mastered the basic pattern, there is plenty of room to make it your own:
- Different colors: Swap the classic yellow and black bee for pastel shades, or try a rainbow duck for a playful twist
- Cute accessories: Add a tiny bow, a flower crown, or a scarf for extra charm
- Mini size variations: Use thinner yarn and a smaller hook to create micro versions perfect for earrings or bag charms
FAQ Section
What is the best yarn for amigurumi?
Cotton yarn is a popular choice for amigurumi because it holds its shape well and creates crisp, defined stitches. Acrylic yarn is also a great budget-friendly option and comes in a wide range of colors, making it easy to find the exact shades needed for characters like this bee and duck.
How do you make a crochet plush firm?
A firm plush comes from combining tight stitches with generous, even stuffing. Use a hook size slightly smaller than recommended for the yarn weight, and stuff in small pieces rather than one large clump so the fiberfill distributes evenly and the shape stays smooth and rounded.
How long does this project take?
Each keychain, once you know the pattern, can be finished in around ten to twenty minutes of active crochet time, plus a little extra for stuffing, assembling, and adding the finishing touches. It is an excellent project for a quick evening craft session.
Conclusion
This bee and duck keychain amigurumi pattern proves that even the smallest crochet projects can bring the biggest smiles. With just a handful of basic stitches and a bit of patience, you can create adorable little companions to keep for yourself or share with someone special. Grab your hook and yarn, give this pattern a try, and let us know how your bee and duck turn out.