Crochet Kawaii Onion Plushie No Sew Amigurumi Pattern Toy
Food items always carry their own special charm in the amigurumi world, and this Crochet Kawaii Onion offers a lovely example. With a round, chubby shape and rosy cheeks, it turns an ordinary onion into a soft, comical handmade companion, one that makes a charming addition to a shelf or kitchen decor.
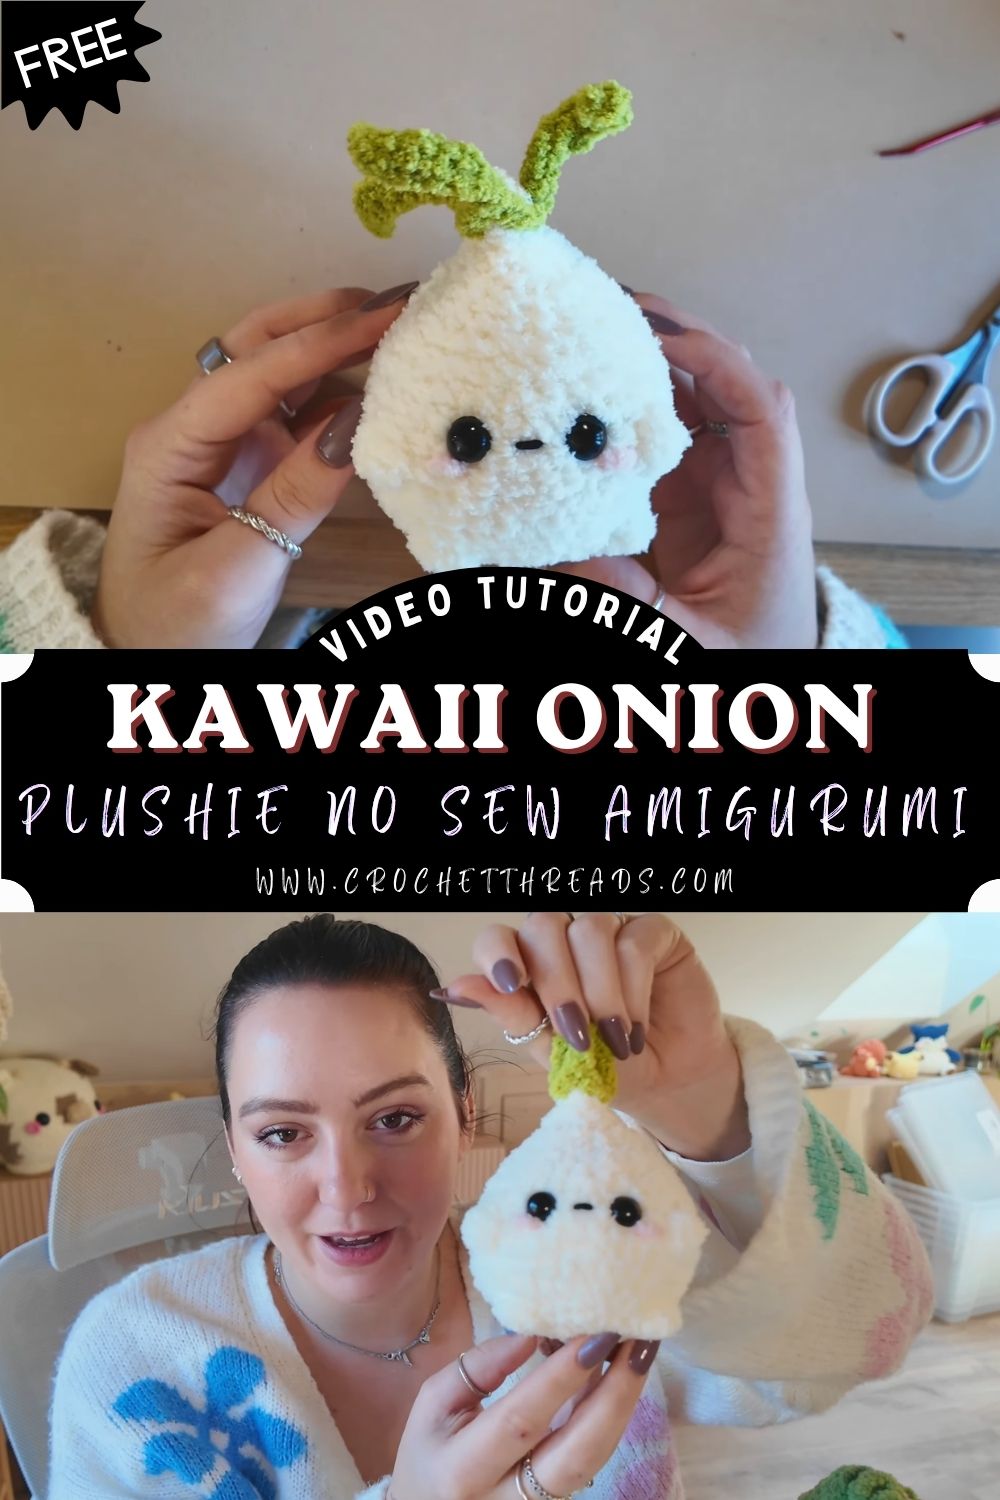
Coming together as a quick, satisfying project, it suits anyone wanting to craft an adorable Amigurumi Plushie in a short time especially well. After just one evening of crochet, a comical, charming handmade onion sits ready for a shelf or kitchen decor.
Skill Level
Beginner to Beginner-Intermediate.
If you already know how to work a magic ring, single crochet in the round, and shape with increases and decreases, this pattern will feel comfortable. New crocheters can manage it too, as long as they’ve practiced basic amigurumi stitches beforehand. There’s minimal finishing work, so it’s a gentle project for anyone still building confidence with a hook.
Materials and Supplies
Gather these before you start so the Crochet Kawaii Onion project flows without interruption:
- Yarn: Worsted weight cotton or acrylic yarn in cream/off-white (main onion body), a soft lilac or pale purple (onion blush at the base), and a small amount of green (sprout top)
- Crochet hook: 3.0mm to 3.5mm hook, sized slightly smaller than the yarn label suggests for tighter amigurumi stitches
- Safety eyes: 8mm to 10mm black safety eyes, or small black beads/felt circles as a child-safe alternative
- Stuffing: Polyester fiberfill, enough to fill a rounded shape roughly the size of a tennis ball
- Needle and scissors: A yarn needle for weaving in ends and small sharp scissors for trimming
- Extras: A keychain ring or bag clip if turning the onion into an accessory, plus pink blush powder or pastel pink yarn for cheeks
Crochet Techniques Used
This pattern relies on a small set of core amigurumi skills:
- Magic ring to start each piece with a tight, hole-free center
- Single crochet (sc) as the main stitch throughout the body
- Increase and decrease rounds to shape the onion’s rounded curves
- Minimal sewing, limited to attaching the sprout and any tiny accent pieces, since the body itself is worked as one continuous piece
Step-by-Step Crochet Pattern
Head and Body (Worked As One Piece)
Since this onion doesn’t need a separate head and body, everything grows from a single round base.
- Start with a magic ring and work 6 single crochet stitches into it, then close the ring.
- Round 2: Increase in every stitch (12 stitches total).
- Round 3: Alternate one single crochet, one increase around (18 stitches).
- Round 4: Alternate two single crochet, one increase (24 stitches).
- Continue increasing every other round until you reach about 30–34 stitches, giving the onion its rounded belly.
- Work several rounds even, without increasing, to build the height of the body.
- Begin decreasing gradually in the same pattern as the increases, working inward to taper the top toward the sprout opening.
Switch yarn color partway through the rounds if you want the classic onion look, with a pale purple blush near the base fading into cream higher up.
Ears, Sprout, and Accessories
Onions don’t have ears, but the tiny green sprout on top plays that same cute, expressive role.
- Using green yarn, make a magic ring with 5–6 single crochet stitches.
- Work 4–5 rounds without increasing to form a short tube.
- Stuff lightly, then flatten the top and close with a few stitches.
- For a fun variation, add two small curled leaves using chain stitches twisted into gentle spirals.
Facial Details
The face is what gives this onion its personality, so take your time here.
- Place safety eyes a few rounds down from the top opening, spaced slightly apart for a wide-eyed, friendly look.
- Add a small pink blush on each cheek using felt, embroidery, or blush powder for a soft, dewy finish.
- A tiny curved mouth stitched in black or brown thread completes the kawaii expression. Keep it simple; a gentle smile reads as cuter than an elaborate one.
Assembly Process
Because the body is worked in one continuous piece, assembly stays refreshingly simple.
- Stuff the body firmly as you crochet the final rounds, pushing fiberfill into the lower half first, then the upper half.
- Attach the sprout piece to the top opening using a few small stitches, tucking raw edges inward.
- Weave in any loose yarn ends securely so nothing unravels with handling.
- If adding a keychain ring, loop it through a stitch at the top before closing the sprout completely.
Finishing Touches
- Trim any stray yarn fibers for a clean, polished look.
- Fluff the stuffing gently through the fabric to smooth out lumps.
- Steam-block lightly if the stitches look uneven, this helps the rounds sit flat and consistent.
Helpful Beginner Tips
A few small habits make a big difference in amigurumi projects like this one.
- Keep stitches tight. Loose single crochet leaves gaps where stuffing peeks through, so use a hook one size smaller than usual for a dense, sturdy fabric.
- Use stitch markers. Amigurumi is worked in continuous spiral rounds with no chain to mark the start, so a stitch marker on round one keeps your count accurate throughout.
- Stuff as you go, not at the end. Adding fiberfill gradually while crocheting the final rounds gives a firmer, rounder shape than cramming it all in at once.
- Count your stitches often. A single missed increase or decrease can throw off the whole shape, so pause every few rounds to check the total.
Design Customization Ideas
Once the base pattern feels comfortable, there’s plenty of room to make it your own.
- Different colors: Try a red or yellow onion palette, or switch things up entirely with a garlic bulb or radish version using the same base shape
- Cute accessories: Add a tiny scarf, bow, or hat for extra personality, or embroider a simple face expression instead of safety eyes for baby-safe versions
- Mini size variations: Use a thinner yarn weight and smaller hook to create a pocket-sized keychain version, perfect for bag charms or party favors
Frequently Asked Questions
What is the best yarn for amigurumi projects like this onion?
Cotton yarn is a popular choice for amigurumi because it holds stitch definition well and doesn’t split easily, making increases and decreases easier to see. Acrylic yarn works nicely too and comes in a wider range of soft pastel shades, which suits kawaii-style designs like this onion plushie.
How do I make my crochet plush firm and well-shaped?
Firmness comes down to two things: tight stitches and generous stuffing. Using a smaller hook than the yarn label recommends tightens the fabric, while adding fiberfill in small amounts as you crochet each round (rather than stuffing everything at the very end) keeps the shape rounded and dense instead of lumpy or soft.
How long does this project take to finish?
Most crocheters finish this onion plushie in about two to four hours, depending on experience level. Beginners might spread it across two shorter sessions, while more practiced crocheters can often complete the whole thing in a single relaxed evening.
Conclusion
This Crochet Kawaii Onion plushie proves that even the most ordinary kitchen vegetable can turn into something genuinely adorable with a hook and a little yarn. It’s quick enough for a weekend project, forgiving enough for beginners, and charming enough to gift, sell, or simply keep as a happy little desk companion. Grab your yarn, pick a color, and give this pattern a try. Once it’s finished, it might just become the start of a whole crochet veggie garden.