Adorable Crochet Dachshund Dog Amigurumi Pattern
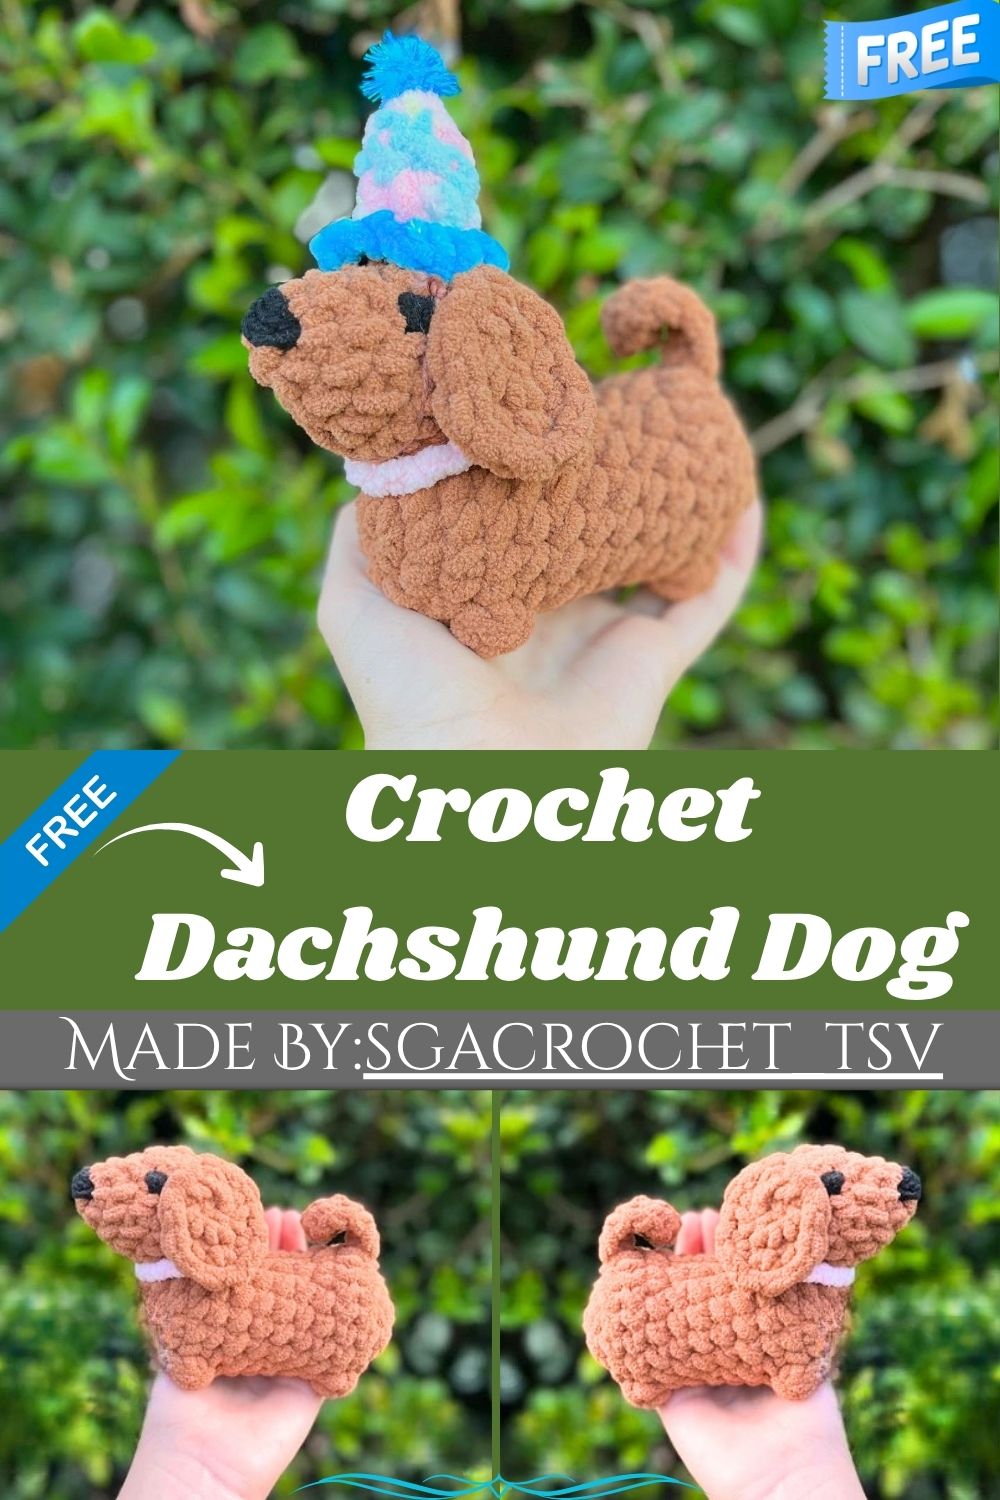
Honestly, dachshunds are one of the most fun shapes to crochet because of that long little body. This free amigurumi pattern gives you a soft, huggable pup with two fun hat options included.
If you’ve been wanting to try a longer amigurumi body shape, this dachshund pattern is a great place to start. Trust me, the stretched-out torso looks tricky in photos but works up in simple rounds of single crochet. You’ll finish with a floppy-eared pup wearing either a party hat or a little Christmas hat, plus a matching collar for the finishing touch.
Skill Level
This pattern suits confident beginners who already know magic ring, increases, decreases, and bobble stitch. There’s some shaping around the legs and tail that intermediate crocheters will find quick, but a patient beginner can manage it too.
Pattern Overview
- Body: worked in one continuous piece from nose to tail, with bobble stitches forming the front and back legs and a small chained tail worked into the front loops
- Head: a rounded ball shape stitched separately, sized to sit neatly on top of the body
- Ears: two floppy ears combining slip stitch, half double, and double crochet for a soft, drooping curve
- Accessories: a Christmas hat, a party hat with optional pom-pom, and a simple chained collar
- Finished size: a small tabletop-sized dog, ideal for shelves, keychains, or gift toppers
Customization and Variation
- Swap the brown and pink chenille yarn for any two-tone combo — grey and white or tan and cream both suit a dachshund’s coloring
- Skip the accessories entirely for a plain everyday pup, or make both hats so the dog can be restyled for different seasons.s
- Use a smaller hook with worsted weight yarn instead of chenille if you’d prefer a firmer, smaller finished toy
- Add a tiny bandana instead of the collar for a more casual look
- Try safety eyes in a larger size for a more cartoonish, wide-eyed expression
Special Techniques
- Bobble stitch (BO): five loops pulled up in one stitch and closed together, used here to shape the legs along the body without adding separate limb pieces
- Front loop only (FL) and back loop only (BL): worked selectively on the body to create the raised ridge where the tail is added and to mark the tail’s starting point cleanly
- Working into a chain for the tail: rather than crocheting the tail separately, it’s built directly onto the body by chaining out and single crocheting back down, which keeps the tail attached with no extra sewing
Abbreviations
sc – Single Crochet | FL – Front Loop | hdc – Half Double Crochet | BL – Back Loop | dc – Double Crochet | (..) x.. – complete the instructions in the brackets the amount of times stated | INC – Increase | DEC – Decrease | sl st – Slip Stitch | ch – Chain | [..] – complete the instructions stated in one stitch | mr – Magic Ring | FO – Finish Off | BO – Bobble Stitch (5 loops) | R – Round
Highlighted white = complete in white yarn. Highlighted red = complete in red yarn
Materials
Here’s everything you’ll need to put this little dachshund together from start to finish.
- Size 6 chenille yarn in brown and pink
- Black yarn for embroidery
- For accessories: white, red, blue, and multi-colour yarn
- Stuffing
- 5.5mm hook
- Sewing needle
- Stitch marker
- Scissors
Instructions
Body
- R1: 8sc MR mr (8)
- R2: 8 INC (16)
- R3: sc around (16)
- R4: 6sc, BO, 3sc, BO, 5sc (16)
- R5-10: sc around (16) — 6 rounds. Adjust BO placement accordingly in R11 to line up with the front feet. Tip: mark the BL not worked into for the tail for easy identification when working R13.
- R11: (INC) x3, 4sc, BO, 3sc, BO, 4sc (19). Adjust tail placement accordingly in R12.
- R12: 3sc, FL: sc, ch 8, 7sc down ch, 15sc (19)
- R13: (sc, DEC) x6, sc (13)
- Stuff body.
- R14: (DEC) x6, sc (7)
- Finish stuffing, FO, and close.
Head
- R1: 6sc in mr (6)
- R2: (sc, INC) x3 (9)
- R3: (2sc, INC) x3 (12)
- R4: (sc, INC) x6 (18)
- R5-6: sc around (18) — 2 rounds. Recommend 12mm eyes. If using safety eyes, add them between R3 and R4, ~5 stitches apart.
- R7: 9 DEC (9)
- Stuff, FO, close,e and leave a long tail.
Ears (make 2)
- R1: 6sc in mr (6)
- R2: 6 INC (12)
- R3: 4 sl st, [2 hdc], [2 dc], [2 hdc], 5sc (15)
- FO, leave a long tail.
Christmas Hat
- R1: 4sc in mr (4)
- R2: 4 INC (8)
- R3: 4 DEC (4)
- R4: (sc, INC) x2 (6)
- R5: sc around (6)
- R6: (sc, INC) x3 (9)
- R6: sc around (9)
- FO, weave in ends.
Party Hat
- R1: 4sc in mr (4)
- R2: (sc, INC) x2 (6)
- R3: (2sc, INC) x2 (8)
- R4: (3sc, INC) x2 (10)
- R4: FLO: (sl st, [3sc]) x5 (20)
- Sl st, FO, weave in ends.
- Optional: glue a pom-pom to the top of the party hat.
- Cut a ~15 cm and ~20 cm string. Tie both strings to either side of the bottom of the hat. Tuck one loop behind the ears to keep it secure.
Collar
- Ch 12, wrap ch around the neck (adjust number of chains according to neck size).
- Sl st into the initial ch.
- FO, weave in ends.
Assembly
- Sew the head onto the top of the body between R3 and R5.
- Sew the ears onto R5 and R6 on the side of the head, ~4 stitches apart.
- Embroider a nose on the front of the head.
- Embroider eyes in front of the ears onto R4, ~5 stitches apart.
- Feel free to adjust the head angle when sewing so it points straight ahead or slightly up.
Common Mistakes
- Losing track of the front loop and back loop rounds on the body, which throws off where the tail attaches; es keep a stitch marker on the marked loop until R13 is done.
- Placing the bobble stitches in R11 without first checking R4’s placement, which makes the front and back legs look uneven
- Understuffing the body before closing R14, leaving the dachshund’s long torso looking flat instead of firm
- Sewing the head too far forward or back instead of centering it between R3 and R5, which throws off the whole pup’s proportions
- Rushing the ear shaping round and skipping stitches, which leaves the ears looking stiff instead of naturally floppy
Important Remarks
This pattern is an original design and is free to use for personal projects and finished-item sales. If you share photos of your finished dachshund online, a credit back to the original pattern source is always appreciated.
Finishing Tips
- Weave in all tail ends securely before adding any accessories, especially around the tail and ear attachment points
- Brush the chenille yarn lightly with a soft brush after finishing to bring out its soft, plush texture
- Steam the ears gently to help them hold a relaxed, drooping curve instead of standing up stiff
- Double.-check both eyes sit at the same height before the glue or thread sets permanently .nently
- Trim any loose yarn fibers around the nose embroidery for a cleaner finished face.
Gifting Ideas
- Attach a small keychain clasp to the collar for a wearable accessory gift
- Pair the Christmas hat version with a holiday card for a low-key stocking stuffer
- Make the party hat version as a birthday gift topper for a card or wrapped box
- Create a two-pack with both hats so the recipient can switch up the look
- Add a small tag with the dog’s “name” for a personalized new-pet or housewarming gift
Conclusion
This dachshund pattern is a fun one to have in your amigurumi lineup; real talk, the long body shape is more approachable than it looks once you get past R11. Whether you dress it up for a holiday or keep it plain, it makes a sweet gift or shelf companion either way.