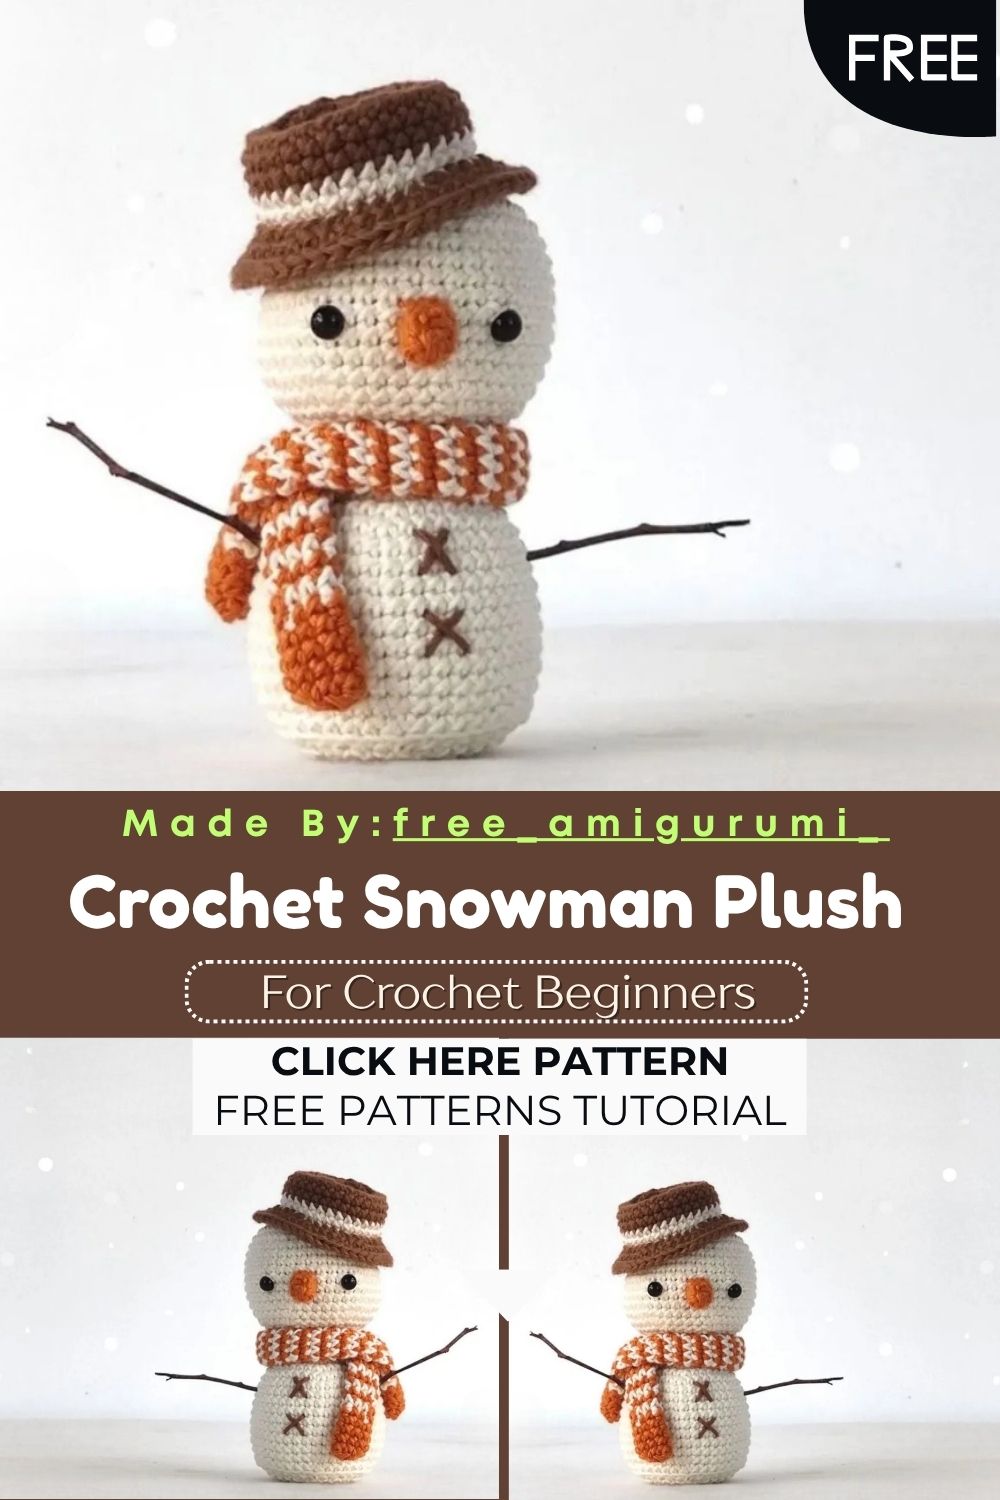
Make a Crochet Snowman Plush – Free Pattern
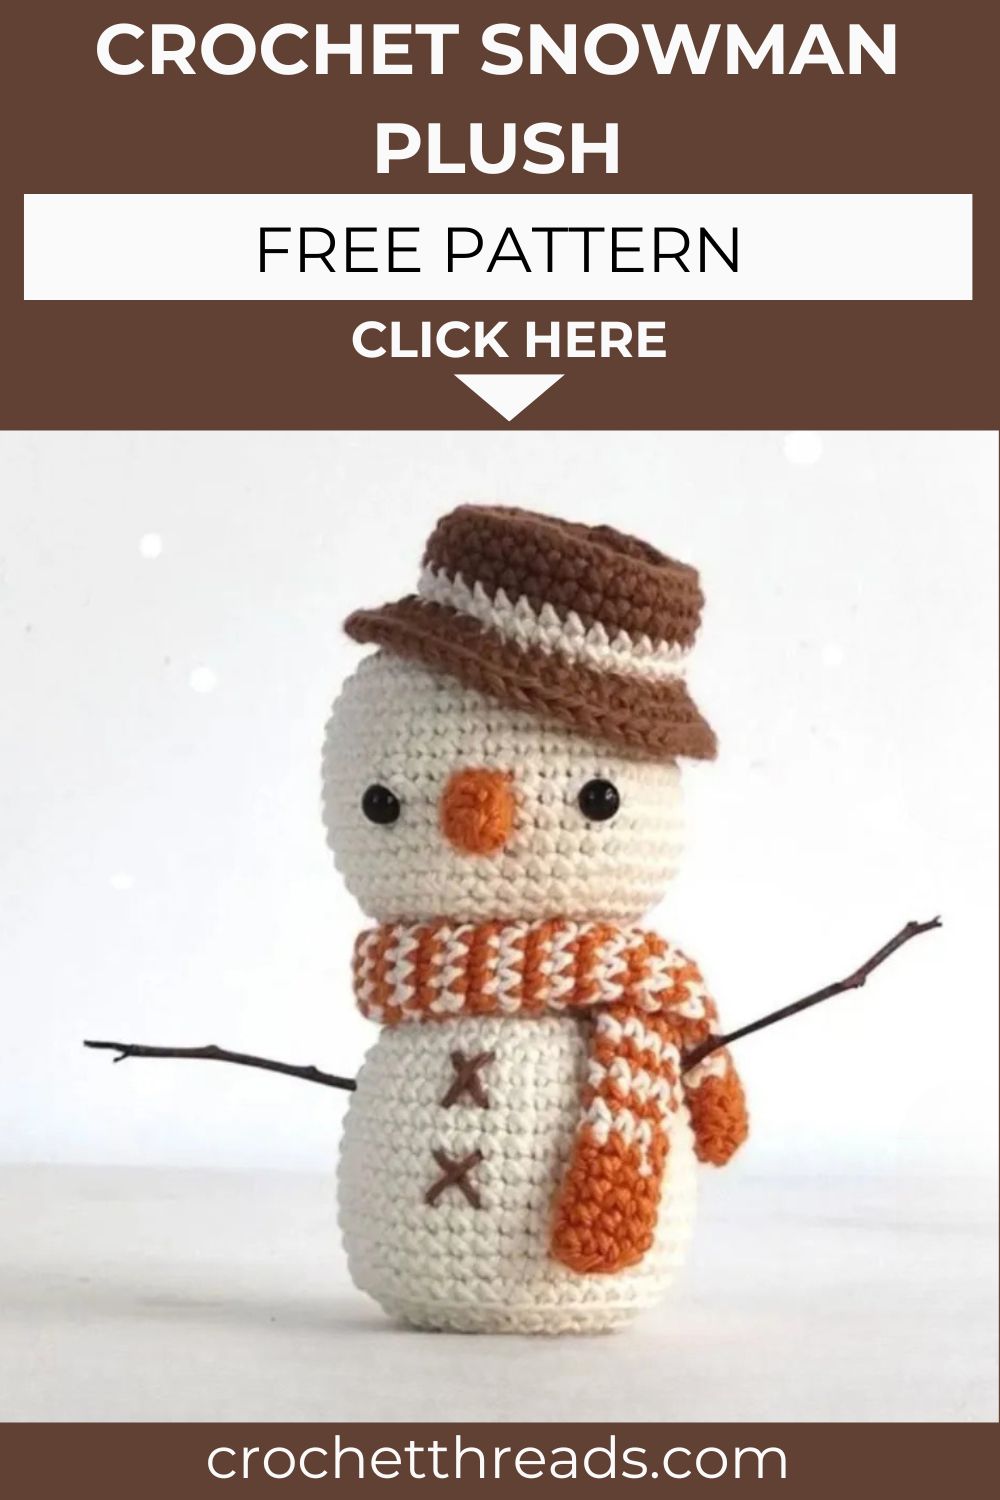
Twig arms, a tiny carrot nose, and a cozy striped scarf meet Adam, the most charming little snowman you will ever crochet!
There is something deeply nostalgic about a handmade snowman. This pattern brings that warmth into your hands with a soft cream body, a rustic brown hat, real twig arms, and a striped ochre and white scarf that wraps perfectly around his neck. The hat construction uses a clever color change technique to create the classic banded brim, while the scarf works up in a long, color-alternating spiral that ends in tasseled fringe. Every detail, from the carrot nose to the embroidered X-shaped buttons, comes together to create a finished snowman that feels genuinely collectible. Whether displayed on a holiday mantel, given as a meaningful gift, or added to a growing winter collection, Adam brings cozy charm to every season he sits through.
Skill Level
Beginner to intermediate. Basic single crochet, increases, and decreases form the foundation throughout. Additionally, the hat color change band and long alternating-color scarf introduce simple new techniques that build confidence with repetition.
Materials You Will Need
Yarn 4 ply weight:
- White or cream for the head and body
- Brown for the hat
- Ochre for the scarf, nose, and brim accent
- White for the scarf stripe alternation and hat band
Other Supplies:
- Crochet hook — 2.5mm
- Yarn needle
- Fiberfill stuffing
- Scissors
- Stitch markers
- Safety eyes — 6mm
- Two small twigs for the arms
Abbreviations
- SC — Single Crochet
- INC — Increase
- DEC — Decrease
- BLO — Back Loops Only
- FLO — Front Loops Only
- CH — Chain
- SLST — Slip Stitch
- ( )* — Repeat the sequence the stated number of times
- [ ] — Total stitch count for the round
Pattern: Head
Using white yarn
Rnd 1: Magic circle, 6 sc [6] Rnd 2: (inc) x6 times [12] Rnd 3: (sc, inc) x6 times [18] Rnd 4: (2sc, inc) x6 times [24] Rnd 5: (3sc, inc) x6 times [30] Rnd 6: (4sc, inc) x6 times [36] Rnd 7: (5sc, inc) x6 times [42] Rnd 8–16: sc all around [42] for 9 rounds
Place the safety eyes 8 stitches apart, positioned between rounds 12 and 13.
Rnd 17: (5sc, dec) x6 times [36] Rnd 18: (4sc, dec) x6 times [30] Rnd 19: (3sc, dec) x6 times [24] Rnd 20: (2sc, dec) x6 times [18]
Begin stuffing the head at this point.
Rnd 21: (sc, dec) x6 times [12] Rnd 22: (dec) x6 times [6]
Continue directly into the body without fastening off.
Pattern: Body
Continuing with white yarn
Rnd 23: (inc) x6 times [12] Rnd 24: (sc, inc) x6 times [18] Rnd 25: (2sc, inc) x6 times [24] Rnd 26: (3sc, inc) x6 times [30] Rnd 27: (4sc, inc) x6 times [36] Rnd 28: (5sc, inc) x6 times [42] Rnd 29–37: sc all around [42] for 9 rounds
Rnd 38: (5sc, dec) x6 times [36] Rnd 39: BLO (4sc, dec) x6 times [30]
This back loop only round creates the small ridge detail at the base of the body where the snowman’s lower section meets the ground.
Rnd 40: (3sc, dec) x6 times [24] Rnd 41: (2sc, dec) x6 times [18]
Start stuffing the body firmly.
Rnd 42: (sc, dec) x6 times [12] Rnd 43: (dec) x6 times [6]
Fasten off and close the hole securely.
Pattern: Carrot Nose
Using ochre yarn, leave a long tail for sewing.g
Rnd 1: Magic circle, 6 sc [6] Rnd 2: sc all around [6] Rnd 3: (dec) x3 times [3]
Fasten off and weave in the tail end. Set aside the long sewing tail for attachment.
Pattern: Scarf
Using ochre yarn
Chain 6. Slip stitch into the first chain to form a small ring.
Rnd 1: Chain 1, 6 sc [6]
Continue working in a spiral without slip stitching between rounds from this point forward.
Rnd 2–5: 6 sc [6] for 4 rounds
For the following rounds, change color every single round, alternating between white and ochre. Do not cut either yarn — simply pick up the unused color where you left off on every alternate round.
Rnd 6–52: 6 sc [6] for 47 rounds, alternating colors each round
The last 5 rounds are worked in ochre only.
Rnd 53–57: 6 sc [6] for 5 rounds
Fasten off and weave in all tail ends securely.
Pattern: Hat
Using brown yarn
Rnd 1: Magic circle, 6 sc [6] Rnd 2: (inc) x6 times [12] Rnd 3: (sc, inc) x6 times [18] Rnd 4: (2sc, inc) x6 times [24] Rnd 5: (3sc, inc) x6 times [30] Rnd 6: BLO sc all around [30]
This back loop round creates the ridge where the hat brim will later attach.
Rnd 7–8: sc all around [30] for 2 rounds
Attach white yarn. Do not cut the brown.
Rnd 9–10: sc all around [30] for 2 rounds
Pick up the brown yarn again. Leave a long tail of the white yarn to attach later, then cut it.
Rnd 11: FLO 2sc, inc, (4sc, inc) x5 times, 2sc [36] Rnd 12: 2sc, inc, (5sc, inc) x5 times, 3sc [42] Rnd 13: (6sc, inc) x6 times [48]
Fasten off and weave in all tail ends.
Assembly
Attach the carrot nose centered between the safety eyes on the face, using the long sewing tail prepared earlier.
Wrap the finished scarf around the neck where the head meets the body, and stitch it securely in place to prevent shifting.
Attach the hat using the front loop only edge created at round 11, positioning it centered on top of the head.
Insert two small twigs into the sides of the body to form the snowman’s classic stick arms.
Embroider two small X shapes in dark thread onto the front of the body for the button details, positioned vertically down the center front.
Customization and Variation Ideas
- First, swap the ochre and white scarf for a holly green and cream combination for a more traditionally festive color palette.
- Additionally, use a textured or flecked yarn for the hat to mimic the look of natural felted wool for a more rustic, vintage finish.
- Moreover, add tiny embroidered snowflakes onto the body using white thread scattered randomly for extra wintery detail.
- Furthermore, attach a small jingle bell to the tip of the hat for a soft, festive sound whenever the snowman is moved or displayed.
- Also, make a mini version using fingering-weight yarn and a smaller hook for an ornament-sized snowman perfect for hanging on a tree.
- Finally, create a small family of snowmen in different sizes using the same construction at varying gauges for a charming holiday display set.
Common Mistakes to Avoid
- First, fastening off between the head and body: This pattern is designed to continue directly from Rnd 22 of the head into Rnd 23 of the body without cutting yarn. Fastening off here breaks the seamless connection.
- Additionally, missing the BLO round at Rnd 39 of the body: This back loop round creates an important shaping detail. Working both loops here removes the visual ridge that defines the body’s lower section.
- Also, cutting yarn during the scarf color alternation: The pattern specifically instructs not to cut either color during the long alternating section. Cutting and rejoining repeatedly creates unnecessary ends and weak points in such a long, thin piece.
- Furthermore, attaching the hat without using the FLO row: Round 11 of the hat is worked in front loops only, specifically to create the brim attachment point. Skipping this technique makes the hat sit incorrectly on the head.
- Moreover, placing eyes without checking spacing: The pattern specifies 8 stitches apart between rounds 12 and 13. Always mark with pins first and check symmetry before locking the eyes permanently in place.
- Finally, inserting twig arms before the body is fully stuffed and closed: Always complete the body construction first, then carefully insert twigs through the stitches at the desired arm position once the shape is finalized.
Finishing Tips
- First, when transitioning from head to body without fastening off, maintain consistent tension to avoid any visible gap or pucker at the neck joint.
- Additionally, weave in the white yarn tail left at Rnd 10 of the hat carefully, since it will be hidden beneath the brim attachment and needs to be secure.
- Moreover, when wrapping the scarf, leave a small amount of slack rather than pulling it perfectly tight, allowing it to drape naturally for a more lifelike finished look.
- Furthermore, choose twigs that are similar in thickness and slightly curved for the most charming, natural-looking arm placement.
- Also, use a fine embroidery needle for the button X stitches to keep the detail crisp and proportional against the smooth cream body yarn.
- Finally, photograph the finished snowman against a soft grey or white background with a few scattered snowflake props for the most magical seasonal presentation.
Gifting Ideas
- First, place the finished snowman inside a small gift box lined with white tissue paper and a sprig of real or faux pine for a beautifully coordinated holiday presentation.
- Additionally, pair the snowman with a small handwritten holiday card for a personal, heartfelt gift that feels genuinely thoughtful.
- Moreover, these snowmen make wonderful Secret Santa or white elephant gifts, offering a handmade alternative that stands out among typical small gift exchanges.
- Furthermore, attach a small loop of yarn to the top of the hat for use as a tree ornament that doubles as a tabletop decoration when not hanging.
- Also, make a small family of snowmen in graduating sizes and gift them together as a complete handmade holiday collection.
- Finally, these snowmen sell wonderfully at winter craft markets, where the twig arm detail and cozy scarf create genuine standout charm among more typical holiday amigurumi designs.
Conclusion
This little snowman captures everything wonderful about handmade holiday crafting — cozy texture, charming detail, and a finished piece that feels genuinely collectible. The continuous head-to-body construction keeps the project flowing smoothly, while the long alternating scarf rewards patience with a beautifully striped result. Therefore, maintain your stitch tension through the seamless body transition, keep your color changes consistent through the scarf, and take your time with the hat brim attachment. In conclusion, Adam the snowman is ready to bring cozy, handmade warmth to your holiday season.
Happy crocheting! Cannot wait to see your little snowman come to life.