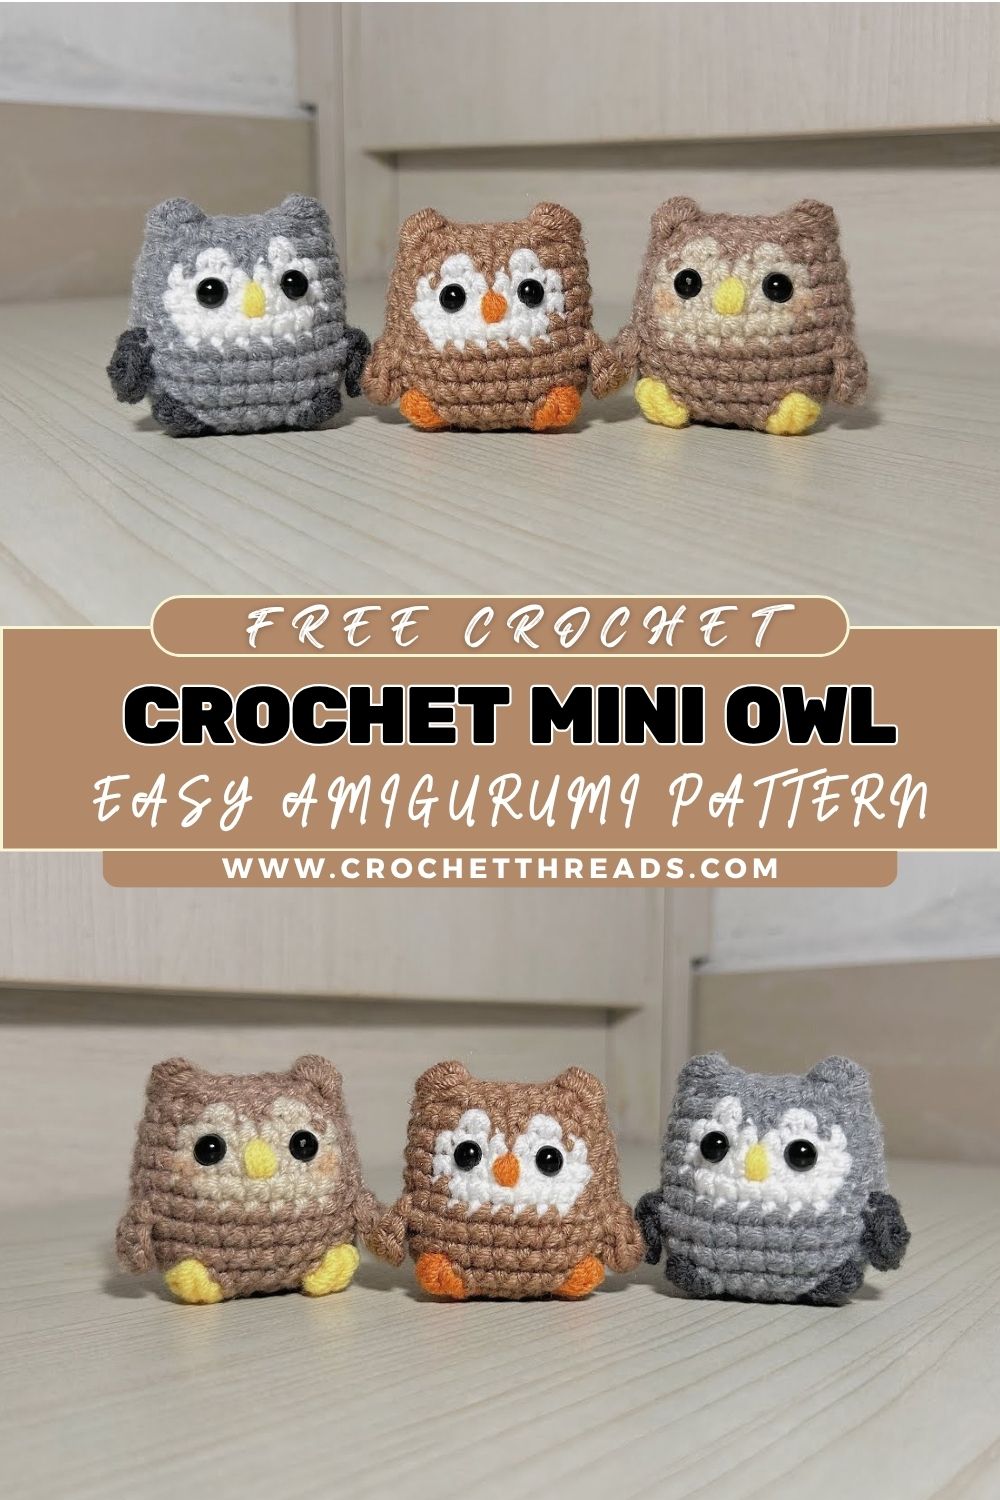
Passionate Crochet Mini Owl Easy Amigurumi Pattern for Beginners
Mini owls have a special kind of charm, with their round little bodies, big, curious eyes, and that sweet “always listening” look. This crochet mini owl amigurumi pattern is made to be tiny, tidy, and extra cute, so it’s perfect for desks, shelves, and gift baskets.
Even better, an owl is one of those projects that never gets boring. Whether it becomes an amigurumi owl keychain, a tiny pocket buddy, or the start of a whole collection, it’s a fun make for crocheters who love quick wins and adorable results.
Amigurumi is the cozy craft of crocheting small stuffed shapes—usually animals or characters—using simple stitches worked tightly in the round. Because the same few steps repeat (increase, crochet even, decrease), it’s a great style of crochet for beginners, and it’s still satisfying for experienced makers who want something cute and calming.
Why Owls Are So Popular in Amigurumi
Owls are especially popular in amigurumi because their design is naturally simple: a round body, wide eyes, and little wings. At the same time, they look full of personality, even with just a few stitched details. That quirky-cute mix is exactly why owls make such lovable handmade gifts.
Why This Mini Owl Pattern Works for Beginners
This crochet owl tutorial keeps everything beginner-friendly with clear steps, simple parts, and easy assembly. As a result, the mini owl works up quickly and ends up the perfect size for gifts, an amigurumi owl keychain, or a small addition to any amigurumi collection.
Materials Needed (Exact Measurements)
- Yarn (worsted weight / #4):
- Yellow (main body): 20–30 g
- Gray (wings or accents): 10–15 g
- White (eye whites): 5–10 g
- Black (details/optional embroidery): 2–5 g
Optional: a tiny bit of orange for the beak if preferred
- Crochet hook: 3.5 mm or 4.0 mm (choose the smaller size for tighter stitches)
- Safety eyes: 10 mm (great size for mini owls)
- Yarn needle: 1 blunt tapestry needle
- Stitch markers: 1–2 markers (or a scrap yarn loop)
- Scissors
- Polyfill stuffing: 10–15 g (small handful)
- Optional: keychain ring, lobster clasp, or a small hanging loop
Skill Level
Beginner / Easy
Making Time (Overview)
Total estimated time: 1.5 to 2.5 hours
- Body: 45–70 minutes
- Face: 20–35 minutes
- Wings: 15–25 minutes
- Assembly: 20–30 minutes
Abbreviations (quick and beginner-friendly)
- sc = single crochet
- inc = increase (2 sc in one stitch)
- dec = decrease (sc 2 stitches together; invisible decrease recommended)
- ch = chain
- sl st = slip stitch
Note: Work in continuous rounds unless stated otherwise. Move the stitch marker to the first stitch of each round.
1) Body (Main Shape)
Making time: 45–70 minutes
This mini owl body is crocheted as one rounded piece, starting at the top and working down.
- First, start with a magic ring using the main body color (yellow or gray).
- Round 1: 6 sc in MR (6)
- Next, increase to build a smooth, round head.
- Round 2: inc x6 (12)
- Round 3: (sc, inc) x6 (18)
- Round 4: (2 sc, inc) x6 (24)
- Round 5: (3 sc, inc) x6 (30)
- Meanwhile, crochet can even create the “chubby owl” shape.
- Rounds 6–10: sc around (30) for 5 rounds
- Later, begin decreasing to close the body.
- Round 11: (3 sc, dec) x6 (24)
- Round 12: (2 sc, dec) x6 (18)
- Round 13: (sc, dec) x6 (12)
- Stuff the body.
- First, add polyfill in small pinches.
- Next, press it outward to make the owl firm and round.
- Meanwhile, avoid stretching stitches—firm is good, overstuffed isn’t.
- Finally, finish closing.
- Round 14: dec x6 (6)
- Fasten off, close the hole, and weave the yarn tail inside.
Optional “ear tufts” look: After closing, pinch the top corners slightly when shaping. With tight stitches, that pinch naturally hints at owl ears.
2) Face
Making time: 20–35 minutes
A) Create the eyes (attach safety eyes)
- First, decide the face height. A classic placement is between Rounds 7–8.
- Next, position the 10 mm safety eyes about 6–7 stitches apart.
- Meanwhile, check symmetry by looking straight at the owl from the front.
- Finally, secure the backs firmly from the inside.
Optional eye whites (adds extra cuteness):
- With white yarn, crochet two small circles:
- MR 6 sc, sl st to close. Fasten off, leave a sewing tail.
- Next, sew each circle behind each safety eye like a little “eye patch.”
B) Create the beak (small triangle)
Using orange or yellow yarn:
- First, ch 3.
- Next, sc in 2nd ch from hook, then sc in next ch (2 sc).
- Then, ch 1, turn, dec (1 stitch).
- Finally, fasten off and sew the beak between and slightly below the eyes.
C) Add cheeks (optional but adorable)
Although the main yarn list focuses on yellow/gray/black/white, blush cheeks look so sweet on a mini owl.
- With pink yarn, make two tiny circles: MR 5 sc, sl st, fasten off.
- Next, sew them under the eyes, slightly outward.
No pink yarn available? Later, a few soft pink stitches (or even a tiny bit of rosy makeup on yarn) can create the same effect.
3) Wings
Making time: 15–25 minutes
Using gray yarn (or the body color for a simpler look), make 2 wings.
- First, start with a magic ring: 6 sc in MR (6)
- Next, increase slightly: (sc, inc) x3 (9)
- Meanwhile, shape the wing: sc around for 1 round (9)
- Later, flatten and finish:
- Sl st, fasten off, leave a long tail
- Pinch the circle flat to create a neat oval wing
Attach wings:
- Sew one wing to each side around Rounds 9–11, angled slightly upward for a “hugging” pose.
4) Assembly
Making time: 20–30 minutes
- First, confirm the face layout (eyes, beak, cheeks).
- Next, sew on the beak and any eye-white circles if used.
- Meanwhile, attach the wings with small, tight stitches so they don’t wobble.
- Later, check shaping by gently rolling the owl in the hands. Add a tiny bit more stuffing if needed.
- Finally, weave in all ends by threading them through the body and trimming.
Optional keychain/hanging loop
To turn it into an amigurumi owl keychain:
- Attach yarn to the top center.
- ch 12–18 (depending on ring size).
- sl st back into the same spot.
- Tug gently, knot if needed, and weave the tail inside.
- Add the keychain ring.
Special Features
- Texture: Soft, smooth, and nicely firm (especially with a smaller hook).
- Expression: Wide eyes + tiny beak give a sweet, innocent owl look.
- Shape: Round and compact—ideal for keychains, desk buddies, or tiny gifts.
Sizing Tips
- Thicker yarn + larger hook = bigger owl, but stitches may loosen and show stuffing.
- Thinner yarn + smaller hook = smaller owl with sharper details.
- For amigurumi, it helps to use a hook slightly smaller than the yarn label suggests. As a result, the fabric stays tight and neat.
Finishing Tips
- First, keep stitches tight and consistent to avoid gaps.
- Next, place eyes and beak, then pause and check symmetry before locking anything in.
- Meanwhile, secure parts with extra passes of yarn—keychains get tugged.
- Finally, hide yarn ends by weaving through several stitches so the finish looks smooth.
Common Mistakes to Avoid
- Overstuffing: stretches stitches and pushes the eyes outward.
- Understuffing: makes the owl look floppy instead of round.
- Misplaced eyes or beak: changes the whole expression and can look “off-center.”
- Loose tension: causes uneven rounds and visible holes.
- Weak sewing: wings can shift if only tacked on with a few stitches.
Variations & Customization Ideas
- Create different owl “breeds” by changing colors: snowy owl (white + gray), barn owl (cream + tan), or night owl (dark gray + white).
- Add tiny accessories: a mini scarf, a cozy hat, or a little sweater band around the belly.
- Make a larger version for décor by using thicker yarn, or make tiny ones for earrings using lightweight yarn and smaller eyes.
- Try different expressions: embroidered sleepy eyes, tiny eyebrows, or a small open beak.
Tutor Suggestions
- First, take time during assembly—face placement is what gives the owl personality.
- Next, keep tension even from the first round to the last for a smooth, rounded body.
- Meanwhile, pin wings before sewing so both sides match.
- Finally, test the look from a distance before trimming yarn tails, because small adjustments can make a big difference.
Conclusion
This crochet mini owl amigurumi pattern is a quick, cozy project that turns simple stitches into something truly charming. With a round body, sweet wings, and those classic wide eyes, the owl comes together in a few easy steps and feels so satisfying to finish. Later, it can become a gift, a tiny shelf buddy, or an amigurumi owl keychain that travels everywhere. Most importantly, every owl can look a little different, so customizing colors and expressions is half the fun.