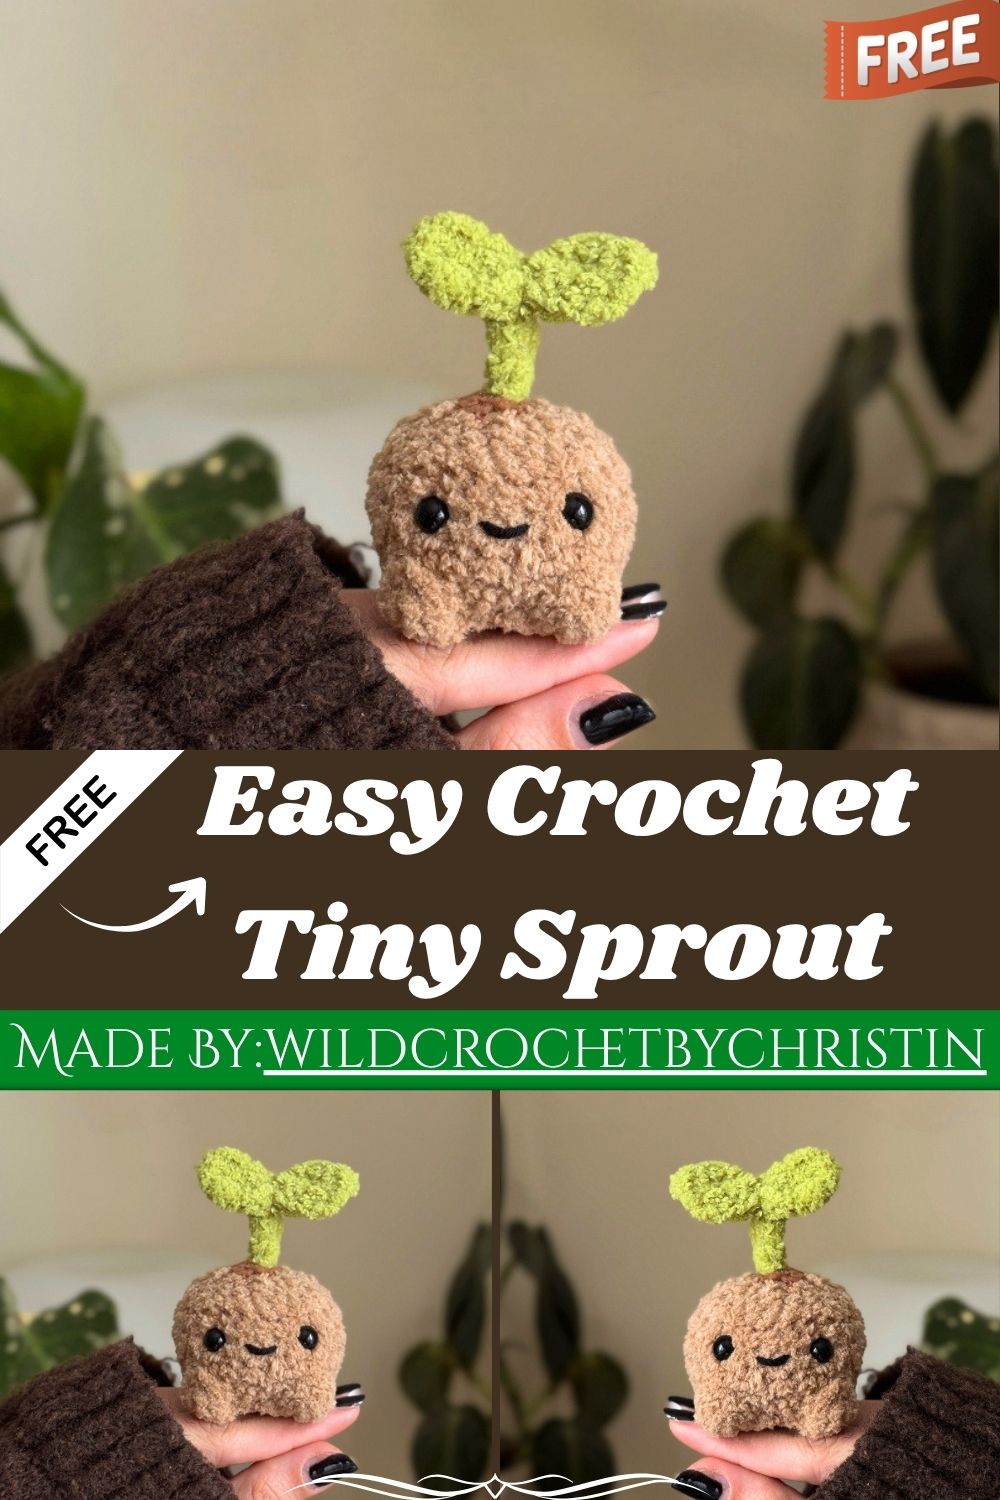
Easy Crochet Tiny Sprout Amigurumi Plush Pattern
Grow a sweet crochet sprout with this quick amigurumi pattern. Honestly, the tiny wired leaves and simple round body make it a genuinely fun, beginner-friendly little plant toy project overall.
Little crocheted sprouts make charming shelf decor or gentle gifts for plant lovers everywhere. Low-key, this pattern combines a rounded body with two leafy accents on top. Bulky yarn keeps the stitching quick, while a wired stem lets you bend and pose the leaves however you like once finished.
Skill Level
Rated beginner-friendly, this pattern suits crocheters comfortable with magic rings and basic increases. Ngl, the bobble stitch legs need a little practice, but nothing here truly overwhelms newer makers.
Pattern Overview
- The body works in continuous rounds, using bulky yarn for fast, chunky stitching.
- Color changes from dark brown to light brown happen early in round two
- Bobble stitches form two tiny leg shapes near the base of the body
- Safety eyes get placed between specific rounds for a balanced, friendly expression
- Two crocheted leaves attach to a wire stem inserted directly into the head
- An optional no-wire version lets you skip the wire for a softer, safer finish
Materials
- Bulky yarn (Alize Softy Plus used here, dark brown, light brown, and light green)
- 4.5mm crochet hook for the body
- 3.5mm crochet hook for the leaves
- 7mm safety eyes
- Stuffing
- Stitch marker
- Scissors
- Wire
- Sewing needle
Abbreviations
- MR – Magic Ring
- ST – Stitch
- CH – Chain Stitch
- SC – Single Crochet
- HDC – Half Double Crochet
- DC – Double Crochet
- SLST – Slip Stitch
- INC – Increase (2 SC in 1 stitch)
- DEC – Invisible Decrease
- BO – Bobble Stitch (6 loops on the hook)
- FO – Fasten Off
The pattern works in continuous rounds, with a stitch marker placed in the first stitch of each new round.
Special Techniques
- Bobble stitches create raised, textured leg shapes without needing a separate piece.s
- Placing safety eyes four stitches apart from the leg markers keeps the face center.ed
- Wired leaves let you bend and angle the sprout’s top for a natural look
- Joining two leaf pieces with a slip stitch creates one seamless leafy top
- An optional shortened stem method skips the wire for a simpler, softer finish
Full Pattern Instructions
Body
Start with dark brown yarn and a 4.5mm hook.
Round 1: 8 SC in MR (8) Change to light brown yarn. Round 2: 8 INC (16) Round 3: (1 SC, 1 INC) x 8. (24) Rounds 4-7: SC around (24) for 4 rounds. Round 8: 9 SC, BO, 4 SC, BO, 9 SC (24)
Begin stuffing and continue stuffing as you go. Attach the safety eyes between rounds 5 and 6, spacing them four stitches apart, using the bobble legs as a guide to find the center front.
Round 9: (1 SC, 1 DEC) x 8 (16) Round 10: 8 DEC (8)
Fasten off, close the hole, and hide the tail. Embroider a small mouth below the eyes using black cotton thread if you’d like added facial detail.
Leaves
Start with light green yarn and a 3.5mm hook.
Chain 5. Starting from the second chain from the hook, work 2 SC, 1 HDC, 1 SLST, then chain 1. Turn and work along the opposite side of the chain: 1 SLST, 1 HDC, 2 SC. Fasten off the first leaf and weave in the ends.
Make a second leaf the same way, but don’t fasten off. Join the two leaves together with a slip stitch through the last stitch of the second leaf and the first stitch of the first leaf.
With the loop still on your hook, thread a piece of wire through it and fold the wire in half. Crochet 5 SC along the folded wire. Fasten off, leaving a tail for sewing.
For a version without wire, fasten off after joining the leaves and leave a long tail for sewing directly into the magic ring. For a shorter stem instead, chain 3 after joining the leaves, work 2 SC starting from the second chain, then slip stitch into the leaves before sewing the stem into the magic ring.
Customization and Variation
- Use a deeper green for the leaves to give the sprout a more mature look
- Swap safety eyes for embroidered ones if the toy is meant for a young baby
- Skip the wire entirely for a softer, huggable version safe for smaller children
- Add a tiny crocheted pot or planter base for the sprout to sit inside
- Try variegated yarn on the body for a naturally speckled, earthy texture
Assembly
Push the single crochet stitches on the leaf wire tightly together with your finger if they feel loose. Sew the finished leaf piece onto the sprout by inserting the wire directly into the center of the magic ring at the top of the head. Twist the leaves into whichever shape looks best, then push the wire in until it disappears from view. Sew the stem firmly onto the magic ring to finish.
Common Mistakes
- Skipping the stitch marker makes it easy to lose track of round starts
- Placing the safety eyes too close to the bobble legs throws off the face
- Rushing the bobble stitch often leaves loops uneven or too loose
- Forgetting to fold the wire in half weakens the leaf’s ability to hold shape
- Under-stuffing the body causes the rounded shape to look flat once finished
Finishing Tips
- Bend the wired leaves gently, a little at a time, to avoid snapping the wir.e
- Steam-block the body lightly before assembly to even out any tight stitches
- Weave in every tail twice, especially around the leaf and stem area
- Test the eye placement with pins before committing to a permanent attachment
- Keep spare wire on hand in case the first piece bends out of shape
Gifting Ideas
- Pair the sprout with a small crocheted flower pot for a matching desk set
- Wrap it with a handwritten “grow” themed card for an encouraging gift
- Bundle several sprouts together as a mini crocheted garden gift set
- Add it to a plant-lover’s care package alongside a real succulent
- Attach a gift tag with the sprout’s name for a personalized housewarming gift
Frequently Asked Questions
Can I make this pattern without the wire? Yes, the pattern includes an optional no-wire version that sews the leaves directly onto the head.
What yarn weight works best for this project? Bulky yarn paired with a 4.5mm hook keeps the body quick to stitch and nicely rounded.
How do I keep the leaves standing upright? Inserting the wire fully into the magic ring and bending gently gives the sturdiest, most lasting shape.
Is this pattern suitable for absolute beginners? Yes, though practicing the bobble stitch separately first makes the leg shaping much easier to manage.
Conclusion
Real talk, this tiny sprout amigurumi comes together fast thanks to its chunky yarn and simple shaping. The wired leaves add a playful, poseable touch that makes each sprout feel unique. No joke, this little plant-inspired plush makes a genuinely sweet handmade gift for any home.