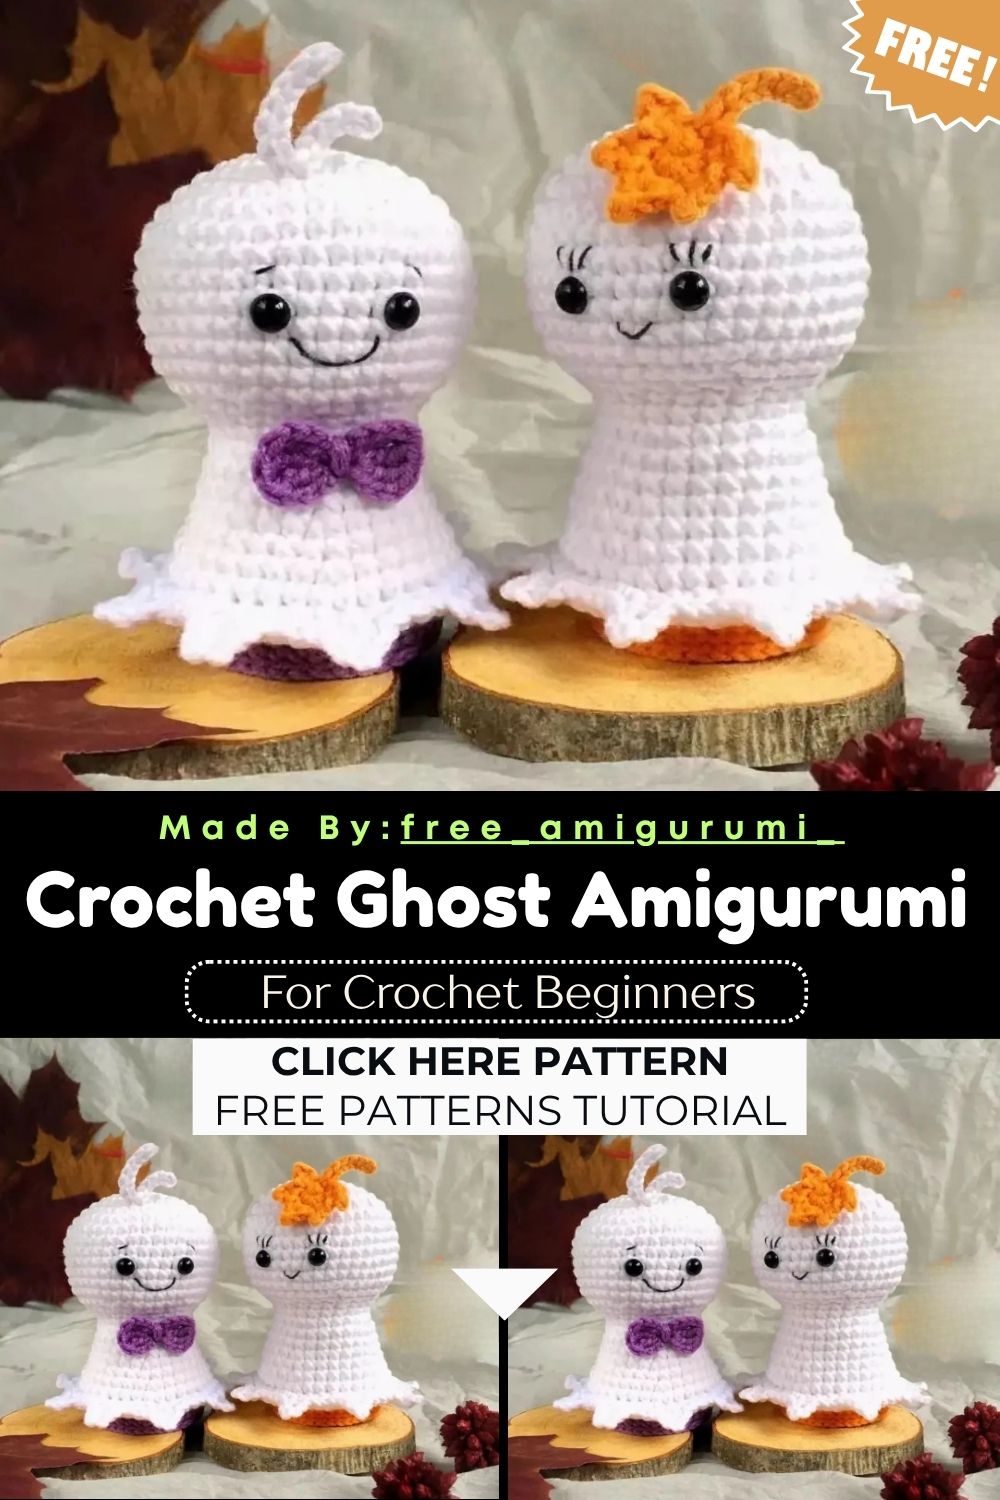
Free Crochet Ghost Amigurumi Pattern | Cute Halloween Plush
Some Halloween crochet projects win your heart the moment you see them, and this tiny ghost amigurumi is exactly that. With its soft, huggable shape, flowing hem, and charming maple leaf accent, it instantly captures the feel of fall. Made with white yarn and one beautiful accent color, this project comes together quickly, making it a perfect pick for Halloween decor, gifting, or adding to your seasonal collection.
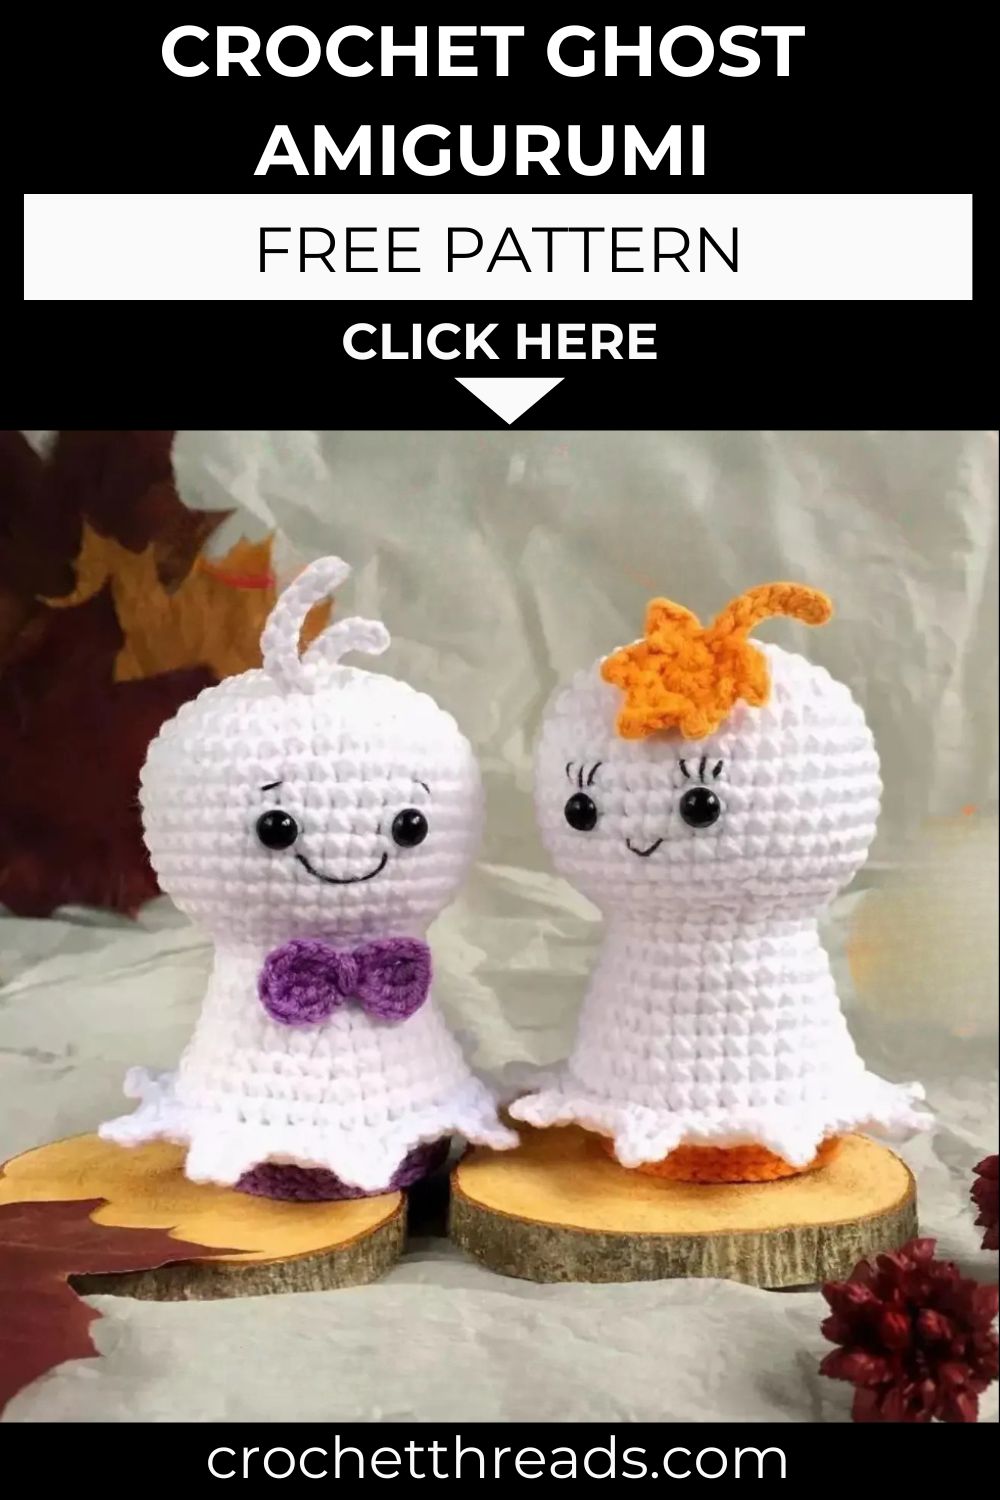
This little ghost amigurumi is built from one continuous head-and-body piece, finished with a wavy hemline and a tiny maple leaf accent for autumn flair. Low-key, the shaping happens through simple increases and decreases, so there’s no separate sewing for the main shape. You’ll add a short white hair tuft and a leaf detail once the body’s complete. Ngl, this pattern works as a seasonal decoration, gift, or shelf-friendly make.
Skill Level
EASY LEVEL: This pattern suits confident beginners comfortable with magic rings, basic increases, and decreases. For real, finished size runs small, roughly 8 to 9 centimeters tall once stuffed.
Materials
- Yarn of your choice (Alize Cotton Gold, 330m/100g, works great) in white and one accent color
- 2mm crochet hook, or another size comfortable for your tension
- Safety eyes, 6mm
- Toy stuffing
- Scissors
- Stitch marker
- Sewing needle and dollmaking needle
- Optional: a small rattle insert
Abbreviations
- mr: magic ring
- ch: chain
- sc: single crochet
- hdc: half double crochet
- tr: treble crochet
- inc: single crochet increase
- dec: single crochet decrease
- BLO: working in back loops only
- FLO: working in front loops only
- st: stitch
- sl st: slip stitch
- (….)*x: repeat the sequence x times
- (….): total stitch count at the end of the round
Tip: For small children’s safety, embroider the eyes instead of using safety eyes. Always switch yarn color on the last step of the last stitch of the previous color, and stuff the toy gradually as you crochet rather than all at once.
Pattern Overview
- Head and Body: one continuous piece worked from the top down, shaped entirely through increases and decreases with no separate sewing
- Safety eye placement: inserted between rounds 11 and 12, spaced 5 stitches apart
- Wavy line detail: a decorative scalloped edge crocheted directly onto round 25 using the front loops left open earlier
- Bottom line detail: a clean slip-stitch border worked into round 28’s front loops
- Hair: a small tufted white accent made from two looped chain sections
- Maple Leaf: a separate accent piece worked in a color of your choice, shaped using a mix of hdc, sl st, and chain stitches
Special Techniques
- BLO and FLO shaping: working in back loops only on certain rounds leaves the front loops free, which is what allows the wavy line and bottom border to be added afterward as separate layers
- Gradual stuffing: since this pattern has no final closing seam to stuff through, filling the toy as you go keeps the shape even from top to bottom
- Picot-style chain loops: the wavy line and maple leaf both use a ch 2, sc-in-second-chain technique to create small decorative points along the edge
- Magic ring center pieces: the hair and maple leaf both start in a magic ring that gets pulled closed after the shaping rounds, leaving a neat, gap-free center
- Color changes mid-round: always finishing the last stitch of a color change in the new yarn keeps the transition clean and avoids visible color jumps
Common Mistakes
- Forgetting to stuff gradually and trying to fill the body only at the very end
- Placing safety eyes before reaching rounds 11 and 12, throwing off the face proportions
- Working the wavy line and bottom border into the wrong loop, since both rely on the FLO left open earlier
- Overstuffing the flat bottom of the body, which stops the toy from sitting upright
- Pulling the maple leaf’s chain points too tight, flattening its shape
Assembly
- Complete the head and body first, stuffing gradually as each round is worked
- Insert safety eyes between rounds 11 and 12, spaced 5 stitches apart
- Turn the finished body upside down and crochet the wavy line into round 25’s front loops
- Crochet the bottom line into round 28’s front loops using your chosen accent color
- Sew the hair tuft to the top of the head where the magic ring was pulled closed
- Attach the maple leaf accent piece to the body in your preferred spot
Important Remarks
- Yarn weight and hook size can be adjusted, but changing them will affect the final finished size
- For toys intended for small children, embroider the eyes instead of using safety eyes as a safer alternative
- Add a rattle insert before closing the body fully, if you’d like an interactive element
- Keep the bottom of the body lightly stuffed and flat, so the finished ghost can stand upright
- This pattern is intended for personal crafting use
Conclusion
This little ghost amigurumi turns a handful of simple techniques into a genuinely charming autumn make. Honestly, the wavy hemline and maple leaf accent are what give it that extra seasonal personality, while the continuous head-and-body construction keeps the actual crocheting quick and beginner-friendly. There’s no complicated sewing involved, just thoughtful shaping and a couple of decorative touches added at the end.
Once the hair and leaf are attached, you’ll have a sweet little decoration ready for a shelf, a gift box, or a Halloween display. For real, this is the kind of pattern that’s easy to make in multiples, so don’t be surprised if one ghost turns into a whole little haunted collection by the time you’re done.