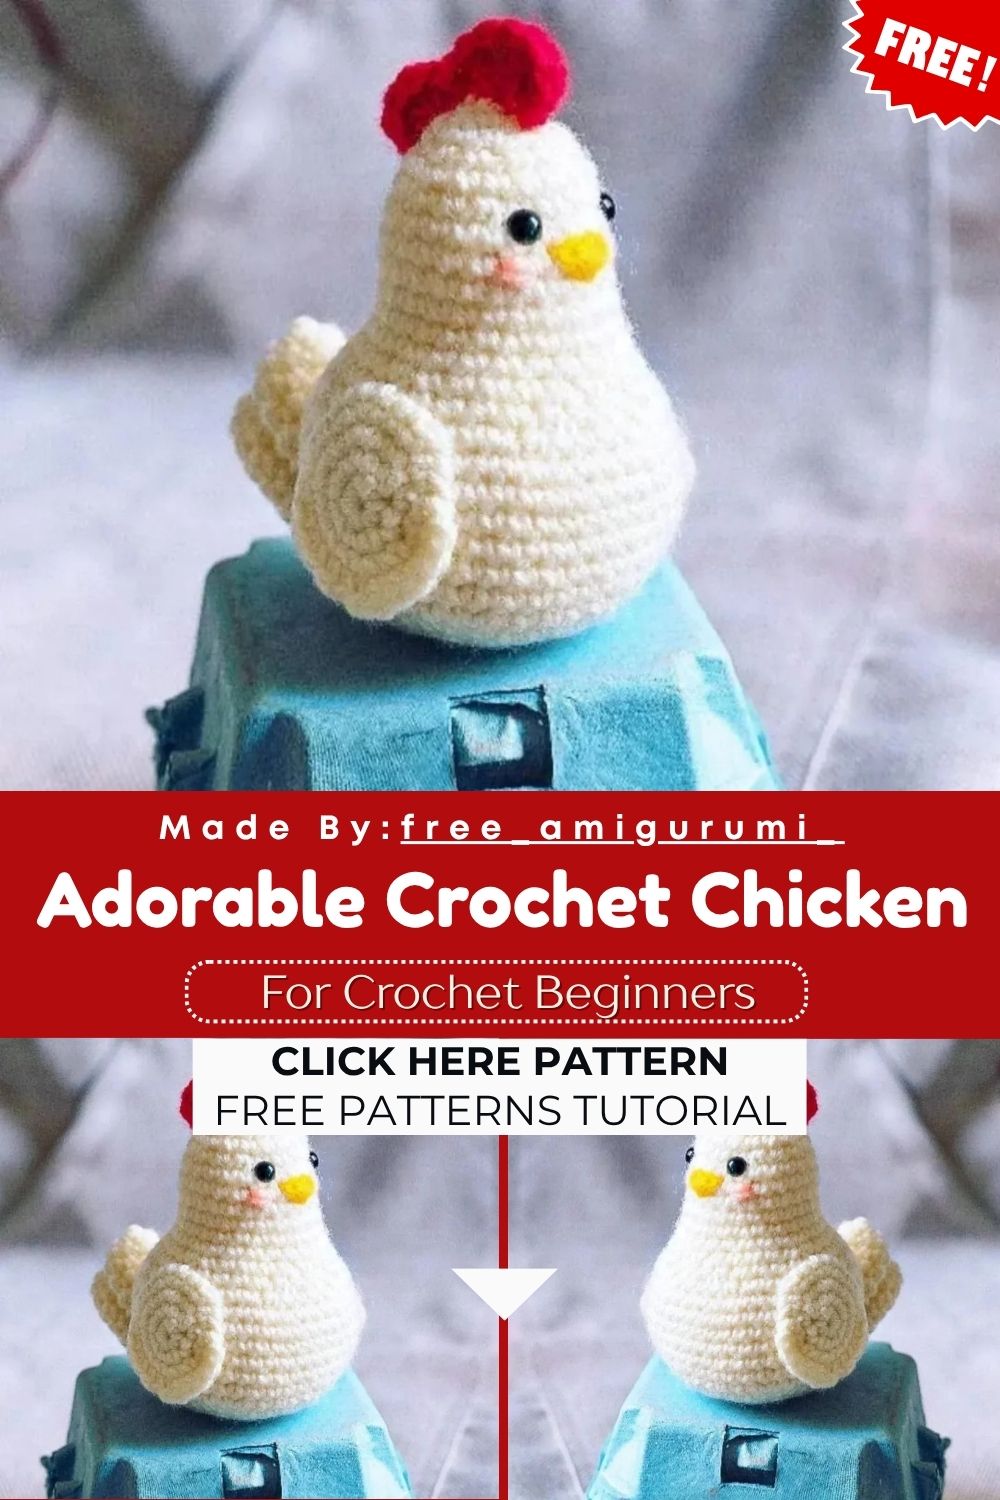
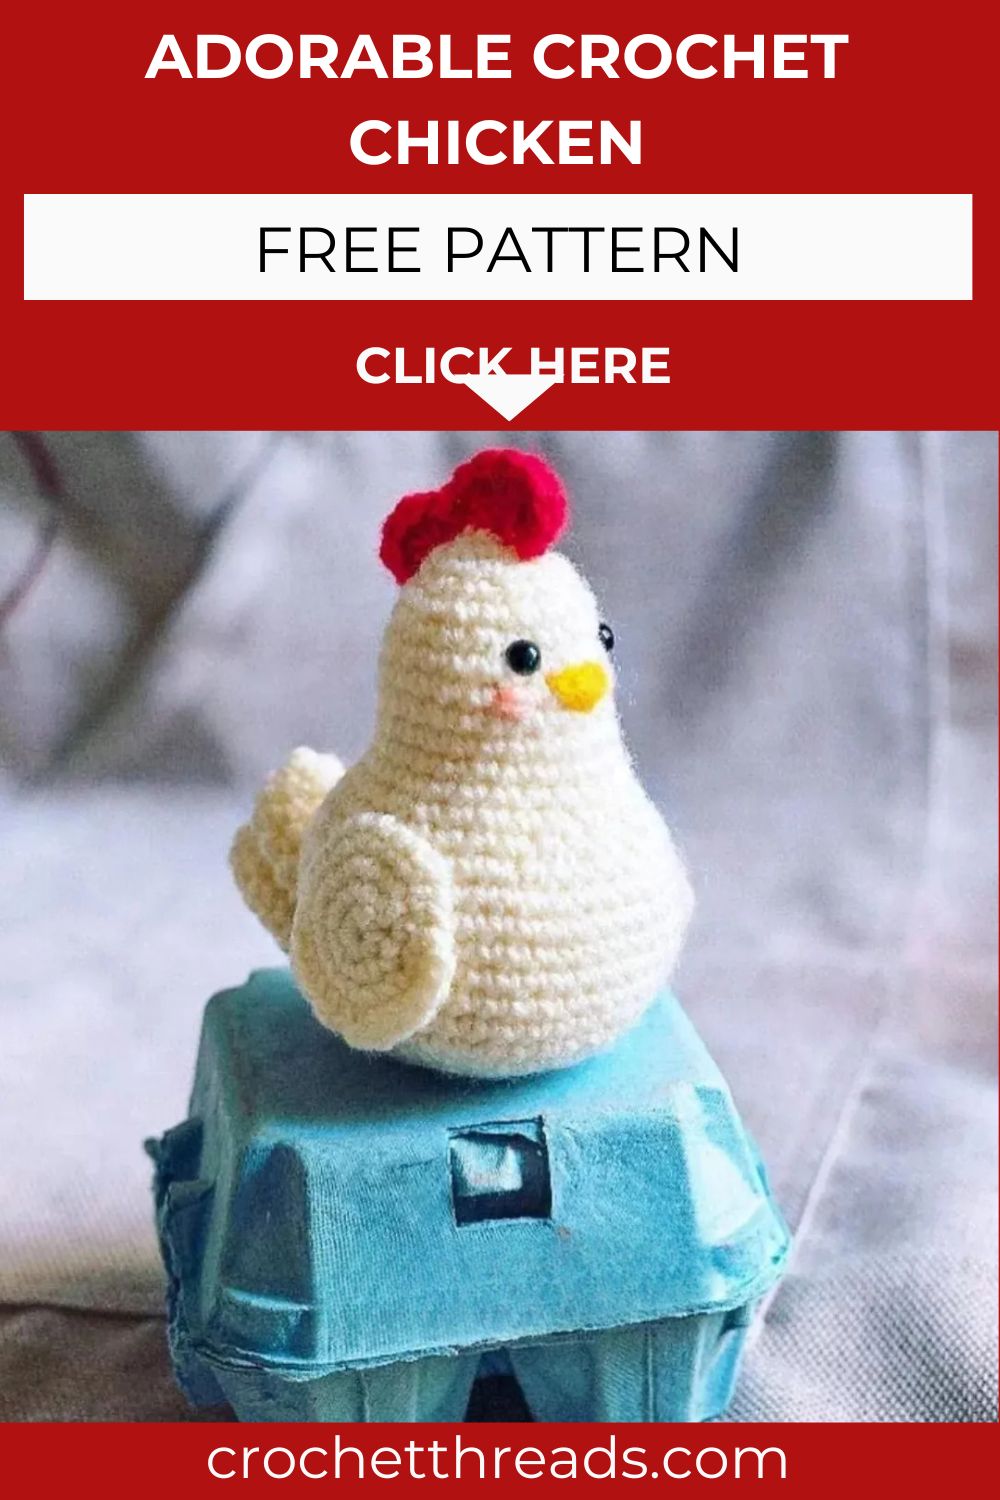
Adorable Crochet Chicken Amigurumi Pattern DIY Cute Farm Animal
This little hen amigurumi packs serious charm into one tiny pear-shaped body. Trust me, Cocca comes together fast using basic stitches plus a few playful details. Grab white, red, yellow, and pink yarn, then bring this cheerful chicken to life.
Cocca is a beginner-friendly amigurumi hen built from a simple pear-shaped body with a handful of quirky add-ons that give her real character. Honestly, the design stays approachable while still delivering a finished piece full of personality and charm. You’ll work the body first, then create wing pieces, a cockscomb, and small beak details before sewing everything together. Low-key, this project makes a great weekend make, gift, or collection piece.
Skill Level
ADVANCED BEGINNERS: You should feel comfortable with magic rings, increases, decreases, and basic stitch counting. No joke, prior amigurumi experience helps, but confident beginners can absolutely finish Cocca successfully.
Materials
- White yarn
- Red yarn
- Yellow yarn
- Some leftover pink yarn
- Crochet hook size 3mm
- Fiberfill for stuffing
- Two 6mm black safety eyes
- Tapestry needle
Abbreviations
- st: stitch
- sc: single crochet
- inc: increase
- dec: decrease
- hdc: half double crochet
- dc: double crochet
- tr: treble crochet
- sist: slip stitch
- ch: chain
- MR: magic ring
- R: round
Pattern Overview
- Body: a single pear-shaped piece worked in continuous rounds, shaped through a series of increases and decreases
- Big Piece and Small Piece: two wing pieces worked separately in white yarn, unstuffed
- Cockscomb: worked in red yarn using a mix of chain, treble, and double crochet stitches to form its jagged shape
- Wattle piece: a small extra round worked and sewn near the head for added detail
- Safety eyes: inserted between specific rounds so the face reads correctly once assembled
Special Techniques
- Magic Ring (MR): creates a tight, gap-free starting point for the body and every smaller piece, which keeps the base neat before you start shaping
- Continuous rounds: this pattern works without joining or turning, so use a stitch marker on round one to keep track of where each round begins
- Front loop closure: weaving the yarn tail through the front loop of each remaining stitch and pulling tight gives Cocca’s body a smooth, seamless top closure instead of a bulky knot
- Combined stitch base: the cockscomb uses treble and double crochet stitches worked into a single chain foundation, which is what creates its uneven, comb-like edge
- Partial sewing: the wing pieces are only half-attached to the body, a small trick that lets them sit naturally away from the form rather than lying flat
Full Pattern Instructions
BODY (white yarn)
R1: start 7 sc in a MR [7] R2: inc in all 7 st [14] R3: (sc, inc) repeat 7 times [21] R4: (2 sc, inc) repeat 7 times [28] R5: (3 sc, inc) repeat 7 times [35] R6: sc around [35] R7: (4 sc, inc) repeat 7 times [42] R8-13: sc around [42] R14: (4 sc, dec) repeat 7 times [35] R15: (3 sc, dec) repeat 7 times [28] R16: (5 sc, dec) repeat 4 times [24] R17-22: sc around [24]
Insert safety eyes between rounds 22 and 23, leaving a gap of 4 stitches.
R23: (2 sc, dec) repeat 6 times [18] R24: sc around [18] R25: (sc, dec) repeat 6 times [12] R26: sc around [12] R27: dec 6 times [6]
Stuff the body with fiberfill. Fasten off, leaving a long tail. Using a yarn needle, weave the tail through the front loop of each remaining stitch and pull tight to close.
BIG PIECE (white yarn)
R1: start 6 sc in a MR [6] R2: inc in all 6 st [12] R3-5: sc around [12] R6: (2 sc, dec) repeat 3 times [9] R7-8: sc around [9] R9: (sc, dec) repeat 3 times [6] R10-11: sc around [6]
Sist to finish off, leaving a long tail. Don’t stuff.
SMALL PIECE (white yarn)
R1: start 6 sc in a MR [6] R2: inc in all 6 st [12] R3-4: sc around [12] R5: (2 sc, dec) repeat 3 times [9] R6: sc around [9] R7: (sc, dec) repeat 3 times [6] R8: sc around [6]
Sist to finish off, leaving a long tail. Don’t stuff.
Sew the tail to the body, placing the small piece between round 8 and 9, and the big piece between round 5 and 6.
COCKSCOMB (red yarn)
R1: ch 11. R2: make 5 tr in the 4th chain from the hook. Skip 2 st, sis in the next st, skip 1 st, 5 dc in the next st, skip 1 st, sis in the last st.
Fasten off, leaving a long tail for sewing. Place the cockscomb starting from the back of Cocca’s head, at round 23.
WING (repeat twice, white yarn)
R1: start 6 sc in a MR [6] R2: inc in all 6 st [12] R3: (sc, inc) repeat 6 times [18] R4: (2 sc, inc) repeat 6 times [24]
Sist to finish off, leaving a long tail. Sew only half of each wing to the body.
Enjoy this pattern!
Common Mistakes
- Skipping the stitch marker on round one and losing track of where each round starts
- Placing the safety eyes too early, before reaching the correct round gap
- Over-stuffing the body, which distorts Cocca’s signature pear shape
- Sewing both wing pieces completely flat against the body instead of leaving the loose half free
- Rushing the cockscomb’s chain base, which leads to uneven tr and dc spacing
Assembly
- Stuff the body firmly, then close the top using the front-loop weave method
- Position the small wing piece between rounds 8 and 9 on the body
- Position the big wing piece between rounds 5 and 6, just below the small piece
- Attach the cockscomb starting at the back of the head, around round 23
- Sew only half of each wing to the body so they sit slightly away from the form
- Insert safety eyes between rounds 22 and 23, leaving a 4-stitch gap between them
Important Remarks
- This pattern is intended for personal use only and cannot be sold or redistributed in any form.
- Finished dolls made from this pattern can be sold, but please credit The Crochettisti as the original designer.
- Use a 3mm hook with worsted weight yarn for accurate sizing.
- Keep the fiberfill light around the neck area to preserve the pear-shaped silhouette.
- Secure the safety eyes firmly before closing the final rounds of the body.
Conclusion
Cocca proves that a handful of simple stitches can turn into a genuinely charming amigurumi with real personality. Real talk, the pear-shaped body keeps this project quick to work through, while the cockscomb and wings add just enough detail to make her stand out on a shelf or in a gift box. Whether you’re new to amigurumi or just adding to your farm animal collection, this little hen delivers a satisfying finish without a steep learning curve.
Once you’ve closed up that final round, take a moment to admire how those small details- the cockscomb, the wattle, the partially sewn wings- come together into one cohesive character. For real, that’s the kind of payoff that makes amigurumi so addictive to keep making. Save this pattern, share your finished Cocca, and get ready to whip up a whole flock for your next crochet project.