Adorable Crochet Gingerbread Amigurumi Pattern Free Holiday Toy
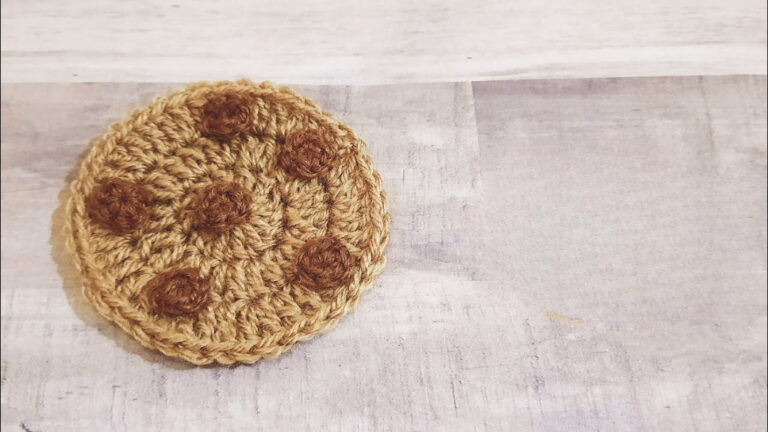
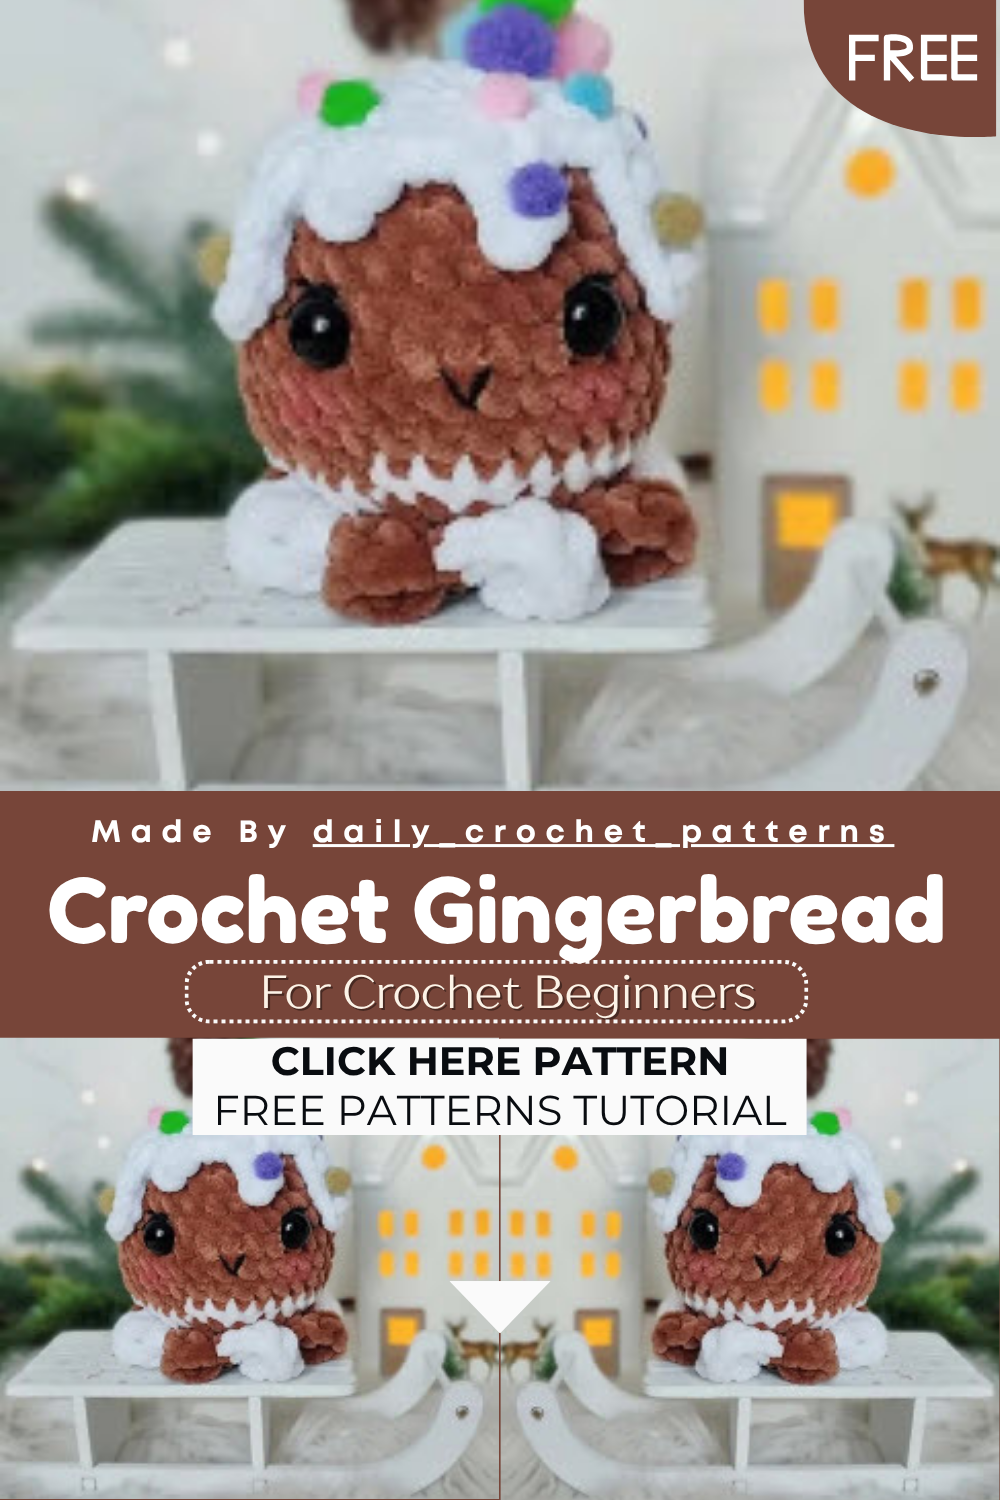
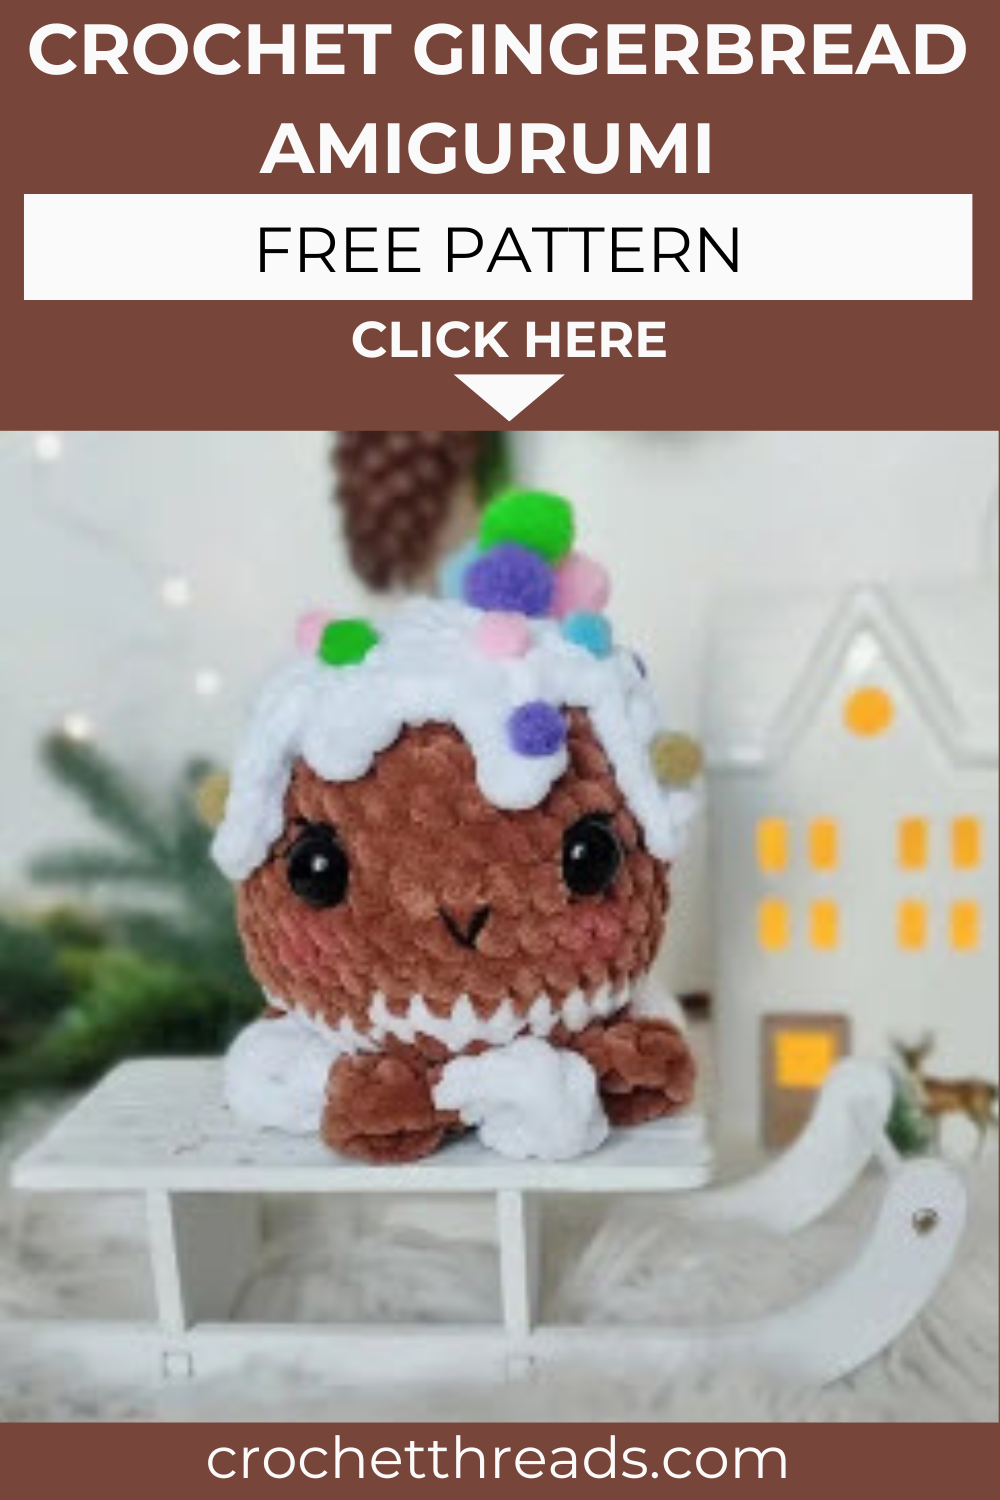
Holiday cheer arrives in the cutest form with this chubby Crochet Gingerbread Amigurumi cookie you keep forever. This crochet version never crumbles, never gets stale, and looks downright huggable. Brown and white yarn become the sweetest festive friend in one cozy evening.
Crochet gingerbread amigurumi might be the comfiest holiday make on your list this year. You stitch the round cookie body first, then top it with a fun dripping icing layer. That icing edge looks fancy, yet it relies on simple stitches you already know. Safety eyes and a tiny embroidered smile bring the whole face to life. Honestly, this guy works beautifully as an ornament, a gift, or shelf decor.
Skill Level
This Crochet Gingerbread Amigurumi makes suits adventurous beginners who are comfortable with the magic ring and basic shaping. The dripping icing round uses taller stitches like half double, double, and treble crochet.
Abbreviations (US Terms)
Keep this key close while you crochet. Every round leans on these short forms.
- MR – Magic Ring
- ch – Chain
- sc – Single Crochet
- inc – Increase (2 sc in the same stitch)
- dec – Decrease (single crochet 2 stitches together)
- sl st – Slip Stitch
- hdc – Half Double Crochet
- dc – Double Crochet
- tr – Treble Crochet
- FLO – Front Loop Only
- BLO – Back Loop Only
- FO – Fasten Off
- st – Stitch
- rep – Repeat
- BOB – Bobble Stitch
Work everything on the right side throughout.
What You Will Need
Good news, the supply list stays wonderfully short here. You probably own most of it already.
- Yarn: brown and white
- Hook: match to your yarn weight
- Safety eyes
- Small pom-pom (optional)
- Black yarn (for embroidery)
Pick a warm gingerbread brown for that classic cookie look. The white yarn becomes your icing, so a bright shade really pops against the brown.
How This Cookie Comes Together
Real talk, knowing the plan first makes the whole pattern click faster. Here is the quick rundown before you dive in.
- You crochet two separate pieces, the body and the icing topping.
- The body starts as a round shape, then switches colors to create a frosted look.
- A clever last body round forms a scalloped brown and white edge using tall stitches.
- The topping piece sits on top and finishes with a dramatic dripping icing border.
- Safety eyes go in early, and you embroider the smile afterward.
- You stuff the body partway through, then close it neatly with a long tail.
You know what makes this so satisfying? Two small pieces feel quick, yet the finished cookie looks impressively detailed.
Stitches That Make It Special
This Crochet Gingerbread Amigurumi pattern hides a few neat tricks behind that bakery-fresh finish. Get these down and everything flows.
- Color changing mid piece: You swap between brown and white to mimic icing dripping over a cookie. Carry or cut yarn cleanly to avoid bumps.
- FLO and BLO rounds: Working into front or back loops only shapes the edges and keeps the silhouette crisp.
- The decorative drip edge: Combining sc, hdc, dc, and chains builds those gooey icing droplets all around the topping.
- Tall stitch scallops: Round 15 stacks treble and double stitches to fan out a pretty cookie rim.
- Embroidered details: A few stitches of black yarn create the classic gingerbread smile and buttons.
No joke, that drip edge looks tricky but it is just the same little sequence repeated around.
Gingerbread Pattern Instructions
Alright, time to stitch. Follow the body first, then move on to the topping.
Body
R1. 8 sc in MR (8)
R2. 8 inc (16)
R3. (1 sc, inc) x8 (24)
R4. (2 sc, inc) x8 (32)
R5-11 (7 rows). 32 sc
If you use blanket yarn, skip one round here. It keeps the shape nice and balanced.
Change to white yarn
R12. 32 sc
Add safety eyes between rounds 7 and 8, about 6 stitches apart.
Change back to brown yarn
R13. (2 sc, dec) x8 (24)
R14. (1 sc, dec) x8 (16)
R15. (FLO) [with brown yarn: (1 sc, 1 hdc, 1 dc, 1 tr) in first st; (1 tr, 1 dc, 1 hdc, 1 sc) in next st] then [with white yarn: (1 sc, 1 hdc, 1 dc, 1 tr) in first st; (1 tr, 1 dc, 1 hdc, 1 sc) in next st] x4
R16. (BLO, brown yarn) 16 sc → Start stuffing now.
R17. 8 dec (8) FO. Leave a long tail to close the hole.
Topping
R1. 8 sc in MR (8)
R2. 8 inc (16)
R3. (1 sc, inc) x8 (24)
R4. 24 sc
R5. Creating the dripping icing edge (work all around the round):
1 sc, ch 5, sc in 2nd ch from hook and in the next 3 ch (4 sc total), sl st in same st, 2 sc, ch 2, sc in 2nd ch from hook, sl st in same st, 3 sc, ch 5, 1 sc in 2nd ch, 2 hdc, 1 dc, sl st in same st, 2 sc, ch 2, sc in 2nd ch from hook, sl st in same st, 3 sc, ch 5, 1 sc in 2nd ch, 2 hdc, 1 dc, sl st in same st, 4 sc, ch 3, sc in 2nd ch and next ch, sl st in same st, 2 sc, ch 2, sc in 2nd ch, sl st in same st, 4 sc, ch 5, sc in 2nd ch from hook and in the next 3 ch (4 sc total), sl st in same st, 3 sc.
FO and hide the tail.
Slip Ups To Watch For
Here is the thing, a few small mistakes can throw off your cookie. Dodge these and you stay smooth.
- Forgetting the color change: Miss the switch to white and you lose that signature icing band. Mark the round if needed.
- Loose stuffing: Underfilling leaves a flat, sad cookie. Pack it firmly before closing for a plump shape.
- Wrong loop work: Skipping the FLO or BLO instructions changes the edge entirely. Read those rounds twice.
- Uneven drip edge: Rushing the icing sequence makes lopsided droplets. Count your chains carefully each repeat.
- Eyes too high or low: Placing eyes off the noted rounds shifts the whole face. Stick to rounds 7 and 8.
Take it slow on the icing round, and the rest honestly feels like a breeze.
Putting It All Together
The fun part arrives now. With both pieces done, you simply join and decorate.
- Close the body: Thread the long tail, weave through the last stitches, and pull tight to seal the hole.
- Attach the topping: Center the icing piece on top of the body. Then sew it down evenly all around.
- Add the smile: Embroider a curved mouth with black yarn for that cheerful gingerbread grin.
- Optional pom-pom: Stitch a small pom-pom on top as a cute frosting cherry.
- Tidy the tails: Tuck every loose end inside so the surface stays smooth and clean.
That is really it. Two pieces, a little sewing, and your cookie looks bakery ready.
A Few Handy Notes
Before you finish, tuck these reminders away. They help your gingerbread shine.
- Match your hook to your yarn for tight stitches with no stuffing showing.
- Skip a body round when using thick blanket yarn to keep the shape even.
- Keep tension consistent across the drip edge so droplets stay uniform.
- Swap icing colors for pink or pastel for a fun custom bakery vibe.
- Remember the right side faces out on every round.
- Small parts mean this toy needs supervision around very young kids.
Low-key, matching your hook size correctly fixes most amigurumi gaps before they happen.
Wrapping Up
And there you go, one squishable Crochet Gingerbread Amigurumi cookie ready for the holidays. This pattern blends easy shaping with one show-off icing edge that always impresses. You finish two quick pieces, then watch them transform into a charming festive friend. Beginners pick up taller stitches here without feeling overwhelmed, which builds great confidence. Hang yours on the tree, set it on a shelf, or gift it to someone sweet. Better yet, stitch a whole batch and build your own little crochet bakery. Happy crocheting, and enjoy your cozy new holiday cookie.