Make This Crochet Airy Floral Sweater Pattern
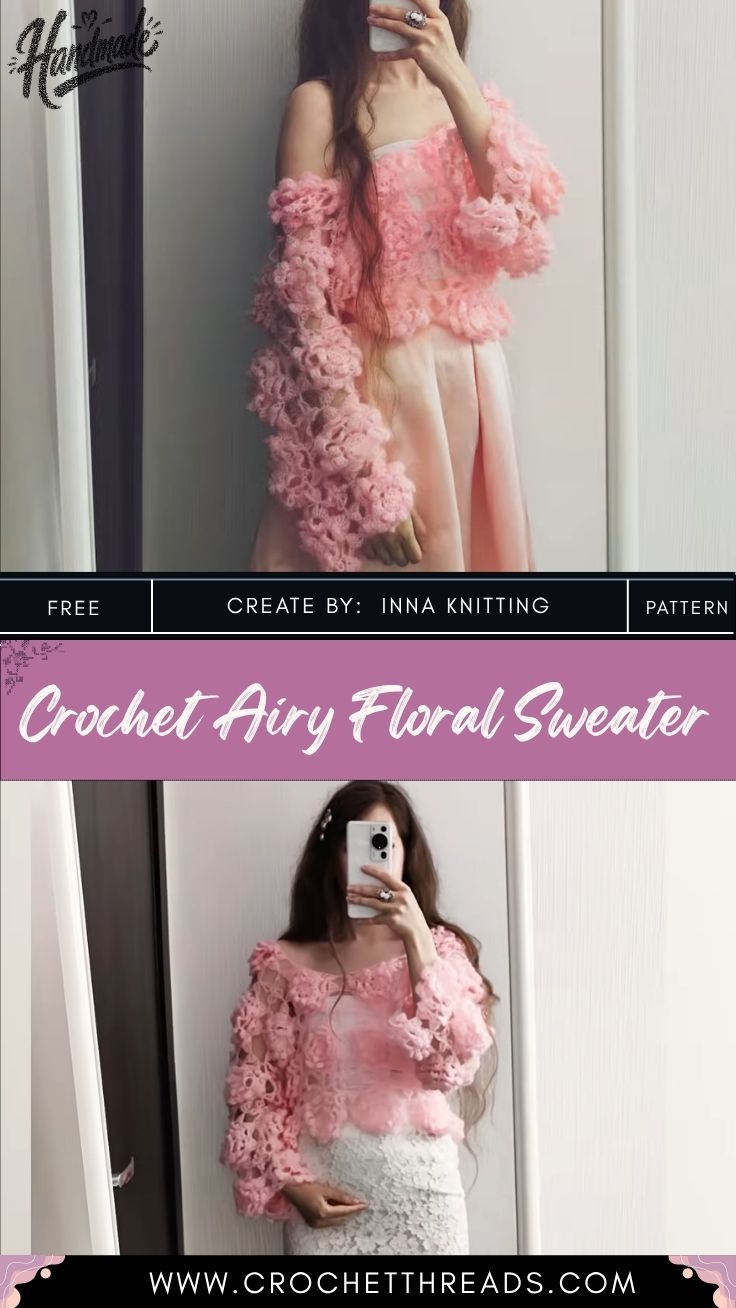
Make This Crochet Airy Floral Sweater Pattern if delicate layered blooms and breathable stitch work sound appealing. This design pairs light drape with dimensional rose appliques. The result feels romantic, textured, and completely handmade from the first stitch to the last petal.
This crochet airy floral sweater pattern stands out because it merges a soft, open-stitch garment base with raised rose motifs sewn directly onto the fabric. Unlike a flat floral crochet top, the layered petals add real texture and movement. Meanwhile, the rose embellishment technique used here can be repeated endlessly, making this a project that keeps giving long after the sweater is finished.
What Is This Pattern?
The crochet airy floral sweater combines two elements: an open, lacy sweater body and small crocheted roses worked separately, then attached. The main body uses a lightweight stitch pattern for breathability, while the roses are built in spiraling rounds that create natural, layered petals. Consequently, the finished piece looks far more complex than the actual stitch count suggests.
Do You Need to Make It?
- Worsted or DK weight yarn in a soft pink or neutral shade
- A crochet hook sized to match the yarn label (typically 4mm–5mm)
- Stitch markers for tracking rounds
- A yarn needle for weaving in ends and attaching motifs
- Small fabric scissors
What Will You Learn From This Pattern?
- Building a rose motif from a center ring outward in spiraling rounds
- Layering petal rounds to create dimensional, raised texture
- Attaching a finished appliqué neatly onto an open-stitch garment
What Skills Does It Require?
Basic chain, single crochet, and slip stitch knowledge is enough to start. However, the petal rounds require some comfort with working into previous stitches without twisting the round. Therefore, this pattern suits someone who has finished at least one small project before.
How Long Does It Take?
Each rose motif typically takes 20–30 minutes once the rhythm is established. The full sweater, including all embellishments, usually takes a few evenings spread across a week. Naturally, timing depends on hook comfort and how many roses the design calls for.
What’s the Process Like?
Step 1: Set up the hook and yarn tension.
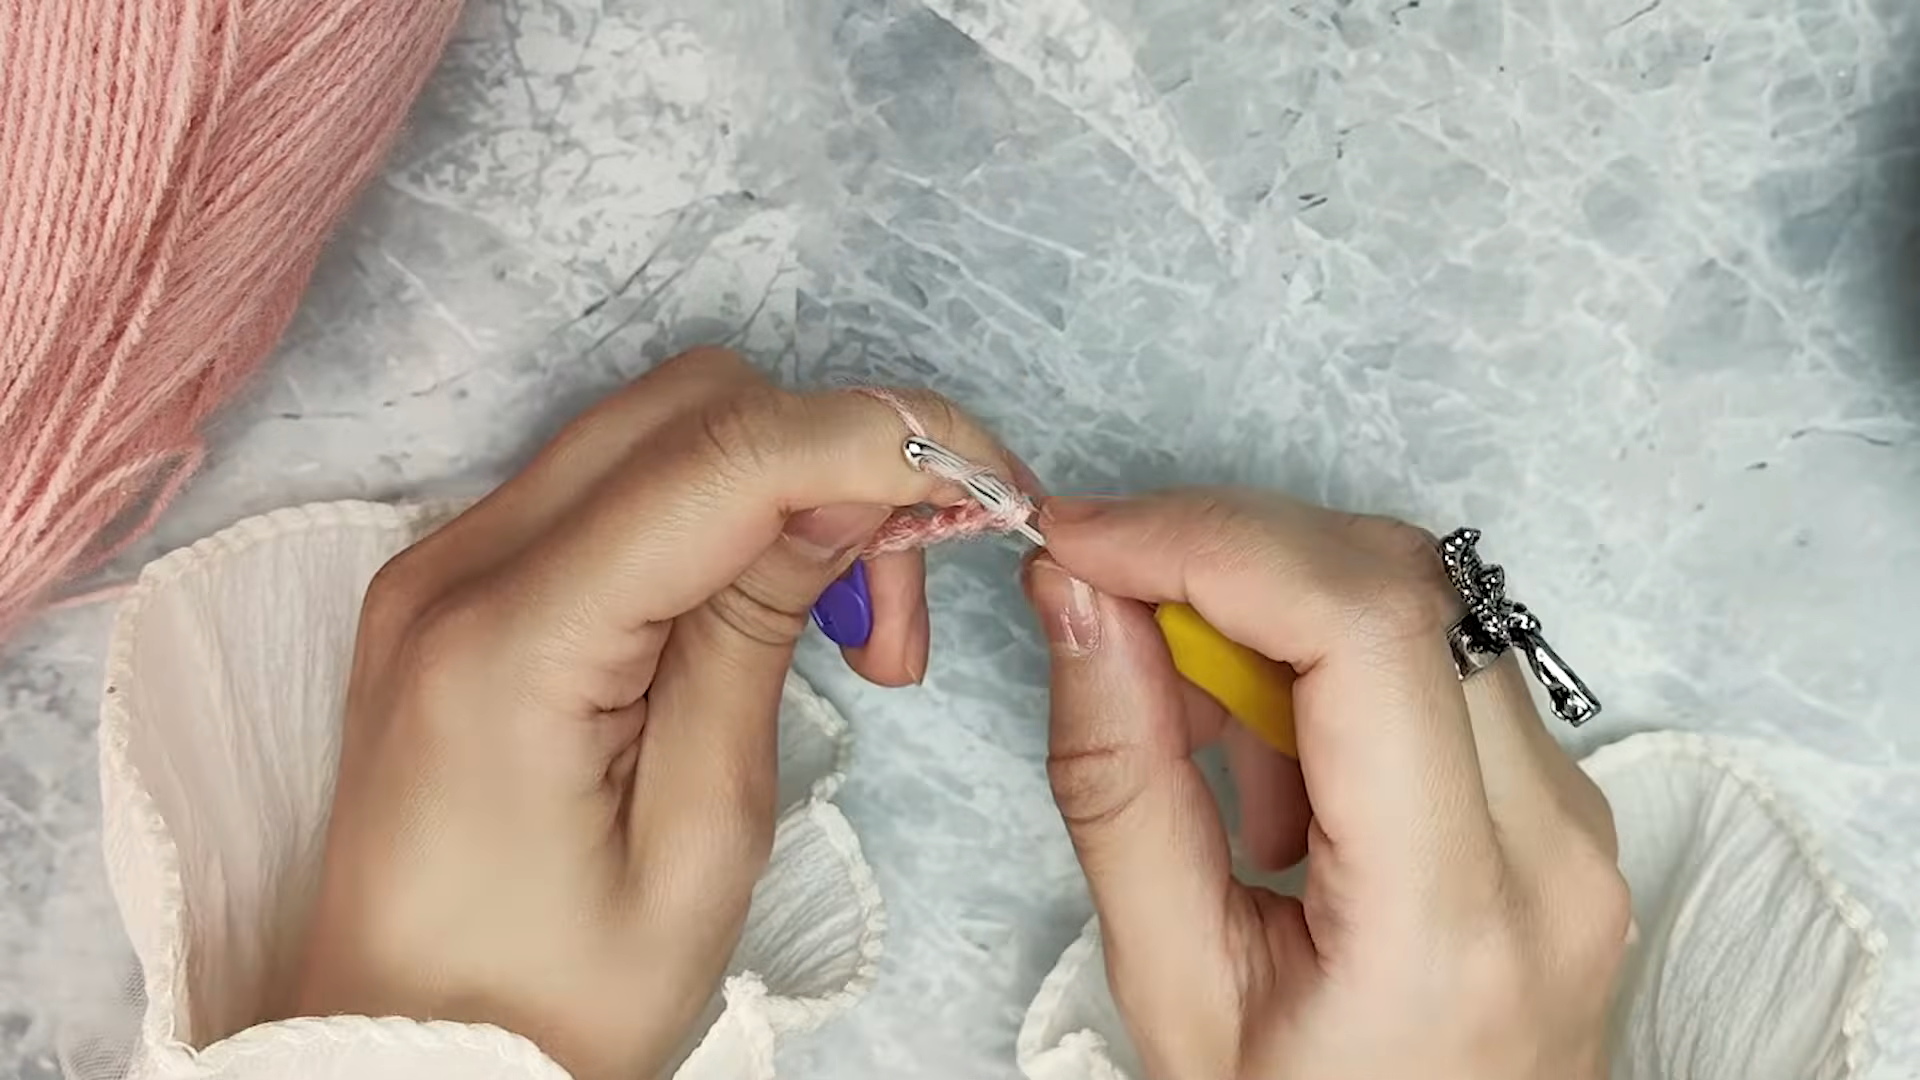
Begin by looping the working yarn once around the index finger to control tension, then let it rest across the palm so it feeds smoothly as stitches are worked. Hold the crochet hook in the opposite hand, gripping it lightly between the thumb and first two fingers rather than in a tight fist, since a relaxed grip makes it easier to control stitch size from the very first pull. Pinch the base of the starting loop between the thumb and middle finger of the yarn-holding hand, keeping it steady so the hook can slide through cleanly without the loop slipping loose.
- Yarn wrapped once around index finger for tension
- Hook held with a relaxed three-finger grip
- Starting loop pinched firmly to prevent slipping
Step 2: Draw up the first worked loop.
With the hook positioned inside the starting loop, catch the working yarn and pull it through in one smooth motion to form the first small loop on the hook. At this stage, the yarn tail and working yarn should both be held firmly between the fingers so the loop does not loosen while tension is adjusted. Keep the loop snug but not tight, since a loop pulled too tight here makes the following rounds harder to work into. This small loop becomes the anchor point that every following stitch and round will build from.
- Hook drawn through starting loop in one motion
- Yarn tail and working yarn held together for stability
- Loop kept snug, not overly tight
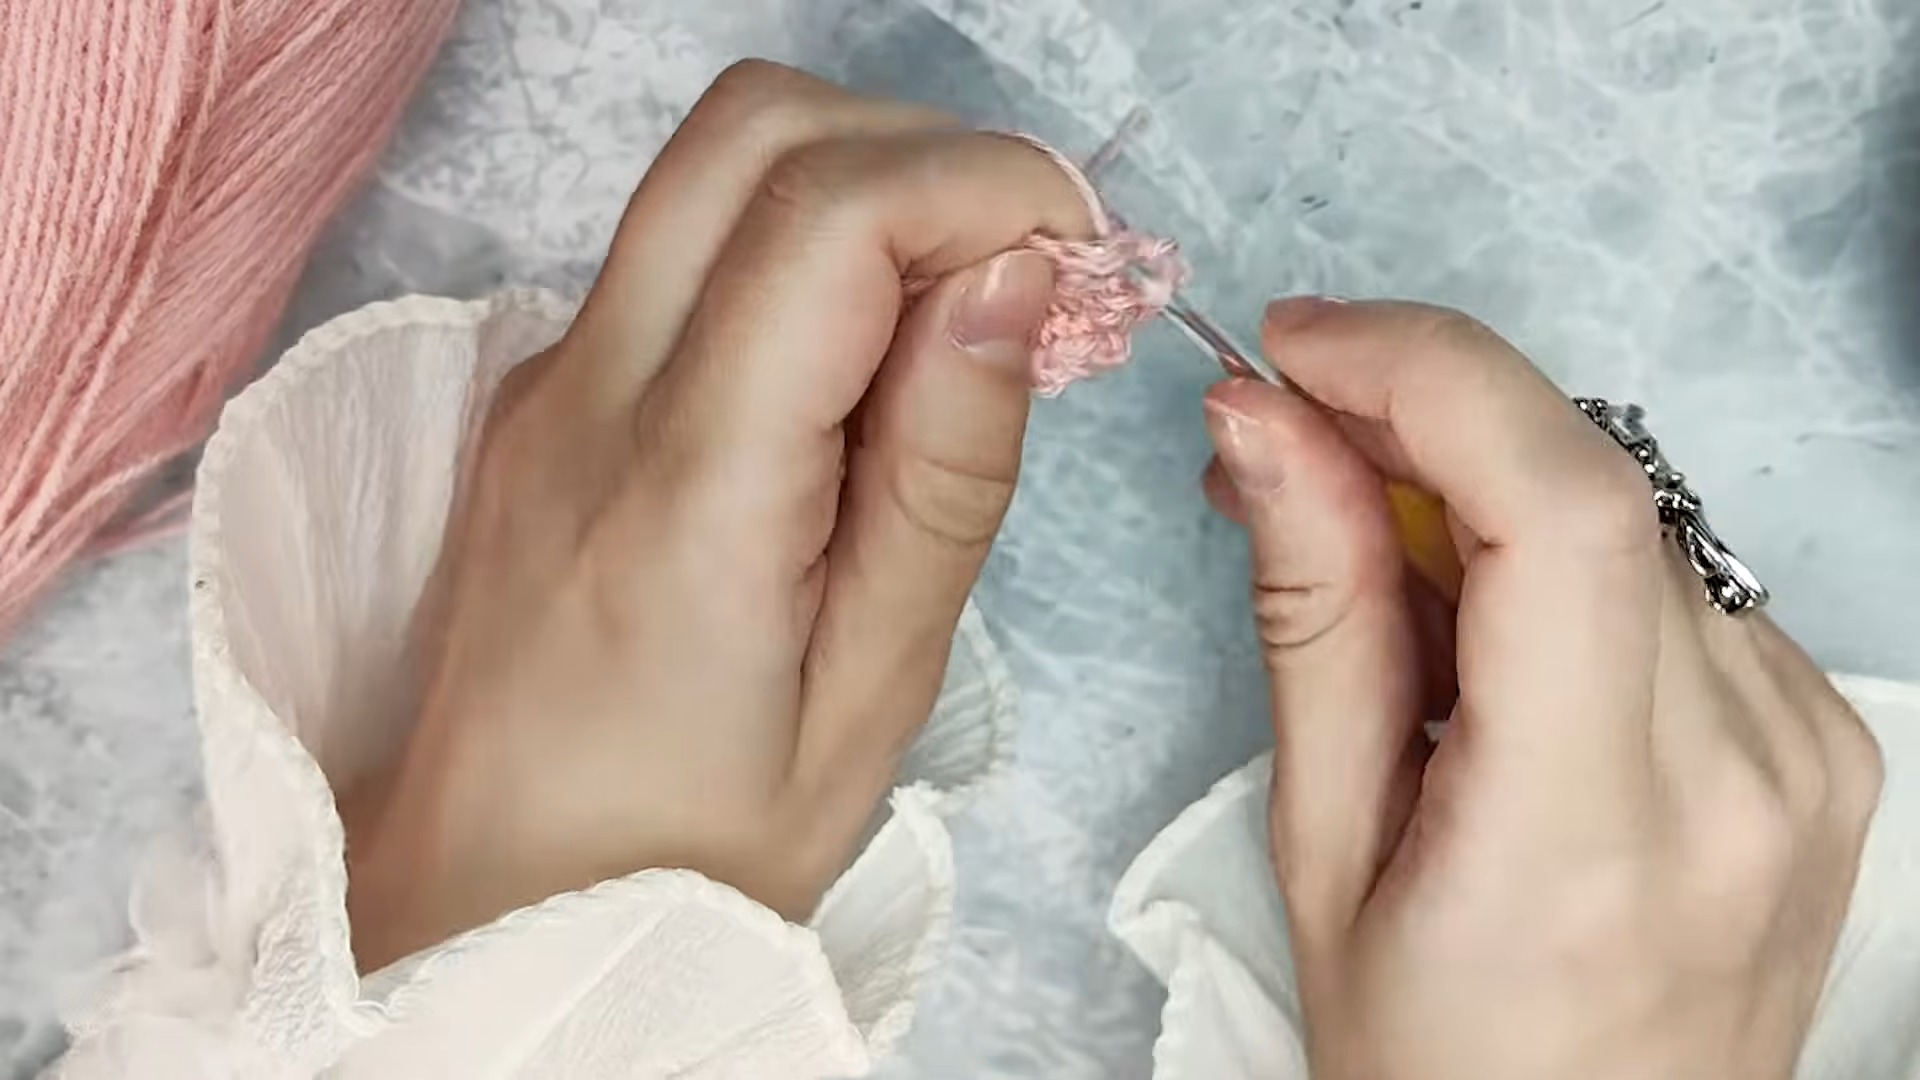
Step 3: Work the stitches into the center to form the base circle.
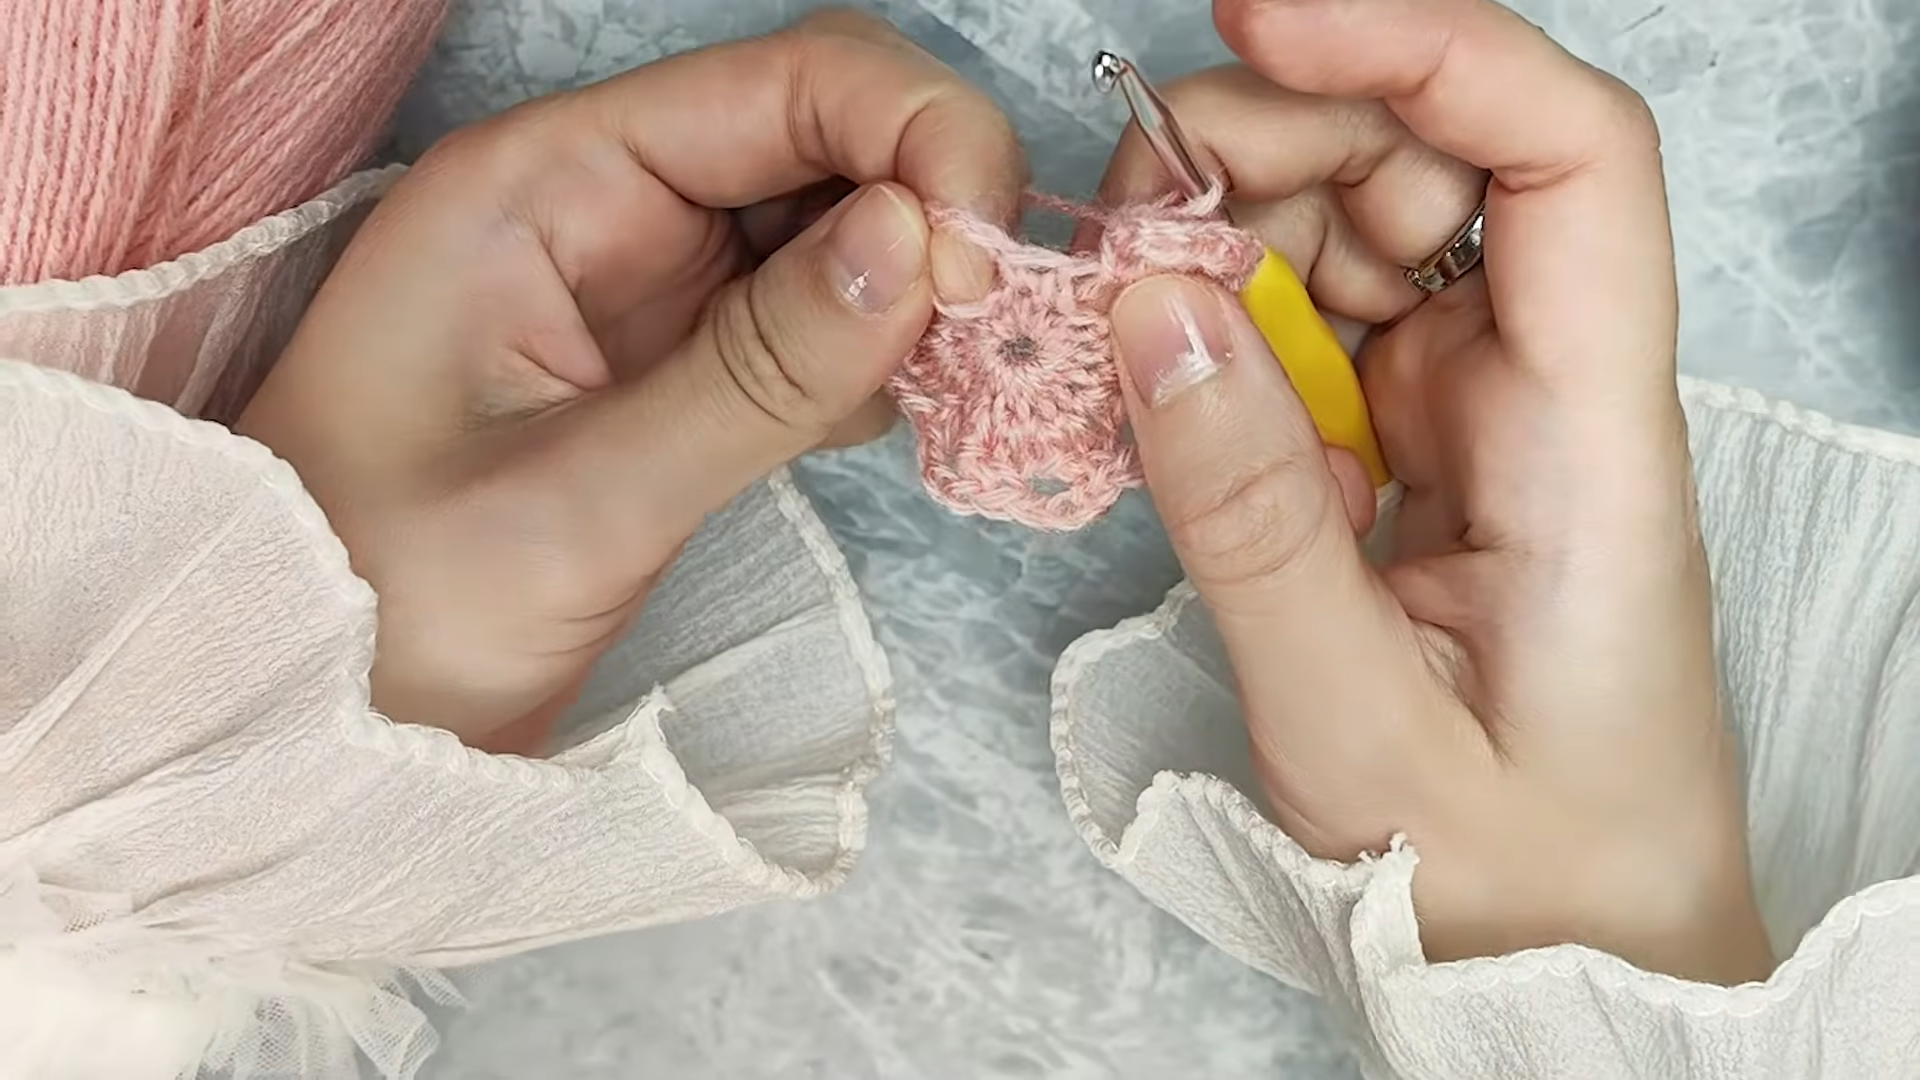
Step 4: Begin the next round to start forming petals.
Insert the hook into one of the stitches along the outer edge of that base circle, positioning it carefully so the new round builds outward rather than on top of the existing stitches. Draw the yarn through and begin working taller stitches into this round, which naturally makes the fabric flare slightly away from the flat center disc. As more stitches are added along this round, the beginning shape of a petal starts to appear, curving gently outward from the base. The working hand continues to rotate the piece slightly with each stitch, giving consistent access to the next stitch in the round.
- Hook inserted into outer edge stitches of the base circle
- Taller stitches used to create outward flare
- Piece rotated slightly between stitches for even access
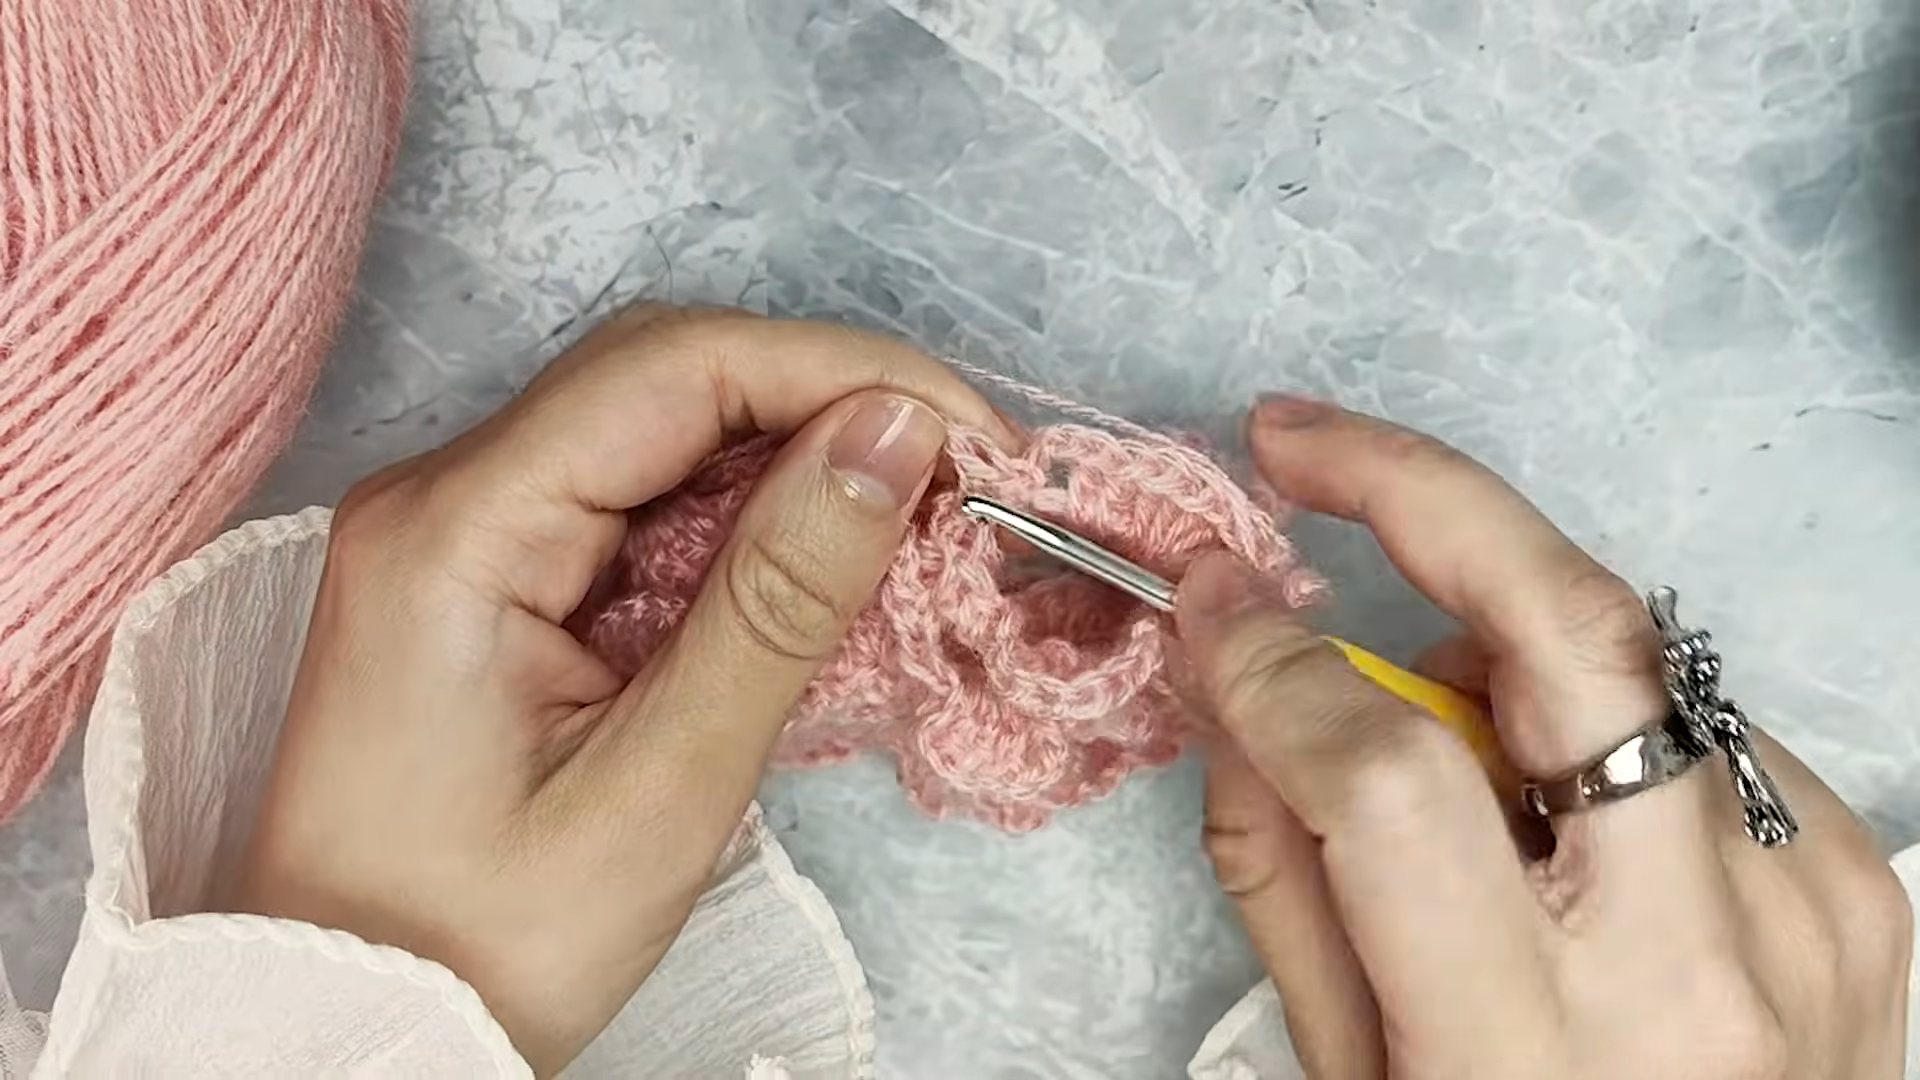
Step 5: Layer additional petal rounds and finish the rose.
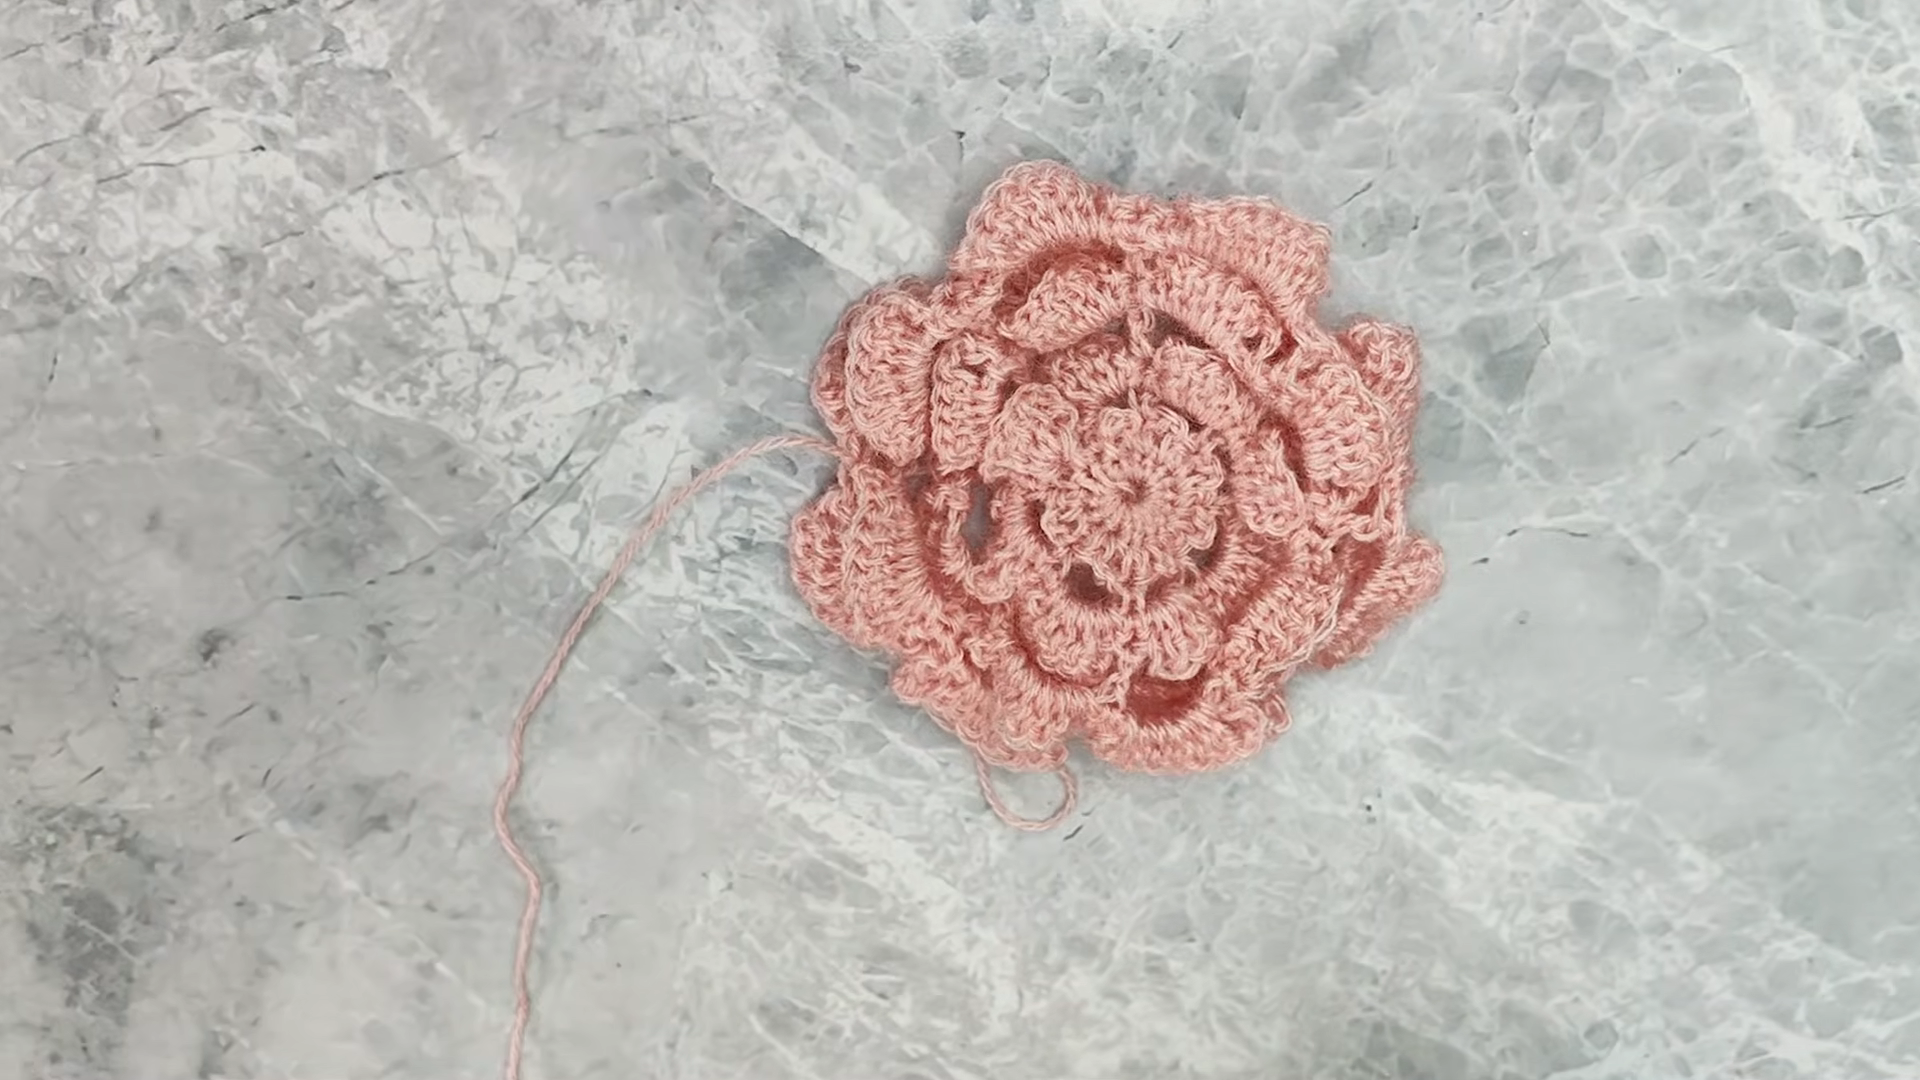
Continue working new rounds of stitches into the base of the previous round, choosing taller stitches each time so every new layer flares out further than the one before it. This layering is what gives the piece its raised, dimensional petal structure rather than a flat, single-layer flower. Keep working rounds outward until the piece reaches a full, rounded shape with multiple visible layers of petals stacked one over another. Once the last round is complete, leave a length of yarn tail hanging free rather than cutting it short, since that tail will later be used to sew the finished rose onto the sweater body.
- Each new round is worked taller than the previous one
- Layers built outward until the rose reaches full size
- Yarn tail left long for sewing the motif onto the sweater
What Usually Goes Wrong?
Beginners often wonder why their petals curl unevenly or lie flat instead of standing up. Usually, this happens when tension is too tight during the petal rounds. Additionally, skipping stitch markers can cause rounds to drift out of place.
How Can Mistakes Be Avoided?
- Keep tension slightly loose during petal rounds so stitches can flare naturally
- Use a stitch marker at the start of every round
- Count stitches before closing each round to avoid drifting
- Pin the finished rose in place before sewing to check positioning
What Else Can You Make With This Pattern?
The rose motif technique extends well beyond a sweater. Use these blooms as embellishments on hats or bags for a matching accessory set. They also work beautifully as standalone brooches, pinned onto a coat or scarf. Additionally, smaller versions of the same motif make charming coasters or ornament toppers, so the same skill set stretches across several other projects without needing a new pattern.
What Can This Piece Be Used For?
Beyond the sweater itself, individual rose motifs can dress up plain garments, tote bags, or headbands. They also make lovely gift toppers when attached to a wrapped box. Because the motif is compact, it adapts to almost any accessory that could use a soft, textured accent.
Is It a Good Project for Beginners?
Yes, with some patience. The sweater body itself relies on repetitive, beginner-friendly stitches. The rose motifs are the only slightly trickier section, though they become intuitive after the first attempt. Overall, this pattern rewards beginners willing to slow down during the petal rounds.
What Makes It Worth Trying?
The crochet airy floral sweater offers a rare mix of simplicity and visual payoff. Meanwhile, the technique introduces dimensional crochet without requiring advanced skills. Few beginner-friendly patterns manage to look this intentional while staying approachable.
Why Are People Making This Right Now?
Textured, nature-inspired crochet has surged in popularity across handmade communities recently. This pattern fits that trend perfectly by combining wearable comfort with decorative detail.
- Floral motifs continue trending across crochet and fashion spaces
- Lightweight, breathable sweaters suit transitional weather
- Dimensional textures photograph well for sharing finished projects
FAQ
Can this pattern be made in a different yarn weight?
Yes, though petal size and drape will shift slightly. Lighter yarns create a more delicate, airy finish overall.
How many rose motifs does the sweater typically need?
Most versions use three to five roses, though placement is flexible based on personal preference.
Can the roses be removed and reused later?
If sewn on rather than glued, roses can be carefully unpicked and reattached to another project.
Is blocking necessary for the finished sweater?
Light blocking helps the open stitches lie flat and gives the petals a cleaner, more defined shape.
Conclusion
The crochet airy floral sweater pattern proves that a few extra rounds can transform a simple garment into something special. Once the rose technique clicks, it becomes a skill worth reusing across countless future projects. Ultimately, this pattern rewards patience with a genuinely eye-catching result.