Crochet Bitty Butterfly Plush with Soft Pink Wings
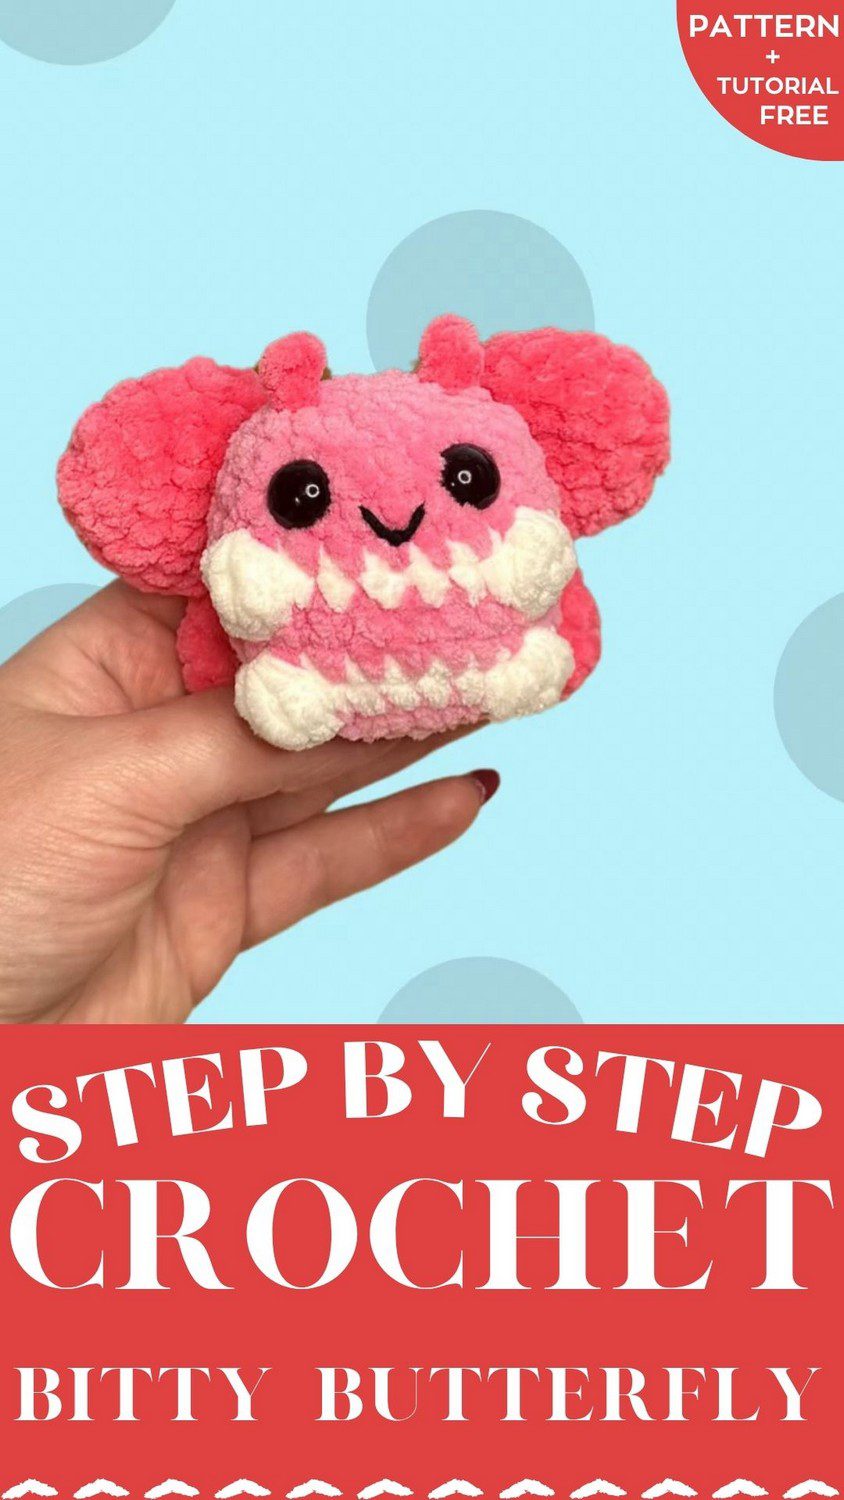
This bitty butterfly crochet pattern is a free tutorial for a squishy pink and white plush that works up fast. Beginners will love how simple this bitty butterfly crochet pattern is with chunky velvet yarn and no tricky shaping. Make it as a Christmas crochet gift idea or tuck it into a stocking as a stocking stuffer crochet project. It also makes a sweet amigurumi butterfly for kids and plush lovers.
Only basic stitches are needed for the crochet bitty butterfly plush: single crochet, increases, decreases, and a bobble. Because every part is worked in the round, there is very little sewing, and the wings are joined while you crochet them. Below, you will find the materials, sizing notes, every round, and quick fixes for problems that tend to appear along the way.
Crochet Bitty Butterfly Plush Pattern Overview
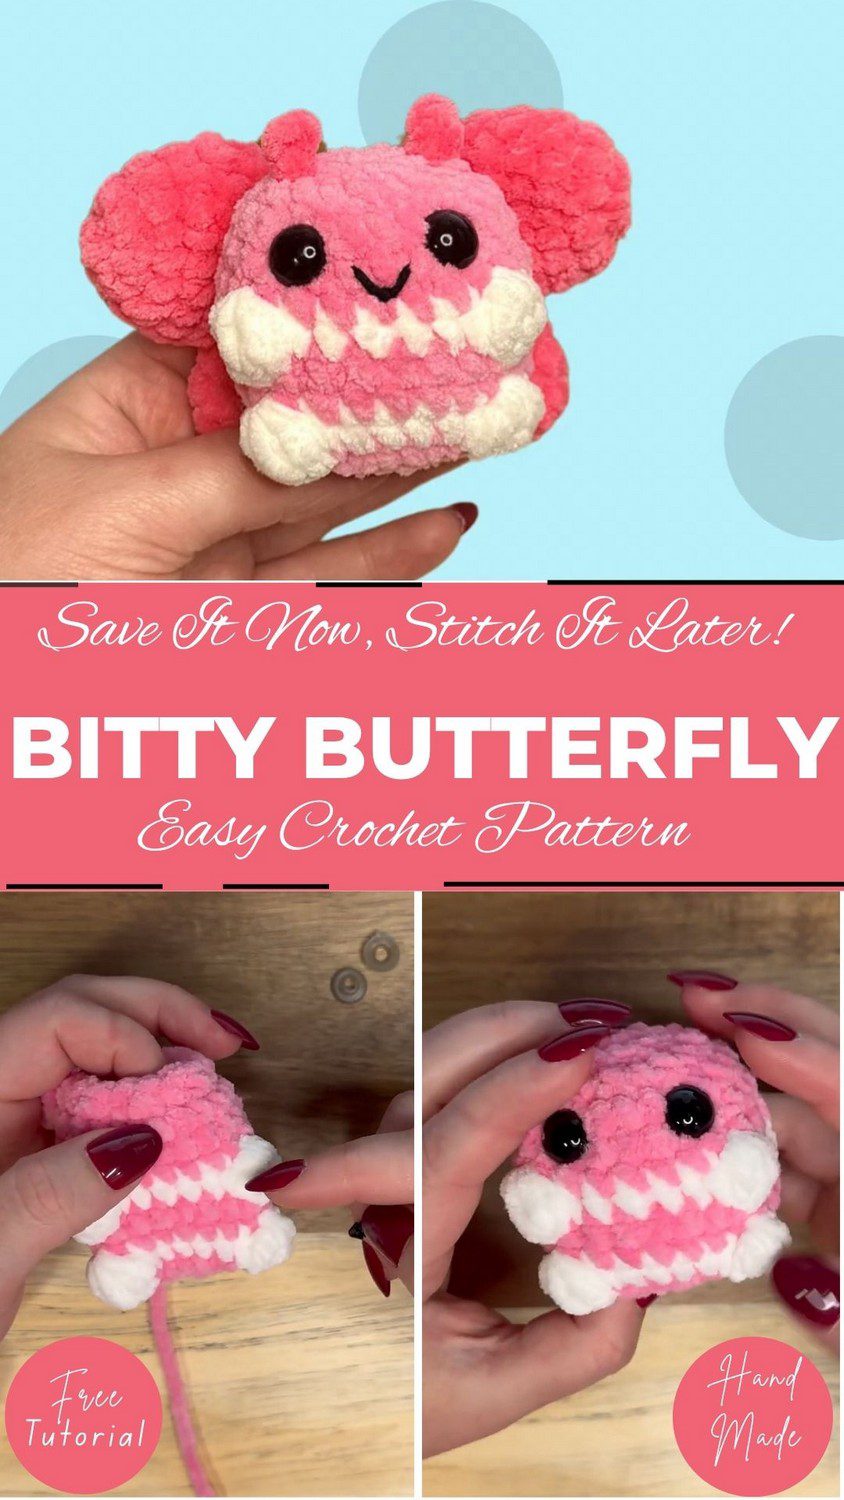
The crochet bitty butterfly plush is a small, plush-style amigurumi made in chenille yarn. In addition, several details give it personality:
- A pink body with white stripes worked in bobble stitches
- Two large wings, each joined to a small wing for a layered look
- Black safety eyes set close together for a sweet expression
- A hand-embroidered smile, plus optional blush cheeks
- Short chained antennae anchored into the head
The wings are the clever part of the pattern. Since each small wing is attached to its large wing during crocheting, every wing set comes off the hook as one piece.
Skill Level for the Butterfly Plush
The pattern suits confident beginners. You need a magic ring, single crochet, and basic increases and decreases. You also need the bobble stitch, which only takes a round or two to get comfortable with. However, chenille yarn is slippery and its stitches are hard to see, so a little patience goes a long way.
Materials Needed and Yarn Information
- Main color yarn: pink chenille
- Stripe yarn: white chenille
- Wing yarn: a bright coral or deep pink chenille
- Safety eyes: 10mm, black
- Embroidery thread: black, for the smile
- Crochet hook: one suited to the chenille yarn label
- Stuffing: polyester fiberfill
- Tools: tapestry needle, scissors, and a stitch marker
Hook size depends on the yarn, so the ball band is the best guide. Therefore, choose a hook small enough to keep stitches tight, because stuffing will show through loose fabric.
Finished Size of the Crochet Bitty Butterfly Plush
Finished size depends on yarn thickness and hook size, so no fixed measurement applies. Chenille gives a plump, palm-sized plush. On the other hand, thicker yarn with a larger hook will make a bigger butterfly, and the stitch counts stay the same.
Stitches and Abbreviations
- MR: magic ring
- sc: single crochet
- inc: two single crochets in one stitch
- dec: single crochet decrease
- dc: double crochet
- ch: chain
- sl st: slip stitch
- Bobble: five double crochets worked into one stitch, leaving six loops on the hook, then pulled through together
Gauge Information
Gauge is not critical for amigurumi. Instead, what matters is tight, even stitches with no gaps. For example, if stuffing peeks through, go down a hook size. Likewise, if the fabric feels stiff and hard to work, go up a size.
Tips Before You Start the Crochet Bitty Butterfly Plush
- First, mark the first stitch of every round and move the marker up as you work.
- Meanwhile, let the unused color rest at the back so the stripe yarn and main yarn do not tangle.
- Since chenille hides stitches, count at the end of each round.
- Before starting the stripe round, practice one bobble on scrap yarn.
- Stuff firmly but evenly, adding a little at a time as the opening closes.
- Also, place the safety eyes before stuffing, while the inside is still reachable.
Step-by-Step Crochet Bitty Butterfly Plush Pattern
1: Starting the Butterfly Body with a Magic Ring (Rounds 1 to 3)
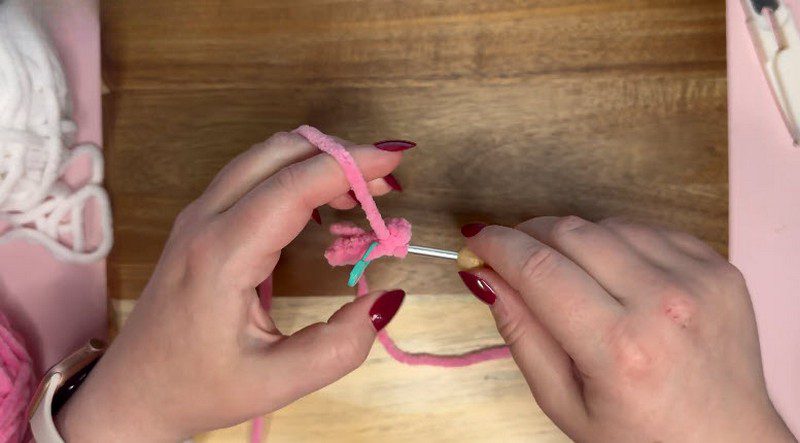
First, begin with the pink chenille yarn. Wrap the yarn around your left fingers to form a loop, then insert the hook into the loop and pull up the working yarn to create the magic ring.
- Round 1: Work 8 single crochets into the magic ring. Then pull the tail to close the ring tight.
- Round 2: Work an increase in every stitch to reach 16 stitches.
- Round 3: Next, repeat one single crochet and one increase around to reach 24 stitches.
Place a stitch marker in the first stitch of each round. Since chenille hides stitches, count after every round before moving on.
2: Working the White Bobble Stripes (Rounds 4 to 10)
After round 3, switch to the white yarn for the first stripe round.
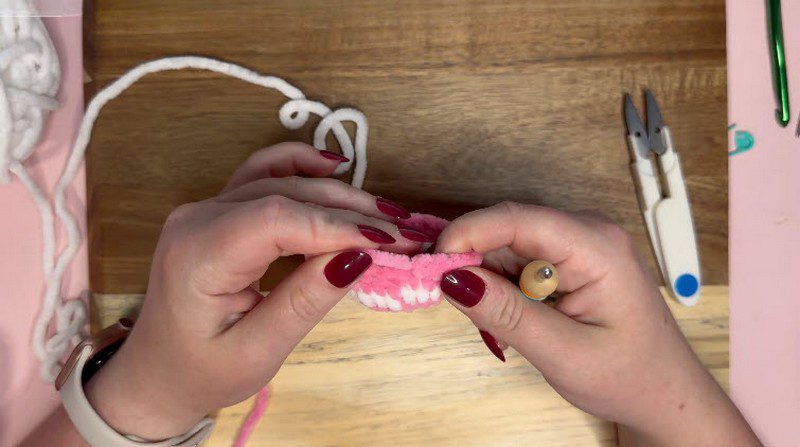
- Round 4: Work bobble stitches around in white. Each bobble is made with 5 double crochets in one stitch, leaving 6 loops on the hook, then pulled through all at once.
- Rounds 5 and 6: Next, return to pink and work plain single crochet rounds.
- Round 7: Then repeat the white bobble round.
- Rounds 8 to 10: Finally, work plain single crochet in pink.
As a result, the bobbles push toward the outside of the body and form the raised white stripes. Meanwhile, keep the unused color at the back so the yarns do not tangle.
3: Placing the Safety Eyes and Stuffing the Body (Round 11)
Hold the striped body with the front facing you, and then begin the decreases on round 11.
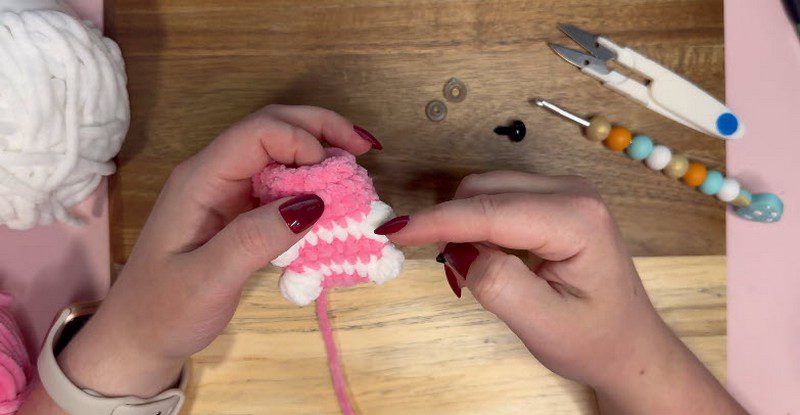
- First, insert the 10mm safety eyes between rounds 9 and 10.
- Leave about four stitches between the eyes.
- Before snapping on the backing washers, check the placement from the front.
- Next, stuff the body firmly, adding a little at a time as the opening gets smaller.
- Finally, sew the remaining hole closed and hide the yarn end inside.
Set the eyes before stuffing, because the inside is still easy to reach at that point.
4: The Finished Body of the Crochet Bitty Butterfly Plush
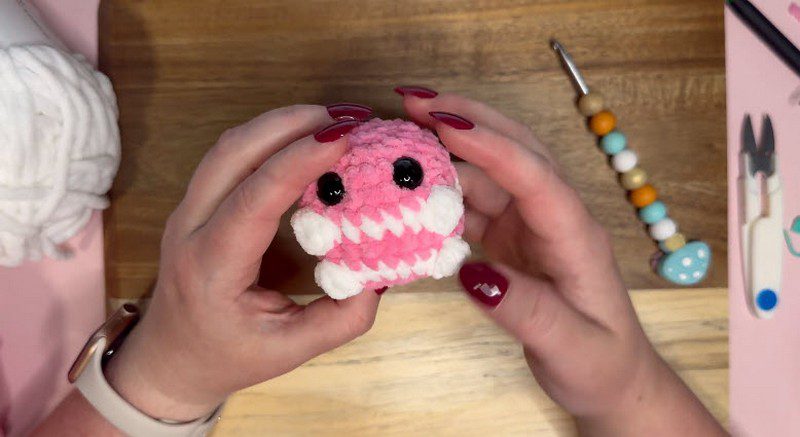
At this stage, the body is closed, stuffed, and round. In addition, both eyes are locked in, and the white stripes show clearly between the pink rounds.
- First, make sure both eyes sit level, with an even gap.
- Then reshape the body gently with your hands so it looks smooth and round.
- Also, fluff the chenille with your fingers to lift the pile.
If one eye looks off, adjust it now, before adding the wings and face details.
5: Making the Large and Small Butterfly Wings
Both wing sets are worked in coral chenille.
Large wing
- First, work 8 single crochets into a magic ring.
- Then increase on round 2.
- Next, crochet evenly for three rounds.
- After that, decrease down to 8 stitches, then fasten off.
- Finally, repeat to make a second matching piece.
Small wing and joining
- First, work 6 single crochets into a magic ring.
- Then increase and decrease across rounds 2 to 6 to reach 8 stitches.
- Without fastening off, pinch the small wing flat and work 4 single crochets across both sides to close it.
- Next, pinch the large wing flat and work 4 single crochets through both parts to join them into one wing set.
- Finally, repeat for the second wing set.
Both wing sets should look the same before you sew them on.
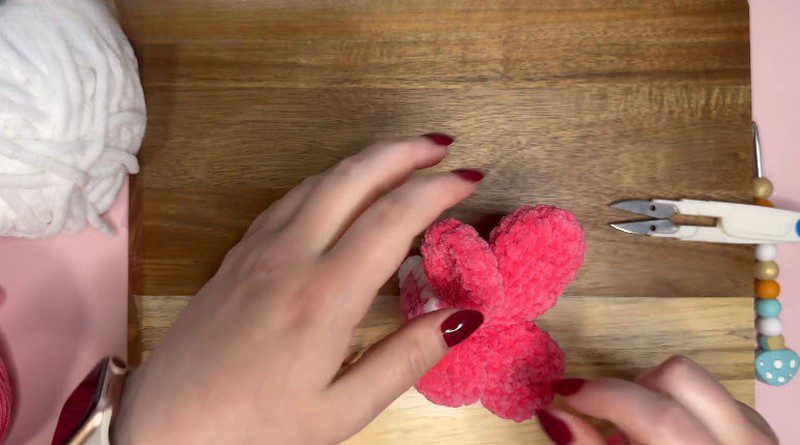
6: Attaching the Wings and Adding Final Details
Wings
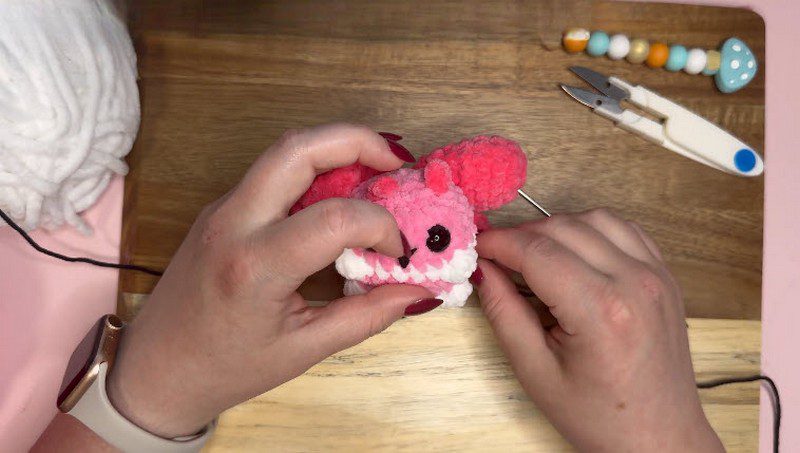
- First, sew the wings onto the center back, rounds side by side with no gap between them.
- Then pull the wing edges closer to the body with the yarn tail for a tighter, more upright look.
Antennae
- Next, add them between rounds 11 and 12.
- Chain 3, slip stitch back down the chain, and then anchor the yarn into the head.
Face
- After that, embroider a small smile on round 9 with black embroidery thread.
- Finally, add blush cheeks if you like.
To finish, weave in all ends and trim any stray strands.
Assembly Order for the Crochet Bitty Butterfly Plush
The order matters. First, finish and stuff the body, since the embroidered smile and the wing placement both depend on a closed, shaped body. Then pin the wings in place before sewing to make sure both sit level. Finally, sew through the back loops of the body for a clean seam, and secure the yarn inside.
Quick Checklist Before You Sew the Wings On
A short check now saves unpicking later. Therefore, run through the list below before the first stitch of assembly:
- Both eyes are level, with about four stitches between them.
- The body is stuffed firmly, and the hole is sewn shut.
- Both wing sets match in size and shape.
- The wings are pinned at the centre back with no gap between them.
- A long yarn tail is still available to pull the wing edges upright.
Ways to Customise Your Crochet Bitty Butterfly Plush
- Colour: Swap the pink for blue, lavender, or mint with white stripes.
- Stripes: Add a third bobble round for a bolder pattern.
- Wings: Use two shades for a gradient look.
- Face: Skip the blush, or add it for a rosy cheek.
- Size: Use bulkier yarn and a bigger hook for a pillow-sized version.
Common Mistakes and Troubleshooting
Stuffing shows through. The hook is probably too large. Therefore, drop a size and keep your tension firm.
Bobbles look flat. Make sure all six loops stay on the hook before pulling through. Then pull the final loop snug.
Eyes sit crooked. Pin the eyes, check them from a few angles, and then lock them in. In addition, four stitches between them keeps the spacing even.
Wings droop. Anchor the wing edges toward the body with the yarn tail so they sit upright.
Stitch count is off. Because chenille hides stitches, count after every round and fix mistakes early.
Finishing and Care for Your Plush Butterfly
First, weave in all ends, trim any stray strands, and fluff the chenille with your fingers. Surface cleaning works best, so use a damp cloth and let the plush air dry. However, avoid hot water and harsh scrubbing, because both can flatten chenille. Also, for a toy meant for small children, secure the eyes extra firmly or embroider them instead.
Gift and Display Ideas for the Butterfly Plush
A little butterfly like the crochet bitty butterfly plush makes a sweet shelf piece, a desk companion, or a handmade gift. For example, pair it with a handwritten note for a birthday, or tuck it into a spring basket. Alternatively, make a few in different colours for a matching set.
Frequently Asked Questions (FAQs)
What yarn works best for a crochet bitty butterfly plush?
Chenille gives the soft, plump look described above. Still, any soft yarn works if you match it with a suitable hook.
Can beginners make a crochet bitty butterfly plush?
Yes. The magic ring and bobble take a little practice, but everything else is basic single crochet.
Where do the safety eyes go?
Place them between rounds 9 and 10, with about four stitches between them.
How are the wings joined?
Each small wing is joined to its large wing by single crocheting through both layers. After that, the finished set is sewn to the back.
Can the smile be skipped?
Yes. Instead, leave the face with eyes only, or add blush for a different look.
Ready to Make Your Own Butterfly?
With a striped body, layered wings, and a tiny stitched smile, the crochet bitty butterfly plush comes together quickly once the rounds start flowing. So save the pattern for later, send it to a friend who loves amigurumi, and try a new color combination on your next butterfly. Finished versions are always fun to see.