Crochet Wrist Warmers Pattern With Frilly Ruffle Cuffs
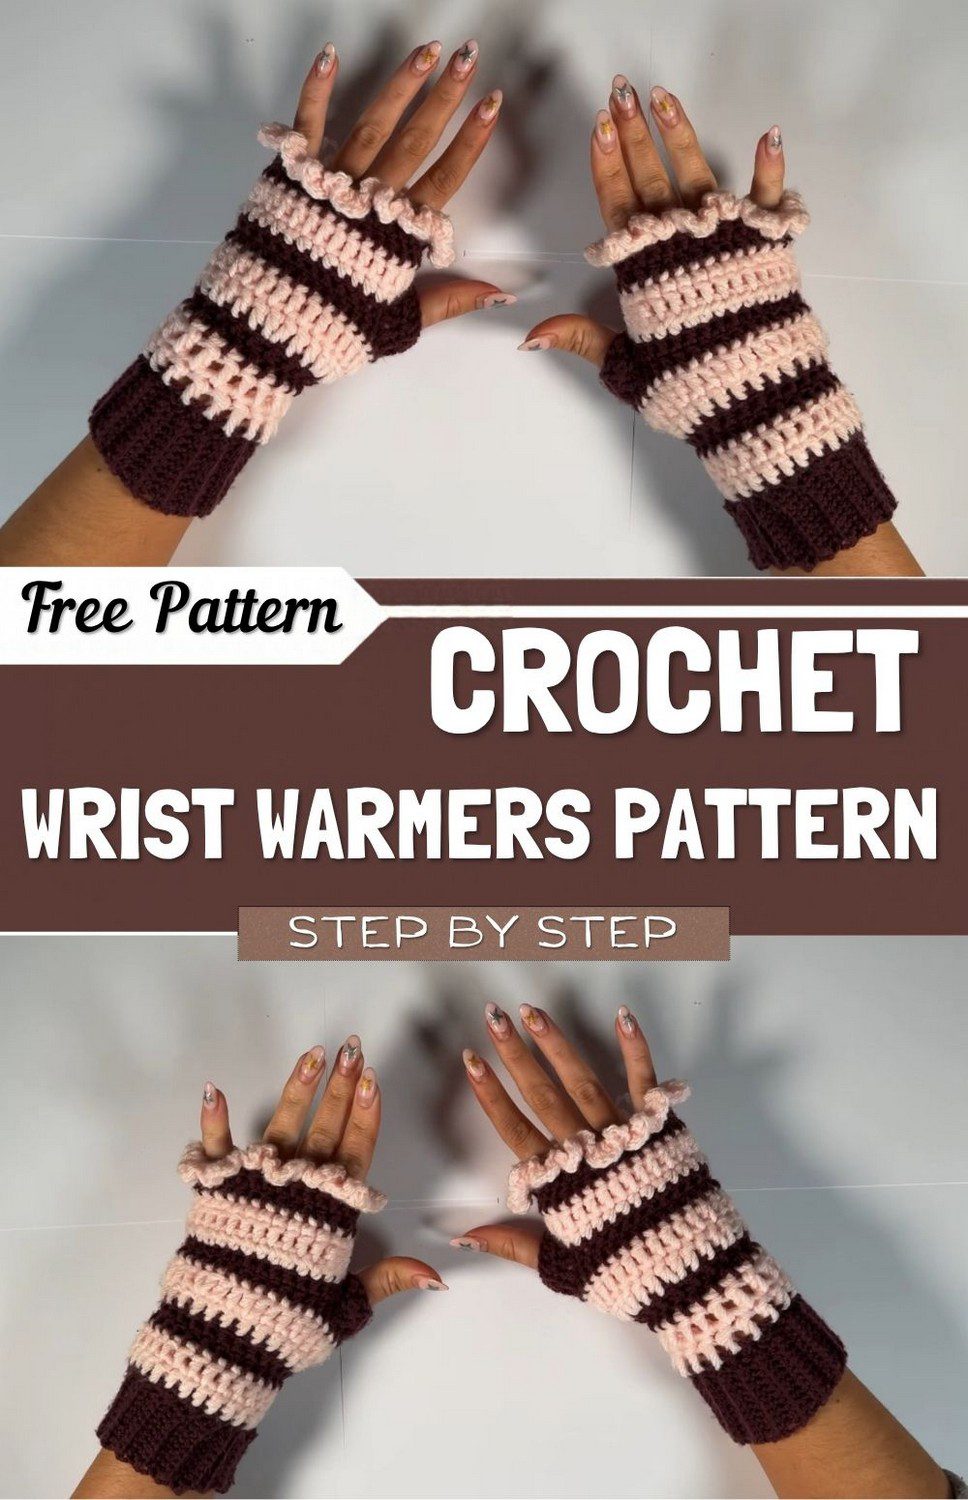
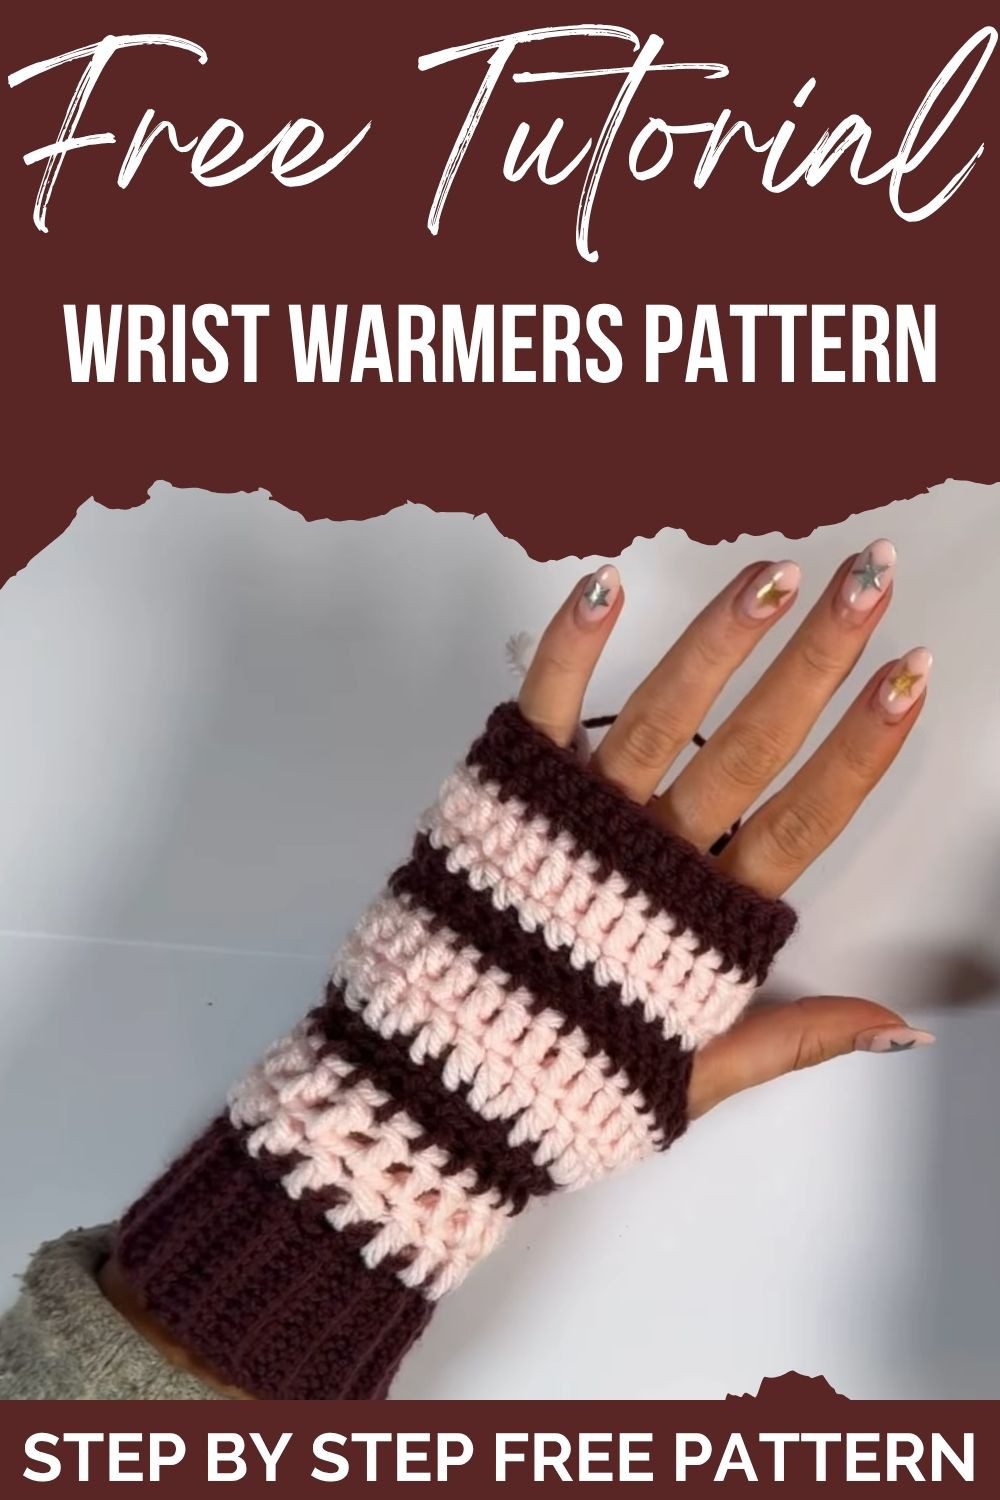
Soft ribbed cuffs, candy stripes, and a bouncy edge turn a pair of Crochet Wrist Warmers Pattern With Frilly Ruffle Cuffs into the coziest handmade treat for chilly mornings. Each stitch feels squishy and warm, and the ruffles add a sweet handmade flourish.
Ribbing, stripes, and ruffles rarely share one project, yet these crochet hand warmers bring all three together. The crochet mitts start with a stretchy band and grow into striped rounds. Next, a soft ruffle finishes the edge with a playful flutter, while the frilly fingerless gloves leave your fingers free for typing or sipping tea. Worked as two-color gloves, a finished pair also tucks neatly into a gift box as a keepsake.
Crochet Wrist Warmers Pattern at a Glance
- Finished size: fitted to the wrist by a 30-row ribbed band, with easy room to add or remove a row.
- Skill level: advanced beginner, because basic stitches combine with a thumb gap and a ruffle.
- Yarn: double knit acrylic in purple and chunky acrylic in pink.
- Hook size: 4.5 mm.
- Time: about one relaxed evening for the pair.
- Best use: cool-weather wear, desk warmth, and handmade gifts.
Materials Checklist for the Crochet Wrist Warmers Pattern
Everything for the crochet wrist warmers pattern fits in one small basket.
- Purple yarn: double knit acrylic in Purple Smoke, used for the band, stripes, and thumb.
- Pink yarn: chunky acrylic in Peaches, used for the contrasting rows.
- Crochet hook: 4.5 mm.
- Small scissors for clean cuts.
- Tapestry needle for weaving in ends.
- Optional: a stitch marker to flag the start of each round.
Know Your Stitches
- Ch (chain): yarn over and pull through the loop on the hook.
- Sl st (slip stitch): insert the hook, yarn over, and pull through the stitch and the loop.
- Sc (single crochet): insert the hook, pull up a loop, then yarn over and pull through both loops.
- Dc (double crochet): yarn over, insert the hook, pull up a loop, then yarn over and pull through two loops twice.
- BLO (back loop only): the hook enters only the loop farthest from you, which creates ribbing.
Stitch Count Reference
- Foundation: 11 chains, giving 10 single crochets.
- Ribbed band: 30 rows of 10 single crochets each.
- Seam: 10 joined stitches.
- Base edging: 30 single crochets, one per row end.
- Each double crochet round: 30 stitches until the thumb gap.
- Thumb gap: 6 stitches skipped and bridged with 3 chains, leaving 27 stitches per round.
- Thumb edge: 2 rounds of double crochet.
- Ruffle: 5 double crochets, then 6 single crochets, repeated around.
Time Box
- Prep: about 10 minutes to gather yarn and test the hook.
- Stitching: roughly 60 to 90 minutes per warmer.
- Finishing: about 15 minutes for weaving in ends on both warmers.
Step-by-Step Crochet Wrist Warmers Pattern
The crochet wrist warmers pattern builds from the bottom band upward, so each part sets up the next one.
Step 1: Create the Ribbed Band Foundation
- First, make a slip knot and place it on the hook.
- Next, chain 11.
- Skip the first chain from the hook.
- Then work 1 single crochet into each of the remaining 10 chains.
- Count the row. Exactly 10 single crochets should sit on the hook side.
Ten stitches set the band width, so a miscount here changes the whole cuff.
Step 2: Work the Ribbed Band Rows
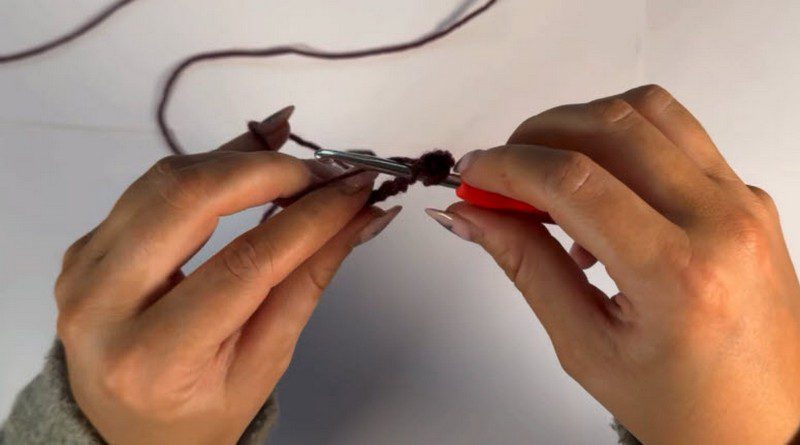
- First, chain 1 and turn the work.
- Then single crochet into the back loop only of each stitch across.
- Chain 1, turn, and repeat until the band has 30 rows in total.
- Finally, slide the band around your wrist to test the fit, and add or remove a row if needed.
Back loops create the stretchy ridges that keep the cuff hugging the wrist.
Stitch check: each row should still hold 10 stitches, with about 15 ridges along either side.
Step 3: Seam the Band
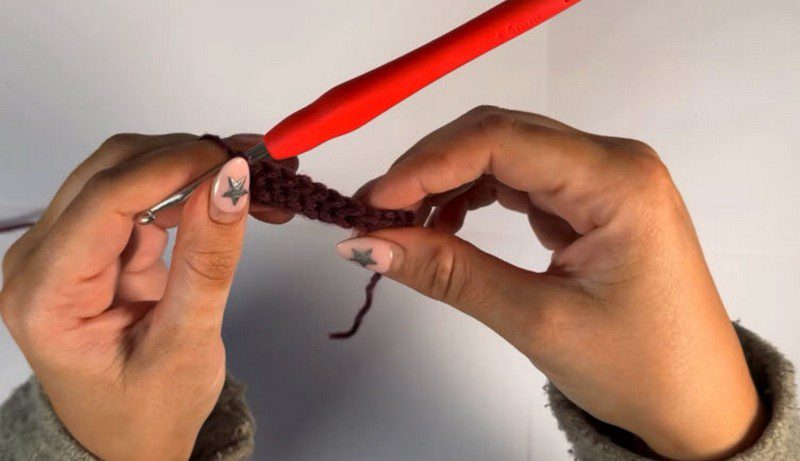
- First, fold the band so the short ends meet, with right sides facing inward.
- Then slip stitch through the foundation chain and the back loops of the last row, joining all 10 stitches.
- Finally, turn the piece inside out so the seam hides within.
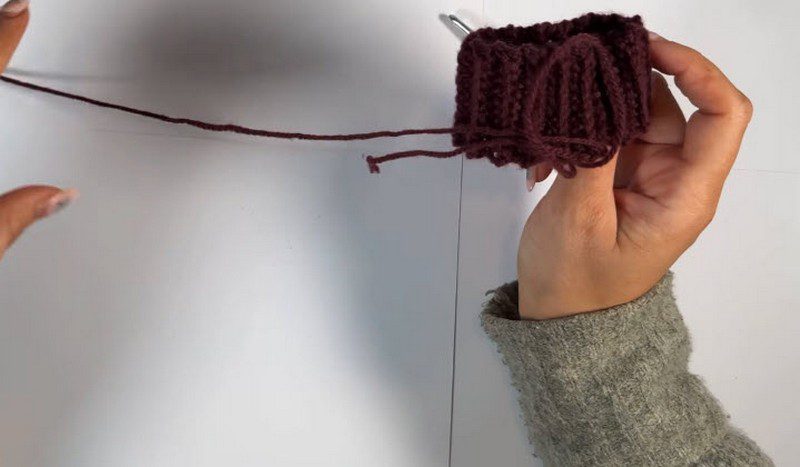
Step 4: Wrist Base Edging
- First, chain 1.
- Next, work loose single crochets around the band edge, one per row end, for 30 stitches.
- Then join with a slip stitch to the first single crochet.
Loose stitches matter here, because a tight edge would pinch the cuff.
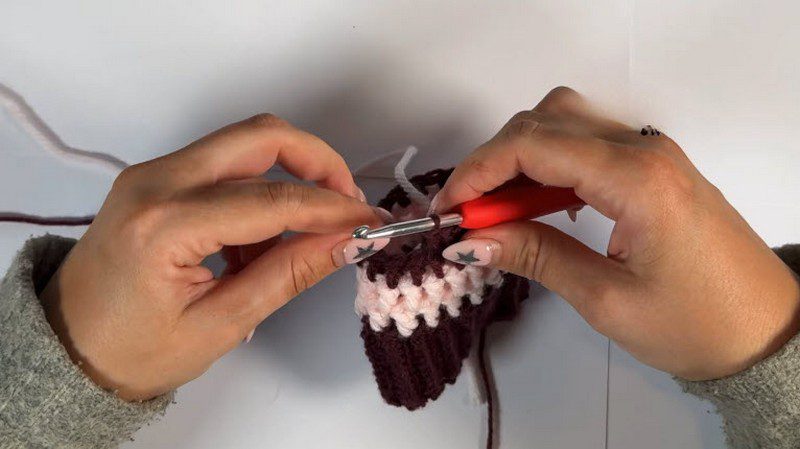
Step 5: Color Change and Double Crochet Rows
- First, drop the purple yarn and attach the pink yarn.
- Chain 2, which does not count as a stitch.
- Next, work 1 double crochet into every stitch around, giving 30 stitches, then join.
- Work a second pink round the same way.
- Then switch to purple for rows 3 and 4, and return to pink for row 5.
- If the fit feels snug, add an occasional increase around the widest part of the hand.
Count now: every round should hold 30 double crochets before the thumb gap.
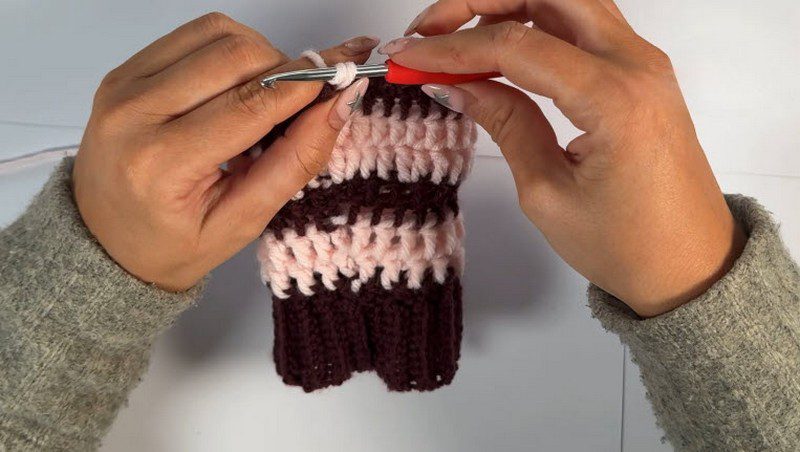
Step 6: Create the Thumb Opening
- First, work around until you reach the thumb placement.
- Leave the last 6 stitches unworked.
- Next, chain 3, then slip stitch to the other side to bridge the gap.
- On the next round, work a double crochet into each chain as well. The round now holds 27 stitches.
The bridge forms the thumb hole, so place it carefully to keep the fit comfortable.
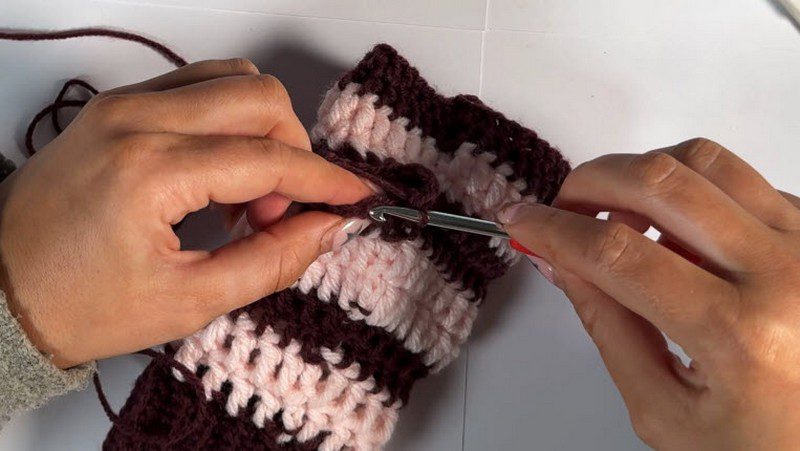
Step 7: Finish the Thumb Edge
- First, attach purple yarn at the thumb opening.
- Then work 2 rounds of double crochet around the hole.
- Finally, fasten off and trim the tail.
Shape check: the thumb should slip through easily without puckering around the hole.
Step 8: Work the Top Edge Round
- First, attach the working yarn at the top edge of the glove.
- Next, work one round of single crochets evenly along the edge.
- Then join with a slip stitch.
A steady single crochet round gives the ruffle a neat base to grow from.
Step 9: Add the Ruffle Border
- First, work 5 double crochets into the first stitch.
- Next, work 6 single crochets into the next stitch.
- Keep alternating the two groups all the way around.
- Finally, join at the end of the round.
Extra stitches in one spot force the fabric to wave, and that waving creates the frill.
Before moving on: the ruffle should ripple evenly without lying flat or curling tightly.
Step 10: Fasten Off and Repeat
- First, fasten off after the last stitch.
- Then thread the tail onto a tapestry needle.
- Weave every loose end through the inside stitches.
- Finally, repeat the entire process for the second warmer.
Pre-Ruffle Checklist for the Crochet Wrist Warmers Pattern
A quick check before the ruffle saves unpicking later. Therefore, confirm these points on each warmer:
- The band has 30 rows of 10 stitches, and the seam joins all 10 stitches.
- Each double crochet round holds 30 stitches before the thumb gap.
- The rounds after the thumb gap hold 27 stitches.
- The thumb edge has 2 rounds of double crochet.
- The top edge single crochet round sits evenly and does not pull tight.
Signs You Did the Crochet Wrist Warmers Pattern Right
- The ribbed band stretches gently, then returns to shape.
- Stripes stay even, with clean colour changes.
- The thumb hole feels roomy but not floppy.
- The ruffle ripples softly all the way around.
Common Mistakes with the Crochet Wrist Warmers Pattern
Band feels too tight. Back loop rows can pull inward when you work them with a firm hand.
Fix: Loosen your tension slightly, or add one extra row before seaming.
Edging puckers the cuff. Tight single crochets around the band squeeze the fabric.
Fix: Pull out the round and rework it with looser stitches.
Thumb hole sits too low or high. The gap started at the wrong row.
Fix: Try the piece on, then rip back to the row that matches the thumb base.
Ruffle lies flat. Too few stitches went into each group.
Fix: Recount to confirm 5 double crochets and 6 single crochets in each group.
Safety and Durability Notes
- Weave each tail through at least three stitches, then snip close.
- Keep stitches snug enough that fingers cannot catch in gaps.
- Skip loose buttons or beads on pairs meant for little ones.
- Test the thumb opening once so the edge never feels scratchy.
Troubleshooting Guide
Warmers slide down the wrist. The ribbed band may be too wide. Fix: Use a slightly smaller hook on the next pair, or remove a row.
Colors bleed together. Dark and light yarns sometimes shed fuzz onto each other. Fix: Block lightly and keep a lint brush handy.
Ruffle flips upward. Stitches may be too tight along the top edge. Fix: Relax your tension on the single crochet round before the ruffle begins.
Ways to Customise the Crochet Wrist Warmers Pattern
Colour swaps. Try cream and sage, or mustard and plum. Keep one colour darker so the stripes stay crisp.
Yarn weight and size changes. Thinner yarn makes lighter cuffs, while bulkier yarn grows warmer and larger. A smaller hook tightens the fabric, and a larger hook softens it.
Accessories. A small button sewn near the cuff adds charm, and a matching headband makes the set complete.
Washing and Cleaning
Hand wash in cool water with mild soap. Then press out the water gently and reshape the ruffle with your fingertips. Lay the warmers flat to dry, away from direct heat, so the acrylic keeps its softness.
Colour Palette Suggestions
- Berry blend: deep plum with blush pink for a sweet winter mood.
- Soft neutrals: oatmeal and dusty rose for a quiet, modern look.
- Bright pop: teal with coral for a playful gift.
- Cozy classic: charcoal with soft lilac for everyday wear.
Why Make the Crochet Wrist Warmers Pattern?
Handmade accessories feel personal and finish quickly. In addition, the crochet wrist warmers pattern adds ruffles that wear easily.
- Small yardage keeps the project affordable.
- Basic stitches welcome newer crocheters.
- Stripes and ruffles feel fresh and giftable.
Frequently Asked Questions About the Crochet Wrist Warmers Pattern
Can the crochet wrist warmers pattern band be made wider or narrower?
Yes. Chain more or fewer stitches in the foundation, and the seam count changes to match.
Why is the band worked in the back loop only?
Back loops create ridges that stretch, so the cuff hugs the wrist.
Does the thumb hole need to be exact?
Not exactly. Try the warmer on and adjust the skipped stitches until the fit feels comfortable.
What if the yarn weights feel mismatched in the crochet wrist warmers pattern?
Chunky pink and double knit purple differ slightly, but the 4.5 mm hook blends them well.
How can the ruffle look fuller?
Keep the 5 double crochet and 6 single crochet groups consistent, and work them loosely.
Cozy Hands and Happy Hooks
Once the first pair is finished, the second glides along faster. Every ruffle, every ridge, and every stripe teaches a little more about shaping fabric. So keep the yarn handy, because a matching scarf or headband might be next on the hook.