Crochet Placemat Pattern in Yellow, Sage, and Cream Stripes
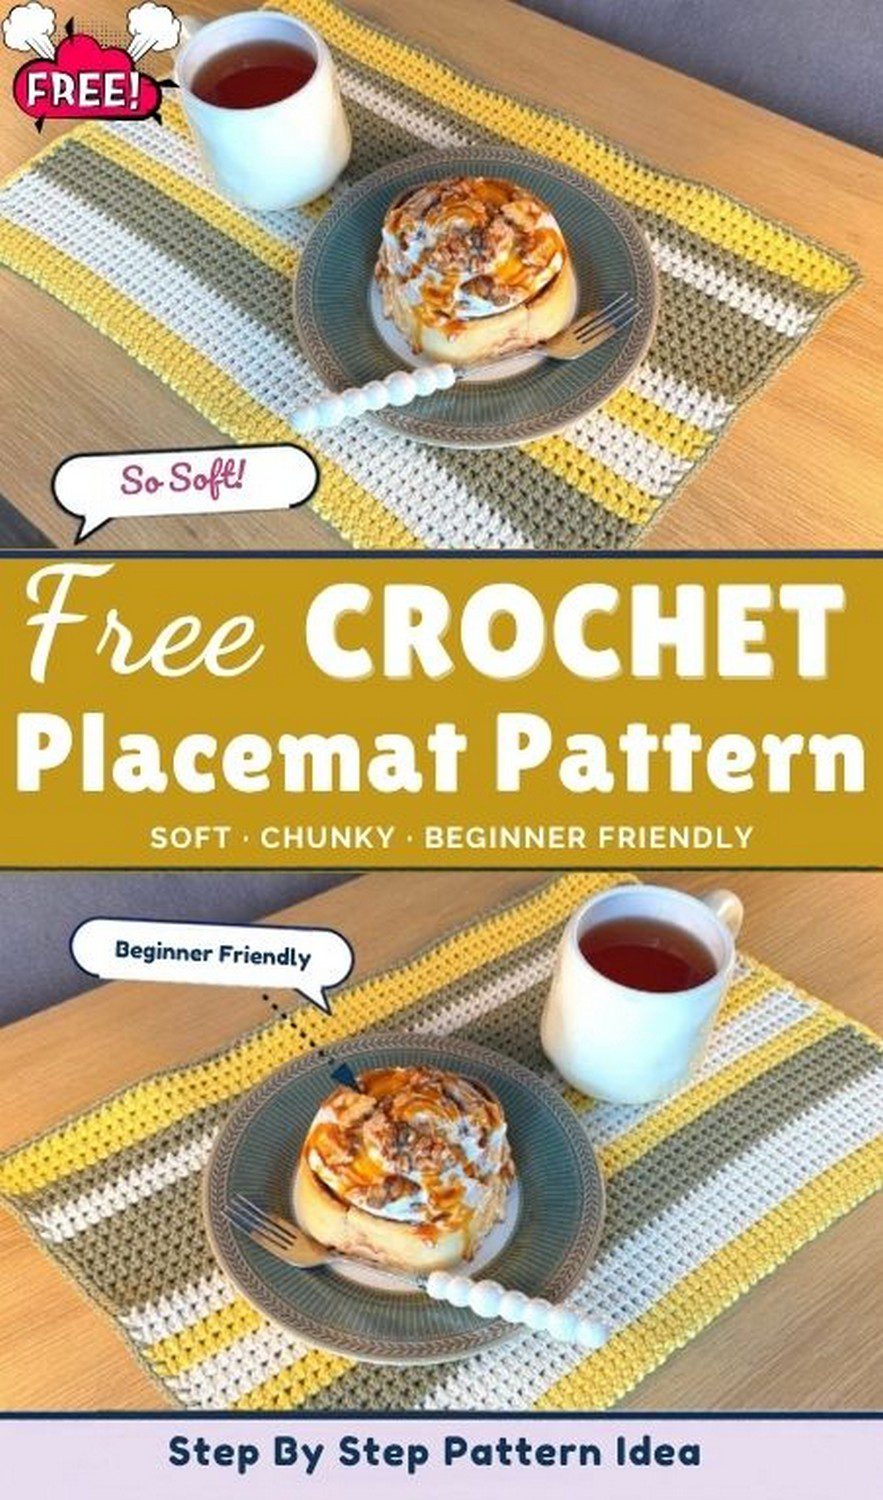
Buttery yellow, soft sage, and creamy ivory stack into bold bands in this crochet placemat pattern, a thick, ridged, textured placemat built for everyday breakfasts and holiday dinners alike.
If you want a placemat that goes beyond plain rows, this design delivers. Single crochet rows alternate with a tall-loop stitch that reaches down into the previous row, so the fabric turns out dense and bumpy. Better yet, the project welcomes leftover yarn, which makes a scrap yarn placemat set easy to build. Clear steps, exact measurements, and practical fixes follow below.
Crochet Placemat Pattern and Key Features
The placemat is worked flat, back and forth, in a single piece. It starts with a foundation chain of 62 stitches, and a two-row repeat builds the texture. Colour changes create the stripes, and a neat border finishes all four edges.
Key features:
- Worked in rows, so no seaming is needed
- Firm 62-stitch base
- Two-row repeat of standard single crochet and a textured stitch
- Yellow, sage, and cream stripes, or any palette
- Border of alternating single crochets and chain-1 spaces
- About 66 rows in total
Skill Level and Gauge for the Crochet Placemat Pattern
Crochet Placemat Pattern Skill Level
Confident beginners can handle the project, because only three techniques appear: chains, single crochet, and the textured stitch. Counting 62 stitches and reaching down into the previous row takes a little focus. Still, the two-row repeat builds a steady rhythm quickly. If the textured stitch is new to you, practice on a short chain first.
Crochet Placemat Pattern Gauge Information
No official gauge is listed, so no stitches-per-inch count appears here. Instead, width works as the guide. A chain of 62 worked with a 5 mm hook should land near 44–45 cm. Measure after a few rows, with the piece lying flat and unstretched. If the width runs short, move up a hook size, and if it runs wide, move down one. Even tension matters most, because it keeps the side edges straight.
Materials Needed for the Crochet Placemat Pattern
- Yarn: Leftover or scrap yarn in various colors, or a single color. Plan on about 130 g (roughly 4.6 oz) total per placemat if using cotton or a cotton blend.
- Crochet hook: 5 mm (US H-8).
- Notions: Scissors, measuring tape, and a tapestry needle.
Yarn Information
The sample uses yellow, sage, and cream. Cotton and cotton blends are a common choice for table linens because they handle washing well. No specific yarn weight is listed, so pick a yarn that forms a firm, dense fabric with a 5 mm hook. When mixing leftovers, stick to similar fibers so every stripe washes and wears evenly.
Crochet Placemat Pattern Size and Abbreviations
Finished Size and Sizing Options
Each finished placemat measures roughly 28–31 cm (11–12 in) tall and 44–45 cm (about 17½ in) wide. That takes 62 stitches across and about 66 rows. Width comes from the chain count, while height comes from the row count. For a wider mat, chain more, and for a narrower one, chain fewer. However, either change also shifts the yarn amount, so the 130 g estimate applies to the original size only. When making a set, use the same row count for every mat so all pieces match.
Stitches and Abbreviations
US terms are used throughout.
- ch: chain
- sc: single crochet
- st(s): stitch(es)
- sp: space
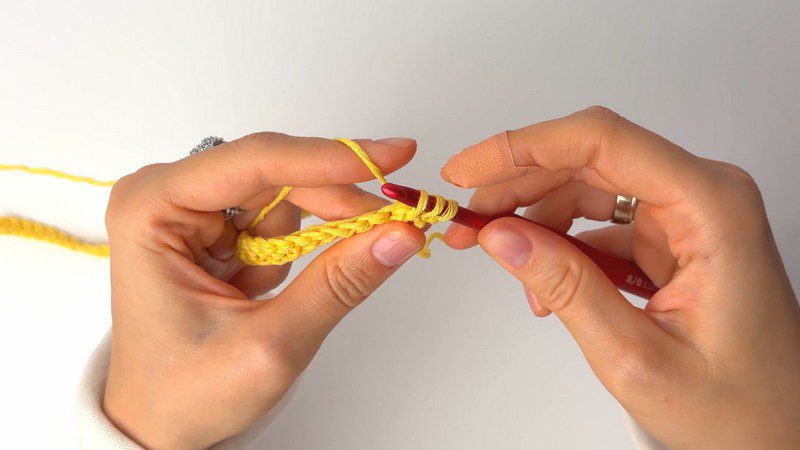
- Textured stitch: Insert the hook into the top loops of the stitch and also reach down into the base loop (the foundation hole) of the previous row. Pull up a tall loop, then finish the stitch.
Tips Before Starting the Crochet Placemat Pattern
- Plan the stripe order first, and lay the yarns out in sequence before starting.
- Count the 62 chains before turning, since a miscount shifts the whole width.
- Pull each tall loop up to roughly the height of the row so the fabric stays smooth.
- Keep tension relaxed on textured rows, because tight loops make the fabric stiff.
- Leave a tail at every color change so the tapestry needle can grab it later.
- Keep scissors and the tapestry needle within reach, so color changes stay quick.
Step-by-Step Crochet Placemat Pattern
The steps below follow the project from the first chain to the final block.
Step 1: Make the Placemat Foundation Chain
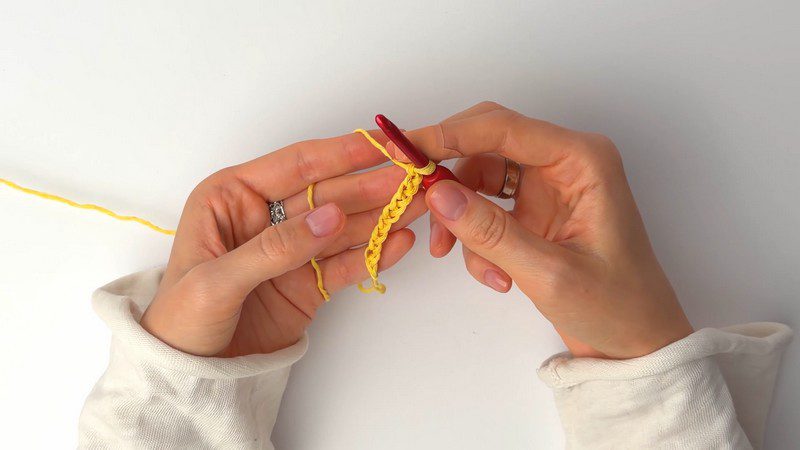
Start with a slip knot in the first color, yellow in the sample, and place it on the 5 mm hook. Chain 62, or chain the number needed for a different width. Hold the chain close to the hook between the thumb and index finger of the other hand, since that grip keeps every new chain even. Count the chains once before moving on.
Even chains make the first row much easier to work into.
Step 2: Work the Base Row of Single Crochet
Chain 1 as the turning chain. Next, work single crochet back across the foundation chain, placing one stitch into each chain. Keep the yarn wrapped over the fingers of the non-hook hand so tension stays steady. The finished row forms a firm 62-stitch base, so count the stitches before turning.
A firm base row keeps the bottom edge from stretching later.
Step 3: Work the Textured Rows and Change Colours
Now the signature texture begins. Alternate between a row of standard single crochet and a row of the textured stitch. For each textured stitch, insert the hook into the top loops and reach down into the base loop of the previous row. Then pull up a tall loop and finish the stitch. Repeat that two-row sequence, turning the work after every row to keep going back and forth. At the end of a row, change to the next colour to form each stripe, and leave the old tail on the side edge. In the sample, stripes of yellow, sage, and cream take turns.
Pro Tip: Pull each tall loop up a little higher if it feels tight. Loops of equal height give the ridged texture a clean finish.
Step 4: Build the Placemat Body to Full Height
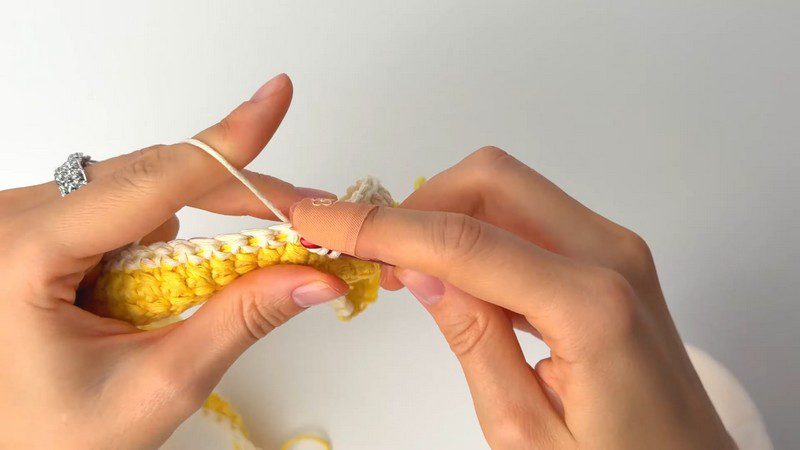
Keep working back and forth, repeating the two-row sequence and swapping colours as desired, until the piece reaches about 66 rows. That equals roughly 28–31 cm (11–12 in) in height. Stripe widths are flexible, so bands can match or vary. Lay the piece flat and measure before stopping. Afterwards, remember that the side edges will carry a row of colour tails, and those get woven in later.
Measuring now prevents surprises once the border goes on.
Step 5: Add the Border and Finish
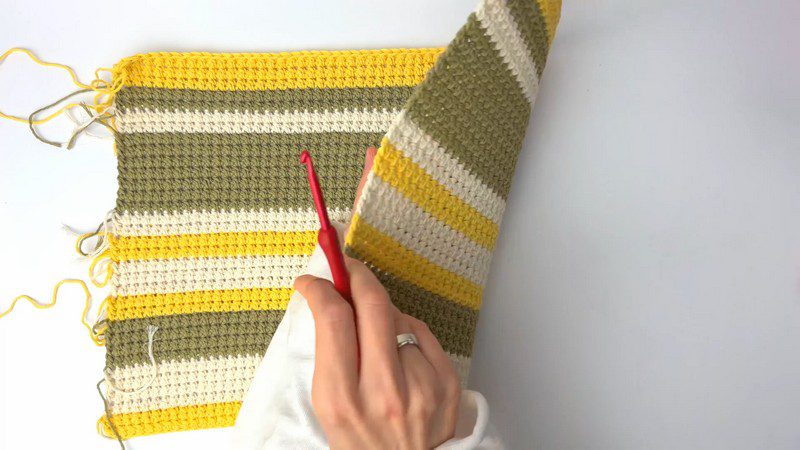
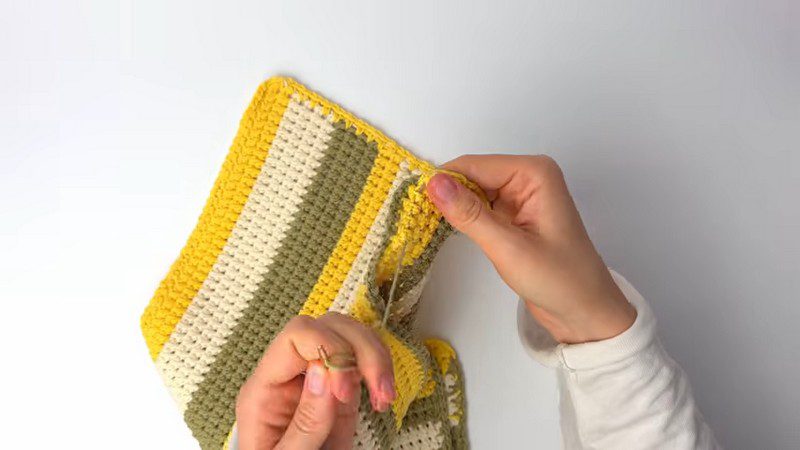
Work a clean border around all four edges, alternating single crochets and chain-1 spaces. Keep the spacing even along each side so the border lies flat. Fasten off with an invisible join. Next, thread the tapestry needle and weave in every loose end. Finally, steam or wash the placemat to block it, then smooth it flat.
How the Crochet Placemat Pattern Is Built
Pattern Construction and Assembly
No seaming is needed, because the body is worked as one flat piece. Assembly comes down to the border and the finishing touches. Complete the work in a set order: add the border first, weave in the tails second, and block last. Hiding each tail within stitches of its own colour keeps the ends out of sight.
Customization Options for the Crochet Placemat Pattern
Color Combinations
Swap yellow, sage, and cream for any palette, or choose a single color. Leftover yarn makes mixed stripes simple.
Stripe Widths
Two rows per stripe gives a delicate pattern, while larger bands feel bolder.
Custom Sizes
Adjust the starting chain for width, and the row count for height. Larger mats suit serving trays, whereas smaller ones suit side plates.
Matching Sets
Make several placemats in one palette, or rotate the stripe order so each mat differs slightly.
Crochet Placemat Pattern Mistakes and Troubleshooting
Edges Pull In or Flare Out
A changing stitch count causes uneven sides. Count every few rows, especially after textured rows, and keep exactly 62 stitches.
Tall Loops Look Uneven
Loops pulled to different heights create an uneven surface. Therefore, aim for consistent loop height across the whole row.
Stripes Look Crooked
Switching colors mid-row leaves a visible step. Change colors at the end of a row instead.
The Placemat Curls
Curling usually disappears after blocking. Steam or wash it, then dry it flat.
Yarn Runs Short
Weigh leftover yarn before starting. About 130 g total covers the original size.
Finishing and Care for the Crochet Placemat Pattern
After weaving in the ends, block the placemat. Steaming relaxes the stitches, while washing works too. Pat the piece into shape, keeping the edges straight and the corners square, then let it dry flat. For regular care, follow the yarn label, since fibers differ. Cotton and blends are often washable, but always confirm on the label. In the end, flat drying helps the placemat keep its shape.
Gift-Ready Crochet Placemat Pattern Set Ideas
A set of four makes a thoughtful housewarming or holiday gift. Stack the mats with the stripe order alternating, tie them with ribbon or twine, and add a small card. Pair them with matching cloth napkins for a complete table. Because each mat uses about 130 g of yarn, plan the total yarn before starting a full set.
Storing Your Crochet Placemat Set
Once the mats are dry, stack them flat so the edges stay square. Alternatively, roll each one loosely and tie it with a strip of leftover yarn. Keep the set in a dry drawer or basket, away from damp corners. Since cotton is often washable, a quick look at the yarn label tells you how to refresh the stack before the next big dinner.
Crochet Placemat Pattern FAQ
How much yarn does one placemat need?
About 130 g total per placemat when using cotton or a cotton blend.
What hook size works best?
The pattern uses a 5 mm (US H-8) hook.
How big is the finished placemat?
Roughly 28–31 cm tall by 44–45 cm wide (11–12 in by about 17½ in).
How many rows and stitches does it take?
The base chain has 62 stitches, and the body runs about 66 rows.
Can this crochet placemat pattern be made in one color?
Yes. Leftover yarn is optional, and a single color works.
Is a gauge swatch required?
No official gauge is listed. Measure the width after a few rows instead.
Time to Dress Your Table
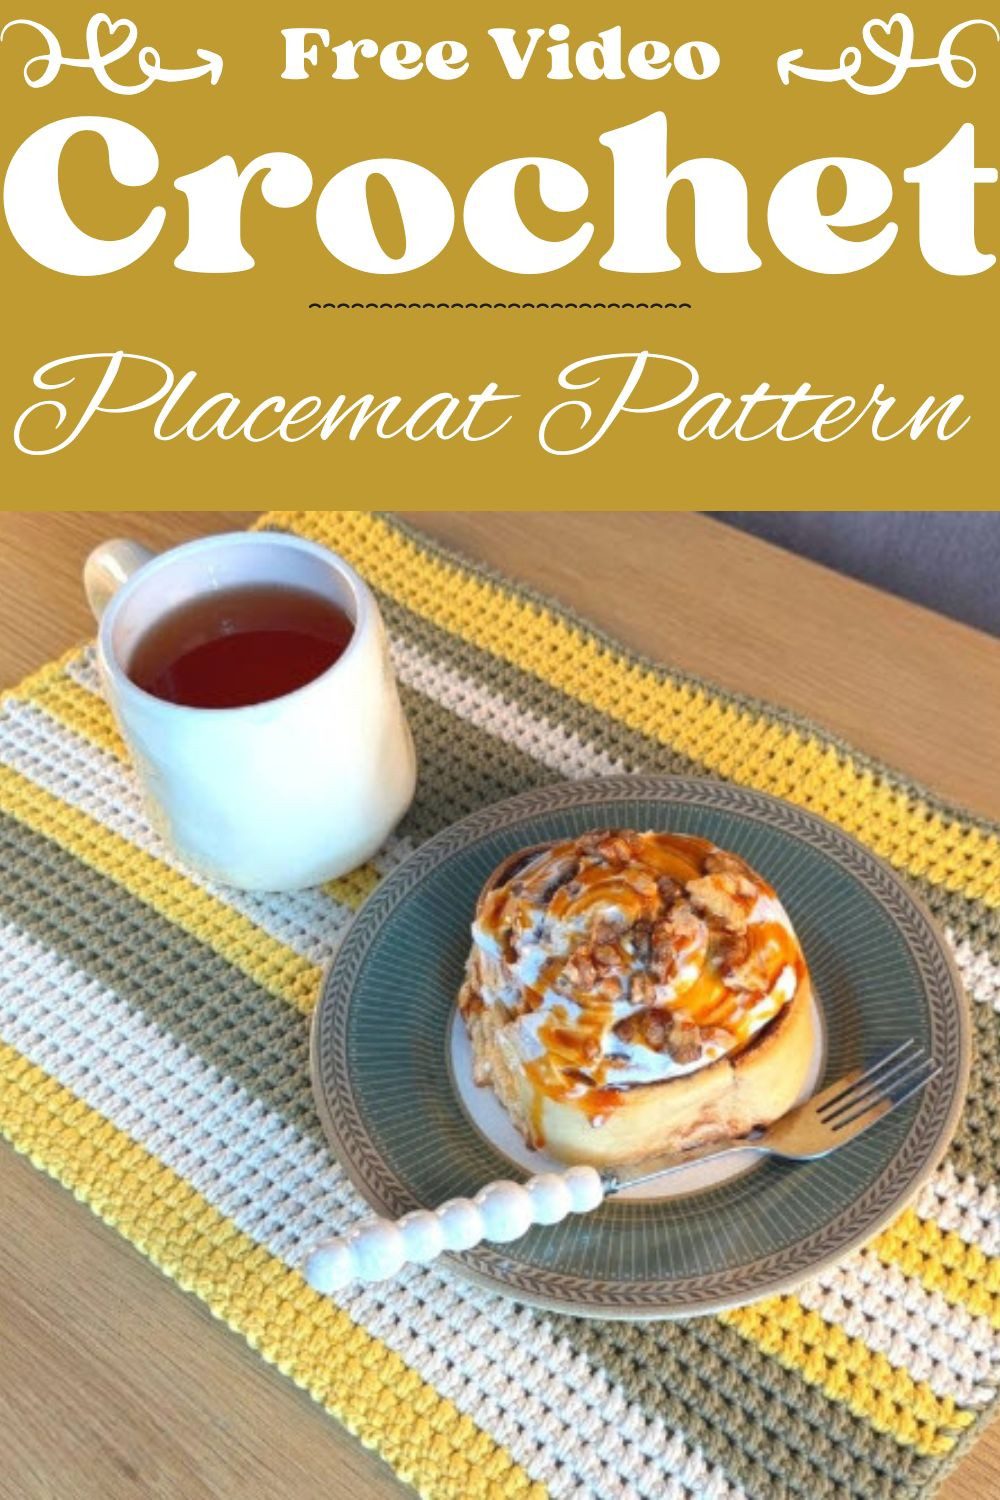
Textured rows, bold stripes, and a tidy border turn scrap yarn into something genuinely useful, and this crochet placemat pattern keeps every step simple: chain, stitch, stripe, border, and block. Gather the yarn, pick a palette, and start the first chain today. When your set is finished, share your color combination in the comments and save the pattern for the next round.