Free Crochet Bonbonniere Pattern For Beginners
Personalizing a Crochet Bonbonniere Pattern can add a unique touch that reflects individual style and purpose. Consider using different patterns such as the classic single crochet for a tight weave or the more open granny square pattern for a decorative flair. Choosing vibrant or pastel colors can completely change the basket’s look, making it perfect for specific themes like baby showers, weddings, or seasonal decor.
Embellishments enhance the basket’s charm; try adding ribbons, buttons, or small crochet flowers to match the occasion. To adjust the size and shape to fit particular needs, vary the number of starting chain stitches and the rounds. For a taller basket, simply add more rows to the sides. To make a wider or narrower base, increase or decrease the number of initial increases. This flexibility ensures the basket can serve various storage purposes, whether for holding toys, makeup, or other household items.
Creating a crochet basket starts with a magic ring to form a sturdy foundation. Begin by making a slip knot and chaining a few stitches, then join them into a ring with a slip stitch. This is followed by working single crochets into the ring, gradually increasing the number of stitches in each round to form a solid base.
Once the base is complete, the sides of the basket are built up by working in continuous rounds without increasing. Combining basic stitches such as single crochet or half-double crochet ensures a consistent and firm structure.
Lastly, customizing the handle by experimenting with different braid techniques or adding a decorative stitch can add further individuality to the basket, making it not just a practical storage solution but also a unique piece of decor. By adjusting the size, shape, colors, and embellishments, the crochet basket can be tailored to suit any purpose or setting.

Crochet Bonbonniere Pattern Hook Pattern
Making handmade crochet bonbonnières offers numerous benefits, starting with the personal touch they bring to any occasion. These creations showcase a unique blend of one’s love and effort, making them ideal for special events or personal gifts. Customization is another significant advantage; one can tailor the colors, patterns, and sizes according to their specific needs and preferences. This level of customization ensures that each bonbonnière fits perfectly into the intended setting or decor. Moreover, handmade crochet bonbonnières are cost-effective. By using leftover yarn and simple tools like a 10 mm hook, beautiful and sturdy items can be crafted without spending a fortune.
The process of making bonbonnières is straightforward and enjoyable. Starting with a slipknot and basic single crochet stitches, moving on to more intricate designs like increases or using special stitches, each step is manageable and rewarding. The end product is not just a functional item but also a beautiful piece of art that reflects the maker’s creativity and skill.
Creating handmade crochet bonbonnières is both fun and beneficial. They add a personal touch, offer endless customization possibilities, and are budget-friendly. So, why not give it a try? Grab some yarn and a hook, and enjoy the process of making something truly special and unique.

Crochet Bonbonniere Pouch And Box Pattern
Crochet bonbonnières exude an elegance and versatility that make them perfect for various special occasions. Two popular types are pouches and boxes, each bringing its unique charm. Pouches are soft and flexible, ideal for holding small treats or keepsakes. Boxes, on the other hand, are sturdy and structured, making them suitable for displaying more delicate items. These handmade treasures are highly customizable, allowing for personalization in color, size, and design, making each piece a unique addition to events like weddings and baby showers.
The process of making a crochet bonbonniere, whether a pouch or a box, starts with selecting a 3.5 mm hook and yarn of choice. Begin with the magic ring technique, which forms a tight adjustable loop, then follow with chain stitches to build the foundation. From there, gradually create the desired shape by combining basic stitches with more intricate patterns, ensuring a beautiful and elegant final product.

Crochet Bonbonniere Basket Fun Pattern
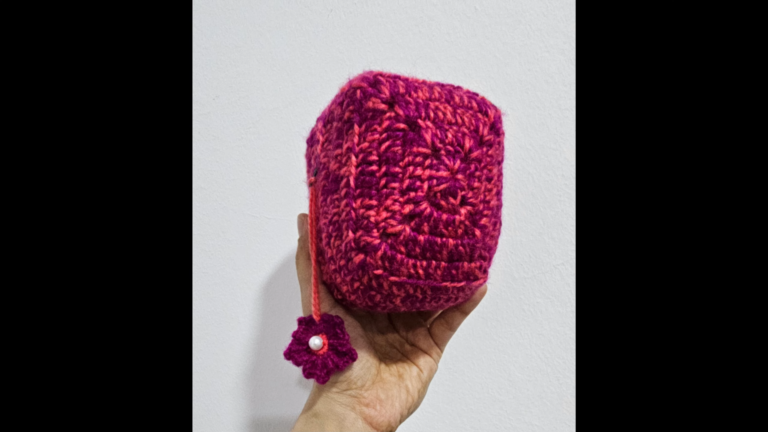
Personalizing crochet bonbonnière baskets can add a special touch to any event. Consider incorporating the event’s colors or patterns into the baskets. Using different colored yarns can create stripes, ombre effects, or even intricate designs. Adding names and dates makes each basket unique and serves as a memorable keepsake. Themed designs can be tailored to match the event, such as hearts for weddings or baby items for a baby shower.
For making the baskets, use two small balls of yarn together to ensure strength. Start with a magic circle and make six tight stitches in it, then pull on the thread to close the circle. Continue crocheting in rounds, increasing the number of stitches each round to widen the base. Once the desired diameter is reached, work only in the back loop for the height, alternating between normal and elongated tight stitches to create a tight, sturdy structure. This way, the basket can hold various items securely.

Crochet Bonbonniere Candy Box Pattern
Personalizing crochet bonbonnière candy boxes makes them special and memorable. Choose colors that complement the event theme, such as pastel shades for baby showers or elegant colors for weddings. Patterns can be incorporated by switching yarns for stripes, polka dots, or more complex designs like flowers.
Adding names and dates enhances the keepsake value. This can be done using embroidered labels or crocheting initials directly into the design. Themed designs, such as hearts for Valentine’s Day or snowflakes for winter events, can make the boxes even more relevant.
To create the candy boxes, start with a magic circle, make eight single crochets into the ring, and join the round with a slip stitch. Chain one and increase in the first stitch; repeat around. Continue rounds, increasing as needed, to achieve the desired size. Aligning the boxes with different event themes ensures they not only look beautiful but also create a coherent aesthetic for any celebration.

Crochet Basket Candy Box Tutorial
Continue to increase by chaining one at the start of each round and adding one extra single crochet between increases in subsequent rounds until the base reaches the desired size.
To shape the sides, work a single crochet in each stitch without increasing, maintaining the stitch count from the last round of the base. For the height, continue until the desired depth is achieved.
For the handle, chain an appropriate length, then attach it to the opposite side of the basket with a slip stitch, ensuring equal spacing.
Finish by adding decorative elements like ribbon weavings, beads, or edging with contrasting yarn to enhance the appearance.

Crochet Candy Box Dress Pattern
Begin by creating a foundation chain that fits around the neck comfortably, then join to form a circle.
Start the yoke by working several rounds of double crochets, increasing evenly until reaching the shoulder width.
Next, divide the stitches into sections for the front, back, and sleeves, continuing to crochet each section separately.
Shape the dress by joining the front and back sections under the arms and working in rounds, increasing gradually to create a gentle flare.
Add the sleeves by rejoining the yarn to the armholes, crocheting in rounds and tapering to the wrist or desired length.
Finish with decorative embellishments, such as a scalloped edge on the hem, embroidered flowers, or adding a contrasting color trim to enhance the design.

Crochet Candy Box Mini Pattern
Begin by creating a foundation chain using Egyptian macrame thread with a 4mm needle. Work 15 chains to reach about 16 cm. Adjust the number of chains for a larger or smaller size. Skip the first chain from the hook and work filling stitches into the back loop of each chain.To shape the body, crochet filling stitches in each stitch, repeating for 10 rows or until reaching the desired length of about 12 cm. Attach the sleeves by working additional foundation chains from the body under the arms, continuing the same stitch pattern.
For decorative elements, sew on pre-made or crochet flowers using Italian cotton thread with a glue gun. Add a chain border or slip stitches around the hemline for a neat finish.

Crochet Bonbonniere Basket Stylish Pattern
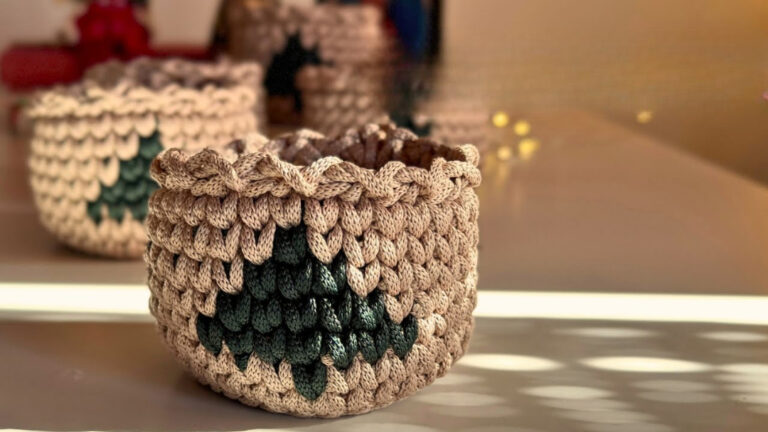
The Crochet Bonbonniere Basket is a delightful blend of elegance and functionality, making it a versatile addition to any home. Its intricate design and charming appearance make it an excellent decorative piece, enhancing the aesthetic appeal of any room. At the same time, it serves as a practical storage solution, perfect for holding small items like candies, jewelry, or trinkets.
This basket is highly customizable, allowing for personalization to suit various occasions or themes, such as weddings, baby showers, or festive holidays. To achieve the desired look, start by creating a sturdy base, then build up the sides using simple crochet stitches. The final touch includes incorporating decorative elements like ribbons or flowers, depending on the occasion. This flexibility makes the Crochet Bonbonniere Basket not only a beautiful creation but also a functional and personalized piece fit for any setting.

Crochet Basket Cute Knitting Pattern
Personalizing a crochet basket can add a unique touch that reflects individual style and purpose. Consider using different patterns such as the classic single crochet for a tight weave or the more open granny square pattern for a decorative flair. Choosing vibrant or pastel colors can completely change the basket’s look, making it perfect for specific themes like baby showers, weddings, or seasonal decor.
Embellishments enhance the basket’s charm; try adding ribbons, buttons, or small crochet flowers to match the occasion. To adjust the size and shape to fit particular needs, vary the number of starting chain stitches and the rounds. For a taller basket, simply add more rows to the sides. To make a wider or narrower base, increase or decrease the number of initial increases. This flexibility ensures the basket can serve various storage purposes, whether for holding toys, makeup, or other household items.