Adorable Crochet Booty Duck Doll Pattern for Now
A round, squeezable bottom and a curious little beak give the crochet booty duck doll pattern a personality that no store-bought toy can match. Beginners will enjoy the simple round-by-round shaping, while seasoned makers will love how quickly the plump body grows. Grab some soft white yarn, a scrap of orange, and an evening of quiet stitching. The result is a cuddly friend worth showing off.
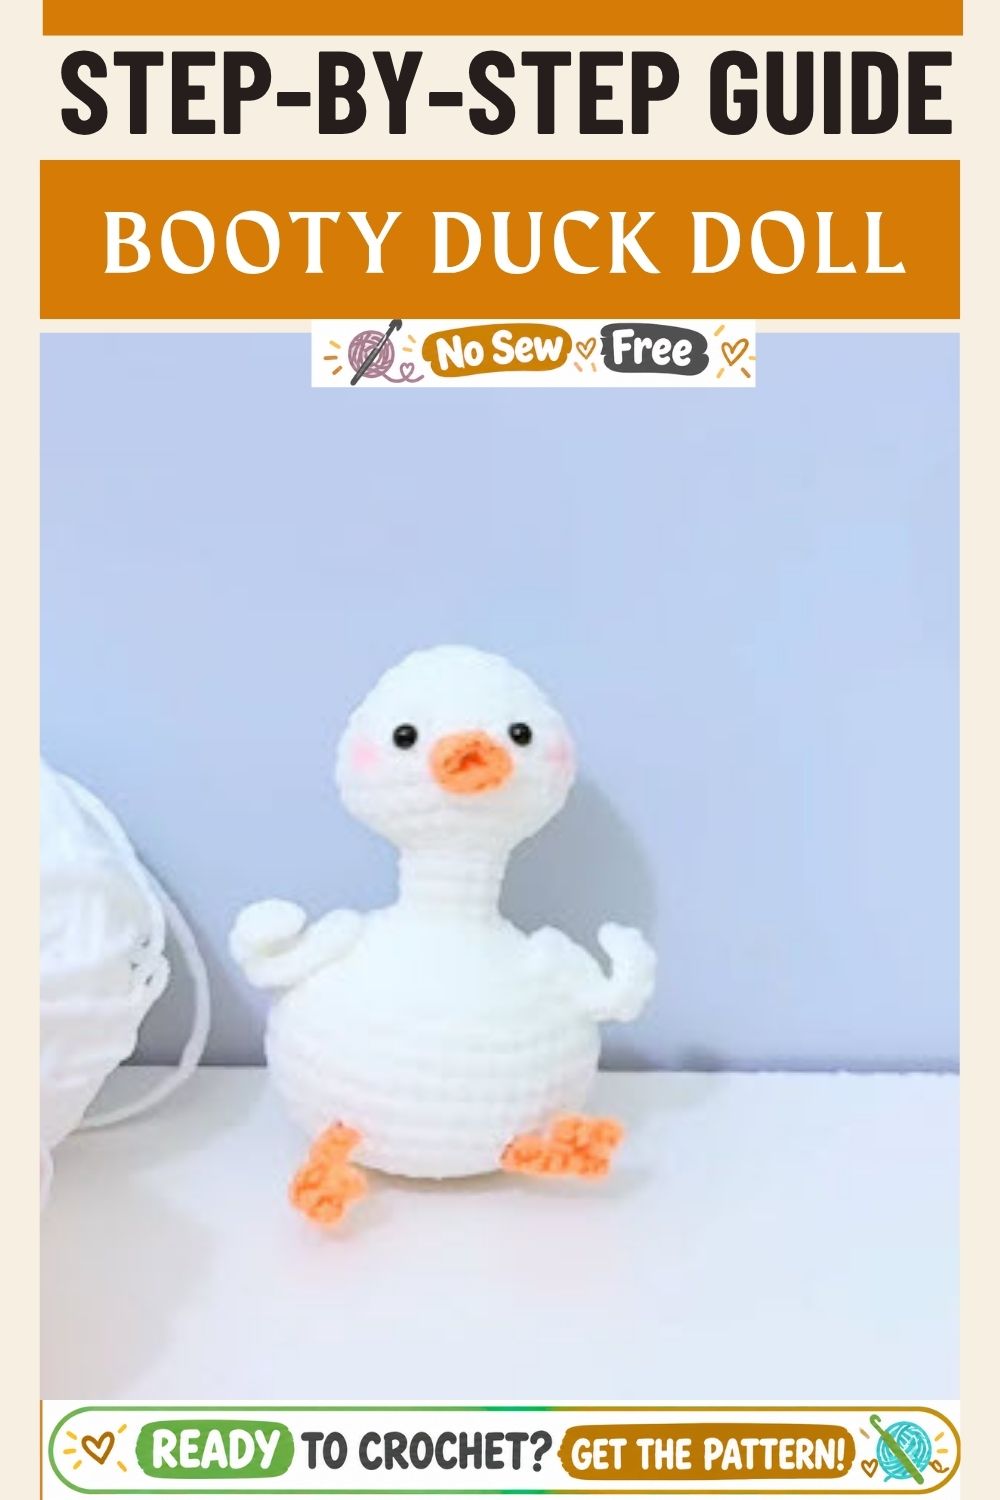
Picture a snowy-white duck with a long, graceful neck that swells into a wonderfully round bottom. A soft orange beak sits at the center of the face, and the whole doll grows in one continuous piece from the head downward. Fewer seams mean a smoother finish and less sewing at the end.
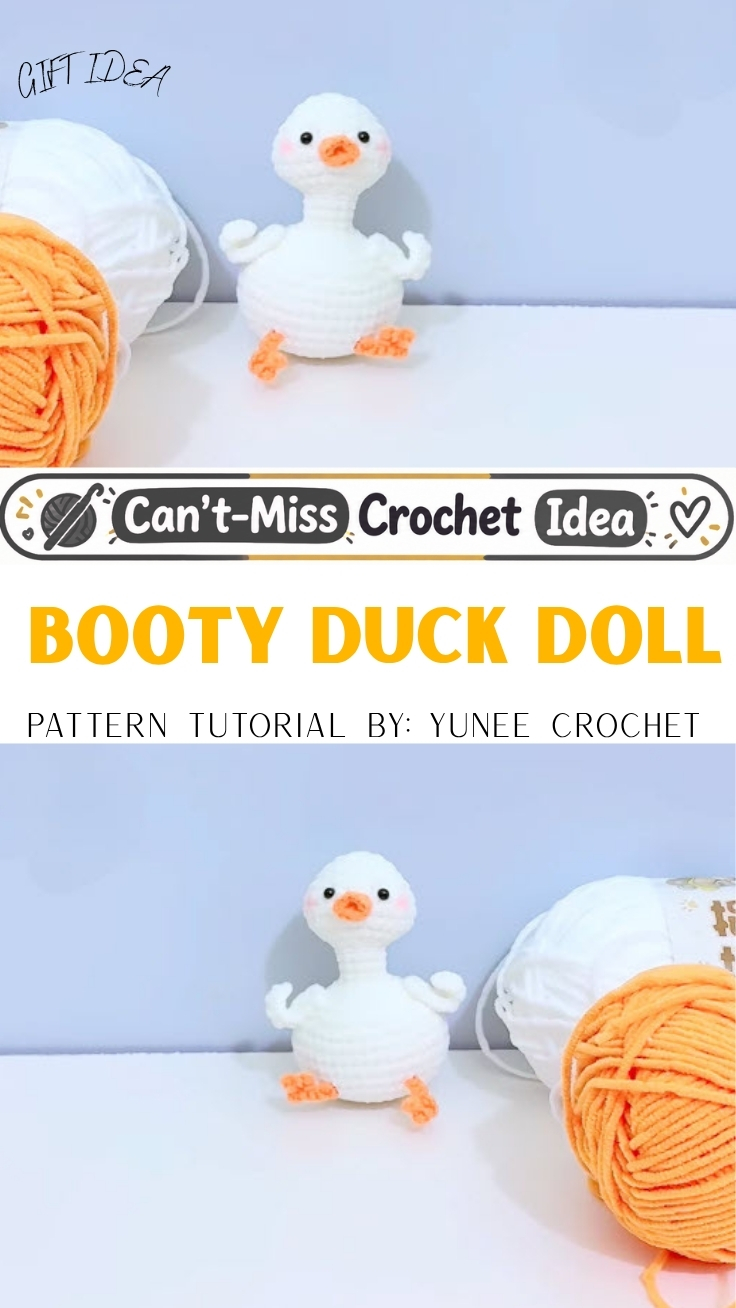
Anyone hunting for an adorable crochet booty duck doll pattern for now, something to start tonight and finish this weekend, will appreciate the steady pace. Every round relies on basic increases and decreases, so the shaping stays predictable. Expect a plush, huggable toy that looks sweet on a bookshelf, a nursery shelf, or a gift table.
Project Details
- Skill Level: Beginner-friendly (comfort with the magic ring helps)
- Finished Size: About 7 inches (18 cm) tall with DK yarn and a 2.5 mm hook
- Estimated Time Required: Prep 15 minutes, stitching 2.5 to 3 hours, finishing 30 to 45 minutes
- Recommended Yarn Weight: DK weight (category 3), such as soft cotton or milk cotton
- Crochet Hook Size: 2.5 mm, a size smaller than the label suggests so the stuffing never peeks through
Materials Needed
- White DK yarn, about 40 g (roughly 100 yards)
- Orange DK yarn, a small scrap of about 5 g
- 2.5 mm crochet hook
- Fiberfill stuffing
- Tapestry needle
- Two stitch markers (a bright locking marker is easiest to spot)
- Sharp scissors
- Optional: 8 mm black safety eyes, pink blush for the cheeks, a ribbon bow
Crochet Stitches & Techniques
Only a handful of moves appear in the whole pattern, and all of them repeat constantly. Patterns are written in US terms and worked in a continuous spiral, so never join the rounds.
- MR (magic ring): an adjustable loop that closes the center of a round piece without a hole.
- sc (single crochet): the main stitch of the entire doll.
- inc (increase): two single crochets worked into the same stitch.
- dec (invisible decrease): insert the hook through the front loops only of the next two stitches, yarn over, pull through both, yarn over, and pull through the remaining two loops.
- Fastening off: cutting the yarn and pulling the tail through the last loop.
- Sewing: attaching the beak with a tapestry needle.
Pattern Instructions
Keep the six photos nearby. Each step below points to the picture that shows that stage, so your work can be compared as you go.
Step 1: Making the Head, Start with a Magic Ring
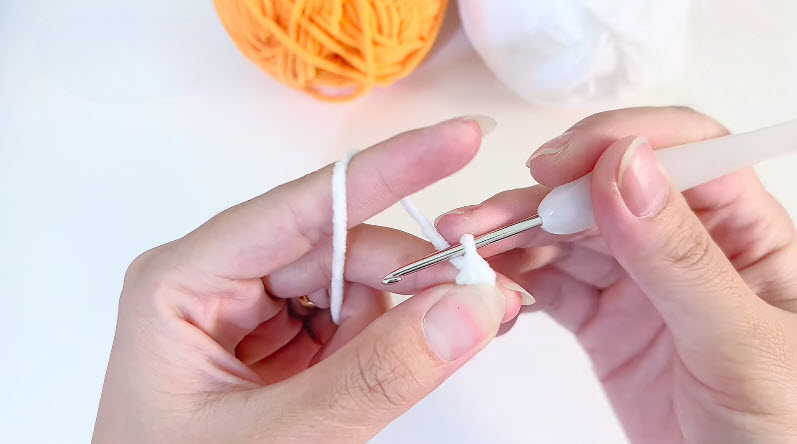
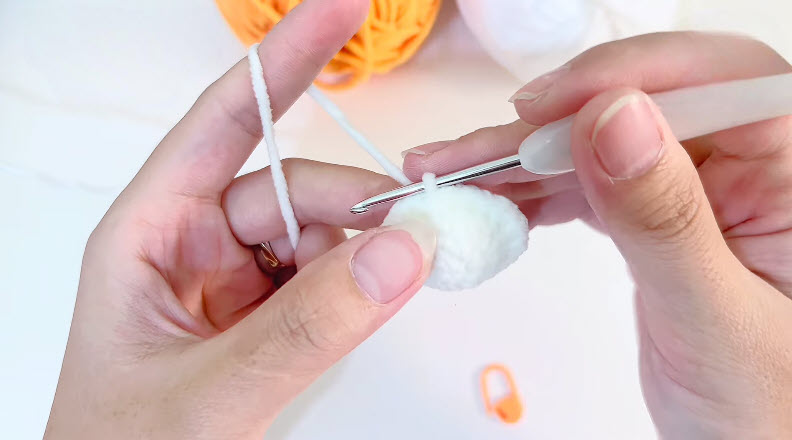
Hold the hook in your right hand like a pencil, and let the white yarn run over your left index finger so it stays under gentle tension, just as in the first photo. Wrap the yarn around two fingers, cross it to form a loop, and slip the hook inside. Pull up a loop, then chain 1 to lock the ring.
Round 1: Work 6 sc into the ring (6). Tug the tail firmly until the center closes, then slide a stitch marker into the first stitch.
Pro-Tip: Leave a tail of about 4 inches. Tugging it after the first round keeps the center tight and saves you from a gap at the top of the head.
Step 2: Building the Flat Circle
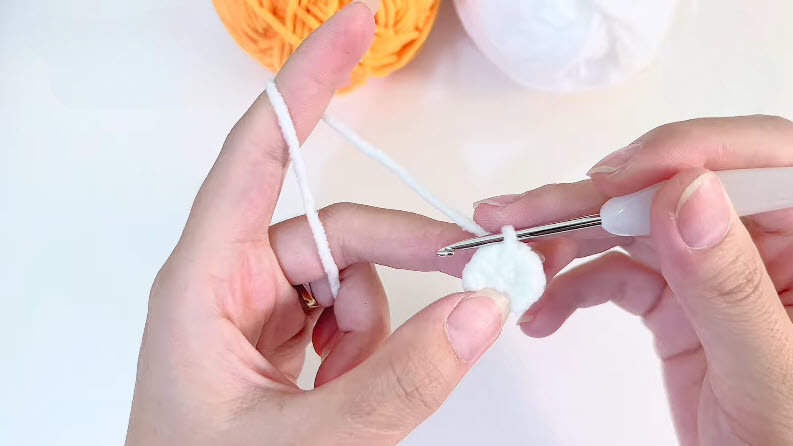
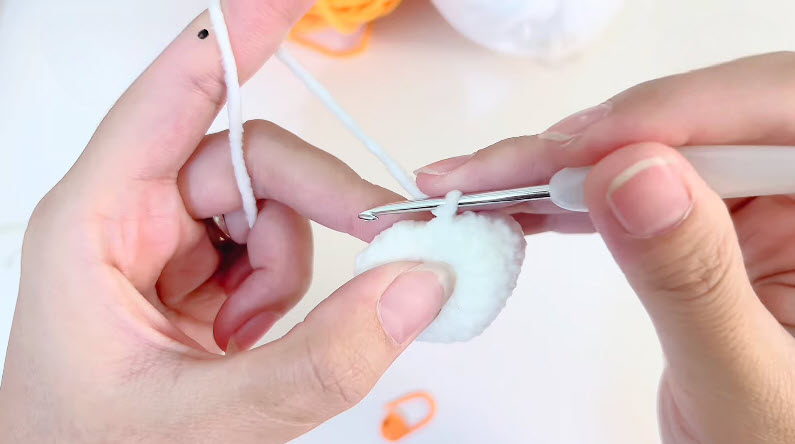
The second photo shows a small, flat white disc growing on the hook. Keep your left fingers close to the work and rotate the circle a little after each stitch.
- Round 2: inc in each stitch (12)
- Round 3: (sc, inc) x6 (18)
- Round 4: (2 sc, inc) x6 (24)
- Round 5: (3 sc, inc) x6 (30)
Count at the end of every round. A flat, even circle means the increases sit evenly, which decides how smooth the head looks later.
Step 3: Working the Sides of the Head
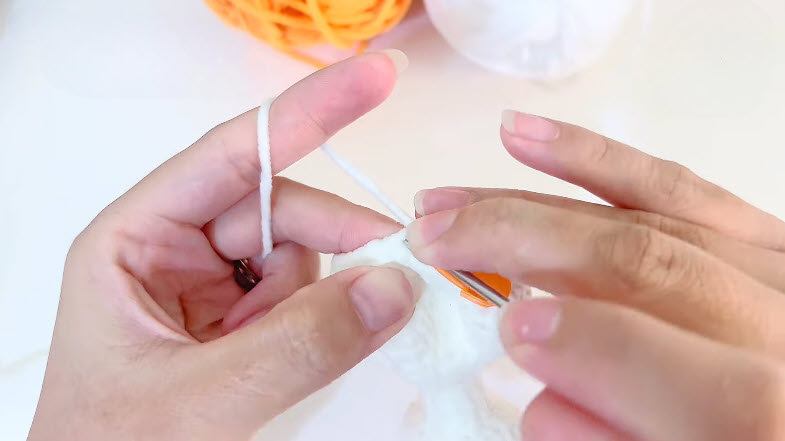
Notice how the disc in the third photo begins to curl into a soft ball. Stop increasing now and stitch straight. Round 6 through Round 8: sc in each stitch around (30).
Keep the orange stitch marker at the end of each round and move it up as you go. Everything sits on the outside of the piece, so the curve forms naturally without any effort from you.
Step 4: Deepening the Head
The fourth photo shows the cup growing deeper and rounder, with the hook resting at the open edge. Round 9 through Round 11: sc in each stitch around (30).
Pinch the sides gently to check the shape. The head should look slightly wider than tall, like a small ball. Six straight rounds in total give the face enough room for the beak and eyes.
Pro-Tip: Stop at Round 11 and measure. Add or remove one round here if your tension runs loose or tight, because the head sets the proportion of the whole duck.
Step 5: Closing the Head and Stuffing
Time to decrease. Stuff the head as you shrink it, and keep adding small tufts so the ball stays firm and smooth.
- Round 12: (3 sc, dec) x6 (24)
- Round 13: (2 sc, dec) x6 (18)
- Round 14: (sc, dec) x6 (12)
Push the fiberfill up into the round cheeks with the blunt end of your hook. Lumps hide easily under white yarn, so roll the head between your palms and fix any bumpy spots right away.
Step 6: Shaping the Neck
Look at the fifth photo: the piece narrows into a long, slim tube while the orange marker sits near the hook. Here the doll becomes a duck. Round 15 through Round 22: sc in each stitch around (12), eight rounds in all.
Stuff the neck lightly as it grows. Pack it too tightly and the neck will stand stiff and straight, while a soft fill lets it curve gently like a real duck’s.
Step 7: Making the Body, Increase for the Booty
From the narrow neck, widen into the round body. Take your time with the counting here.
- Round 23: (sc, inc) x6 (18)
- Round 24: (2 sc, inc) x6 (24)
- Round 25: (3 sc, inc) x6 (30)
- Round 26: (4 sc, inc) x6 (36)
- Round 27: (5 sc, inc) x6 (42)
- Round 28: (6 sc, inc) x6 (48)
Six increase rounds create the bottom’s rounded curve. Spread the stitches evenly, or the booty will look lopsided.
Step 8: Crocheting the Body
Round 29 through Round 38: sc in each stitch around (48), ten rounds without shaping. Stuffing begins once the body reaches about Round 32, and it should go in one small handful at a time.
Step 9: Decreasing and Closing the Body
- Round 39: (6 sc, dec) x6 (42)
- Round 40: (5 sc, dec) x6 (36)
- Round 41: (4 sc, dec) x6 (30)
- Round 42: (3 sc, dec) x6 (24)
- Round 43: (2 sc, dec) x6 (18)
Stop and stuff firmly, pushing extra fiberfill into the lower half so the bottom sits plump and round. Then finish the closing.
- Round 44: (sc, dec) x6 (12)
- Round 45: dec x6 (6)
Cut the yarn, thread the tail through the front loops of the last six stitches, and pull tight. Weave the end inside the body.
Step 10: Crocheting the Beak
Switch to orange yarn and make a magic ring.
- Round 1: 6 sc in the ring (6)
- Round 2: (sc, inc) x3 (9)
- Round 3: sc in each stitch around (9)
Fasten off and leave a long tail for sewing. Squeeze the little cup flat between two fingers so it forms a soft oval.
Step 11: Attaching the Beak and Facial Features
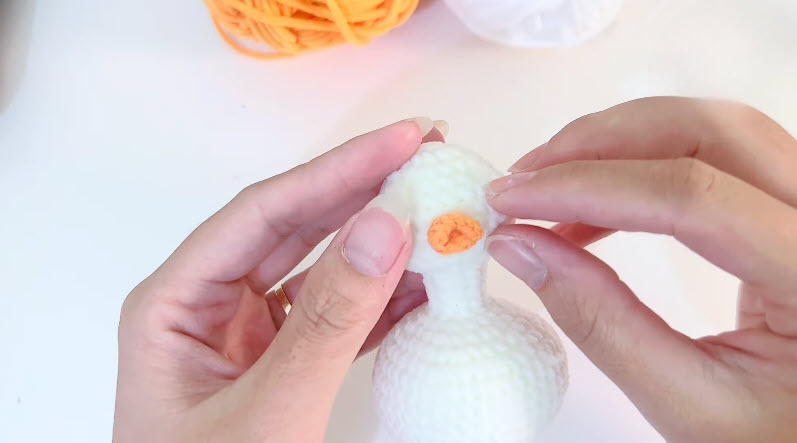
The last photo shows the finished duck with the orange beak resting at the center of the face, right above the neck. Pin the beak between Rounds 8 and 10 of the head and check it from the front before committing.
Sew around the edge with small, even stitches, pulling gently so the beak stays slightly raised. If you’re using safety eyes, place them about four stitches away on both sides of the beak, in the same round. Snap on the backs, then add a touch of pink blush to each cheek.
Step 12: Final Assembly
Weave every remaining tail inside the body. Smooth the neck with your fingers, and set the duck down on its round bottom. A properly stuffed body gives the doll a stable seat, so it stands up all by itself.
Tips for Success
- Count often. A quick stitch count at the end of each round catches slips before they multiply.
- Mark every round. Move your stitch marker up as you finish each round; spiral crochet has no visible seam to guide you.
- Stuff in small pieces. Tiny tufts distribute evenly and prevent a lumpy body.
- Keep tension even. Tight, consistent stitches stop the fiberfill from showing through the white yarn.
- Hide the ends well. Weave tails in different directions for a neat finish.
- Use good light. White yarn hides stitches, so work near a window or lamp.
Personalization Ideas
Colour Swaps
Swap the white for yellow, pastel pink, or soft gray, and pair each with a bright beak. A black-and-white version looks fun and modern.
Seasonal Versions
Add a tiny Santa hat for winter, a green scarf for spring, or a pumpkin-colored bow for autumn. One base pattern can cover an entire year of holidays.
Facial Expressions
Embroidered closed eyes give a sleepy look, and tiny lashes add extra sweetness. Slightly wider-set eyes make the duck look surprised.
Accessories
Tiny sunglasses, a crocheted flower crown, or a ribbon around the neck each change the mood completely.
Mini and Jumbo Versions
Use fingering-weight yarn with a 2 mm hook for a palm-sized duck, or double-strand chunky yarn with a 5 mm hook for a huge floor-sitter.
Keychain, Ornament, or Gift
Skip the long neck and add a metal ring to the head for a bag charm. A small ribbon loop turns the doll into a tree ornament, and wrapping the finished duck in tissue makes a handmade baby-shower gift.
Common Mistakes to Avoid
- Skipping the marker. Losing track of the round start leads to uneven shaping. Always mark the first stitch.
- Leaving gaps in the magic ring. A loose center lets stuffing escape. Pull the tail tight after Round 1.
- Over-stuffing the neck. A stiff neck can’t bend. Fill it softly.
- Under-stuffing the body. A thin body won’t sit up. Firm fiberfill keeps the booty round.
- Attaching the beak too high. A low beak looks cute, while a high one changes the whole expression. Pin first, sew second.
- Rushing the decreases. Uneven decreases leave visible bumps, so work each one slowly.
Care and Storage Tips
Spot-clean the duck with a damp cloth and mild soap. If machine washing is unavoidable, place the doll inside a mesh laundry bag and use a gentle, cold cycle. Air-dry it away from direct heat so the fibers stay soft. For storage, keep the duck in a breathable cotton bag rather than plastic, which traps moisture and yellows white yarn.
Frequently Asked Questions
How long does the crochet booty duck doll take to finish?
Most crocheters finish in three to four hours in total, including stuffing and sewing the beak. Newer makers may need an extra evening.
Can beginners make the Crochet Booty Duck Doll?
Yes. Every round uses single crochet, increases, or decreases, and the magic ring is the only technique that takes practice.
Which yarn works best?
Soft milk cotton or DK cotton holds shape well, while acrylic works too. Pick a smooth yarn so the stitches remain visible.
Do I need safety eyes?
Not at all. Black embroidery thread makes a safer option for babies and toddlers.
How can I make the duck stand more easily?
Add extra fiberfill to the bottom rounds, and flatten the base slightly while stuffing.
Can I change the size?
Definitely. Heavier yarn and a larger hook create a jumbo duck, and thinner yarn with a smaller hook gives a mini version.
In Summary
Now that the steps are clear, pick up your hook and start the magic ring. Each round builds toward a plump, smiling duck that will brighten any corner of your home. Take your time, enjoy the shaping, and don’t worry if the first attempt looks a little wobbly, because practice makes every stitch neater. Once your duck is finished, snap a photo and share it with fellow crocheters. Your version might inspire someone else to start theirs.