Charming Crochet Bunny Bouquet Pattern for Home Décor
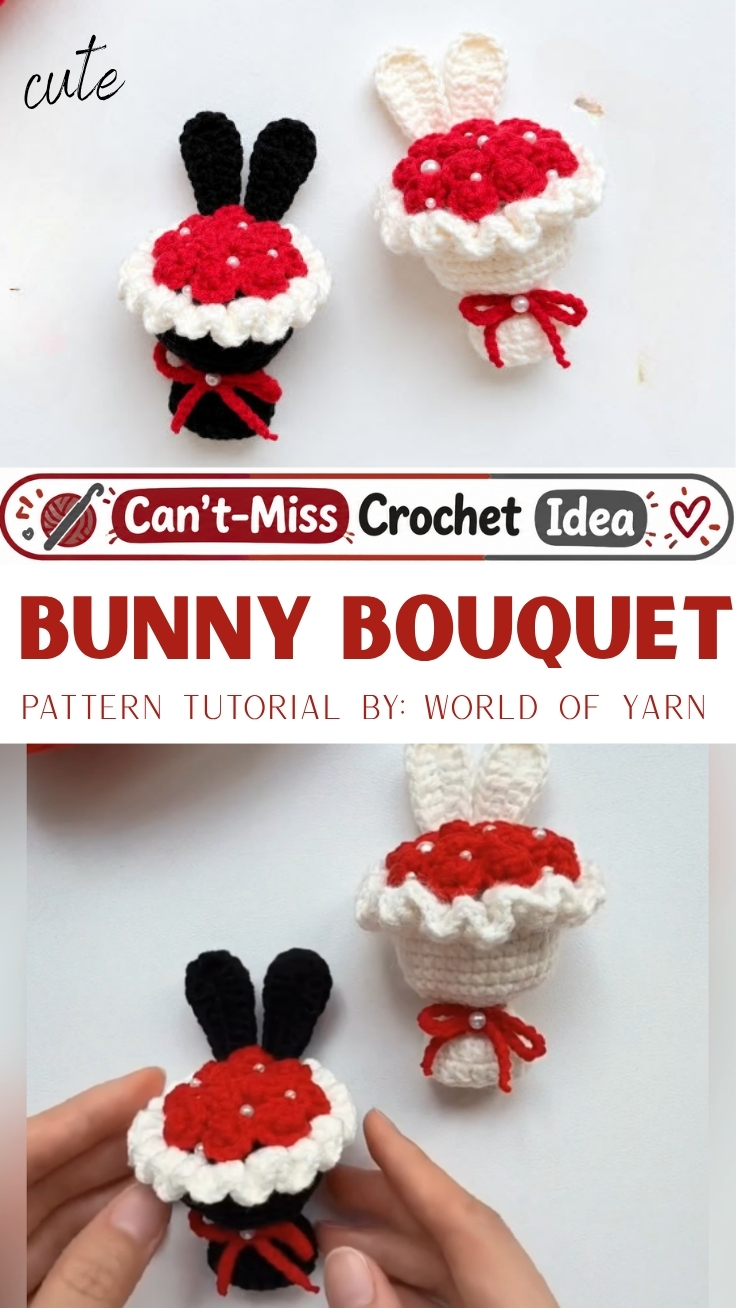
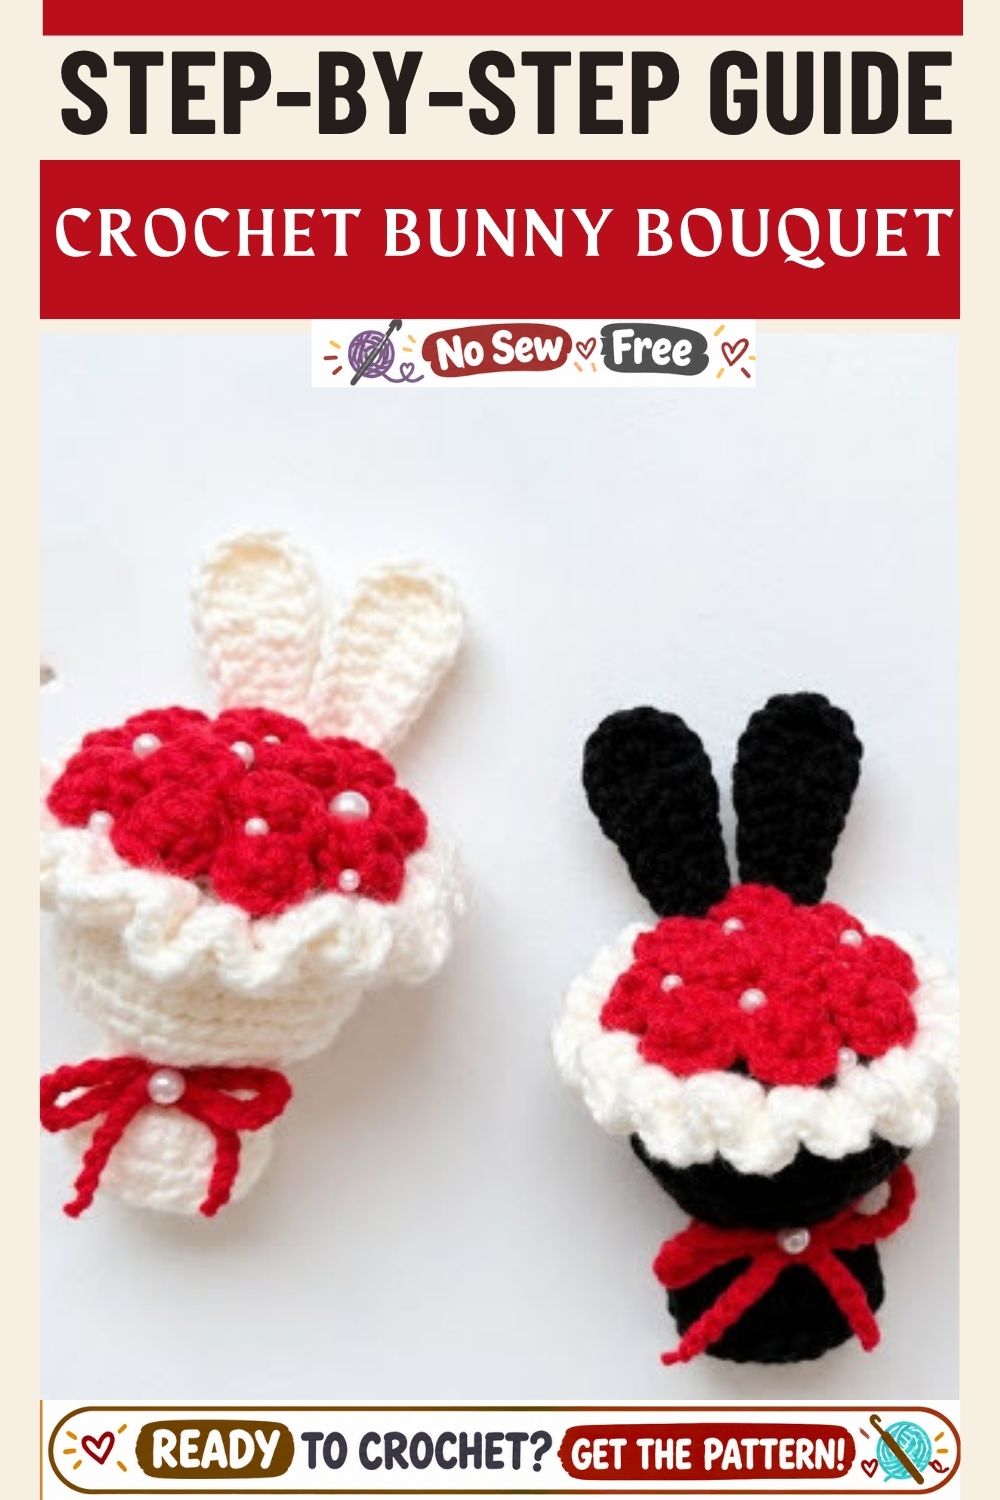
Crisp red, snowy white, and deep black meet in the Charming Crochet Bunny Bouquet Pattern for Home Décor, a tiny amigurumi bunny project. Each bunny wears a ruffled cap and upright ears. Together, the little bunnies form a cheerful arrangement that brightens any shelf.
The crochet bunny bouquet pattern stands out because every piece stays small, quick, and forgiving. Red, white, and black yarn create a bold contrast, while a ruffled trim adds soft texture. Small hooks and simple shaping keep the process approachable. Crafters can build a handmade bunny bouquet in one relaxed weekend. Even better, the miniature shapes double as amigurumi shelf décor that suits desks, mantels, and windowsills.
What You’ll Need
- Yarn: Black in the largest quantity, plus small leftover portions of red and white. Fine sport or DK weight gives crisp stitches.
- Hook: A slim 2.0–2.5 mm hook keeps the fabric dense, so aim for tight tension.
- Filling: Polyester fiberfill for the round base.
- Sewing tools: Tapestry needle, black sewing thread, and sharp snips.
- Extras: Stitch marker and a hot glue gun.
Materials Substitution Ideas
Cotton yarn produces a firmer, matte finish, while acrylic gives a softer, brighter look. Plush chenille can replace the white trim for a fluffier ruffle. However, thicker yarn needs a larger hook, so adjust the size upward. Embroidery floss also works for sewing the ears when black thread runs low. Instead of a glue gun, a dab of fabric glue secures loose ends.
Time Needed
Plan roughly fifteen minutes for prep, about ninety minutes of stitching, and thirty minutes for assembly. Each bunny therefore takes around two to two and a half hours. A full crochet bunny bouquet pattern of three bunnies fits comfortably into one weekend.
Step-by-Step Process
Follow each stage of the crochet bunny bouquet pattern in order. Every step below matches one photo.
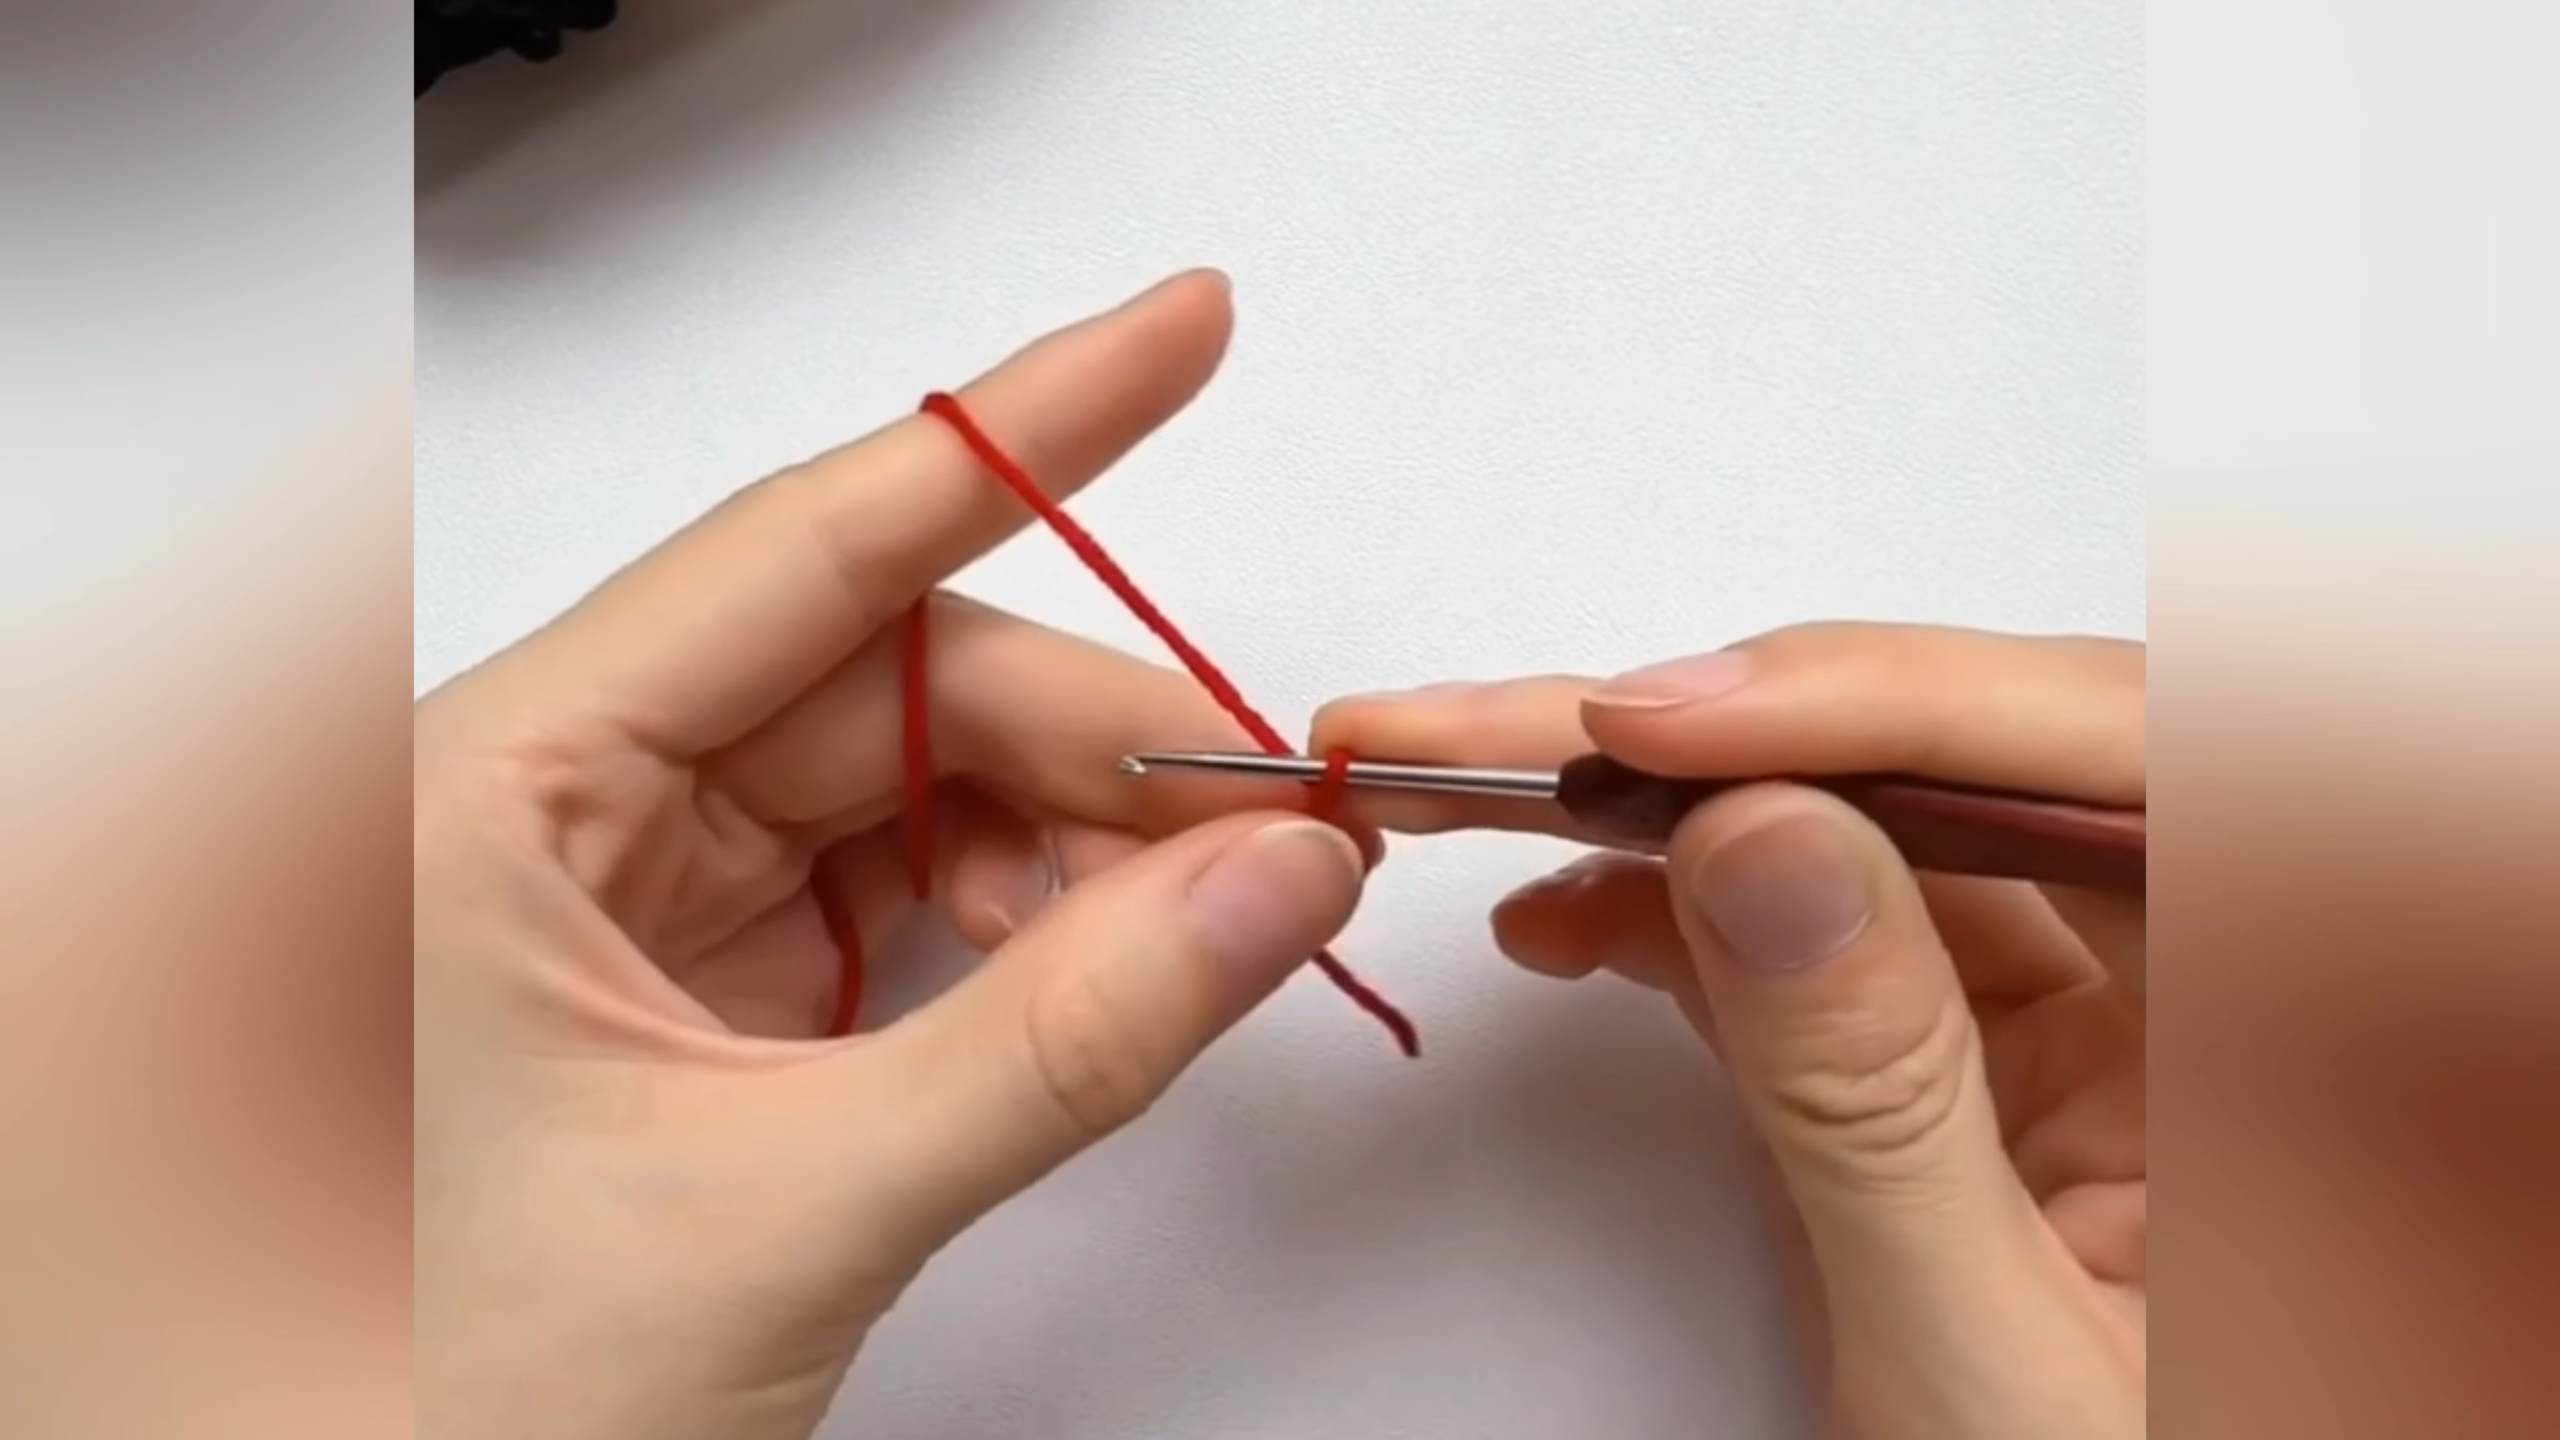
Step 1: Form the Red Magic Ring
Drape red yarn over the index finger and cross it into a loose loop. Next, slide the hook under the loop and draw up the working strand. Keep the yarn resting over the second finger for steady tension.
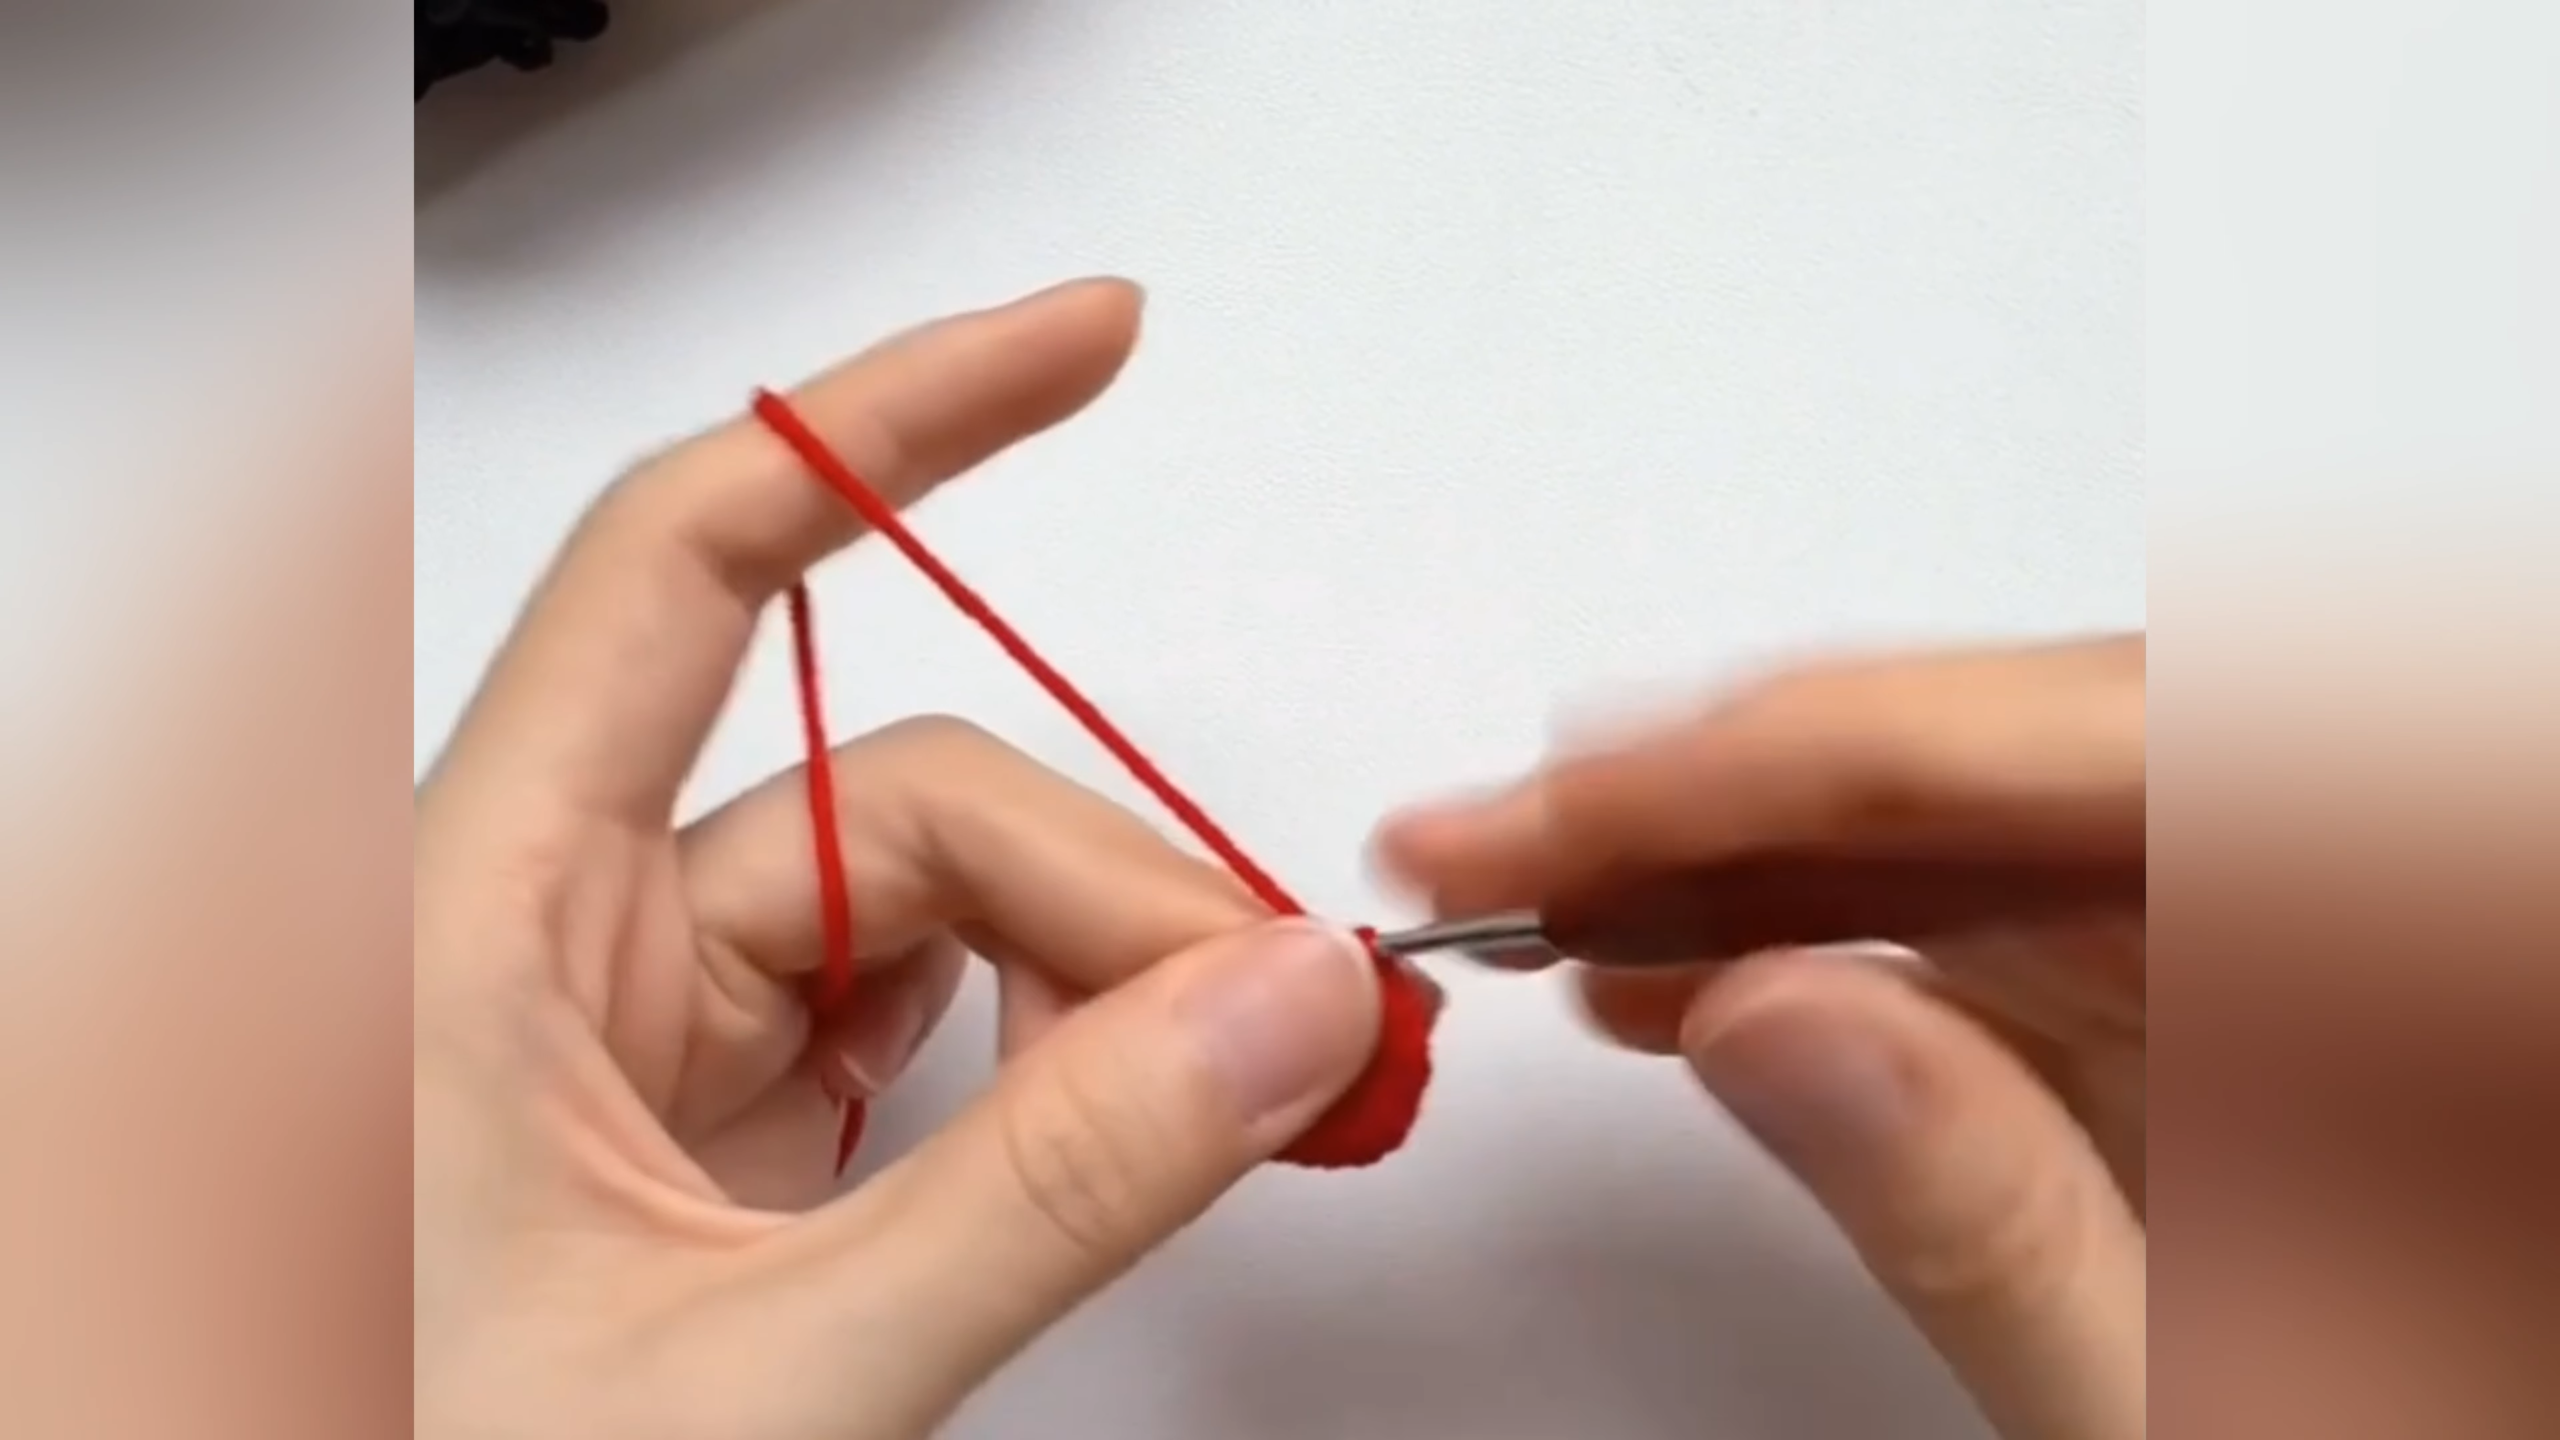
Step 2: Work the First Round
Chain one to lock the ring, then stitch the opening round into the center. Pull the tail firmly so the circle tightens into a small red disc. Pinch it between two fingers to feel its flat shape.
Stitch check: The disc should lie flat with no hole at the center. If a gap shows, tug the tail again.
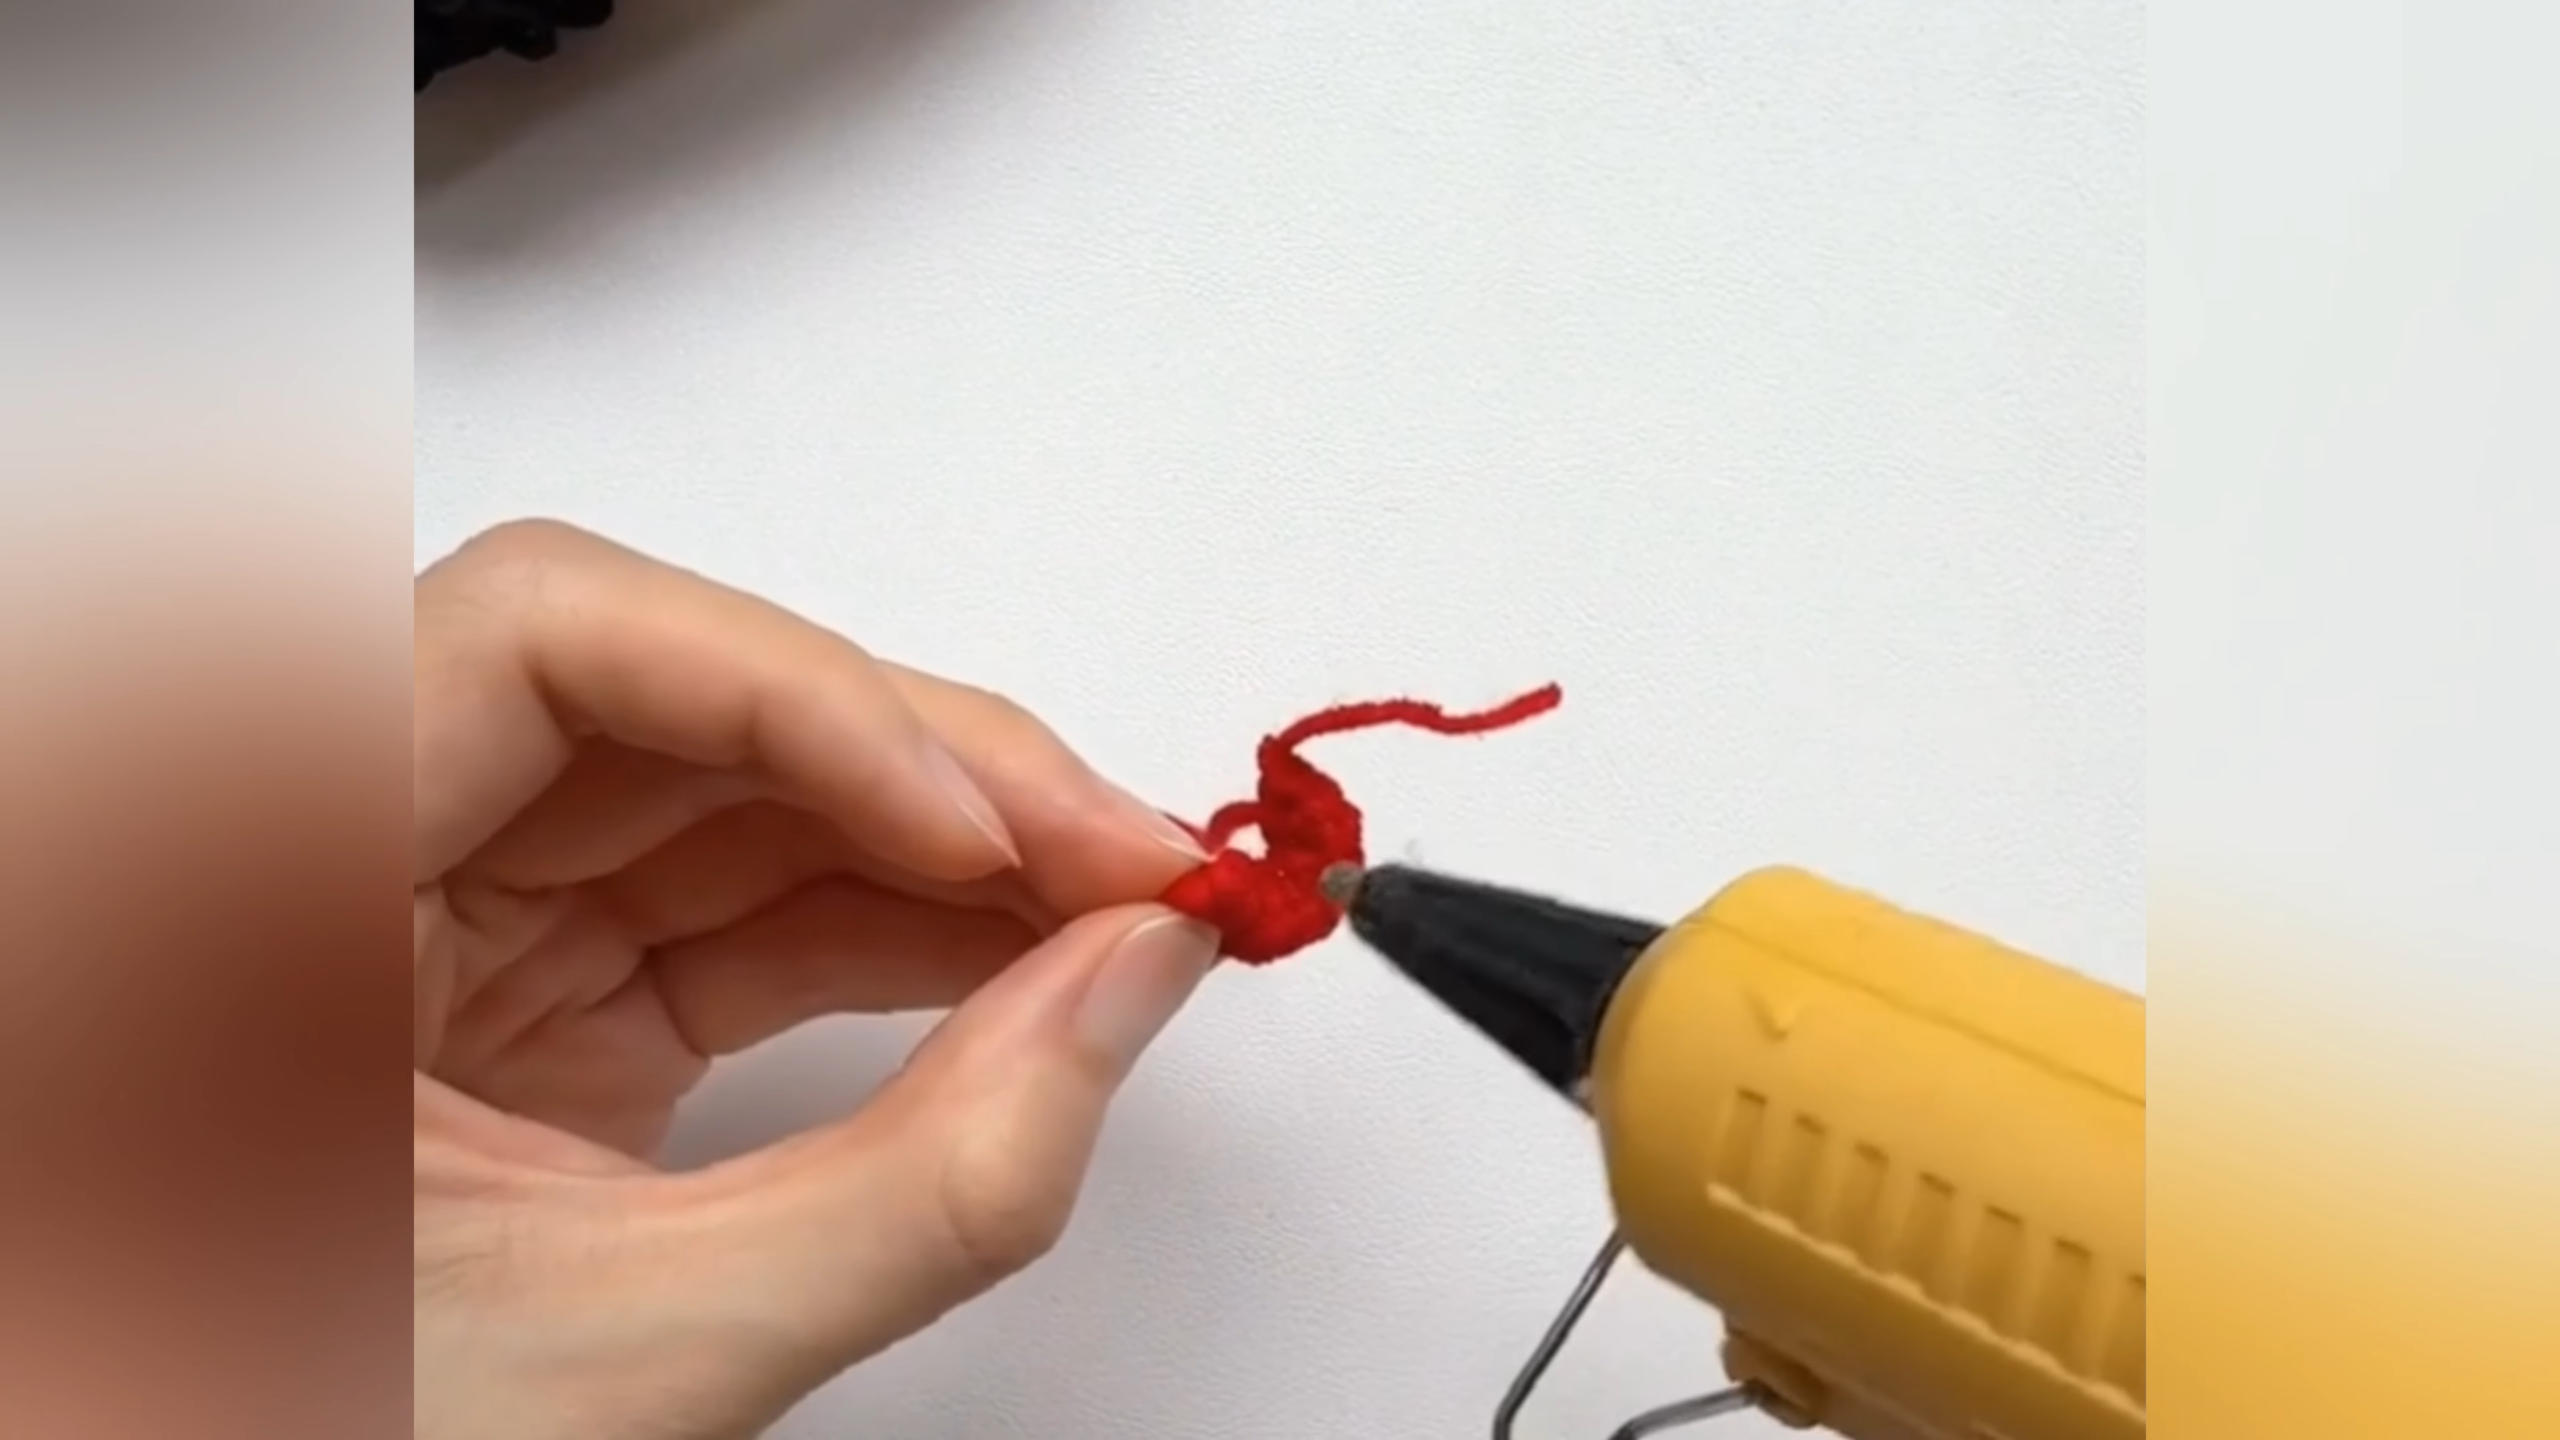
Step 3: Set the Red Piece with Glue
After the piece reaches its intended size, fasten off and trim the yarn. Then hold the red shape between two fingertips. Touch the glue gun nozzle to the edge and add one tiny dot to lock loose ends.
Why it matters: a small dot of glue keeps fine stitches from loosening during handling, which prevents repairs later.
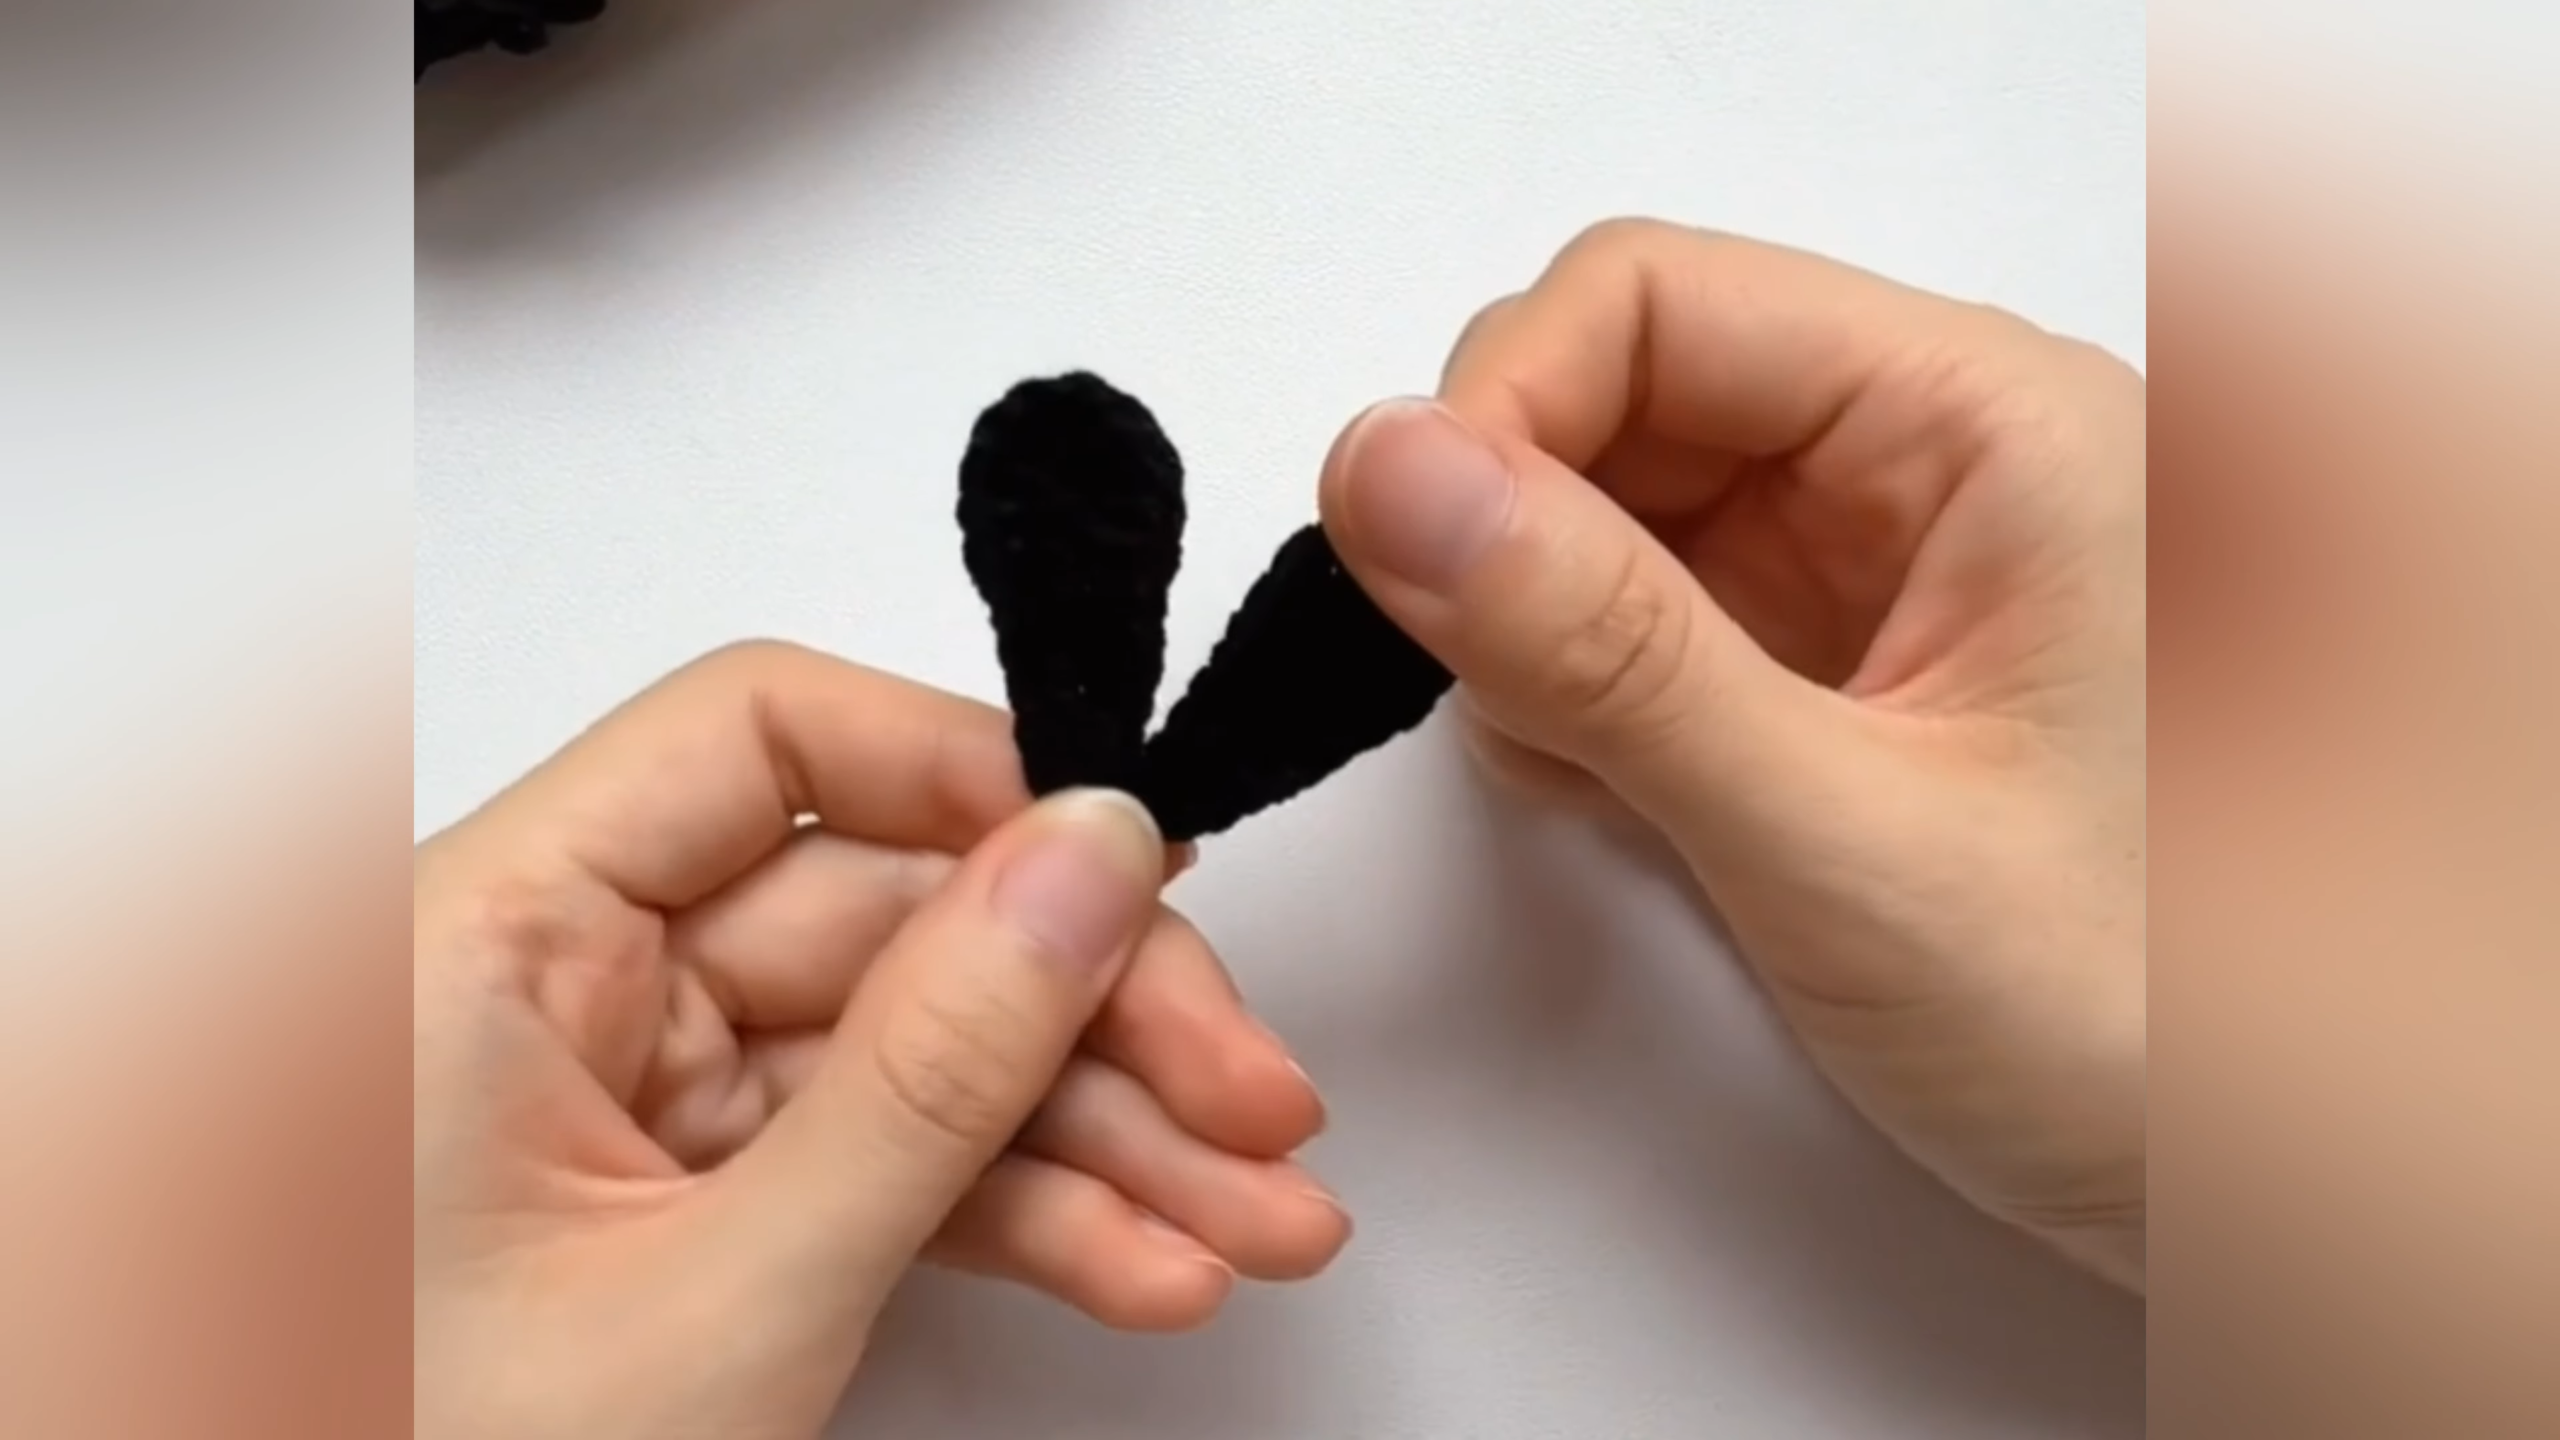
Step 4: Crochet the Two Black Ears
Switch to black yarn and work two slim, teardrop-shaped ears with rounded tips. Flatten both ears and hold them side by side. Their width and length should match closely.
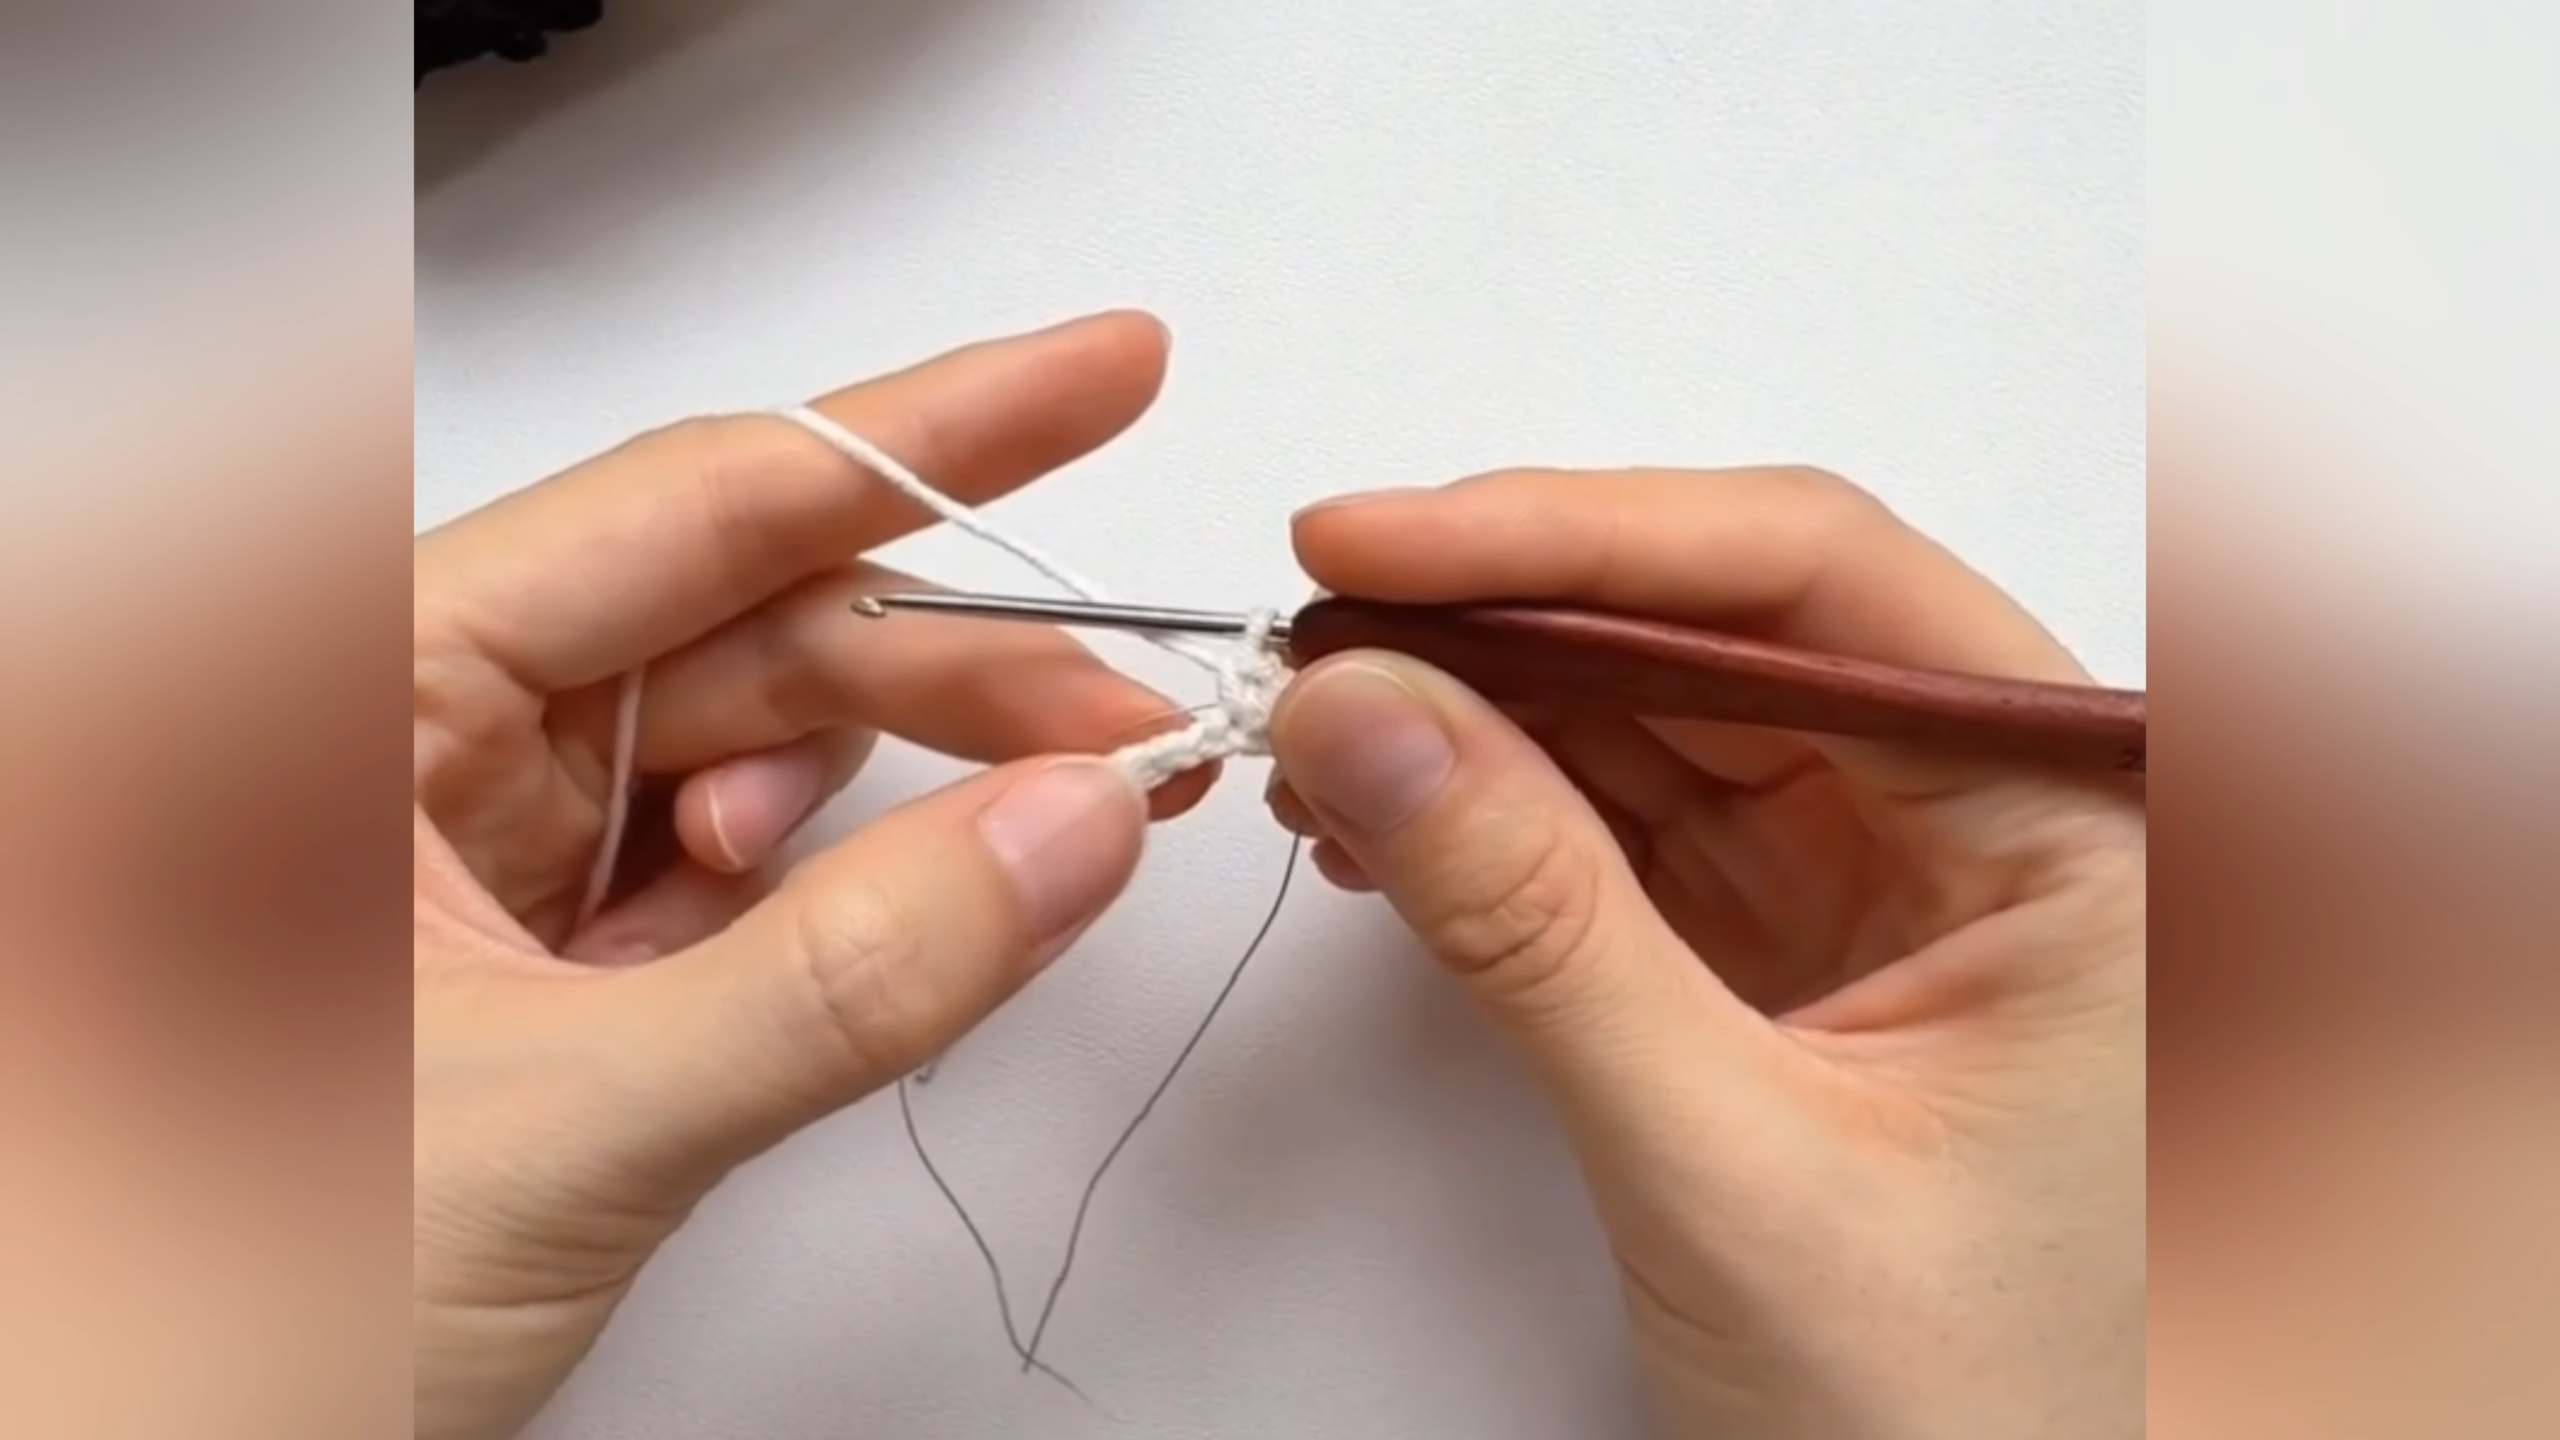
Step 5: Start the White Trim Strip
Change to white yarn and chain a short foundation strip. Then work back along the chain in tight, even stitches. Let any loose starting thread hang below the work while the hook stays close to the fingertips.
Count now: Tally the stitches along each edge. Matching numbers on both sides keep the strip straight.
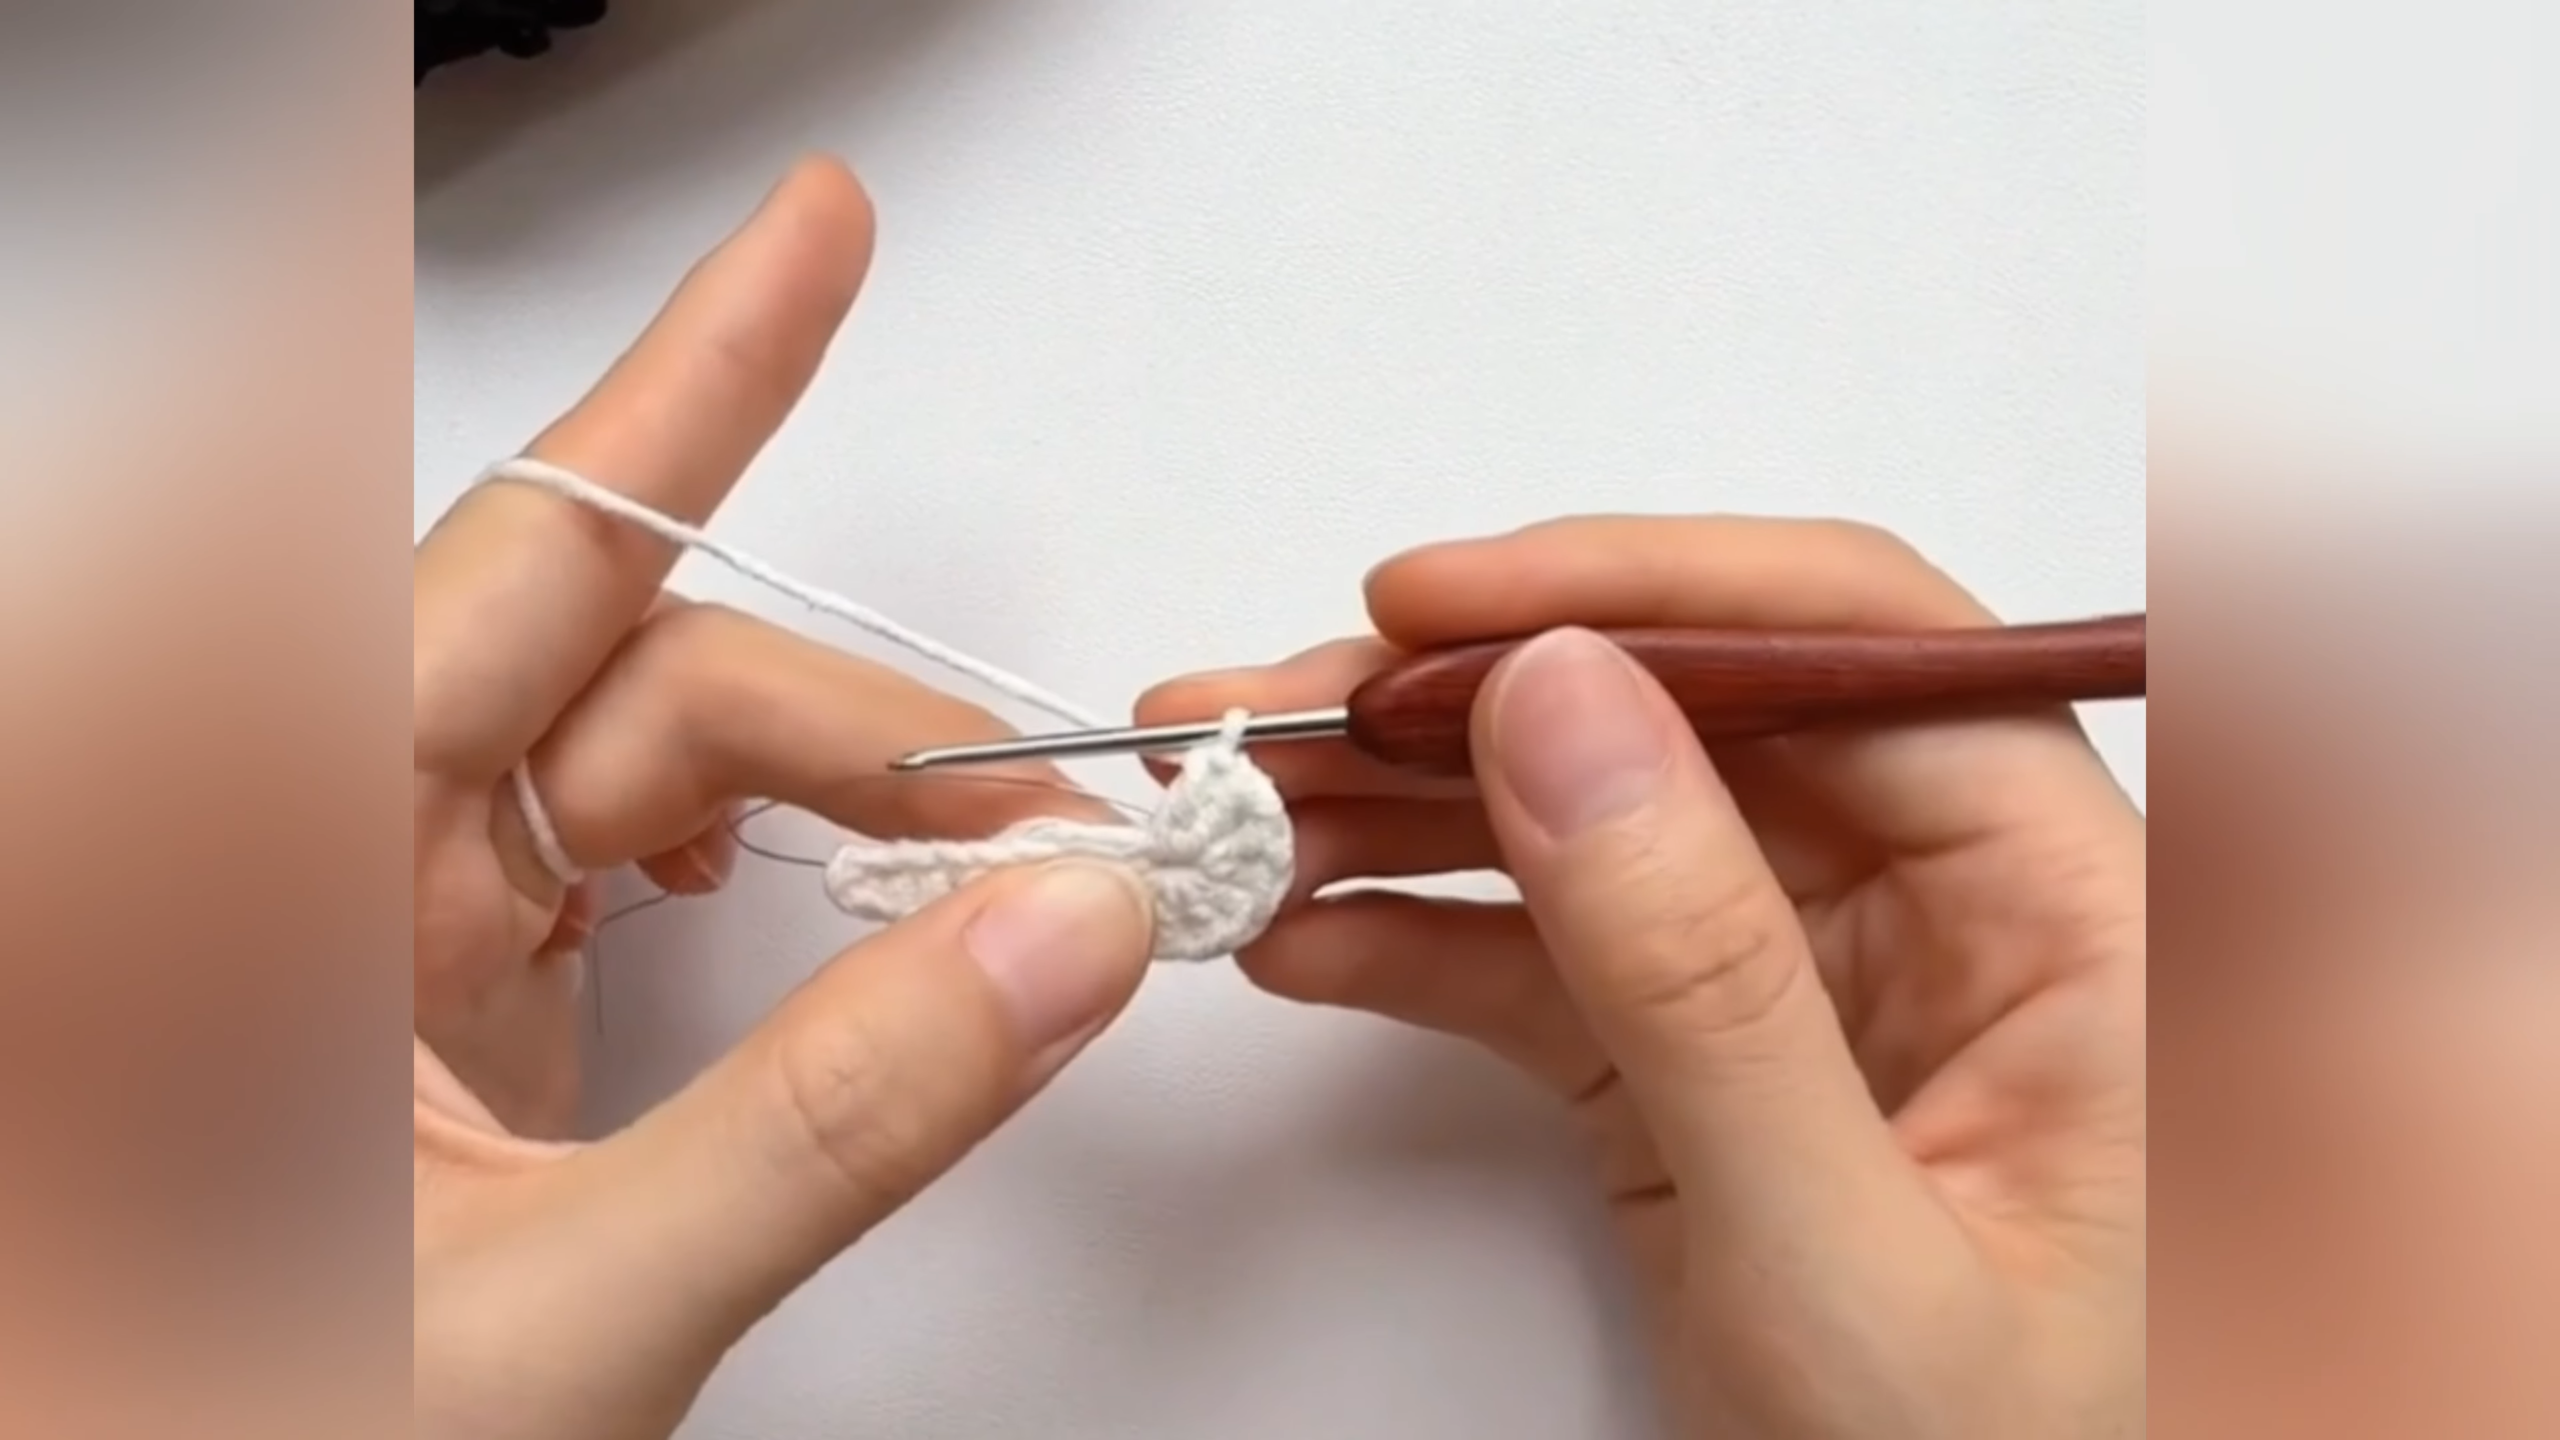
Step 6: Grow the Strip into a Ruffled Fan
Continue in white and add extra stitches along one edge only. Gradually, the strip curls into a half-round fan. The curved side becomes the ruffled border that frames the bunny’s head.
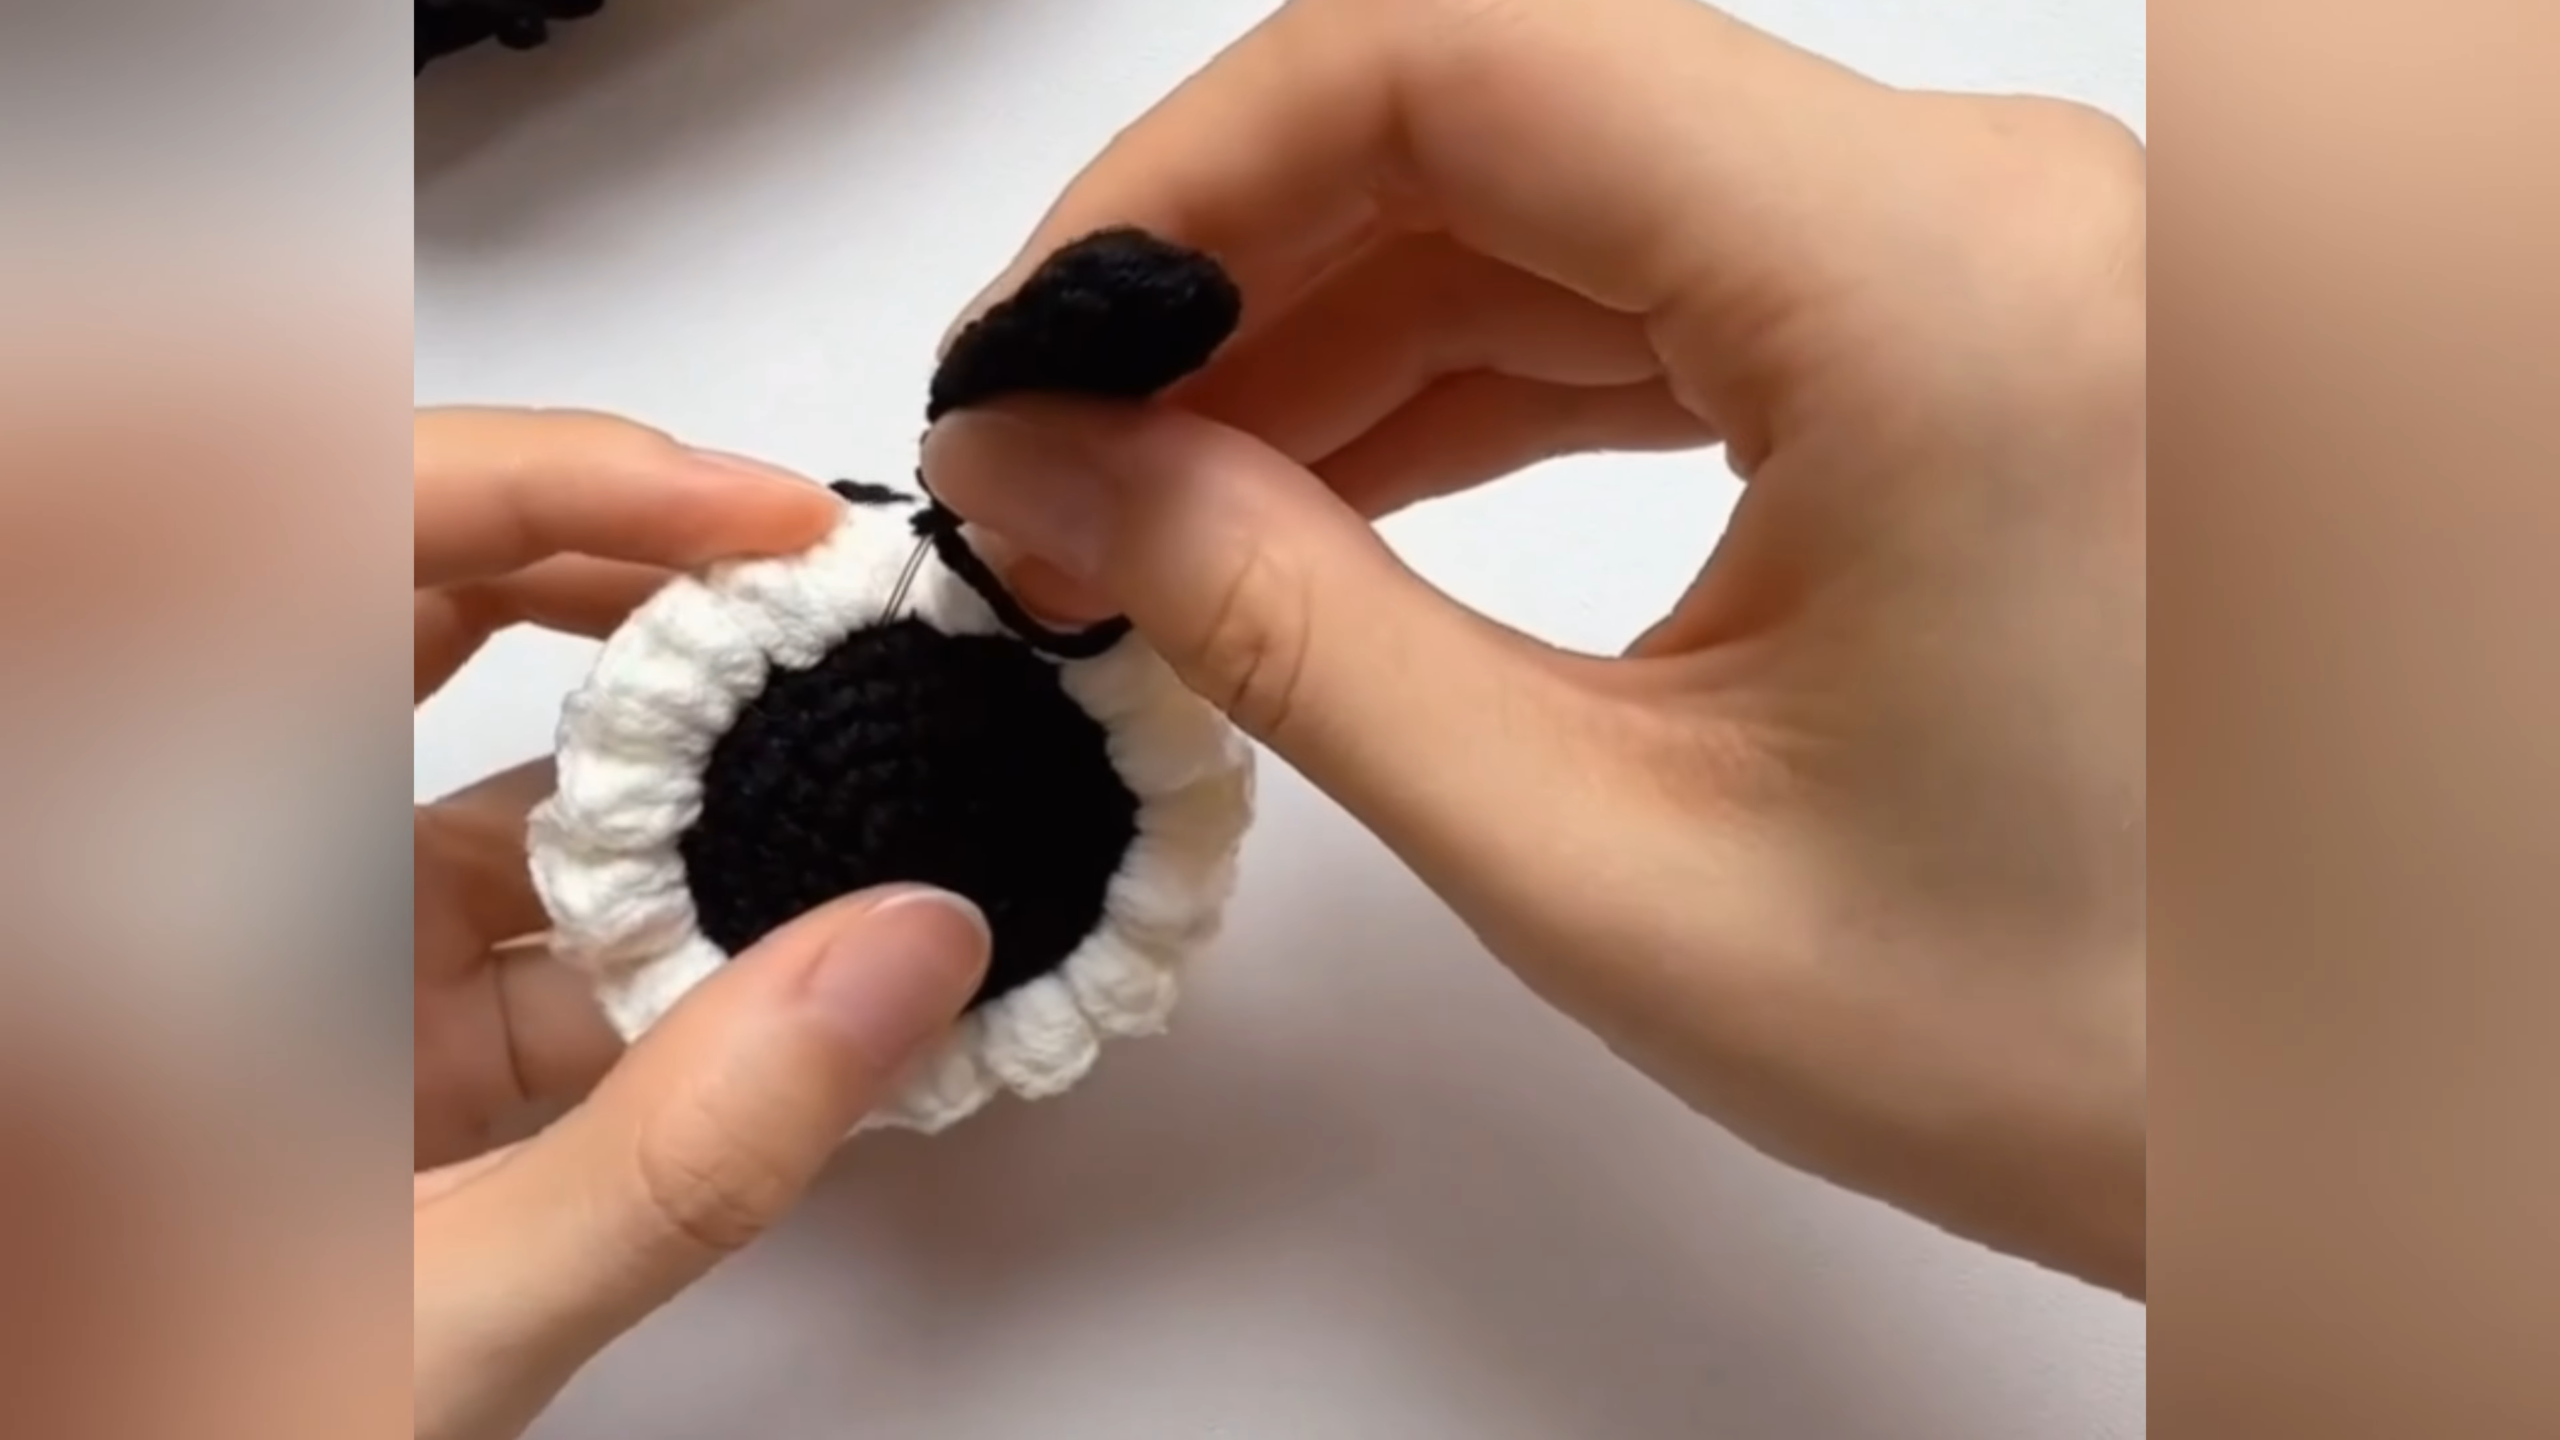
Step 7: Frame the Base and Sew On the First Ear
Wrap the finished white ruffle around the round black base so the puffy edge frames it. Next, thread a needle with black yarn. Stitch the first ear onto the top edge, passing through the ruffle and the base.
Why it matters: sewing through both layers anchors the ear at a firm angle, so the silhouette stays upright after handling.
Step 8: Complete the Ears and Cap
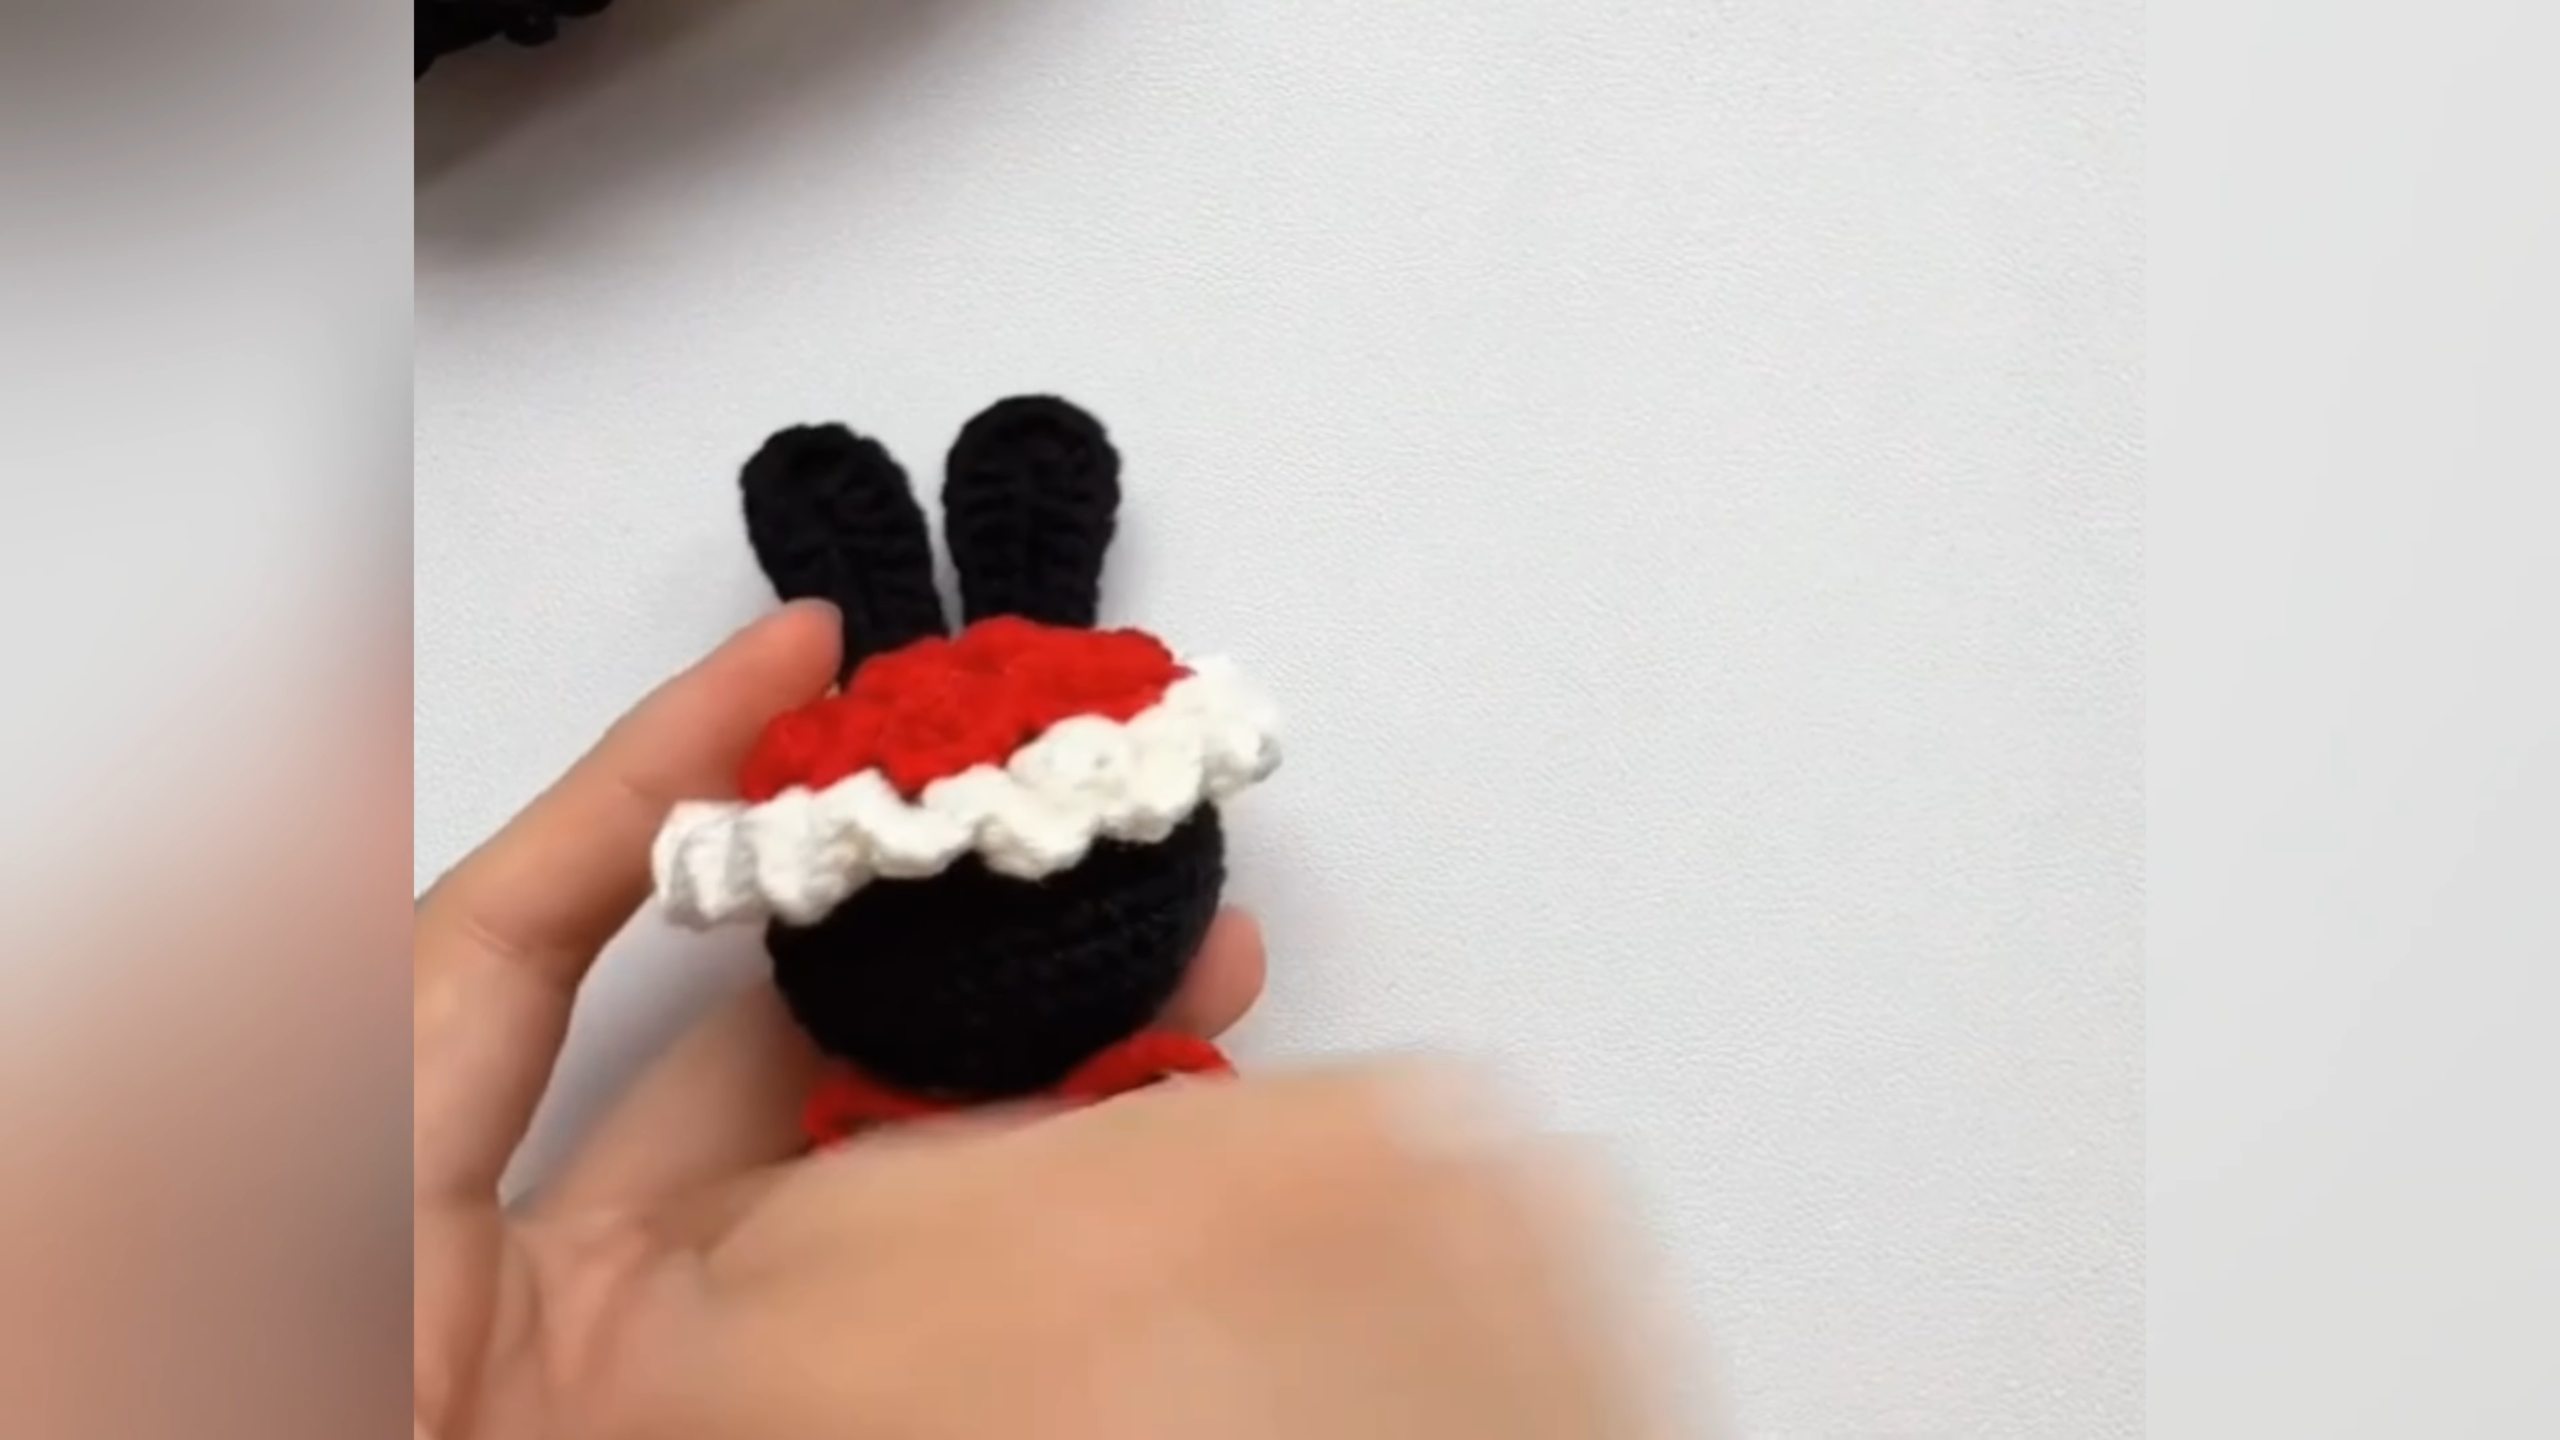
Sew the second ear beside the first, leaving a narrow gap between them. Then set the red cap on top and tuck its edge beneath the white ruffle. Stitch around the rim to secure it. A small red accent at the lower edge completes the color scheme.
Shape check: Both ears should stand at equal height, and the ruffle should sit level all the way around.
Signs You Did It Right
- The red disc lies flat with a closed center.
- Both ears match in height and width.
- The white ruffle waves evenly without twisting.
- The ears stand upright after sewing.
- Tight stitches keep the stuffing hidden.
Common Mistakes and Their Fixes
- Problem: The magic ring gaps open.
- Fix: Pull the tail firmly after round one, then weave it in twice.
- Problem: Ears come out uneven.
- Fix: Count rows as you go, and compare both pieces before sewing.
- Problem: The ruffle looks limp.
- Fix: Increase evenly along one edge and loosen tension slightly.
- Problem: Glue leaves shiny spots.
- Fix: Use a tiny drop, and let it cool briefly before pressing.
Troubleshooting Extra
Some issues appear only after assembly. Ears flop after a few days: whipstitch across each ear base to add support. Ruffle edge curls inward: press it gently outward with fingertips, then let it rest. Cap slides sideways: add three anchor stitches around the rim. Black fuzz clings to white trim: lift it away with a lint roller or tape. Additionally, keep dark and light yarns in separate project bags while stitching.
Quick Reference Cheat Sheet
- Hook size: About 2.0–2.5 mm
- Yarn weight: Fine sport or DK in black, red, and white
- Starting method: Magic ring, typically six stitches
- Pieces per bunny: One red cap, one white ruffle, two black ears, one black base
- Finished size: Roughly 2.5–3 inches (6–8 cm) wide, with ears adding about 1 inch
- Finishing supplies: Fiberfill, black thread, and hot glue
Care & Cleaning Tips
Store finished bunnies in a breathable cloth bag or an open box. Sealed plastic traps moisture and dulls the fibers. For spot-cleaning, dab a damp cloth with mild soap onto the stain, then blot dry. Avoid soaking, because water can loosen glue dots. Keep red pieces away from direct sunlight to prevent fading. Rotate the display position monthly, and brush off dust with a soft brush.
Creative Projects to Make with the Pattern
The crochet bunny bouquet pattern adapts easily. Turn a bunny into a tree ornament, a gift topper, or a bag charm. Mount several on wooden picks for a table centerpiece. Readers who enjoy the style can also browse related amigurumi keychain patterns, holiday ornament patterns, and small gift topper ideas.
Who Will Enjoy Making It
Confident beginners who can already make a magic ring will enjoy the short, forgiving pieces. Scrap-yarn collectors gain a quick way to use leftovers. Gift makers appreciate the compact size. Craft fair sellers benefit from the fast turnaround.
Why It’s Popular Right Now
Handmade décor keeps rising as crafters look for small projects with big visual payoff. Festive colors also arrive early each year, so seasonal makers start planning ahead.
- Tiny scale suits leftover yarn and short craft sessions.
- The red, white, and black palette photographs well for social sharing.
- Finished bunnies make affordable, personal gifts.
Bonus: Bouquet Styling Ideas
Attach each finished bunny to a slim wooden pick with a dot of hot glue. Then gather three to five picks in a small jar or vase. Vary the heights for a fuller look. A twine bow around the stems adds a neat finishing touch. Place the arrangement against a plain wall so the red cap stands out.
FAQ
What hook size suits the bunnies best?
A 2.0–2.5 mm hook usually gives dense stitches. Go smaller if stuffing shows through.
Can beginners complete the bouquet?
Yes, provided the magic ring feels comfortable. Practice the ring with scrap yarn first, then move on to the ears.
How can the ruffle stay fluffy?
Avoid pressing it flat. Instead, fluff it gently with your fingertips after each cleaning.
Conclusion
Once the crochet bunny bouquet pattern feels routine, try scaling up with a larger bunny. Mastering tiny shapes builds the tension control that bigger amigurumi projects demand.