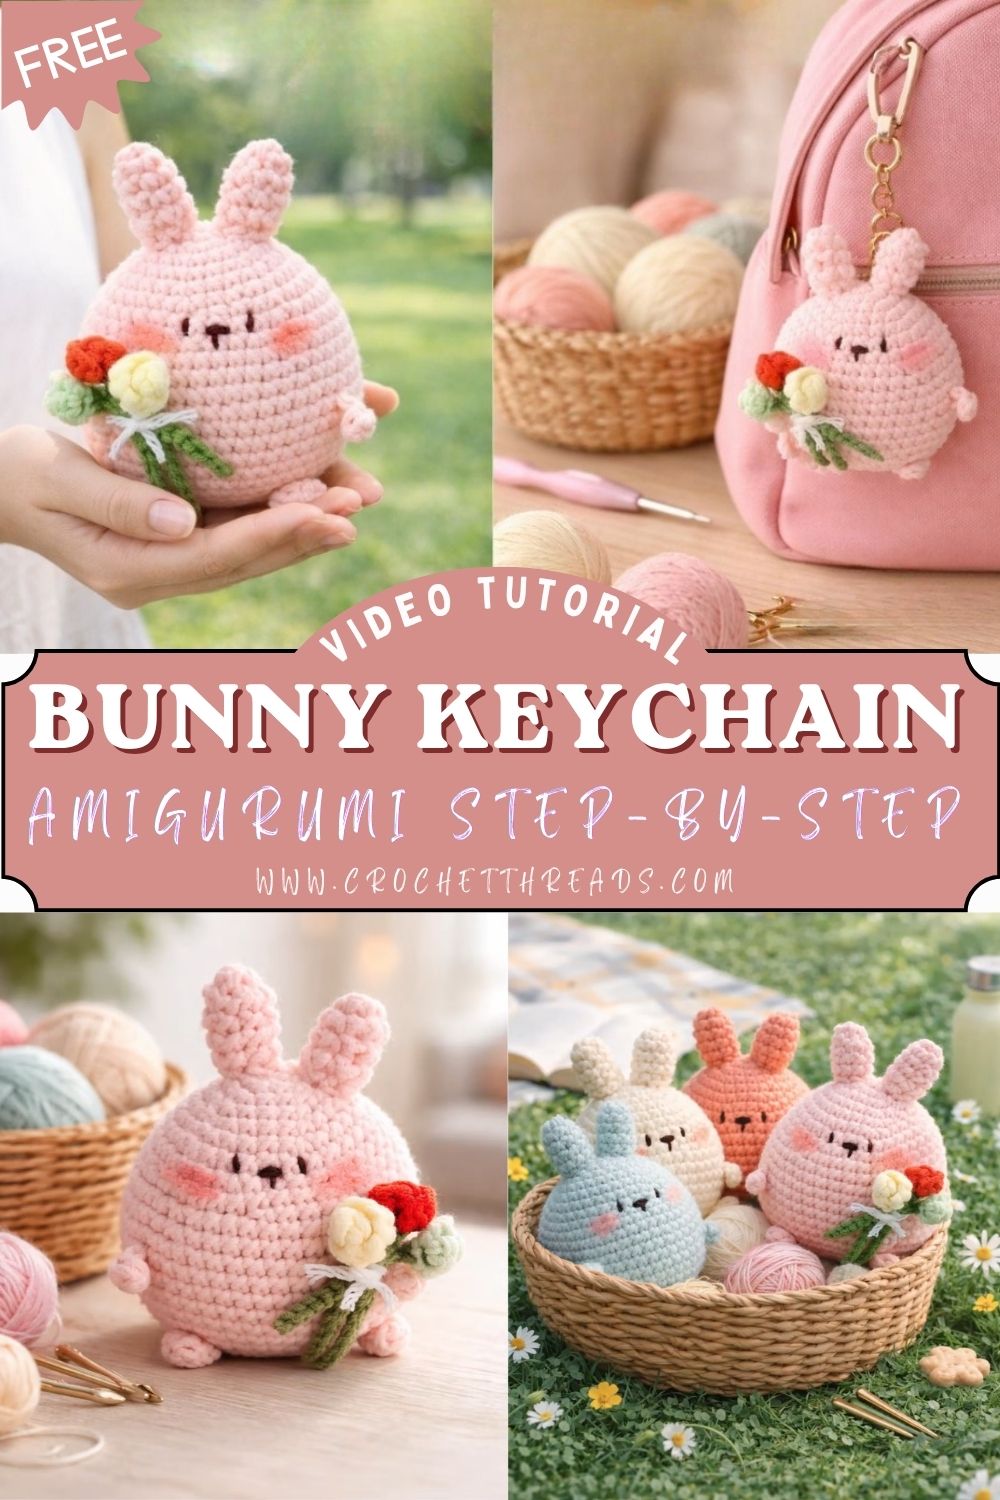
Passionate Crochet Bunny Keychain Amigurumi Step-by-Step Pattern
Amigurumi is the Japanese art of crocheting small stuffed creatures, usually worked in continuous rounds to create smooth shapes. What I love most about it is how simple stitches, mainly single crochet with a few increases and decreases, can turn into a character that feels full of personality. Even if your crochet experience is mostly scarves and squares, amigurumi is a gentle, exciting step into the world of shaping.
Small bunny keychains are especially trending right now because they’re fast to make, easy to customize, and ridiculously giftable. One can be a cute bag charm for a friend, a springtime decor piece, or a “thinking of you” surprise tucked into a card. This design uses basic stitches (sc, inc, dec, a little slip stitching, and chaining), plus simple embroidery for the face, so it stays beginner-friendly while still looking polished.
Materials Needed
- Soft cotton or chenille yarn (pastel shades like pink, cream, blue) – 50–70 g total (main body color ~40–50 g, accents ~10–20 g)
- Crochet hook (2.5mm–4mm depending on yarn) – 2.5 mm for cotton, 3.5–4.0 mm for chenille
- Safety eyes (6–8mm) or embroidery thread – 1 pair (6–8 mm) or ~1 m black thread
- Polyester fiberfill stuffing -10–20 g
- Yarn needle – 1
- Stitch marker – 1
- Scissors – 1
- Keychain ring -1 (20–25 mm)
- Small yarn scraps (for flower bouquet) – 3–5 colors, 1–2 m each
Abbreviations
- sc = single crochet
- inc = increase (2 sc in same st)
- dec = decrease (invisible decrease recommended)
- sl st = slip stitch
- ch = chain
- st = stitch
Skill Level
Beginner-friendly. If you can make a magic ring (or chain-2 start) and count stitches, you can do this. The shaping is forgiving, and the details are small but simple.
Step-by-Step Pattern
BODY (ROUND SHAPE)
Work in continuous rounds unless noted. Use a stitch marker to track the first stitch of each round.
R1: Magic ring, 6 sc (6)
R2: inc around (12)
R3: (sc, inc) around (18)
R4: (2 sc, inc) around (24)
R5: (3 sc, inc) around (30)
R6: sc around (30)
R7: (2 sc, inc, 2 sc) around (36)
R8–R9: sc around (36)
R10: (5 sc, inc) around (42)
R11–R16: sc around (42)
At this stage, you’ll really notice that chubby, rounded look. If your stitches feel a bit loose, sizing down your hook can make the fabric tighter and prevent stuffing from showing.
Now begin closing the sphere:
R17: (5 sc, dec) around (36)
R18: (2 sc, dec, 2 sc) around (30)
R19: (3 sc, dec) around (24)
R20: (2 sc, dec) around (18)
Start stuffing firmly here. Add a little, shape it with your fingers, then add more.
R21: (sc, dec) around (12)
Add a final bit of stuffing—aim for round and plush, not stretched.
R22: dec around (6)
Fasten off, weave the tail through the front loops, pull tight to close, and hide the end.
EARS (make 2)
These ears are small and upright, which keeps the bunny extra “chub”y” and keychain-friendly.
R1: Magic ring, 6 sc (6)
Join with sl st, ch 1 (optional if you like a neat seam).
R2–R4: sc around (6), join with sl st, ch 1 each round (or work continuously if preferred)
Fasten off, leaving a long tail for sewing.
Optional: Add a pinch of stuffing or simply fold the ear slightly as you sew for a perky shape.
ARMS & LEGS (make 4 total)
These are tiny round “nub”, quick to make and great for beginners. You can crochet them the same way for a consistent look.
Option A (mini nub in the round):
R1: Magic ring, 6 sc (6)
R2: sc around (6)
Fasten off, leave a tail for sewing. Light stuffing is optional.
Option B (chain method, extra fast):
ch 4, in the 2nd ch from hook: 2 hdc, then 1 sc in the last ch.
Fasten off, leave a tail.
Make 4 pieces.
Choose the method you like best—round nubs look very plush, while the chain method is speedy and still adorable.
FLOWER DETAIL (mini bouquet)
You can make 2–3 tiny flowers and a small” wrp,” so it looks like a little bouquet on the bunny’s belly.
Simple mini flower (make 2–3):
Magic ring.
Into ring: (sl st, ch 2, 2 dc, ch 2, sl st) repeat 3–4 times to form petals.
Pull the ring tight, fasten off, leave a tail.
Bouquet base (optional, quick leaf/wrap):
With green or cream yarn: ch 4, sl st back down the chain to create a slim leaf/wrap.
Fasten off.
Arrange the flowers together, then stitch them onto the bunny’s front slightly off-center for a cut” held bouquet” look.
Assembly
Take a moment to place pieces with pins or just hold them in place before sewing—tiny adjustments make a big difference in expression.
- Ears: Sew the ears to the top of the body, spaced evenly. I like them slightly forward so the bunny looks alert and sweet.
- Arms and legs: Attach two pieces as arms on the sides/front area, and two as legs near the bottom front. Keep them symmetrical so the bunny sits nicely.
- Face details:
- Add safety eyes (6–8 mm) between roughly rounds 12–14, about 6–7 stitches apart (adjust to your preference).
- If embroidering, use black thread to stitch small oval eyes.
- Embroider a tiny nose and simple mouth (a small “Y” or a short line with a tiny curve works well).
- Flower bouquet: Stitch the bouquet onto the bunny’s front, below the face. Sew through the center of each flower sto keepthe petals sluffy.
- Keychain ring: Secure it tightly at the top. You can either:
- Sew a small loop: attach yarn at the top, ch 10–15, sl st back to form a loop, then weave ends inside, or
- Use a short piece of strong yarn/thread to tie the ring through a few stitches at the crown and knot securely, hiding the knot inside.
Finishing Touch
Gently roll the bunny between your palms to even out the stuffing and smooth the shape. Add a blush effect with a tiny bit of pink yarn (light embroidery) or actual blush/chalk pastel dabbed lightly on the cheeks. Once you’re happy, hide every yarn end inside the body. Those neat finishes are what make a keychain feel “store-bought”, in the best way.
Tips for Beginners
- Use a stitch marker for rounds so you never lose your place.
- Keep tension even; tighter stitches help your bunny look smooth and keep stuffing hidden.
- Avoid overstuffing, aim for plush and round, not stretched or bumpy.
- Place facial features carefully; try pinning the eyes (or marking them) before committing.
- Take time shaping as you stuff; a few gentle squeezes can fix wonky spots fast.
Conclusion
This little bunny is one of those projects that feels like a small act of kindness toward yourself while you crochet, and toward anyone who receives it. Once you’ve made one Crochet Bunny Keychain Amigurumi, it’s hard to stop. Try swapping the bouquet colors for seasonal themes, adding a bow, stitching on tiny hearts, or making a whole pastel rainbow set for gifts.
If you make your own, I’d love for you to personalize it and let the bunny match your mood, because handmade is always sweeter when it carries your own touch.