Crochet Gangle Doll Pattern Using Soft Chenille Yarn
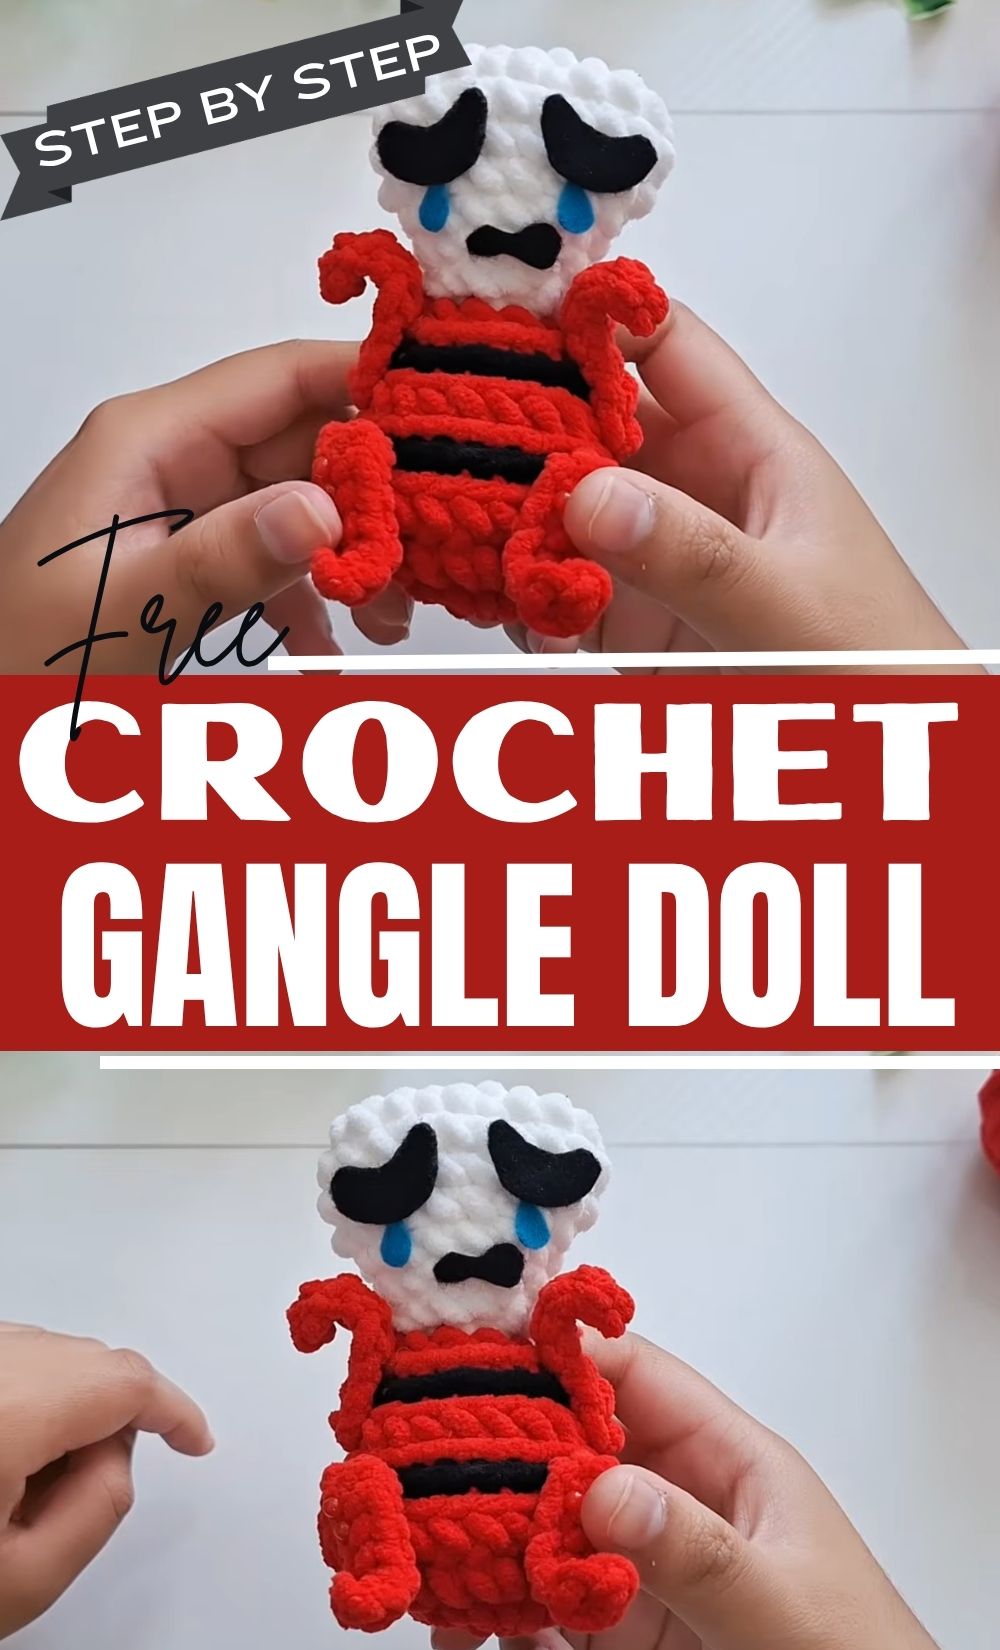
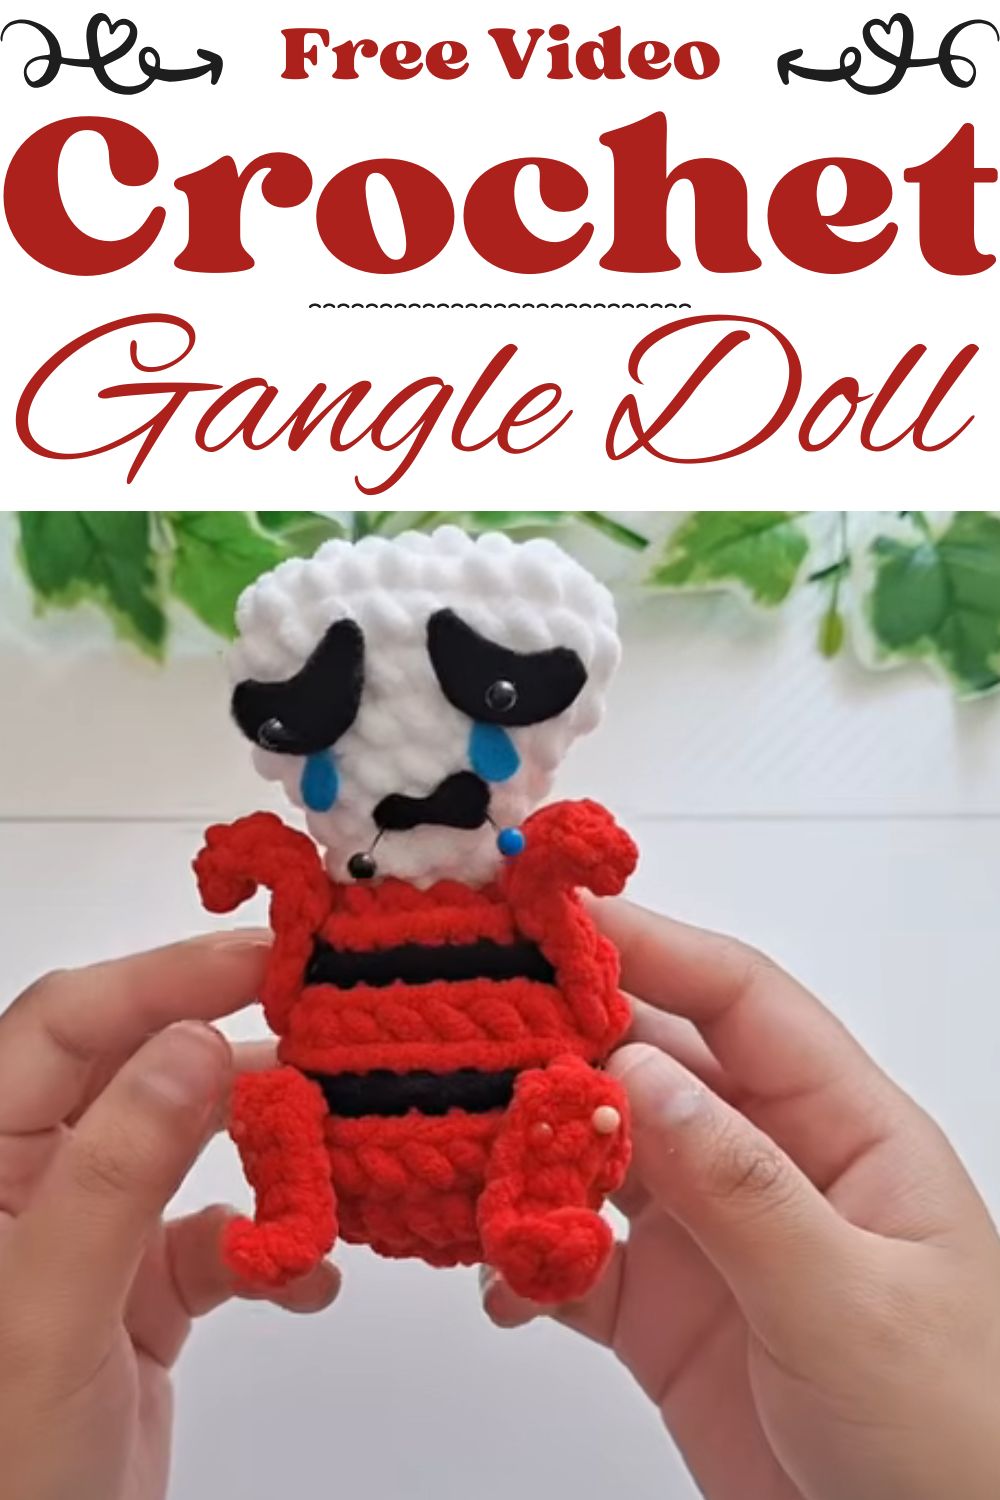
This crochet Gangle doll pattern builds the ribbon-bodied character from three main parts: a striped red and black body, a white comedy and tragedy mask head, and four thin limbs. Chenille yarn gives every part a plush, velvety surface, which suits the rounded ribbon rows and the soft white face.
The doll suits fans of the animated series who want a small display piece. It also suits crocheters who are comfortable with magic rings, increases, decreases, and a little surface stitching. Since chenille is thick and stretchy, hook choice and firm stuffing matter more here than they do with cotton.
About This Crochet Gangle Doll Pattern
Gangle is a ribbon character with a mask-shaped head, a striped body, and long, bendy limbs. This pattern turns that look into a sitting doll. You work the body in the round from the bottom up. The head starts as an oval and narrows into a mask shape, while the arms and legs are simple chained tubes that you sew on afterwards.
The doll relies on felt for its expression. Black felt eyes and teardrop marks sit on the white head, so you can change the face to suit different moods.
Materials and Tools for the Crochet Gangle Doll Pattern
- Chenille yarn in white, red, and black
- Crochet hook suited to chenille yarn
- Black felt, plus other felt colors for facial features if you want them
- Fiberfill stuffing
- Tapestry needle
- Scissors
- Stitch markers
- Hot glue or sewing thread for attaching the felt
The pattern does not list a hook size, yarn amounts, or finished measurements, so none appear here. Check the yarn label for its recommended hook, then go down one size so the stitches stay tight enough to hold stuffing.
Yarn Notes for Chenille
Chenille is soft and thick, with a pile that can hide stitches. That makes it forgiving of small mistakes, yet harder when you count rounds. A stitch marker in the first stitch of every round saves a lot of frustration.
The pile also grips itself, which makes undoing stitches slow. Frogging chenille can leave flattened or worn patches, so pull it back gently and check the count before you move on.
Keep your tension even and slightly firm, because loose chenille lets the white stuffing show through the red and black stitches.
Finished Size: About 5.5 inches (14 cm) tall and about 3.5 inches (9 cm) wide. The doll is flat and small, and the chunky chenille yarn makes it plump. A different yarn or hook size will change the size a little.
Stitches and Skills for the Crochet Gangle Doll Pattern
This pattern uses these techniques:
- Magic ring
- Single crochet (sc)
- Increases and decreases
- Chaining and working back along the chain
- Back loops and surface slip stitches for the black ribbon rows
- Basic hand sewing for assembly and felt features
Beginners who have made a few amigurumi pieces will recognise most of these. However, the surface slip stitch and the sewing steps will take the most patience.
Tips Before You Start This Crochet Gangle Doll Pattern
- Read the full pattern once before you pick up the hook. The doll comes in separate pieces, so it helps to know which colour comes next.
- Use a stitch marker at the start of each round, and count your stitches after every increase round, since the pile makes miscounts easy.
- Keep the black and red yarn balls apart so they do not tangle.
- Leave long tails on the legs and arms, because you will use those tails for sewing.
Step-by-Step Crochet Gangle Doll Pattern
The photos follow the body from the first ring to the finished doll. After the body steps, the head and limb instructions come next.
Step 1: Start the Body With a Magic Ring
Using red chenille, make a magic ring and work 8 single crochets into it. The photo shows the small red circle held in hand while the hook pulls through the first stitches. Pinch the ring flat between your fingers so the stitches do not slip.
Then pull the tail tight to close the center. A closed center keeps the bottom of the body free of gaps once you stuff it.
Step 2: Increase the Red Rounds
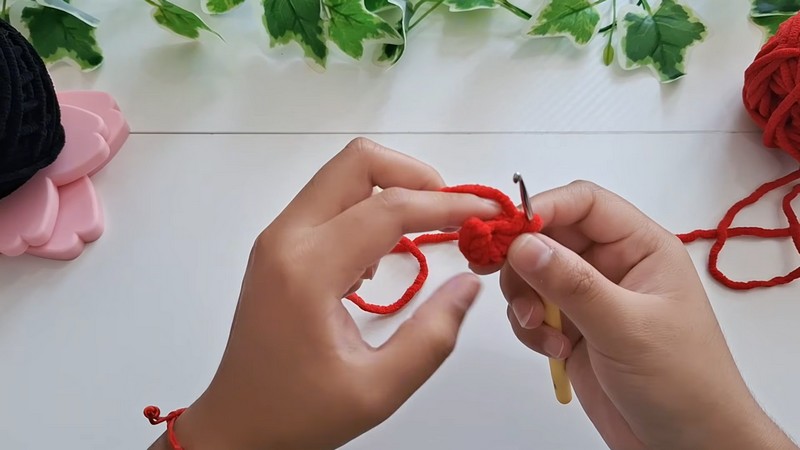
Work increase rounds in red until the piece reaches 24 stitches. In the photo, the red circle has grown into a shallow cup, and a purple stitch marker sits at the edge of the round.
Increase evenly around the circle so the base stays round and flat. After the final increase round, stop adding stitches and let the sides rise.
Step 3: Add the First Black Ribbon Round
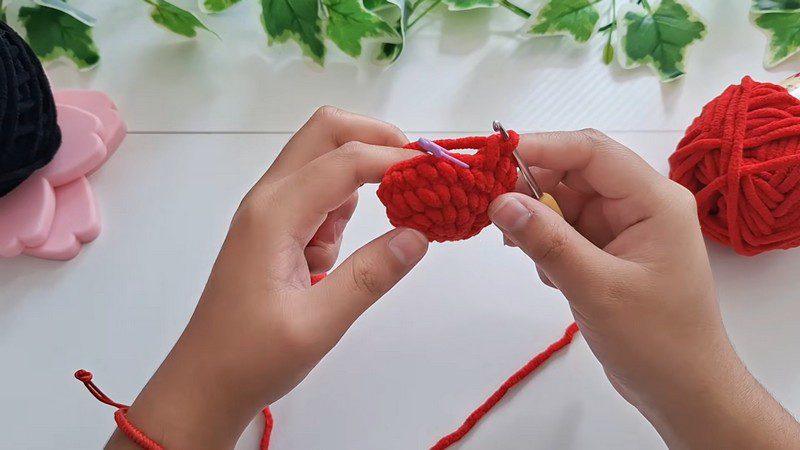
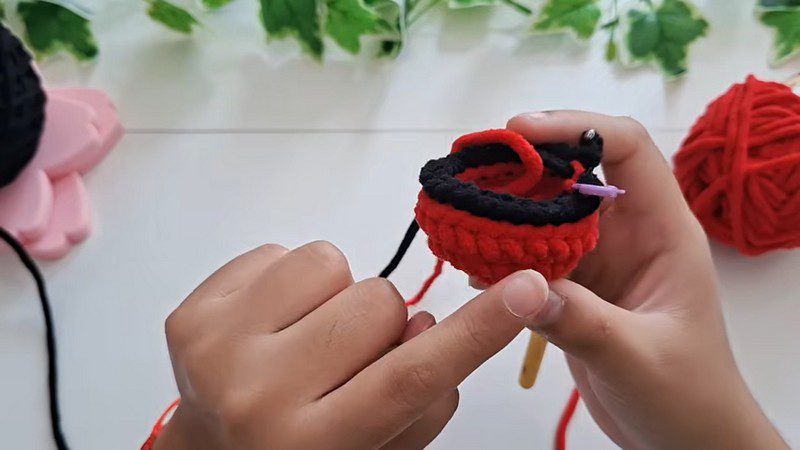
Switch to black chenille and begin the striped body. The pattern alternates rounds of surface slip stitches and back loops in black and red. The photo shows a black round sitting on the red cup, with the loose red edge folded back and the stitch marker still in place.
Work into the back loops so a raised ridge forms, because this ridge creates the ribbon look. Let the red tail rest to the side until the next red round.
Step 4: Build the Stripes and Start Shaping
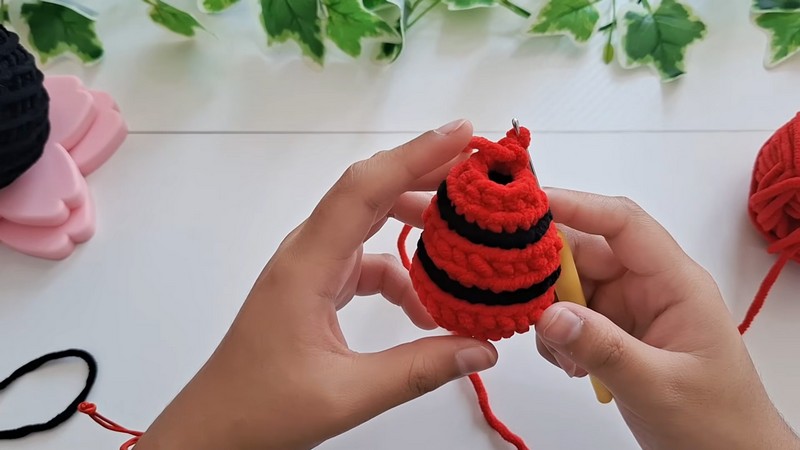
Continue alternating red and black rounds. The photo shows two clear black stripes with the opening narrowing at the top, which is where the decreases begin.
Decrease evenly so the body curves inward toward the neck. Keep the hook ready and test the shape with a hand inside. A smooth taper now makes it easier to attach the head later.
Step 5: Stuff the Body
Before you close the top, stuff the body firmly. Press small amounts of fiberfill into the bottom first, then work upward. Firm stuffing keeps the doll upright and stops the stripes from wrinkling. Close the opening with the last decreases and fasten off.
Step 6: Make the Head
Using white chenille, chain 8 and work around both sides of the chain to make an oval base. Then work decrease rounds to form the triangular mask shape. Stuff lightly, since the head is a flat mask rather than a ball.
Step 7: Make the Legs and Arms
Legs (make 2): Chain 10, then work 9 single crochets back along the chain. Leave a long tail for sewing.
Arms (make 2): Chain 8, then work 7 single crochets back along the chain. Leave a tail here too.
Step 8: Attach the Head and Limbs
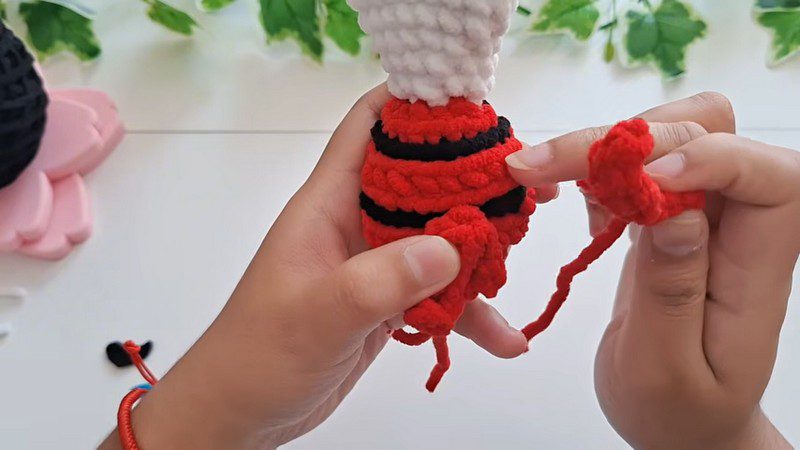
Sew the white head to the top of the body. In the photo, the white head already sits above the striped body while a red limb rests against the lower edge, ready for sewing.
Use the long tail and a tapestry needle. Fold each leg slightly so the doll appears to sit, then sew the legs to the bottom of the body. Attach the arms near the top of the body, close to the face area.
Step 9: Add the Felt Face
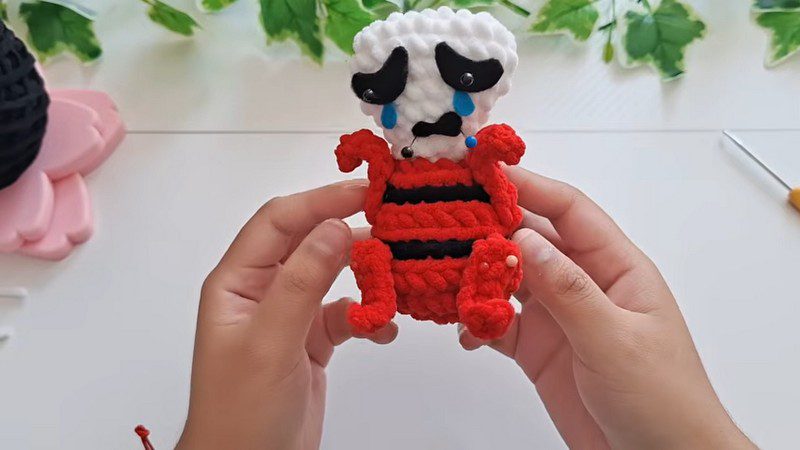
Cut Gangle’s mask pieces from black felt: two eyes and teardrop or expression marks. Pin them in place first, as the photo shows, where pins hold the eyes and a small mouth shape. Then glue or sew them onto the white face once the position looks right.
The finished doll sits with bent legs and arms at its sides, with the face pointing slightly downward.
Common Mistakes and Troubleshooting for the Crochet Gangle Doll Pattern
Gaps between stripes. If the black and red rounds show holes, switch to a smaller hook or pull the yarn firmer when you change colours.
Lumpy stuffing. Add stuffing in small amounts instead of large clumps. Pile-heavy yarn hides lumps until the end, so check by touch.
Floppy limbs. The arms and legs are thin tubes. If they bend too easily, fill them with a thin roll of stuffing, or leave them soft for a posable look.
Crooked head. Pin the head in place before you sew, and view the doll from the front to confirm it sits straight.
Bonus: Stitch Counts for the Crochet Gangle Doll Pattern
Here are the numbers from the steps above in one place, so you can check your work without scrolling:
- Body start: magic ring with 8 single crochets
- Red increase rounds: work up to 24 stitches
- Head: chain 8, then work around both sides of the chain
- Legs (make 2): chain 10, then 9 single crochets back along the chain
- Arms (make 2): chain 8, then 7 single crochets back along the chain
Finishing and Care for Your Crochet Gangle Doll Pattern
Weave in all ends with the tapestry needle, hiding them inside the stuffed body. Trim the felt edges neatly, and use hot glue sparingly so it does not seep through the felt.
Chenille fiber content varies, so follow the yarn label. In general, spot clean with a damp cloth and let the doll air dry. Because the doll has felt and glue, avoid soaking it.
Bonus: Display Ideas
Gangle looks great sitting on a shelf or desk. Fold the legs slightly and lean the doll against a wall or book for support. For a keychain version, sew a small loop of yarn to the top of the head, though this changes the pattern.
FAQs About This Crochet Gangle Doll Pattern
What yarn does this pattern use?
It uses chenille yarn in white, red, and black.
Does the pattern give a hook size?
No. Use the size the yarn label suggests, then go down one size for tighter stitches.
How do I make the legs?
Chain 10, then work 9 single crochets back along the chain.
How do I make the arms?
Chain 8, then work 7 single crochets back along the chain.
What do I use for the face?
Use black felt cut into eye and teardrop shapes, and attach it with glue or thread.
Is this crochet Gangle doll pattern beginner friendly?
It works for beginners who have made a few amigurumi pieces. The surface slip stitch and the sewing steps take the most patience.
Bring Your Gangle to Life
A few basic stitches and some felt turn into a recognizable ribbon doll with this crochet Gangle doll pattern. Take the striped body slowly, and the rest comes together with simple assembly. So grab the chenille, start the magic ring, and watch the character take shape.