
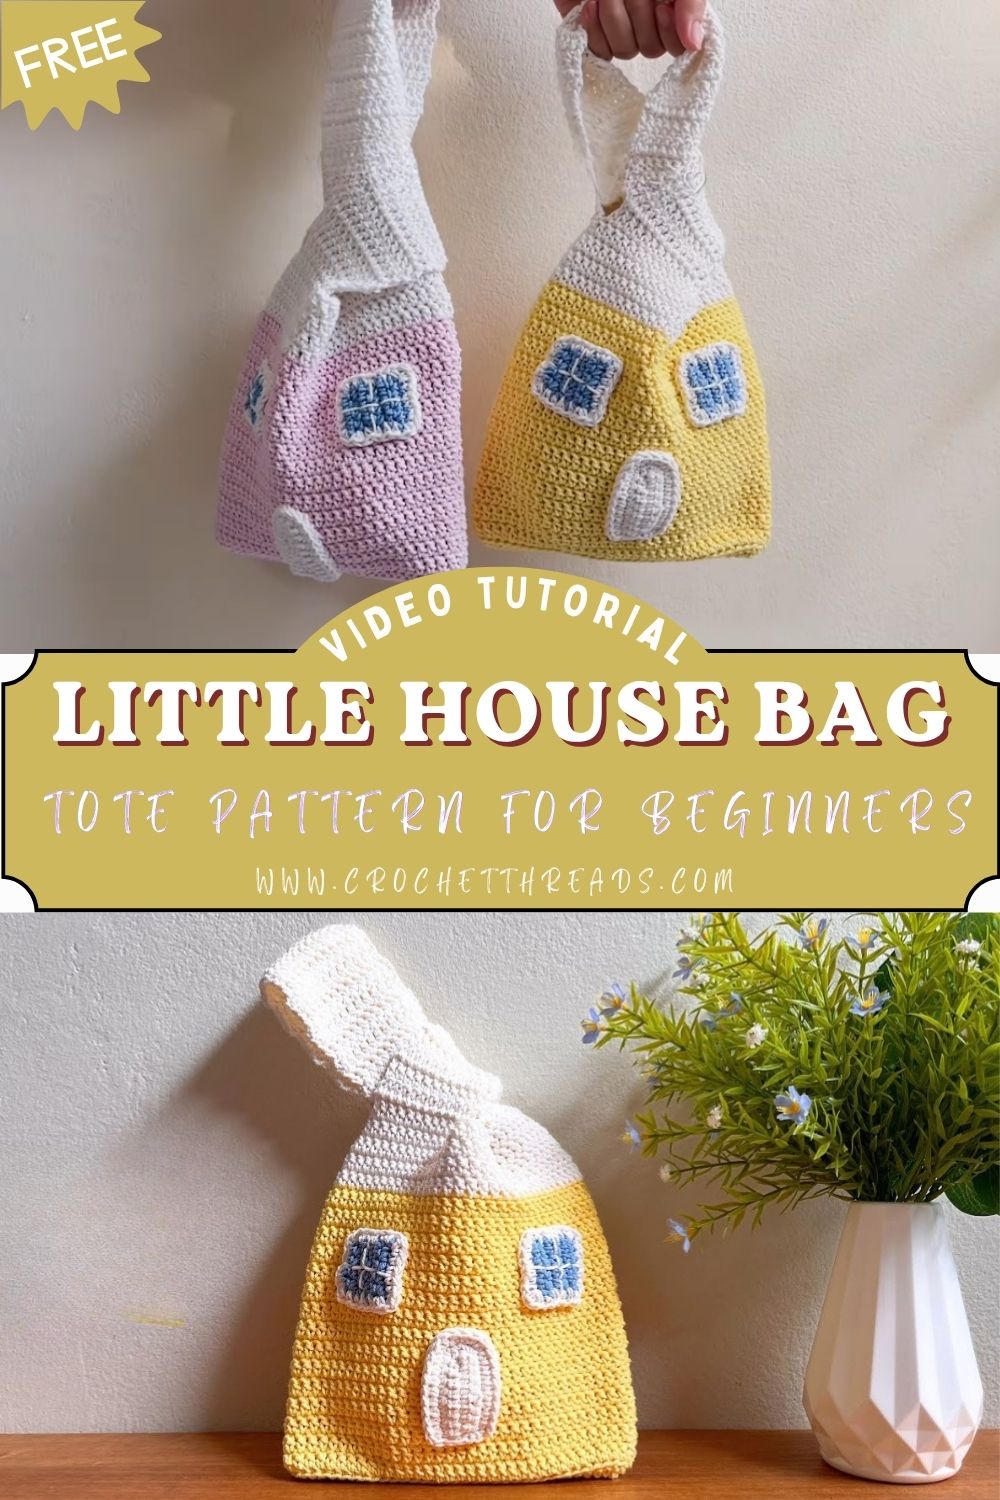
Perfect Crochet Little House Bag Easy Tote Pattern for Beginners
If you want a cute and practical project, this crochet little house bag is the perfect choice. By making this bag, you get a sturdy and functional bag that also includes a playful cottage style, which is very suitable for everyday tasks or craft days. Plus, you can easily match it with other patterns like crochet tote bags, toys, and decorations.
A handmade bag feels special because you made it yourself, and this homemade tote bag beautifully reflects that. With this easy crochet bag pattern, you create a simple shape and then add cute “homey” details that will make everyone smile. The best part is that in the end you get a functional bag that you can use every day. Since its structure is straight forward and simple, you can focus on clean edges, beautiful seams, and a great finish. If you like easy crochet tote bags, bags for beginners, amigurumi-style details, and handmade gifts, this project is perfect for you.
Materials Needed
- Yarn: Medium/worsted weight cotton or cotton-blend for structure (acrylic works too, but cotton holds shape best)
- Crochet hook: Size that matches your yarn label (commonly 4.0–5.5 mm)
- Tapestry needle: For weaving ends and assembling seams
- Stitch markers: To track corners and rows cleanly
- Scissors
- Bag handles: Ready-made handles, leather straps, or crocheted straps
- Optional lining: Cotton fabric lining for extra durability and a polished look
- Optional closure: Magnetic snap, button, or zipper if you want added security
4. Step-by-Step Method (Beginner Friendly)
Step 1: Build the bag panels
Start by crocheting two matching rectangles for the front and back. Keep your stitch count consistent so both panels align smoothly. Mark your first and last stitch to avoid accidental increases.
Step 2: Add the “house” features
Next, you create the simple house look by adding contrasting shapes and lines—think roof edge, door panel, or window blocks. Use basic stitches and clean color changes so the design stays crisp. The full placement and stitch order appear in the video instructions.
Step 3: Join and shape the tote
Then, you stitch the panels together along the sides and bottom to form the bag body. Use a whip stitch or slip-stitch seam for a tidy edge that stays strong. After that, turn the bag right-side out and check the corners for symmetry.
Step 4: Reinforce the opening and add handles
Now, crochet a few rounds along the top opening to stabilize the rim. Attach handles securely, and test the strength by gently tugging before you weave in ends. If you plan to carry heavier items, add extra rows or reinforce with stitching.
Step 5: Finish with lining or final details
Finally, add an optional lining for structure and to protect the stitches from stretching. You can also attach a button, charm, or small label for a boutique finish. For complete, stitch-by-stitch guidance, follow the full instructions in the video.
Unique Design & Aesthetic Appeal
This tote stands out because it looks like a tiny house you can carry. The “roof” effect and simple geometric details create a playful, storybook vibe without requiring complicated techniques. Moreover, color choice transforms the entire mood: soft neutrals feel modern and minimal, while brights give it cheerful kids-room energy. You can even go for a cozy cottage palette—cream walls, a rust roof, and a leafy green accent so the bag feels like a little piece of decor in motion. Because the design relies on clean blocks and lines, your stitches show clearly, which makes the finished item look polished.
Uses & Benefits
This little house tote works harder than it looks, and it suits many lifestyles.
- Daily tote use: Carry a wallet, phone, small notebook, yarn, or a quick grocery run. Since the shape stays structured, the bag holds its form nicely.
- Gift idea: Give it as a thoughtful handmade present for birthdays, housewarmings, teachers, or crochet-loving friends. Add an initial tag or favorite colors to make it personal.
- Decorative handmade bag: Hang it on a hook for a cute craft-room accent, or store small projects inside. It doubles as functional storage while still looking adorable.
Why This Pattern is Perfect for Beginners
- No advanced shaping required: You achieve an impressive look with simple, beginner-friendly construction.
- Easy panel-based build: You crochet basic rectangles and join them with straightforward seaming.
- Gentle practice with color changes: The house details help you learn contrasting sections without stress.
- Forgiving tote format: Minor imperfections won’t ruin the bag, and you still finish with a piece you’ll proudly use.
Creativity & Skill Development
- Build patience as you repeat rows and watch steady progress grow.
- Improve stitch consistency because daily practice trains your hands to keep even tension.
- Strengthen counting skills by tracking stitches, rows, and panel sizing accurately.
- Learn clean color changes while forming the house details with simple contrast sections.
- Develop shaping confidence through basic panel construction and neat edge control.
- Boost problem-solving skills when you adjust strap placement, size, or finishing.
- Grow creativity by experimenting with themes, textures, and playful add-ons (windows, doors, trims).
- Gain finishing skills as you weave ends neatly, seam smoothly, and optionally add a lining.
Helpful Tips for Better Results
- Choose a yarn with good stitch definition so the house details look clean and bold.
- Make a small swatch first if you tend to crochet tightly or loosely, because consistent sizing helps the panels match perfectly.
- Count stitches at the end of each row, especially on the panel edges, since borders show every little change.
- Use stitch markers on corners and strap placement points so everything stays centered.
- Block the panels lightly before assembly if they curl, because flat pieces join faster and look neater.
- Weave in ends as you go when possible, since too many ends at the end can feel overwhelming.
Common Mistakes & Fixes
- Uneven stitches → maintain consistent tension
- Wrong yarn choice → use recommended yarn size
- Loose structure → tighten stitches properly
- Incorrect measurements → follow pattern sizing carefully
Care Instructions
- Hand wash gently with mild detergent
- Do not twist or stretch
- Dry flat to maintain shape
- Store in a clean, dry place
Customization Ideas & Color Variations
- Use pastel or bright color themes
- Add embroidery or buttons
- Change size for tote or mini bag
- Mix yarn textures for unique design
FAQs FOR ( Crochet Little House Bag )
1) What yarn works best for a crochet little house bag?
Cotton or a cotton-blend works best because it holds shape and keeps the design crisp. However, you can use acrylic if you add a lining or crochet a bit tighter for structure.
2) Can I make this tote bigger without ruining the design?
Yes. Increase the panel width and height evenly, then scale the house details to match. Also, place markers so the “roof” and doorway stay centered.
3) Do I need a lining for this bag?
You don’t need a lining for light use, especially if you use firm yarn. Still, a lining improves durability, reduces stretching, and keeps small items from poking through stitches.
4) Which stitches should beginners know before starting?
You should feel comfortable with chaining, single crochet, and counting rows. If the design uses color changes or simple shaping, you can learn those techniques quickly by following the video.
Conclusion
This Crochet Little House Bag tote combines sweet style with everyday function, so you can enjoy a relaxing make and end up with a bag you actually use. Plus, the beginner-friendly structure helps you build confidence while you practice neat edges and simple colorwork. Therefore, you get a creative project that looks special, feels personal, and brightens your routine with handmade charm.


