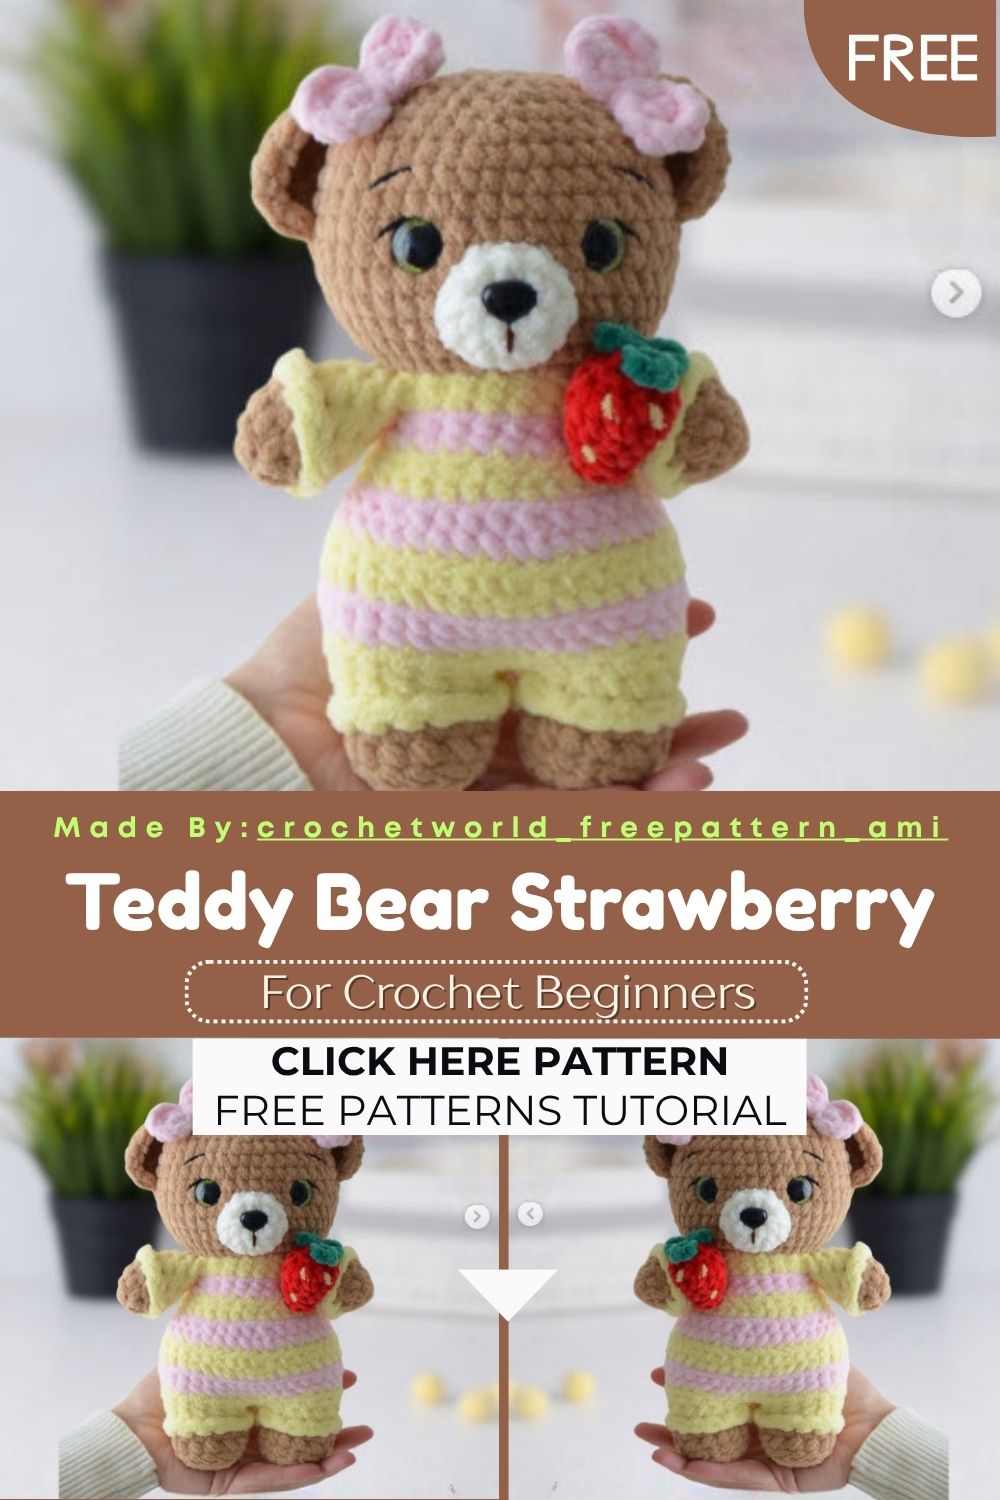
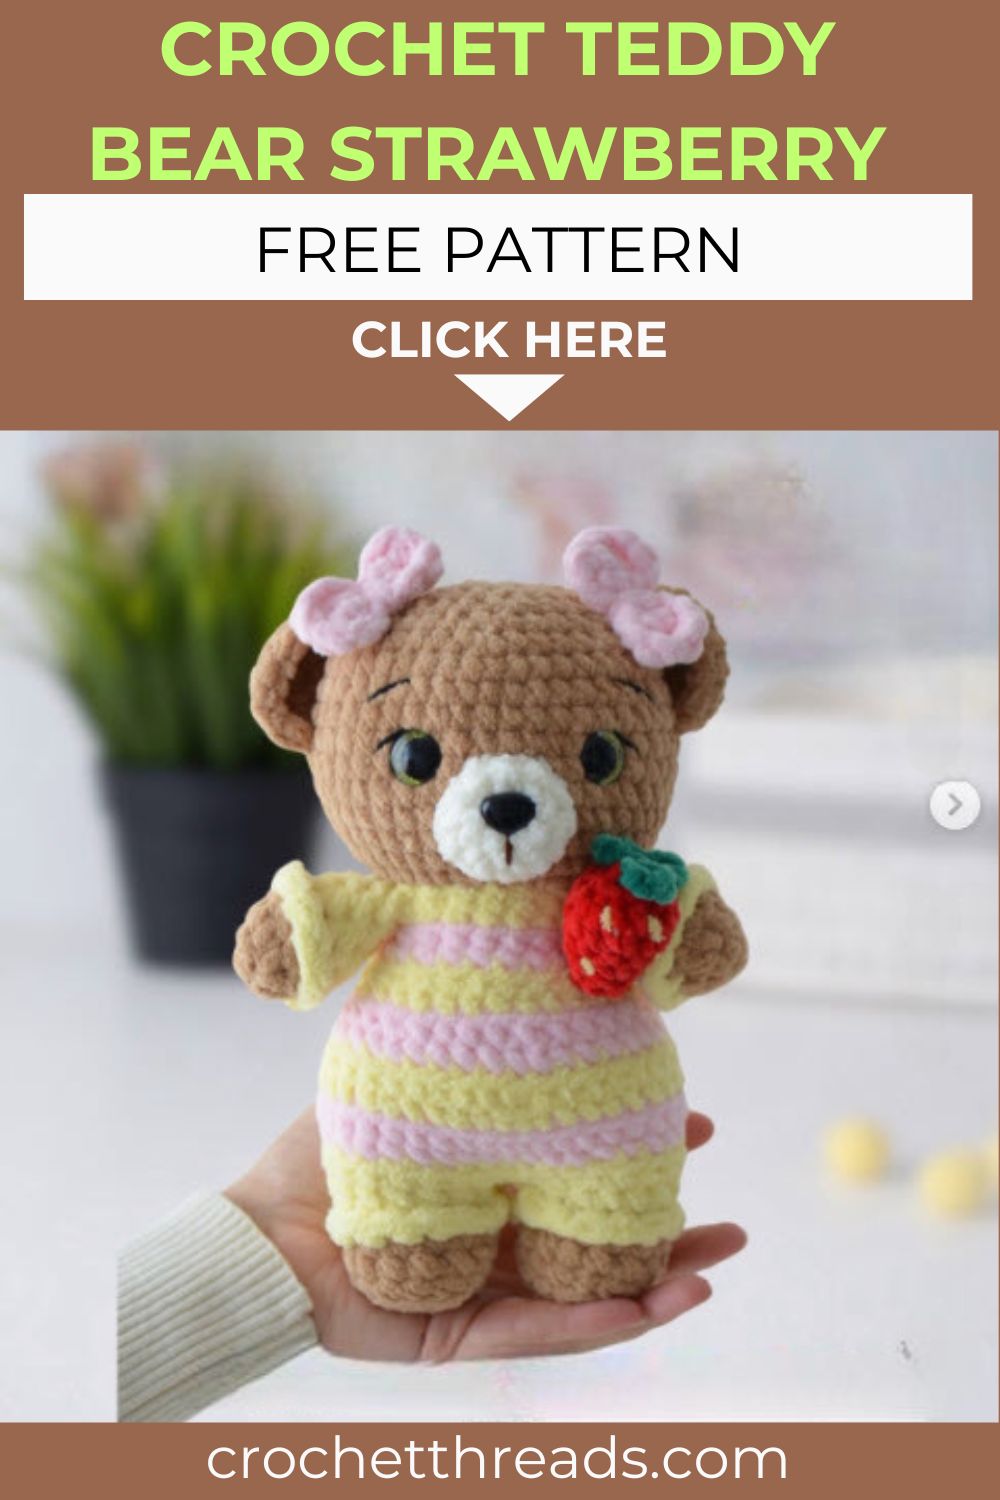
Free Crochet Teddy Bear Strawberry Amigurumi Pattern
Sometimes two unexpected things come together to create the most charming crochet project. That’s exactly why this Crochet Teddy Bear Strawberry combo grabs your attention right away. For crocheters who love fruit-inspired amigurumi, it’s a gorgeous pick, and honestly, stitching every soft, squishy round is just as much fun as admiring it once it’s all done.
Strawberry season meets teddy bear season in this Crochet Teddy Bear Strawberry amigurumi mashup. Velvety Alize Velluto yarn gives the bear its plush, pettable body, while bright red and green threads shape the berry resting beside him. Beginners will manage the basic shapes, though the cute details reward a steady hand. You stuff, shape, and stitch until a huggable friend appears. Honestly, finished bears like this make the sweetest handmade gifts around.
Skill Level
Confident beginners handle this Crochet Teddy Bear Strawberry pattern well, since it sticks to simple stitches and gentle shaping. A little patience with assembly helps, but nothing here feels scary or overly fiddly.
Materials You Will Need
Gather your supplies before the first chain, because a tidy setup keeps the whole make smooth.
- Alize Velluto yarn in brown, yellow, cream, and pink for the bear
- Himalaya Dolphin Baby yarn in red and green for the strawberry
- Black cotton yarn for embroidering eyebrows, lashes, and the nose if desired
- Crochet hook 5.5 mm (US I-9) for the bear, and 4.5 mm (US 7) for the strawberry
- Safety eyes 17 to 18 mm (0.67 to 0.71 in)
- Plastic safety nose 17 mm (0.67 in)
- Sharp scissors
- Stitch marker
- Wide-eye needle for sewing and embroidery
- Fiberfill stuffing
Abbreviations
Keep this quick list handy while you work through each round.
- ch – chain
- MR – magic ring
- sc – single crochet
- tr2 – double treble crochet
- BLO – back loop only
- inc – increase
- dec – decrease
- sl st – slip stitch
Pattern Overview
Before grabbing your yarn, get a feel for how the whole bear comes together. The build splits into a handful of separate shapes, and each one stays small enough to finish in a single sitting.
- Head: worked in brown from a magic ring, then shaped with steady increases and decreases into a rounded ball.
- Body: crocheted in continuous rounds so the bear sits or stands without wobbling.
- Muzzle: a tiny cream oval that gives the face its sweet, snouty look.
- Ears: two small brown pieces, often lined with pink for a soft inner pop.
- Arms and legs: four short limbs stuffed lightly for that floppy, squeezable feel.
- Strawberry: a red berry topped with a green leafy cap, made separately on the smaller hook.
- Tiny extras: yellow and pink accents add seeds, cheeks, or a little bib detail wherever you like.
Each section relies on the magic ring start, so master that one move and the rest falls into place. Color changes stay minimal, which means fewer ends to weave and less fuss overall.
Instructions
Follow these steps to shape every part, then move into assembly once your pieces sit ready. Counts stay flexible, so lean on the photos and your own eye for the cutest finish.
Head and Body
- Start the head in brown with a magic ring, then build steady rounds of single crochet.
- Increase until the circle reaches its widest point, then work a few even rounds for height.
- Decrease slowly, stuff firmly, and close the gap before the rounded shape flattens.
- Crochet the body the same way, switching to yellow and pink for that striped little romper.
Muzzle and Face
- Work a small cream oval for the muzzle, keeping it slightly flat against the head.
- Sew it low on the face, then fix the black plastic nose right on top.
- Place the safety eyes evenly above the muzzle, locking the backs once spacing looks right.
- Embroider thin brows and soft lashes with black cotton for that gentle, sleepy expression.
Ears
- Make two rounded brown ear pieces, small enough to perch high on the head.
- Pin them to the top sides, then sew the pink bow accents in front of each ear.
Arms and Legs
- Crochet four short brown limbs, stuffing them lightly so they keep a soft, floppy feel.
- Attach the arms to the upper body and the legs at the base, so the bear stands balanced.
Strawberry
- Switch to the 4.5 mm hook and red yarn, shaping a small rounded berry from a magic ring.
- Top the berry with a green leafy cap, working those pointed sections for spiky character.
- Add tiny yellow seed details across the red surface, then tack the berry into one paw.
Special Techniques
A couple of skills carry most of the weight in this make, and both are worth a quick practice swatch first. Working in back loop only (BLO) creates a clean ridge, perfect for marking where the strawberry cap folds or where the bear’s body shifts shape. The double treble crochet (tr2) shows up in the leafy strawberry top, giving those pointed green sections their height and spiky character.
Color changing matters too. Swap your yarn on the final yarn-over of the last stitch, so the new shade locks in crisp and clean. Ngl, that single trick makes the difference between a messy seam and a polished one. Stuffing technique counts as its own quiet skill here, since over-packing distorts the cute round shapes you worked so hard to build.
Common Mistakes to Avoid
Even seasoned makers trip over a few repeat offenders, so scan these before you dive in.
- Losing your round start: skipping the stitch marker turns counting into a guessing game, and lopsided shapes follow fast.
- Crochet too loose: gaps let stuffing peek through, which nobody wants on a gift bear. Tighten your tension a notch.
- Overstuffing the head: too much fiberfill stretches the stitches and warps that lovely curve. Add it gradually.
- Sewing parts crooked: pin everything first, step back, and check symmetry before the needle goes in for real.
- Mixing up hook sizes: the strawberry needs the 4.5 mm hook so it stays proportional next to the chunkier bear.
- Rushing the face: eyes placed unevenly change the whole expression, so measure twice before locking the safety backs.
Slow down on these spots and your finished bear looks pro, no joke.
Assembly
Now the fun part, where loose pieces become one charming character. Lay out every component and double-check that each shape is stuffed to the right firmness.
- Attach the muzzle to the lower front of the head, then embroider the nose and mouth with black cotton.
- Fix the safety eyes just above the muzzle, spacing them evenly for a friendly gaze.
- Pin the ears to the top sides of the head and sew them down with small, hidden stitches.
- Join the head firmly to the body, adding a touch more stuffing at the neck for stability.
- Sew the arms onto the upper body and the legs toward the base so the bear sits balanced.
- Position the strawberry in the bear’s arms, or tuck it beside him, and tack it in place.
- Weave in all loose ends and tug them through the body so nothing unravels later.
Take your time pinning before stitching, for real. A few extra minutes here saves a wonky face you cannot easily fix afterward.
Important Remarks
Keep these notes nearby as you crochet, because small choices shape the final look.
- Gauge stays flexible for amigurumi, yet a tight, even stitch always gives the cleanest result.
- Swap the safety eyes for embroidered ones if the bear is meant for a baby or young child.
- Hold the strawberry yarn at the recommended tension, since loose berry stitches show stuffing through the gaps.
- Adjust the yellow and pink accents however you like, so each bear feels a little bit yours.
- Block lightly with steam only if the shapes need coaxing, and never press the velvety yarn flat.
- Store leftover yarn together in a labelled bag, so a future repair matches the original shades perfectly.
- Test your safety eyes on a scrap first, since some backs grip tighter than others and resist removal.
- Photograph your finished piece in soft daylight, low-key the best way to show off that plush texture.
These pointers come from real trial and error, so lean on them when something feels off.
Conclusion
A Crochet Teddy Bear Strawberry cradling a feels like a hug and a treat rolled into one. You learned the magic ring start, picked up BLO and tr2 stitches, and walked through clean assembly from face to feet. Beginners gain confidence, while seasoned hookers get a quick, joyful make. Stitch one for a friend, a nursery shelf, or your own craft corner. Real talk, projects like this remind you exactly why crochet stays so addictive. Grab your yarn and enjoy the process.