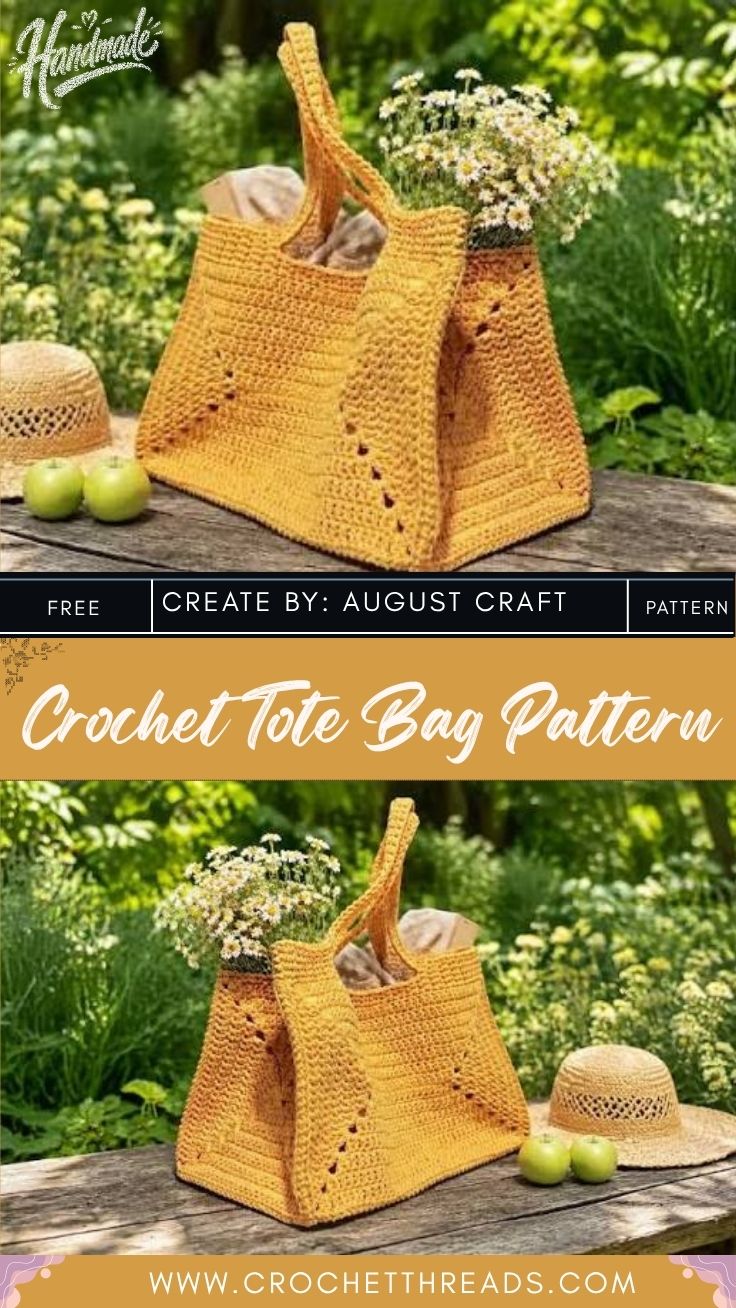
Yellow Crochet Tote Bag Pattern with leaf stitch
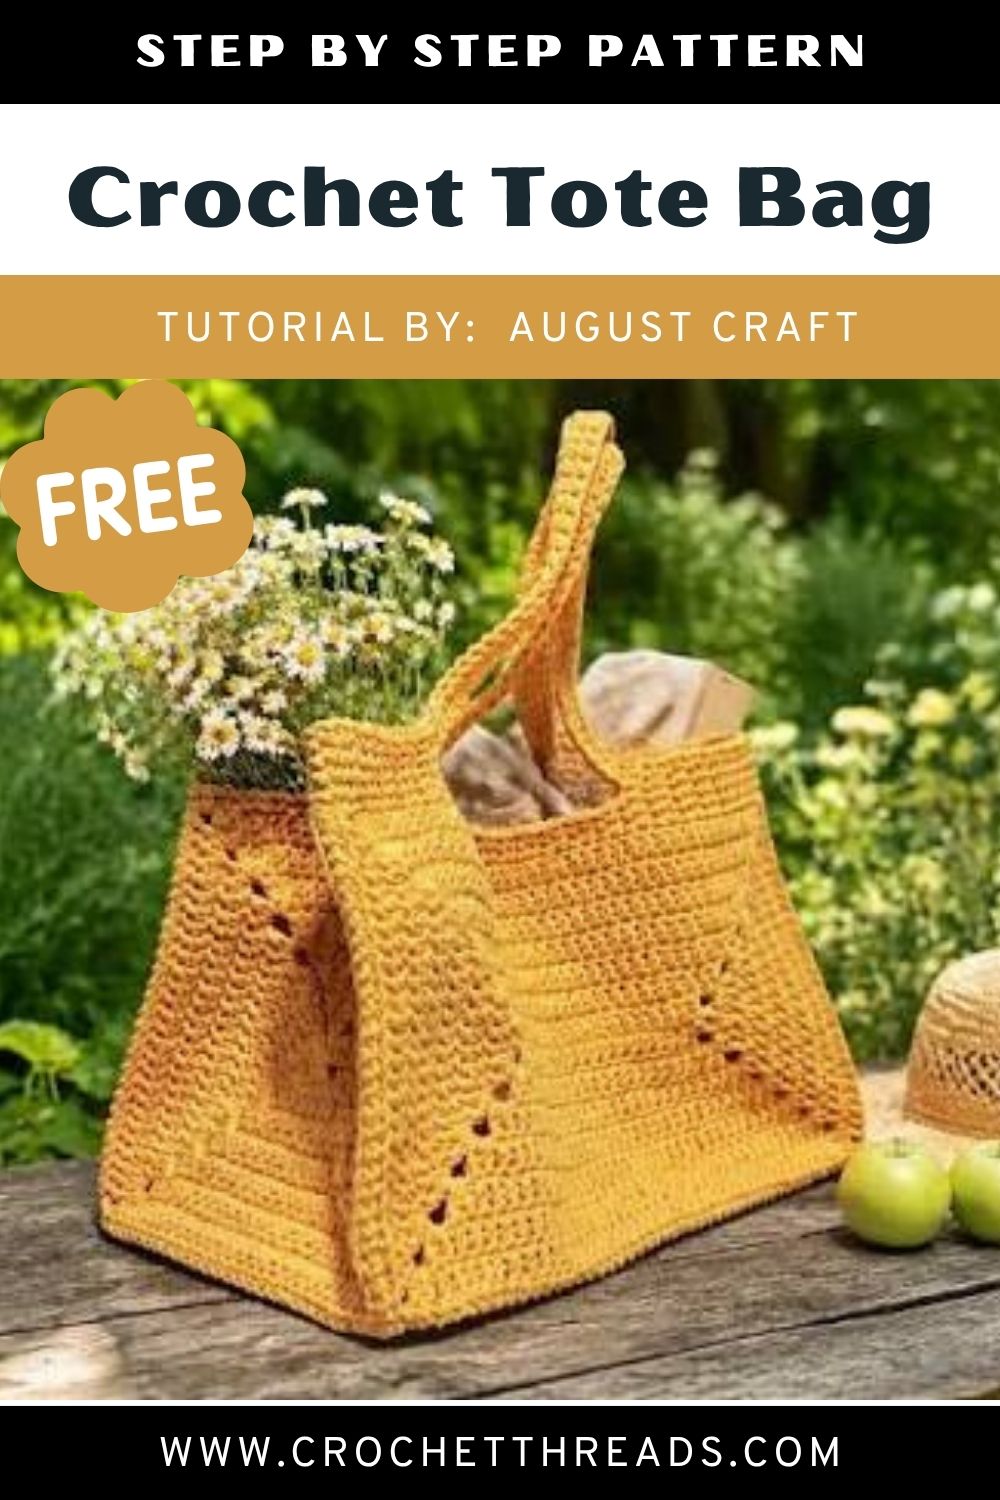
Mustard cotton and diagonal eyelet lines that fan out like leaf veins shape the Yellow Crochet Tote Bag Pattern with leaf stitch, a structured market tote built from joined rectangular panels, ready for groceries, library books, or beach towels.
Each panel starts as a short foundation chain and grows outward in rounds, with chain-space corners stacking into eyelet diagonals. Our crochet tote bag pattern walks through panel shaping, seaming, the upper cotton crochet bag rounds, and sturdy handles. You’ll also find mitered corner tips, stitch checks, fixes for twisted seams, and care advice for everyday carrying.
Pattern Overview
The bag is made from flat panels instead of one continuous tube. You work each rectangle in rounds around a foundation chain. Every round places a small chain-space at the four corners, and those spaces line up into diagonal eyelet rows. When the lines from both ends meet, they form the leaf-vein look.
The finished panels are seamed together around a narrow base. After that, a few solid rounds build up the top edge, and the handles are added last.
Materials
- Sport-weight to light DK cotton or cotton blend in mustard yellow, roughly 500–700 yards (an estimate, so buy an extra skein)
- 3.0 mm crochet hook (sold as 5/0 in Japanese sizing)
- 10–12 locking stitch markers
- Tapestry needle
- Scissors
- Measuring tape
- Optional: fabric for a lining, or plastic canvas for the base
Yarn Selection
Mercerized or combed cotton gives you crisp stitch definition, so the eyelets read clearly. It also resists stretching better than acrylic. A cotton-polyester blend is a little lighter and softer.
Avoid fuzzy yarns. Halo fibers blur the eyelet diagonals, and those diagonals are the whole point of the design.
Hook Size and Gauge
Start with a 3.0 mm hook and work a tight, even fabric. Here is a suggested starting gauge for sport-weight cotton:
- About 22 dc and 11 rounds per 4 inches
- Measure it on the middle of a panel, not across the corners
A slightly firm gauge keeps the bag from sagging.
Abbreviations (US Terms)
- ch – chain
- sl st – slip stitch
- sc – single crochet
- dc – double crochet
- sp – space
- st(s) – stitch(es)
Before You Start
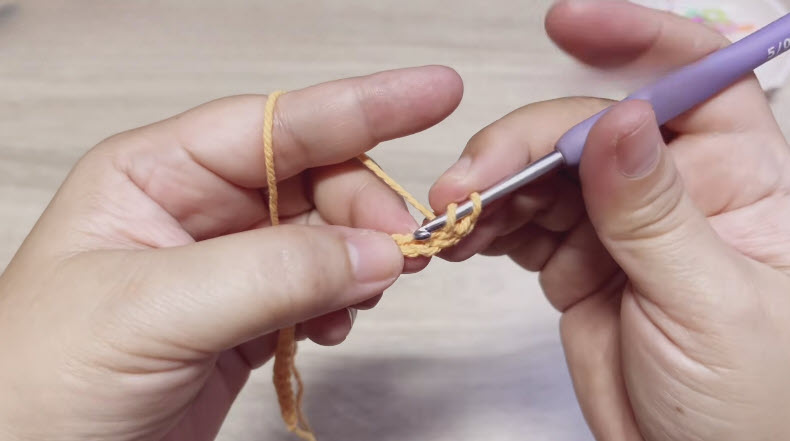
- Tension the yarn over your left index finger, the way the screenshots show. Consistent tension keeps the eyelets evenly spaced.
- Place a marker in every corner chain-space as soon as you make it. It is easy to lose a corner in dense cotton.
- Count your stitches along each side separately. The long sides and short sides grow at the same rate, so comparing them catches errors early.
Time Box
Prep (swatch, winding yarn) – 45 minutes
Stitching the panels – 8–10 hours
Seaming and handles – 2–3 hours
Finishing and blocking – 1 hour
Construction and Instructions
The counts below are suggested starting numbers based on the gauge above. Adjust them to your own yarn.
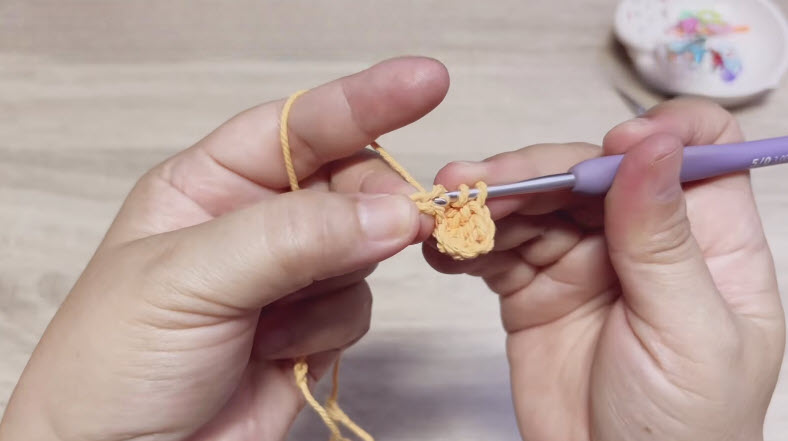
1. Start the Base Panel
- Ch 22.
- Rnd 1: Dc in the 4th ch from the hook and in each ch across to the last ch.
- In the last ch, work (dc, ch 2, dc, ch 2, dc). This turns the first end of the chain.
- Rotate the work and dc along the underside of the chain.
- In the first ch, work (dc, ch 2, dc, ch 2).
- Join with a sl st to the top of the beginning ch-3.
You now have four corner spaces. Mark each one.
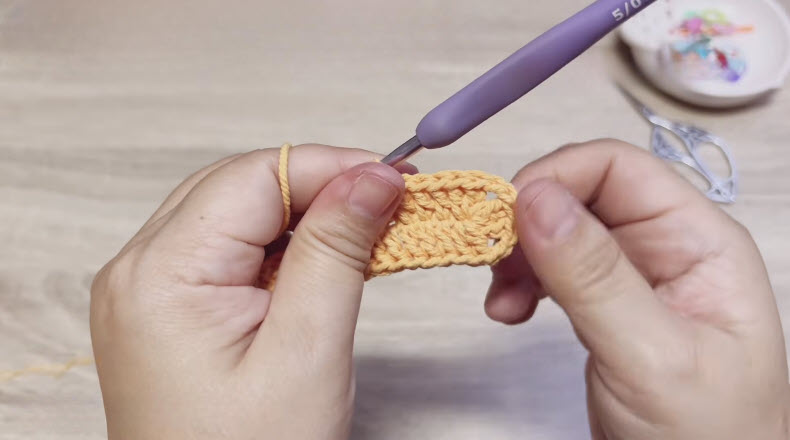
2. Grow the Base in Rounds
- Ch 3 at the start of each round.
- Dc in each st along the sides.
- Work (dc, ch 2, dc) into each corner ch-2 sp.
- Join with a sl st at the end of the round.
Each side gains 2 stitches per round.
Stitch check: after every round, confirm that both long sides match and both short sides match. Continue until the base measures about 12 x 4 inches.
Pro-Tip: If an eyelet drifts off its diagonal, the corner stitches were probably worked into the dc beside the chain-space instead of into the space itself. Frog back to the drift point. The line will not straighten on its own.
3. Make the Front and Back Panels
Use the same method with a longer or wider starting chain, so the panels match the base length. Stop when each panel reaches about 12 x 11 inches.
Measure now: lay the front panel directly on top of the back panel. The diagonals and the edges should line up exactly.
Matching panels matter because the eyelet Vs frame the bag. A mismatch of even one round shows clearly once the bag is seamed.
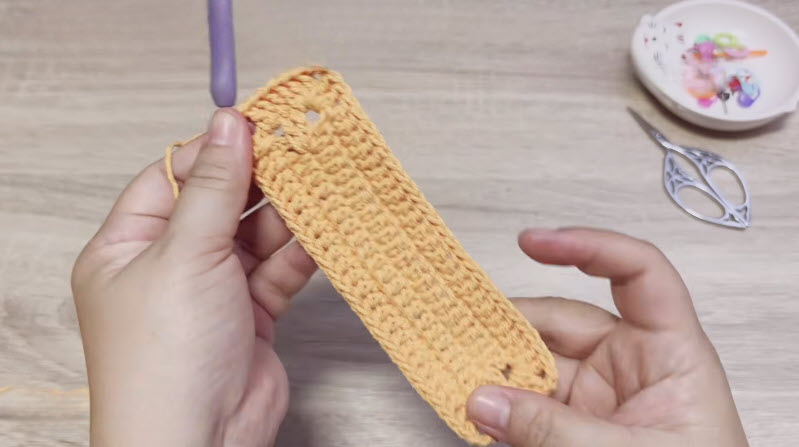
4. Make the Side Panels
Work two narrower rectangles, each about 4 inches wide and the same height as the front panel.
5. Block and Lay Out
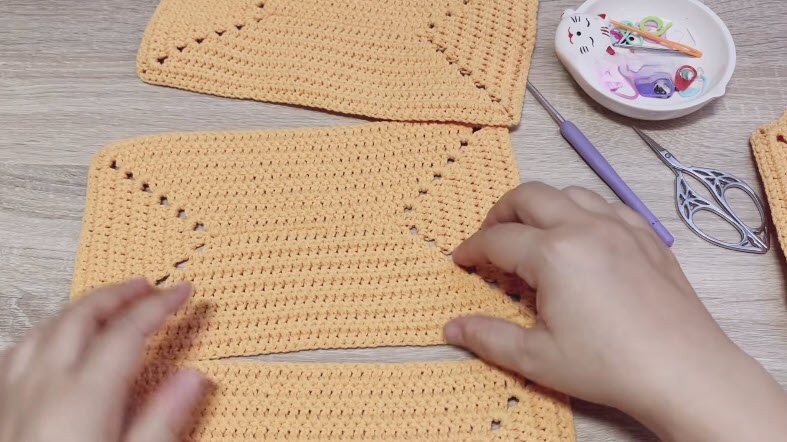
- Pin each panel to size and mist it with water. Let it dry fully.
- Arrange the panels around the base, as shown in the layout screenshot.
Layout test: before you pick up the hook to seam, check that every panel’s eyelet diagonals point in the direction you want.
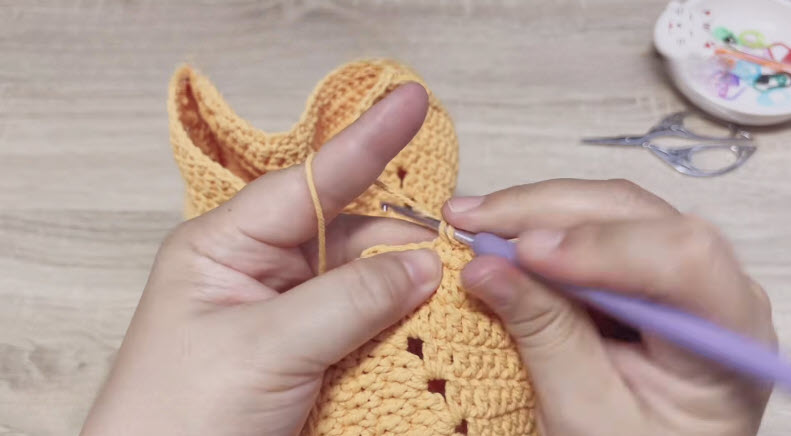
6. Seam the Bag
- Hold two edges with the wrong sides together.
- Sc through both layers, working one sc per stitch.
- Start with the long sides of the base, then the short sides, then the vertical corners.
A seam worked from the outside leaves a neat ridge that outlines the bag’s shape.
7. Build the Upper Rounds
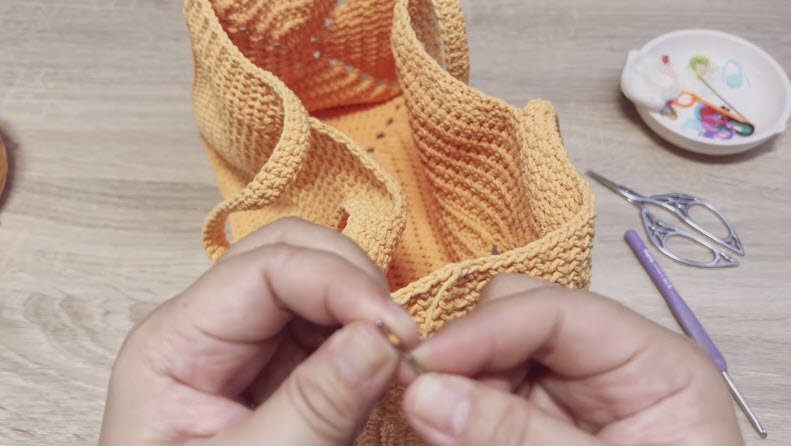
- Join the yarn at a side seam.
- Work 6–8 rounds of sc all the way around the top edge.
- Join each round with a sl st.
The dense sc fabric firms up the opening, so it doesn’t flare.
8. Add the Handles
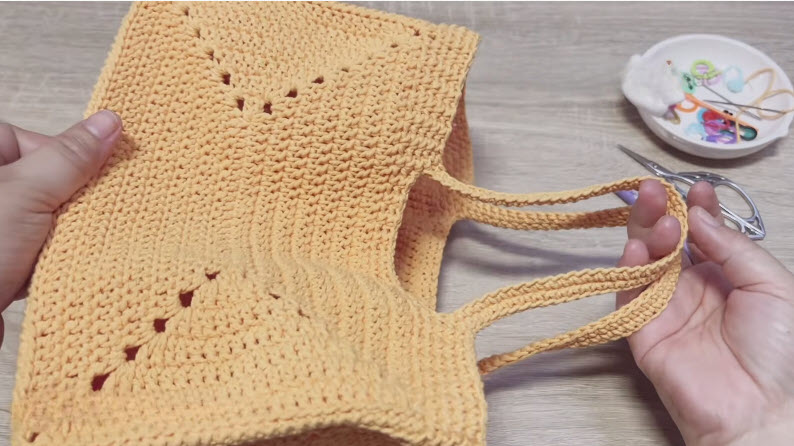
- On the final upper round, mark the centers of the front and back.
- Work sc to the handle position, ch 60, skip the stitches for the opening, and continue.
- Repeat for the second handle.
- Work 3–4 more rounds of sc, placing one sc in each chain over the handle sections.
Strength test: load the bag with 5 pounds of books and let it hang for ten minutes. If the handles stretch more than an inch, add another round, or pick a firmer yarn.
Common Mistakes
- Working corners into stitches instead of spaces. The eyelet lines wander as a result.
- Loose seams. Gaps open at the base corners under weight.
- Uneven panel heights. The top edge ends up tilted.
- Skipping the blocking step. Curled panels are hard to seam straight.
Troubleshooting
Bag leans to one side: one side panel is probably taller than the other. Add a round to the short panel, or rip one round off the tall panel.
Base sags: slip a plastic canvas insert inside (see the bonus section).
Handles curl: steam them lightly and let them dry flat under a book.
Size Modification
Start with a longer foundation chain for a wider bag, and keep adding rounds until the panels reach the new height. For a mini tote, drop to a finer cotton and a 2.5 mm hook.
Color Variations
- Sage green gives a literal leaf look.
- Cream and terracotta suit a farmers’ market bag.
- A contrasting color on the seams outlines each panel.
Care Instructions
- Hand wash in cool water with mild soap.
- Press out the water. Don’t wring the bag.
- Dry it flat and reshape it while damp.
- Avoid hanging it wet, because cotton stretches under its own water weight.
Personalization Ideas
Contrast Handles
Work the handle rounds in a darker gold or brown.
Leather Tabs
Stitch leather patches at the handle bases to reduce wear.
Inner Pocket
Crochet a small sc square and whipstitch it inside for keys.
Tassel Accent
Tie a matching tassel to one handle for a playful finish.
FAQs
What does 5/0 mean on a Crochet Tote Bag hook?
It is Japanese sizing and equals roughly 3.0 mm, close to a US C/2 or D/3.
Can beginners make the bag?
Yes, if you are comfortable with dc and can count stitches. The rounds repeat, so the only tricky part is the first round around the chain.
Is the leaf stitch hard?
No. The “leaf” effect comes from where the corners sit. The stitches themselves are plain dc and chains.
Will the bag hold heavy groceries?
With tight gauge, firm seams, and a base insert, it handles everyday shopping loads well.
Lining and Reinforcing the Base
Cut plastic canvas slightly smaller than the finished base and cover it with a crocheted sc rectangle or with fabric. Drop it inside the bag. For a full lining, sew a simple cotton fabric bag about ½ inch smaller than the tote on all sides, then hand-stitch it just under the top sc rounds. The lining keeps small items from poking through the eyelets and cuts down on stretching.