Free Crochet Scissors Keychain Pattern for bag Charm
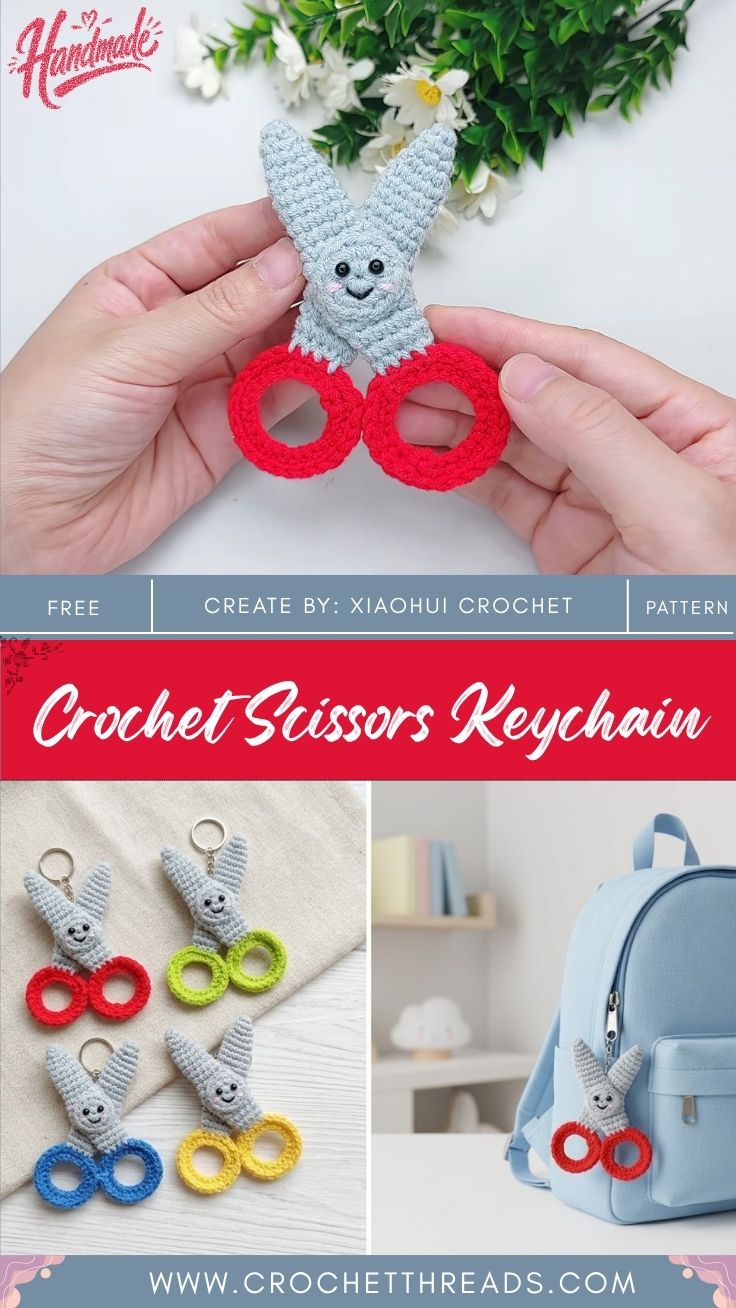
Two tapered gray blades crossing over lime-green ring handles give the Free Crochet Scissors Keychain Pattern for Bag Charm its playful, school-supply look. A tiny smiling face sits right at the pivot, and a keyring clips on top.
Each blade works up as a narrow tube from a pointed tip, and the handles are single crochet worked around a ring core, so shaping stays simple. Below, the crochet scissors keychain pattern walks through blades, handles, crossing the pieces, and embroidering the face, plus tips for a sturdy crochet bag charm or amigurumi scissors charm gift.
Pattern Overview
You make four pieces: two blades and two handle rings. The blades start at the tip in a magic ring and grow slowly wider toward the base. The handles cover a small ring completely. Assembly crosses the blades into an X, stitches the pivot tight, and sews one handle to the base of each blade. Embroidery and a keyring finish it off.
Materials
- Light worsted or DK cotton/milk cotton yarn in gray (blades) and one bright color (handles)
- 2.5–3.0 mm crochet hook
- Two small plastic rings for the handle cores, about 1 inch across
- Small amount of fiberfill
- Scrap yarn in a contrasting color, for a running marker
- Black and pink embroidery thread
- Keyring with jump ring and small pliers
- Tapestry needle and scissors
Yarn and Hook Choices
Cotton holds the pointed blade shape better than fuzzy acrylic, and stitch definition stays crisp on such a small piece. Go down a hook size from the yarn label’s recommendation. Tight fabric keeps stuffing hidden and keeps the blades from bending.
Stuffing and Safety
The blades need only a light touch of fiberfill, just enough to hold a rounded shape. Embroider the eyes instead of using safety eyes if a child will handle the charm. Check that the jump ring closes fully so it can’t catch fabric or fingers.
Abbreviations (US Terms)
- MR – magic ring
- sc – single crochet
- inc – 2 sc in the same stitch
- sl st – slip stitch
- st(s) – stitch(es)
Time Box
- Prep: 10 minutes to gather yarn, rings, and notions
- Stitching: about 60–75 minutes for two blades and two handles
- Finishing: 20–30 minutes for assembly, face, and keyring
Before You Start
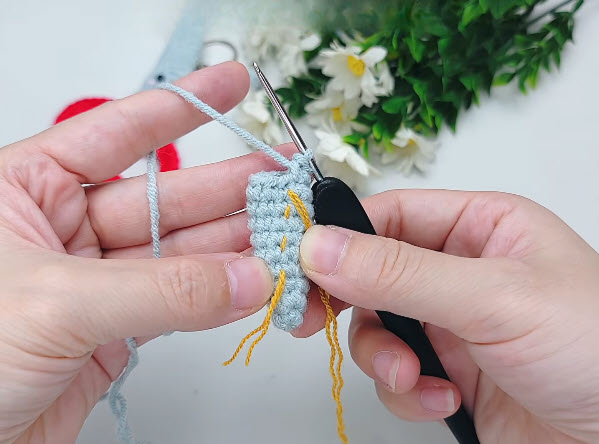
Cut a 12-inch piece of contrasting scrap yarn. On a tube with only a few stitches around, a clip marker gets in the way. A strand woven between rounds shows every round start at a glance, as the yellow strand does in the photos.
Instructions
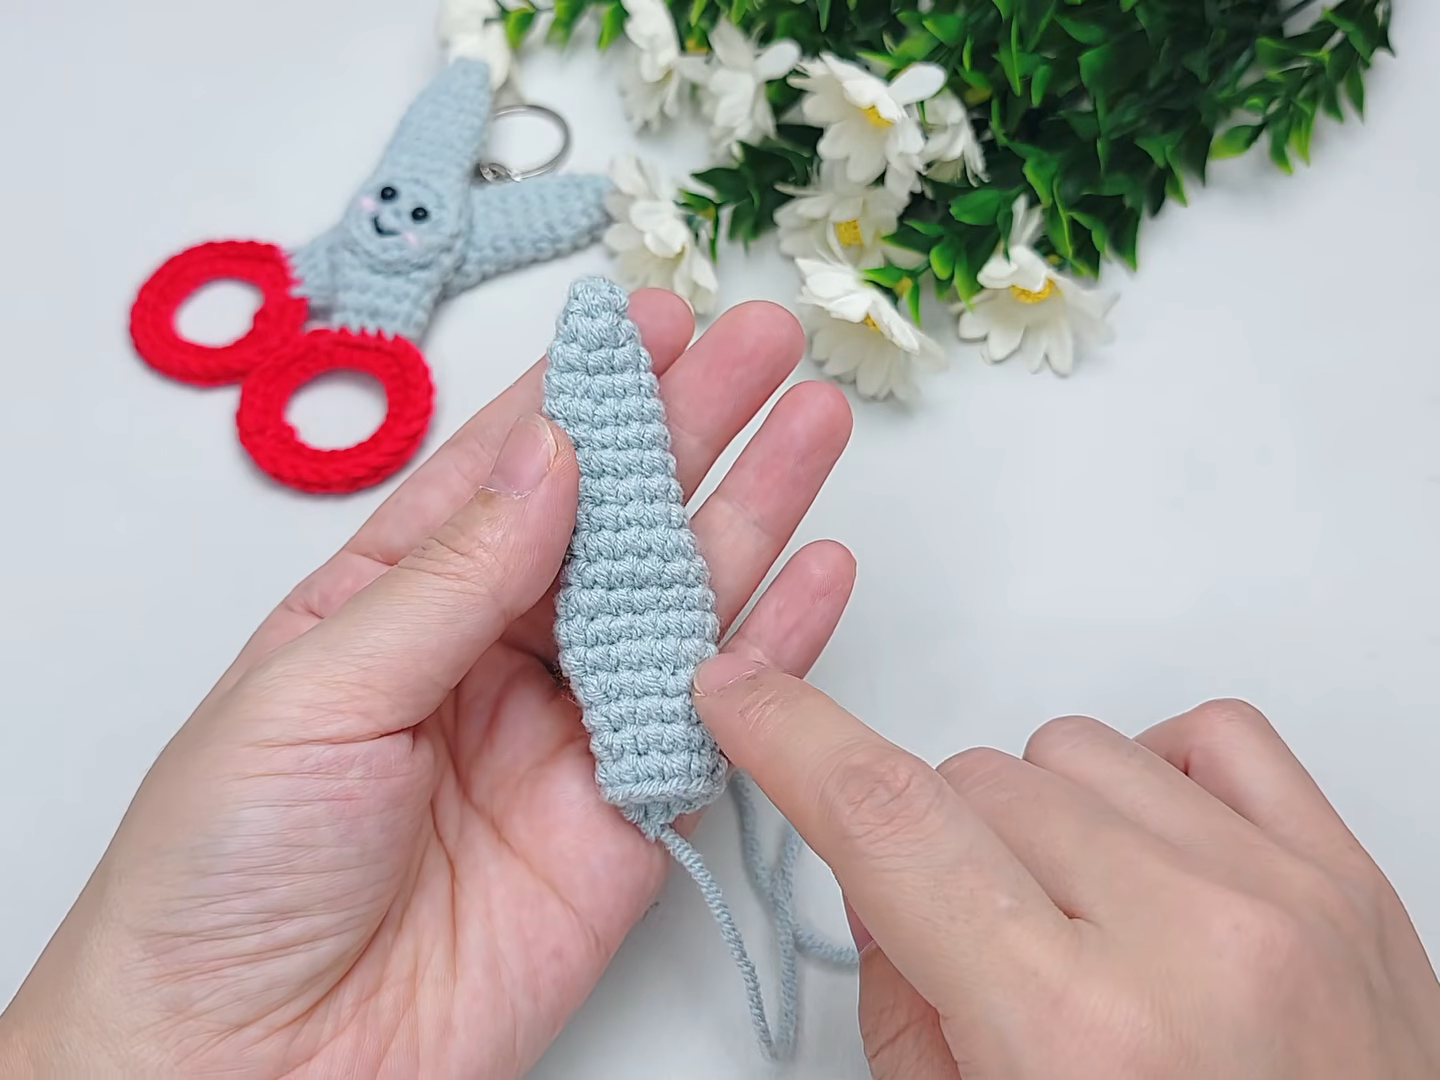
The round counts below are a working guide for the shape shown in the photos. Compare your blade against the finished-blade photo as you go.
Part 1: Blades (make 2, gray)
Step 1 – Start at the tip. Make an MR and work 4 sc into it. Pull the ring snug so the tip closes into a point.
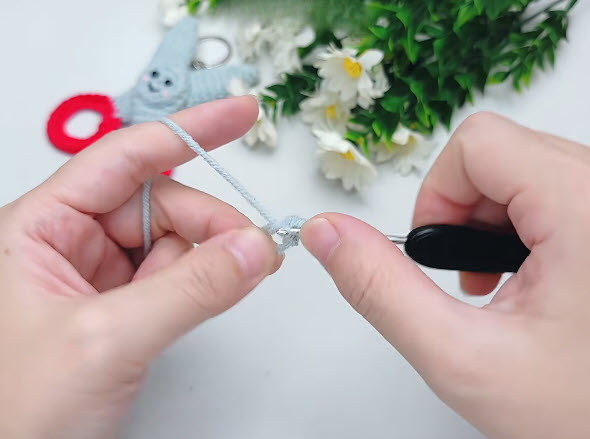
Step 2 – Lay in the running marker. Place the scrap strand across your work before the first stitch of Round 2. Flip it forward or back at the start of every round after that.
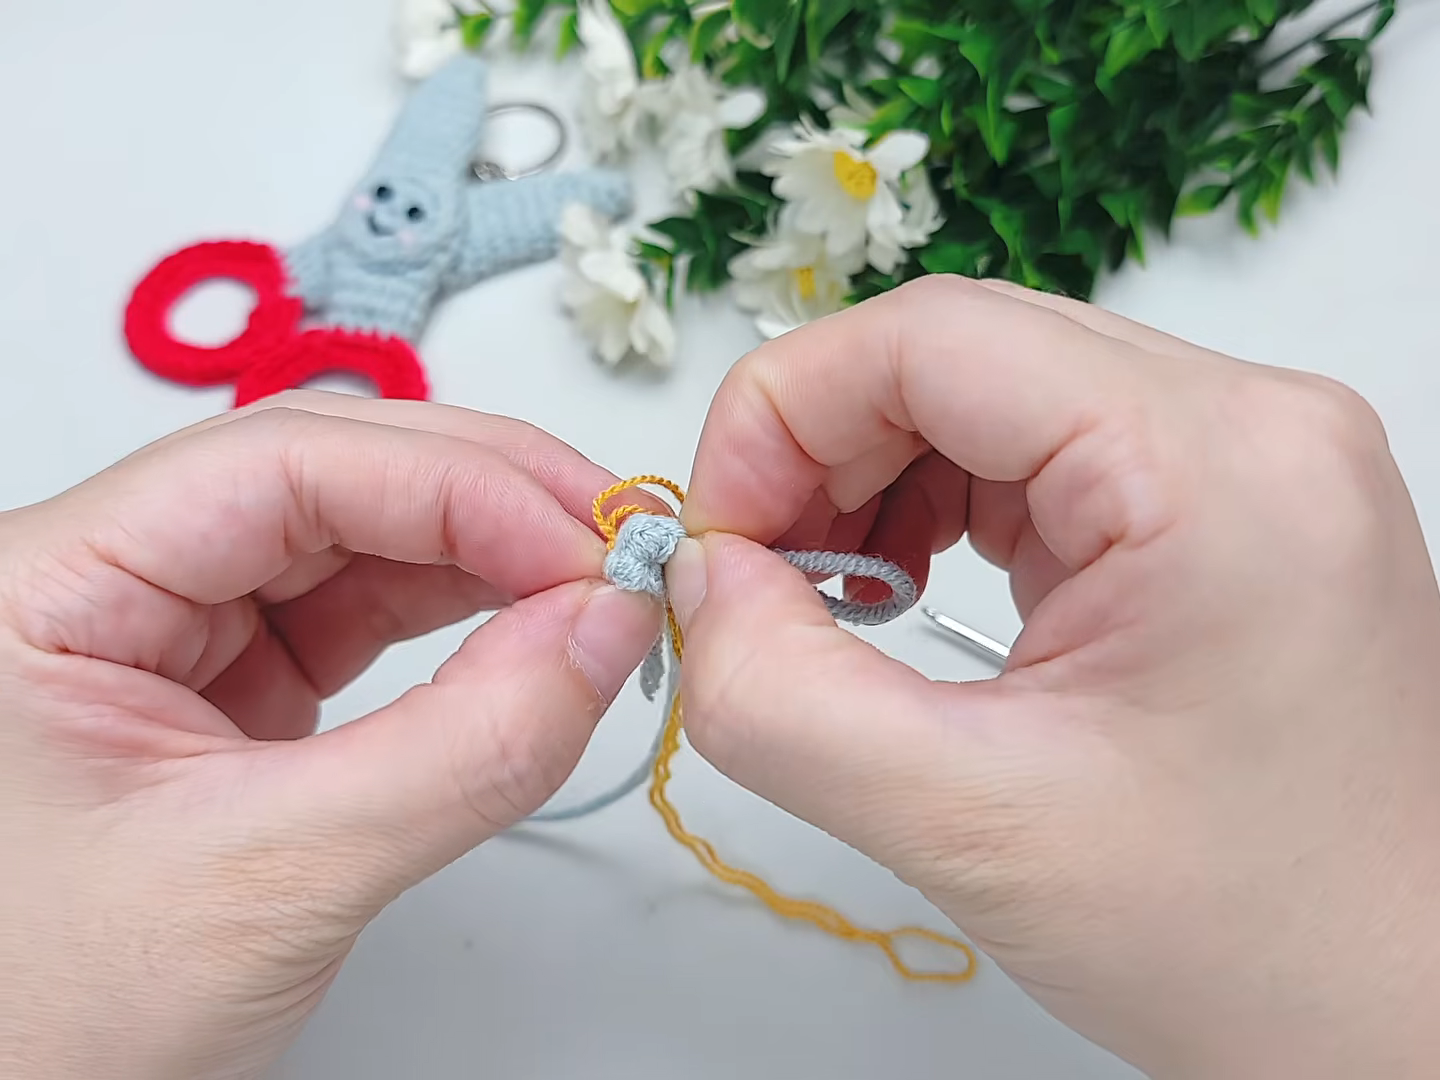
Step 3 – Build the taper.
- Rnd 2: (sc, inc) x2 – 6 sts
- Rnd 3: sc around – 6 sts
- Rnd 4: (2 sc, inc) x2 – 8 sts
- Rnds 5–7: sc around – 8 sts
- Rnd 8: (3 sc, inc) x2 – 10 sts
- Rnds 9–12: sc around – 10 sts
- Rnd 13: (4 sc, inc) x2 – 12 sts
- Rnds 14–22: sc around – 12 sts
Pro-Tip: Put the increases on opposite sides of the tube. Stacking them on one side makes the blade curve like a banana.
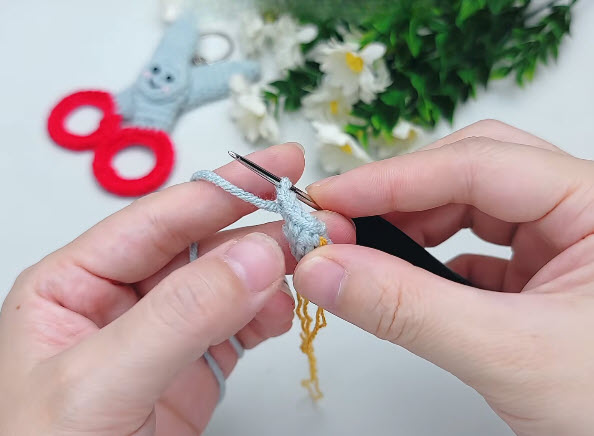
Step 4 – Check the blade. The running marker should climb in a neat line up one side. Stuff the lower half lightly and gently press the blade a little flatter. Fasten off with a long tail for sewing.
Length check: Hold both blades side by side before stuffing the second one. They should match round for round.
Part 2: Handles (make 2, bright color)
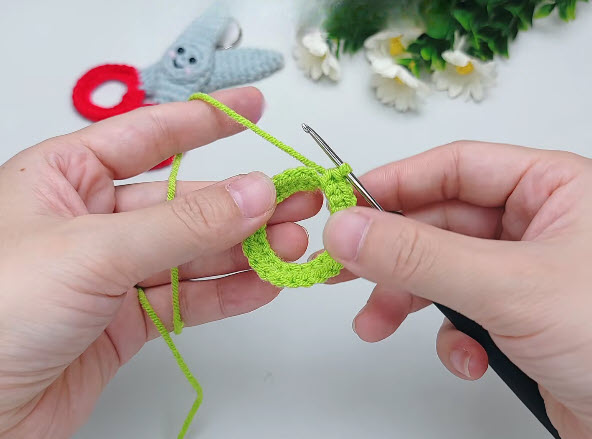
Step 5 – Cover the ring. Attach yarn to the plastic ring with a sl st. Work sc around the ring, pushing each stitch tight against the one before it.
Step 6 – Close the round. Keep going until no plastic shows, usually 30–36 sc depending on ring size and yarn thickness. Join with a sl st into the first sc and leave a long tail.
The tail sews the handle on later, so don’t trim it short.
Part 3: Assembly
Step 7 – Cross the blades. Lay one blade over the other in an X, crossing about one-third of the way up from the base. Pin them in place.
Step 8 – Lock the pivot. Wrap yarn around the crossing point a few times. Then stitch straight through both layers several times so the X can’t twist. The pivot should look slightly rounded, like the center of real scissors.
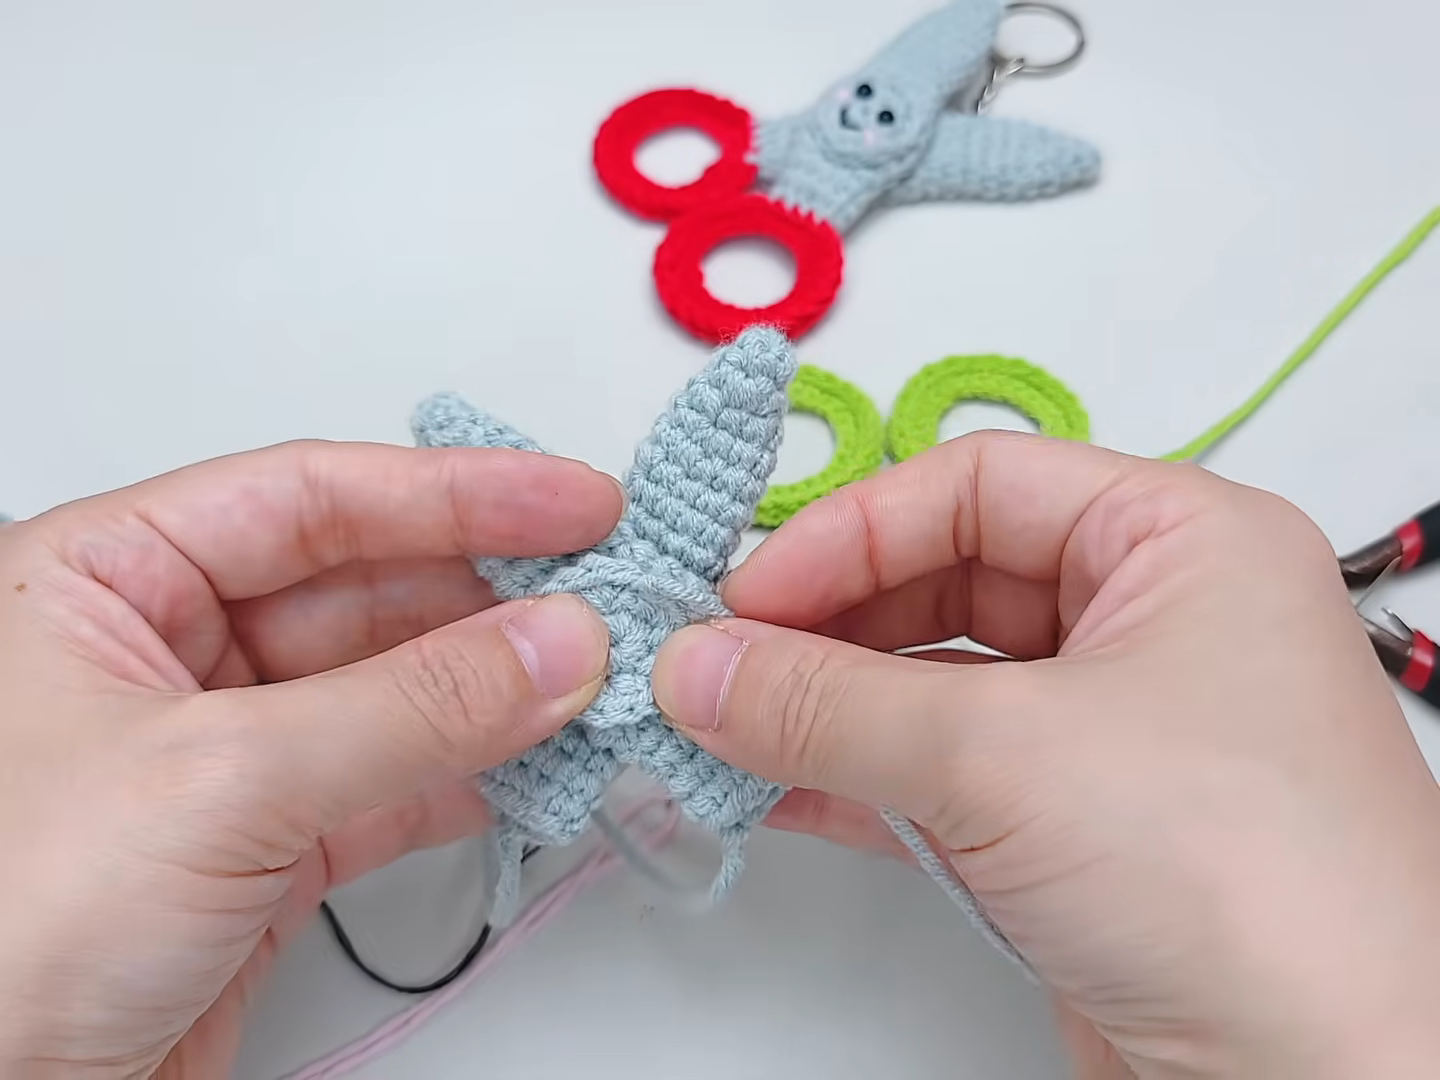
Step 9 – Sew on the handles. Place one ring under the base of each blade. Whipstitch the top edge of the ring to the open blade base, working through the front and back loops so the joint doesn’t flop.
Angle check: Lay the charm flat. Both handles should sit level, with a small gap between them.
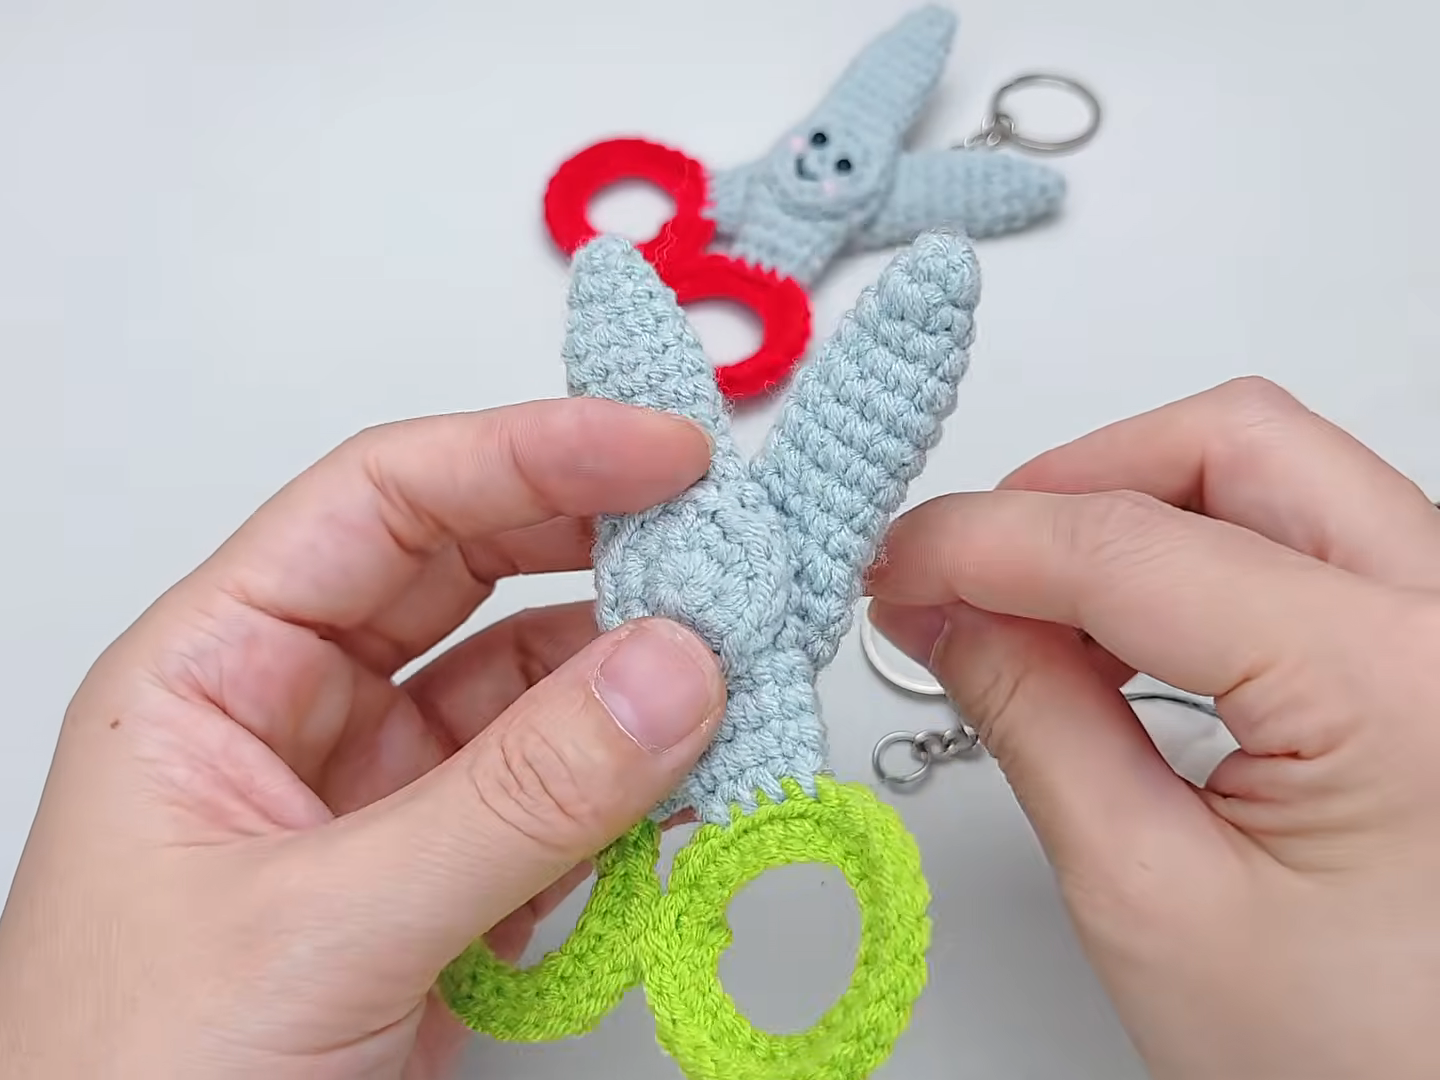
Step 10 – Add the face. Embroider two small black eyes at the pivot, a short smile below, and pink cheek stitches on either side.
Step 11 – Attach the keyring. Open a jump ring with pliers. Slide it through several strands at the top of the pivot, not a single stitch, and close it fully. Then add the keyring.
Common Mistakes
- Loose tip: A MR that isn’t pulled tight leaves a hole at the point. Tighten it again before weaving the tail in.
- Overstuffed blades: Too much fiberfill makes the blades look like sausages. Keep the stuffing light.
- Gaps on the handles: Plastic peeks through when stitches are spaced too far apart. Push them closer together as you work.
- Weak keyring spot: A single stitch can stretch or tear over time.
Troubleshooting
If the scissors lean to one side when hung, the jump ring is off-center, so move it to the middle of the pivot. If a handle twists backward, add two or three stitches at the back of the joint. For blades that droop, a little extra stuffing at the base usually fixes it.
Size Modification
Bulky yarn and a 4 mm hook, with larger rings, make a charm big enough for a backpack. Fine cotton and a 2 mm hook make a tiny version for a zipper pull. Keep the round sequence the same, and choose the ring size to fit the new blade width.
Color Variations
Classic red handles with gray blades look like school safety scissors. Lime green, bright orange, or pastel pink also work well. Silver-gray metallic yarn on the blades adds a little shine.
Care Instructions
Spot clean with mild soap and cool water, then press dry with a towel. Avoid the washing machine, which can bend the plastic rings and rust the keyring.
Uses and Gift Ideas
Hang one from a craft tote, clip one to a pencil case zipper, or dangle one from a sewing kit handle. The charms make quick teacher gifts, sewing-circle favors, and craft fair add-ons. Scrap yarn covers most of the project, so a batch in mixed colors costs very little to make.
Personalization Ideas
Initial Stitch
Embroider a tiny initial on one handle with contrasting thread.
Sleepy Face
Swap the open eyes for closed, curved lashes.
Ribbon Tie
Knot a thin satin ribbon through the keyring for a gift-ready touch.
Mini Charm Set
Pair the scissors with a crochet spool or pincushion charm on the same ring.
FAQs
Can a beginner make the scissors keychain?
Yes, if you can work single crochet in the round and use a magic ring. Assembly takes the most patience.
Do I need plastic rings for the handles?
They keep the handles perfectly round. A tightly worked chain ring also works but may stretch over time.
How much yarn does one charm use?
A small amount. Scrap balls usually cover a full charm.
Can I skip the stuffing?
Yes. Flat blades work fine, but a little fiberfill helps the tips hold their point.
Bonus: Making a Matched Pair for Craft Fairs
Stitch all blades first, then all handles, then assemble in one sitting. Batching keeps tension consistent, so every charm hangs the same way. Pair the scissors in complementary colors, such as red with blue or lime with pink, and sell them as “sewing buddy” sets on one card.
Final Thoughts
Two blades, two rings, and a few careful stitches at the pivot turn scrap yarn into a charm that makes people smile. Once the first one is done, a second in a new color goes much faster.