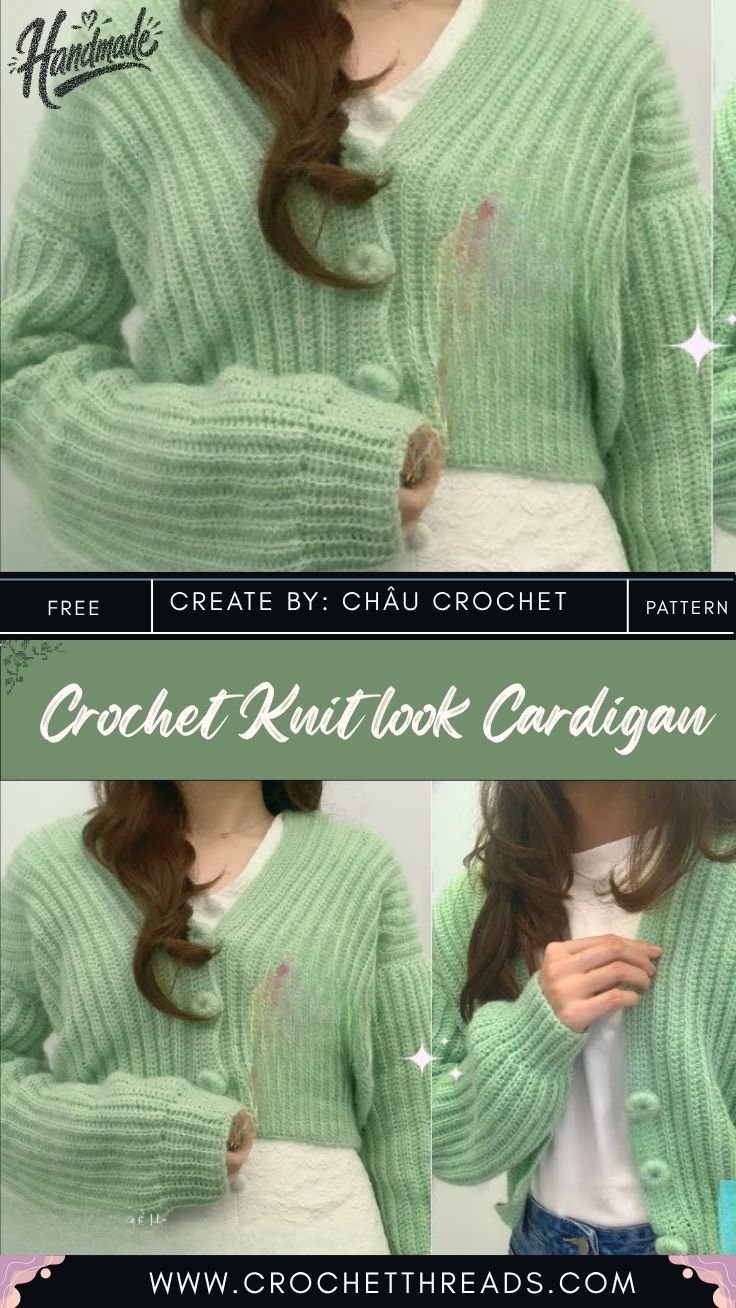
Crochet Knit look Cardigan Pattern with knit-inspired stitch texture
Soft sage ridges stack row after row in the Crochet Knit look Cardigan Pattern with knit-inspired stitch texture, a relaxed piece built from flat panels, seamed together, then finished with picked-up bands and yarn-covered buttons.
Each panel begins as a plain rectangle, so the Crochet Knit look Cardigan suits makers ready to move beyond scarves without tackling complicated shaping. The ribbed crochet texture comes from stitch placement rather than tricky techniques, and the relaxed cardigan fit forgives small sizing errors. Ahead you’ll find gauge math, seaming order, band pickup, and button-making guidance.
Pattern Overview
The cardigan uses five rectangles: one back, two fronts, and two sleeves. Shoulders are seamed first, sleeves attach at the side edges, and side-plus-underarm seams close everything up. A ribbed band worked along the front opening holds the buttons.
Worked rows of half double crochet placed in the third loop create a raised horizontal bar. That bar looks remarkably close to knit stockinette or ribbing, depending on which side faces out.
Materials
- About 1,000–1,600 yards of DK or light worsted yarn (the range depends on size and length)
- 4.00 mm (G-6) crochet hook
- 4–6 locking stitch markers
- Tapestry needle and scissors
- 5–7 buttons, or plastic rings/button forms to cover with yarn
- Measuring tape and blocking pins
Yarn Selection
A yarn with a light halo, like wool blends, alpaca blends, or brushed acrylic, softens the stitch definition and adds to the knitted illusion. Stiff cotton shows every crochet post and makes the fabric heavy. Look for something with bounce so the ribs spring back after wear.
Hook Size and Gauge
Start with a 4 mm hook, then crochet a 6 × 6 inch swatch in the third-loop stitch. Measure the center 4 inches after blocking.
Use the swatch to calculate every panel:
Stitches to chain = desired width (in) × stitches per inch
Worked example only: a swatch of 16 stitches per 4 inches gives 4 stitches per inch. A 20-inch-wide back would then need 80 stitches. Your own swatch sets the real number.
Why it matters: crochet fabric relaxes after washing, so an unblocked swatch can mislead you by a full size.
Abbreviations (US Terms)
- ch – chain
- hdc – half double crochet
- 3rd lp – third loop (the horizontal bar behind the back loop)
- sl st – slip stitch
- st(s) – stitch(es)
- BLO – back loop only
Important Stitches
Finding the Third Loop
Tilt the top of the row toward you. Below the usual two top loops sits a third horizontal strand, created by the yarn over of the hdc. Insert the hook under that strand only. Once you’ve spotted it a few times, it stands out clearly.
Ribbing for Bands
Slip stitch in BLO or single crochet in BLO gives a stretchy, knit-style rib for the cuffs and front band.
Before You Start
Decide the rib direction early. Panels worked bottom-up show horizontal ridges. Panels worked side-to-side give vertical lines, which look more like a classic knit sweater. The sleeves in the reference photos run differently from the body, which creates a nice contrast at the seams.
Time Box
Prep (swatch, blocking, math) – 2–3 hours
Stitching (5 panels) – 18–28 hours
Finishing (seams, band, buttons) – 4–6 hours
Construction and Instructions
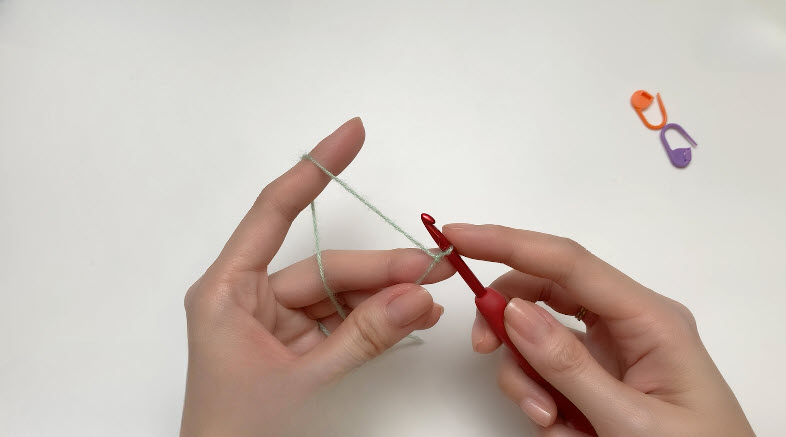
1. Foundation Chain
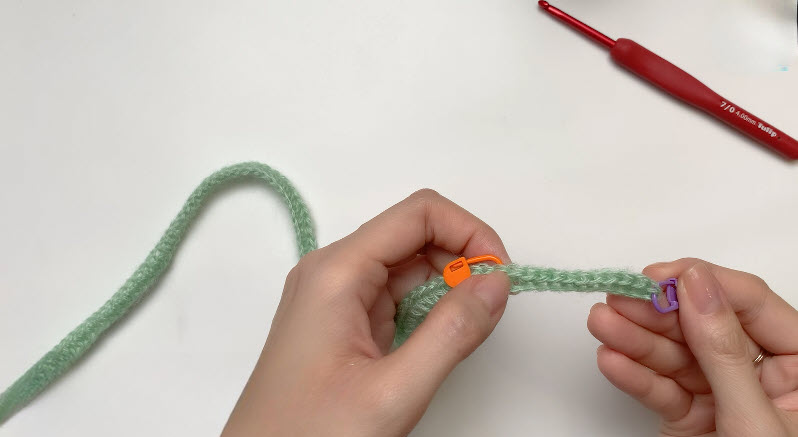
Chain the calculated number plus 2 for turning. Clip a marker every 20 chains so recounting takes seconds instead of minutes.
Count before row 1: confirm the total, because one missed chain shifts every panel measurement.
2. Back Panel
Row 1: hdc in the 3rd ch from the hook and in each ch across. Turn.
Row 2 onward: ch 2 (does not count as a stitch), hdc in the 3rd lp of each st across. Turn.
Continue until the panel reaches your desired body length.
Pro Tip: Always place the last stitch into the final stitch of the row below, not into the turning chain. Edges stay straight, and seams line up later.
3. Front Panels (Make 2)
Work both fronts the same way, each about half the back width minus half the band width. Keep the row count identical to the back.
Match rows now: lay both fronts over the back. Any difference in length shows up immediately.

4. Sleeves (Make 2)
Work each sleeve as a rectangle. The width equals twice the armhole depth, and the length runs from shoulder drop to wrist. Add a BLO rib cuff for a knit finish.
5. Blocking
Pin each panel to its measurements, then mist or steam it lightly and let it dry fully.
Why it matters: blocked panels seam evenly and hide small tension shifts.

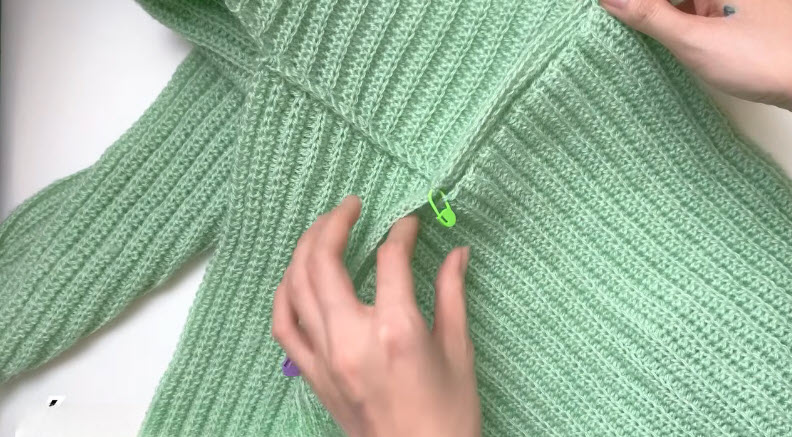
6. Seaming
- Seam the shoulders, leaving the neck opening in the center.
- Center each sleeve at the shoulder seam and attach it along the side edge.
- Sew the sleeve and side seams in one continuous line.
Mattress stitch or sl st seaming on the wrong side both work. Clip a marker at the underarm point before sewing so the seam meets exactly there.
Fit check: try the cardigan on before closing the second side seam.
7. Front Band
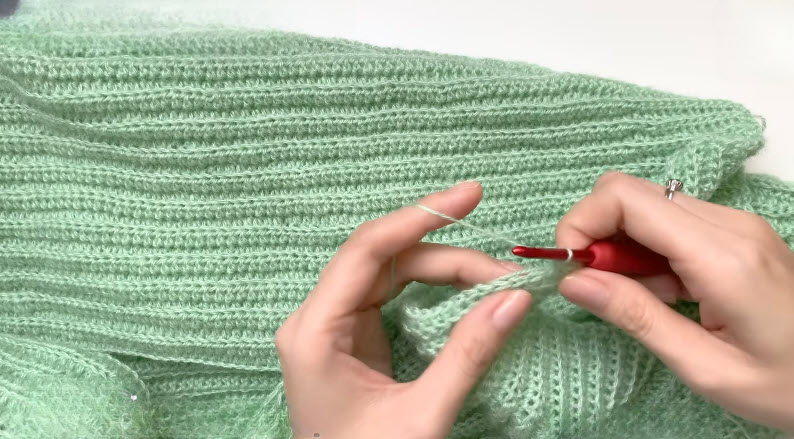
Join the yarn at the lower right front. Pick up roughly 3 sts for every 4 rows along the front edges and neck, then work BLO rows to the band width you want.
Flatness test: the band should lie smooth. If it ripples, pick up fewer stitches. If it pulls or puckers, pick up more.
8. Buttons
Space the buttonholes evenly, with the top and bottom holes about half an inch from the edge. To make yarn-covered buttons, crochet a small circle, stretch it over a plastic ring or button form, then cinch the edge closed with a tapestry needle.
Sizing and Fit Guidance
For a relaxed fit, add 4–8 inches of positive ease to your bust measurement. Oversized styles can go up to 10 inches. Measure a favorite cardigan flat and double the width to find a comfortable target.
Common Mistakes
- Working into both top loops, which flattens the ridge
- Counting the turning chain as a stitch, which makes panels grow
- Skipping the swatch
- Seaming before blocking
- Picking up too many band stitches
Troubleshooting
Panel is getting wider: recount the stitches every 5 rows. An extra stitch usually hides at the row ends.
Ridges look uneven: tension slackens after breaks, so work a few stitches on scrap yarn before resuming.
Sleeves feel tight: add width to the sleeve rectangle, not the cuff.
Color Variations
Oatmeal, dusty rose, charcoal, or heathered navy all show the ridge definition well. Avoid dark black and very busy variegated yarns, since both hide the texture.
Care Instructions
Hand wash in cool water with wool wash. Press out the water inside a towel and dry flat. Never hang a wet cardigan, because the weight stretches the length.
Personalization Ideas
Contrast Bands
Work the front band and cuffs in a second shade.
Cropped Length
Shorten the body panels for a crop that pairs well with high-waisted pants.
Patch Pockets
Crochet two small ribbed squares and sew them to the fronts.
Wooden Buttons
Swap yarn-covered buttons for natural wood.
FAQs
Is the Crochet Knit look Cardigan pattern beginner-friendly?
Yes, as long as you’re comfortable with hdc. Rectangles remove most of the shaping stress.
Can I use worsted yarn?
Yes. Go up to a 5 mm hook and recalculate from a fresh swatch.
Why does my fabric curl?
Third-loop fabric curls naturally before blocking. A light steam flattens it.
How do I lengthen the sleeves?
Add rows before the cuff, keeping both sleeves identical.
Checking Fit Before Seaming
Pin the blocked panels together with locking markers and try the cardigan on carefully. Check the shoulder drop, sleeve length, and front overlap. Adjusting a rectangle now takes minutes, while unpicking finished seams takes hours.
Conclusion
Five blocked rectangles, a few careful seams, and a neatly picked-up band are all it takes to turn simple rows into a Crochet Knit look Cardigan with real knitted character. Take the time to swatch, count at the markers, and try the pieces on before the final seam, since those small pauses protect the fit. Once the covered buttons are stitched in place, you’ll have a soft, ridged layer ready for cool mornings and relaxed weekends.