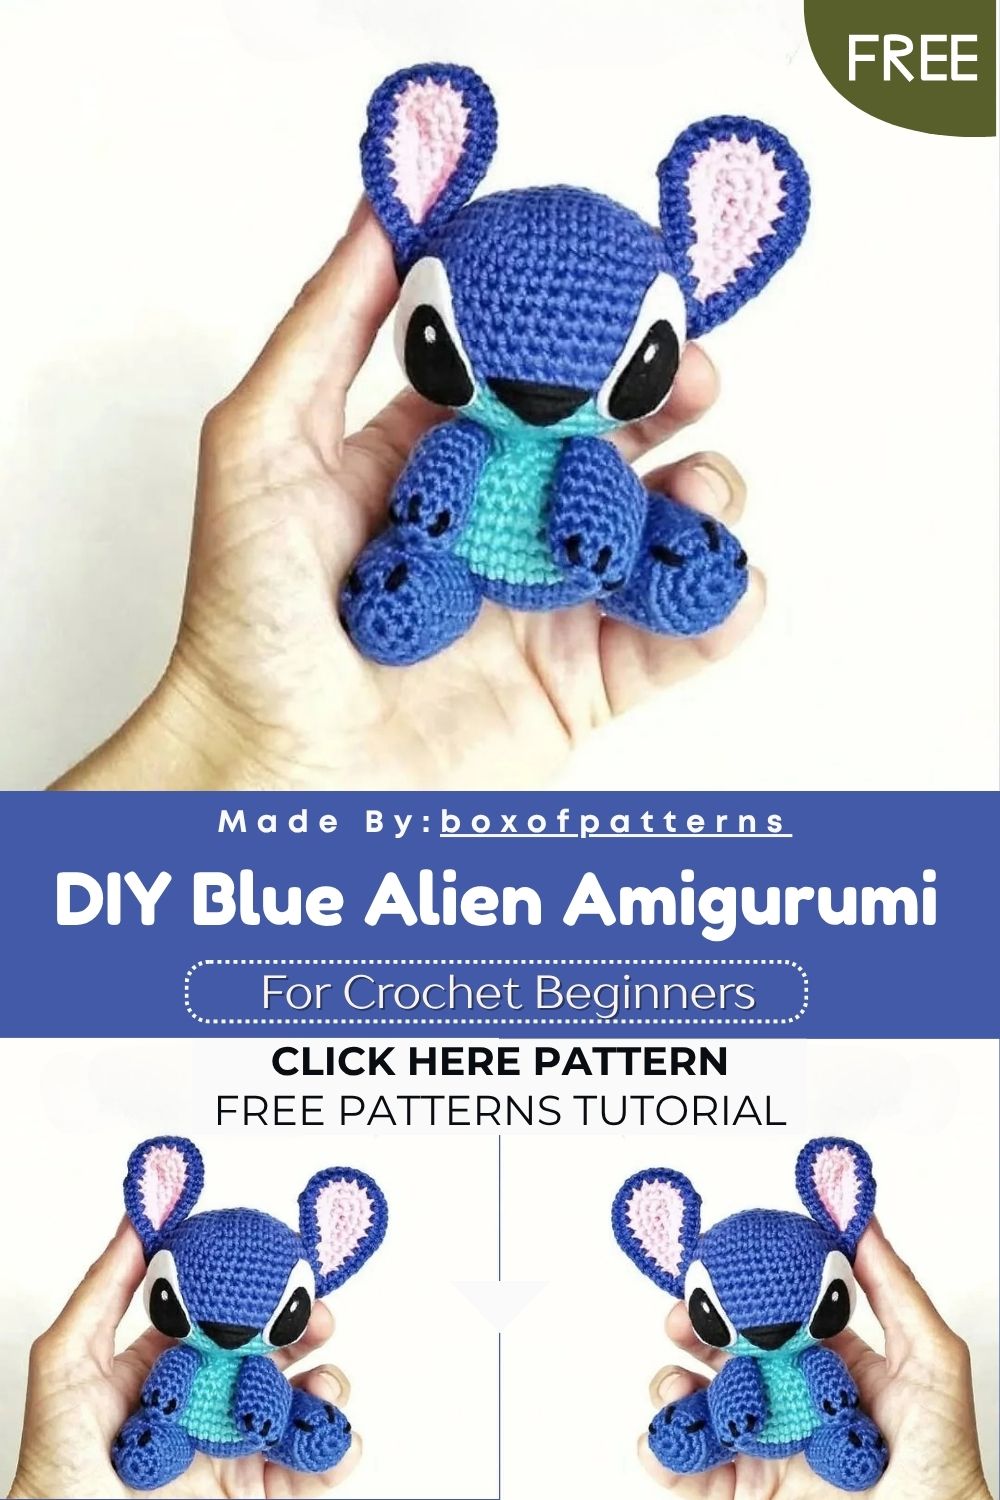
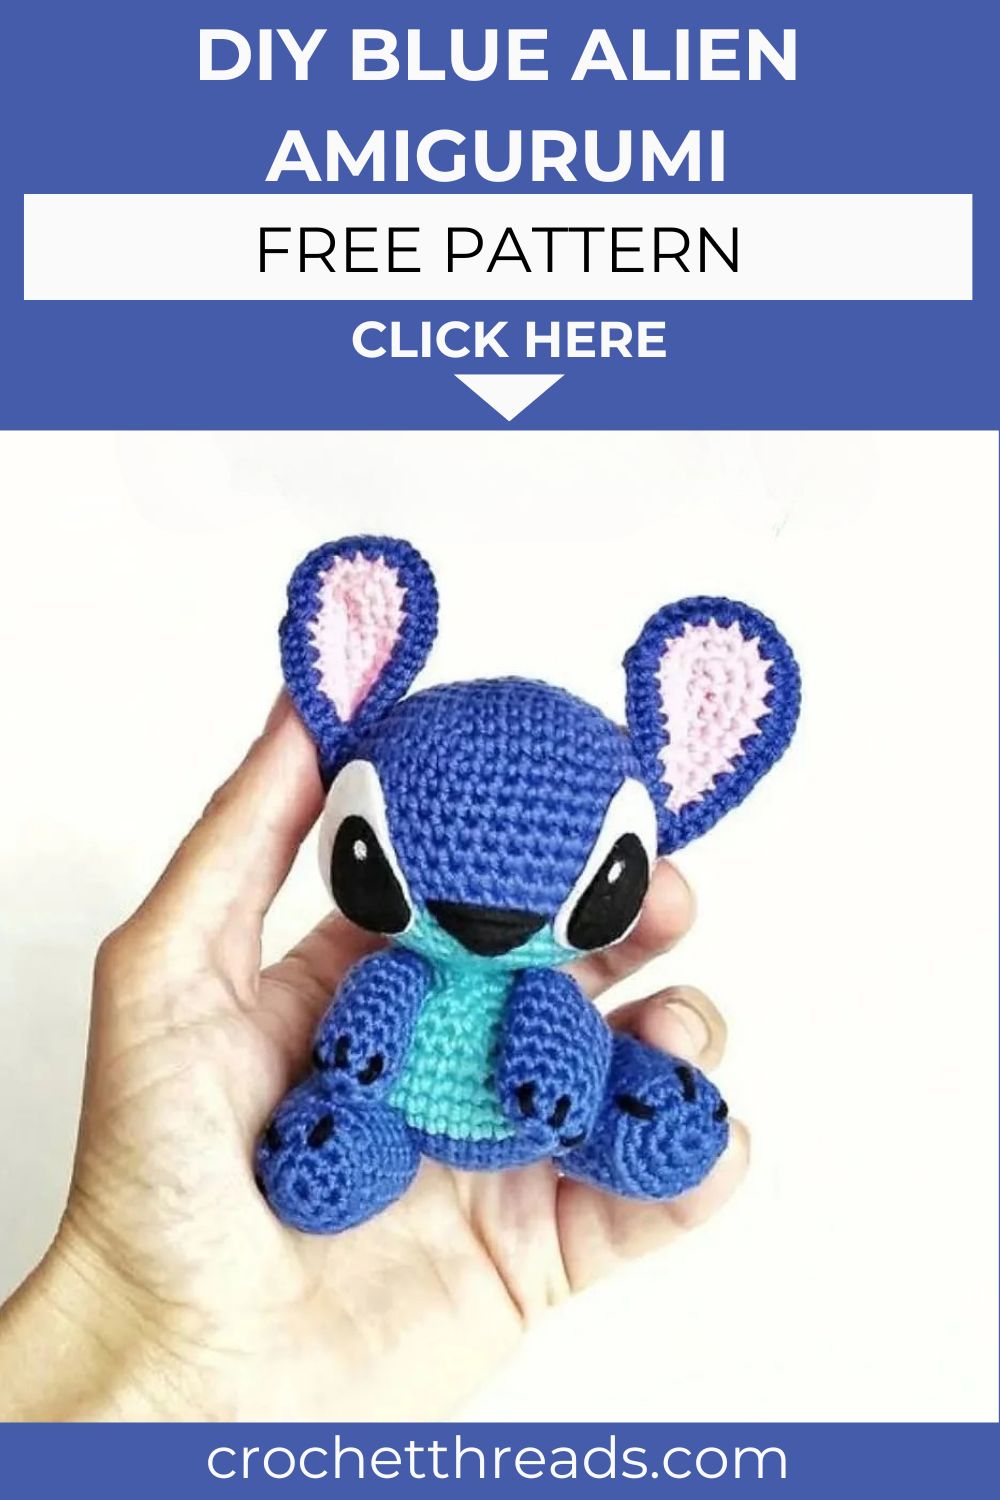
DIY Blue Alien Amigurumi – Free Crochet Pattern & Tutorial
Pick up your hook and bring this chubby blue alien to life, the most out-of-this-world amigurumi you will ever crochet!
Not every crochet project captures hearts the moment someone lays eyes on it. This little blue alien does exactly that. With its round blue head, two-toned pink and blue ears, light blue belly, tiny tail, and felt eyes that give it the most expressive face imaginable, this amigurumi is pure handmade magic from start to finish. Furthermore, the construction is clean and logical throughout. The head, body, arms, legs, ears, and tail are all worked separately and then assembled in a straightforward order that makes the finished piece look far more complex than the individual steps suggest. In addition, the two-color body technique, dark blue for most of the body with light blue worked through specific sections, creates a natural belly contrast that gives this alien its signature look without requiring complicated intarsia or color block skills. Whether you are a fan of the beloved animated character this design draws inspiration from, or simply someone who loves a chubby, expressive amigurumi with enormous personality, this little alien is a project you will want to make again and again in every color imaginable.
Skill Level
Intermediate. Single crochet in continuous rounds forms the foundation throughout. Additionally, color changes, BLO leg construction, and felt eye assembly introduce satisfying techniques at a comfortable and enjoyable pace.
Materials You Will Need
Yarn:
- Blue yarn for the head, body, arms, and main ear panels
- Light blue yarn for the belly sections and head closing rounds
- Pink yarn for the inner ear panels
- Black yarn for any embroidered details
Other Supplies:
- Crochet hook — 2.5mm
- White and black felt for the eyes
- Polyfill stuffing
- Sewing needle and scissors
Abbreviations
- PB — Single Crochet
- AM — Magic Ring
- AUM — Increase (2 sc in same stitch)
- DISM — Invisible Decrease
- BLO — Back Loop Only
- CAD — Chain
Pattern: Head
Starting with blue yarn
R1: 6 pb in AM (6) R2: 6 aum (12) R3: (pb, aum) x6 (18) R4: (2pb, aum) x6 (24) R5: (3pb, aum) x6 (30) R6: (4pb, aum) x6 (36) R7: (5pb, aum) x6 (42) R8–14: 42 pb for 7 rounds (42)
Switch to light blue yarn.
R15: (5pb, dism) x6 (36) R16: (4pb, dism) x6 (30) R17: (3pb, dism) x6 (24) R18: (2pb, dism) x6 (18) R19: (pb, dism) x6 (12)
Fasten off and leave a long tail for sewing onto the body.
Face Details
Cut eyes from white and black felt. Glue them onto the face between R8 and R10, positioned approximately 6 stitches apart. Embroider the nose using black yarn with a simple V stitch. Embroider the claws or toe details using black thread as well.
Pattern: Body
Starting with blue yarn
R1: 6 pb in AM (6) R2: 6 aum (12) R3: (pb, aum) x6 (18) R4: (2pb, aum) x6 (24) R5: (3pb, aum) x6 (30) R6: (4pb, aum) x6 (36) R7: 36 pb (36)
R8–10: 11 pb in light blue, 25 pb in blue for 3 rounds (36)
R11: (4pb, dism x2) in light blue, (4pb, dism x4) in blue (30) R12: (3pb, dism x2) in light blue, (3pb, dism x4) in blue (24) R13: (2pb, dism x2) in light blue, (2pb, dism x4) in blue (18) R14: (pb, dism x2) in light blue, (pb, dism x4) in blue (12)
Stuff the body firmly. Sew the body onto the head securely.
Pattern: Arms Make 2
Using blue yarn
R1: 6 pb in AM (6) R2: 6 aum (12) R3–8: 12 pb for 6 rounds (12) R9: 6 dism (6)
Fasten off and leave a tail for sewing. Stuff lightly before closing.
Pattern: Legs Make 2
Using blue yarn
R1: 6 pb in AM (6) R2: 6 aum (12) R3: (pb, aum) x6 (18) R4: BLO 18 pb (18) R5–12: 18 pb for 8 rounds (18) R13: (pb, dism) x6 (12)
Fasten off and leave a tail for sewing. Stuff firmly.
Pattern: Tail
Using blue yarn
R1: 6 pb in AM (6) R2–4: 6 pb for 3 rounds (6)
Fasten off and leave a tail for sewing. Do not stuff the tail.
Pattern: Ears Make 2 Pink and 2 Blue Panels
Each ear uses one pink panel and one blue panel joined together.
For each panel:
R1: Chain 8. Starting from the second chain from the hook: 6 pb, 3 pb in same stitch, continue along the other side: 6 pb, 3 pb in same stitch
R2: aum, 5 pb, aum, pb, aum, 6 pb, aum, pb, aum
R3: pb, aum, 6 pb, aum, pb, aum, 7 pb, aum, pb, aum, pb, aum, 8 pb
Join one pink panel and one blue panel together by working 2 pb in each stitch around the edge.
Fasten off and leave a tail for sewing.
Cut felt pieces and glue them at the center of each ear if desired for extra detail.
Sew the finished ears onto the top sides of the head, positioned symmetrically with the pink side facing inward.
Assembly
Sew the body firmly onto the base of the head. Attach both arms to the sides of the body at approximately R3–5 level. Sew both legs onto the lower body, evenly spaced and facing forward. Attach the tail at the center back of the body between R8 and R10.
Customization and Variation Ideas
- First, make the entire piece in purple and lavender for a completely different alien colorway that uses the same construction throughout.
- Additionally, use variegated blue yarn for the head and body. The natural color shifts create a subtle gradient that gives the alien a more otherworldly, cosmic feel.
- Moreover, add tiny embroidered stars across the body using white thread for a galaxy-themed variation that feels unique.
- Furthermore, try making the ears slightly longer by adding one extra chain to the foundation before starting the ear rounds. Longer ears create a more exaggerated, dramatic silhouette.
- Also, use safety eyes instead of felt for a more secure finish that works well for toys intended for children who are old enough to handle them safely.
- Finally, make a matching mini version using fingering-weight yarn and a 1.5mm hook. A tiny alien sitting beside the full-size version creates an irresistible display pair.
Common Mistakes to Avoid
- First, losing the belly color placement on R8–10: The light blue section covers 11 stitches, and the blue covers 25 in each of these rounds. Use a stitch marker to note the transition point before starting this section.
- Additionally, skipping the BLO round on R4 of the legs: This round must be worked in back loops only. The front loops left free create a small ridge that defines the top of the foot cleanly.
- Also, gluing felt eyes before the face is fully shaped: Always stuff and close the head completely before adding felt eyes. Applying them to an unstuffed head results in incorrect positioning once stuffing is added.
- Furthermore, sewing ears with the blue side inward instead of outward: The blue panel should face outward, and the pink panel should face toward the center of the head. Reversed ears completely change the finished look of the character.
- Moreover, understuffing the legs: The legs need firm stuffing to hold their shape and support the body above them. Loosely stuffed legs collapse inward and make the finished alien unable to sit stably.
- Finally, assembling pieces before checking overall balance: Always lay all finished pieces out and check proportions before sewing anything permanently. A quick balance check saves a great deal of unpicking later.
Finishing Tips
- First, when sewing the body onto the head, use the mattress stitch around the full circumference of the joining edge. This creates the most invisible and secure seam between the two main pieces.
- Additionally, after attaching the arms, bend each one slightly forward before the joining yarn is fully tightened. Arms angled forward rather than straight down give the alien a more dynamic, reaching pose.
- Moreover, press each felt eye piece firmly with your finger for at least thirty seconds after gluing. This ensures full contact between the felt and yarn surface before the glue begins to set.
- Furthermore, when sewing the tail, angle it very slightly upward rather than straight back. A gently upward-curving tail gives the finished alien far more personality and energy.
- Also, use a single strand of black thread for all embroidered details. A single strand gives precise, clean lines that look far neater against the fine 2.5mm yarn than a full thickness strand would.
- Finally, photograph the finished alien against a deep blue or starry background. The blue yarn reads beautifully against dark backdrops and creates an instantly atmospheric image.
Gifting Ideas
- First, place the finished alien inside a small black gift box lined with silver tissue paper for a space-themed presentation that requires almost no extra effort but looks genuinely stunning.
- Additionally, pair the alien with a small glow-in-the-dark star set for a gift bundle that feels cohesive, imaginative, and completely original.
- Moreover, these aliens make wonderful gifts for fans of the beloved animated film that this character draws inspiration from. A handmade version carries a personal warmth that no store-bought merchandise can replicate.
- Furthermore, make a matching pair in different colorways and present them together as a cosmic duo. Two aliens in complementary colors displayed side by side look spectacular on any shelf.
- Also, attach a small handwritten tag with the yarn color details and hook size. Crafting recipients always appreciate knowing exactly what went into a finished handmade piece.
- Finally, these aliens sell exceptionally well at pop culture conventions, craft markets, and handmade boutiques. The recognizable character inspiration and handmade quality together create a combination that draws immediate attention from any display table.
Conclusion
This blue alien amigurumi is one of those projects that combines genuine technical satisfaction with a result that makes everyone who sees it smile immediately. The two-tone body construction is clever without being complicated. Furthermore, the joined ear panels, the felt eyes, and the tiny tail together create a finished character that is instantly recognizable and deeply charming. Therefore, keep your color transitions tidy, work the BLO leg round carefully, and take your time with the felt eye placement. In addition, assemble all pieces with care before sewing anything. Permanent balance and symmetry make the difference between a good finished alien and a truly great one. In conclusion, this little blue alien is ready to be stitched into existence and loved completely.
Happy crocheting! Cannot wait to see your alien land safely in your hands.