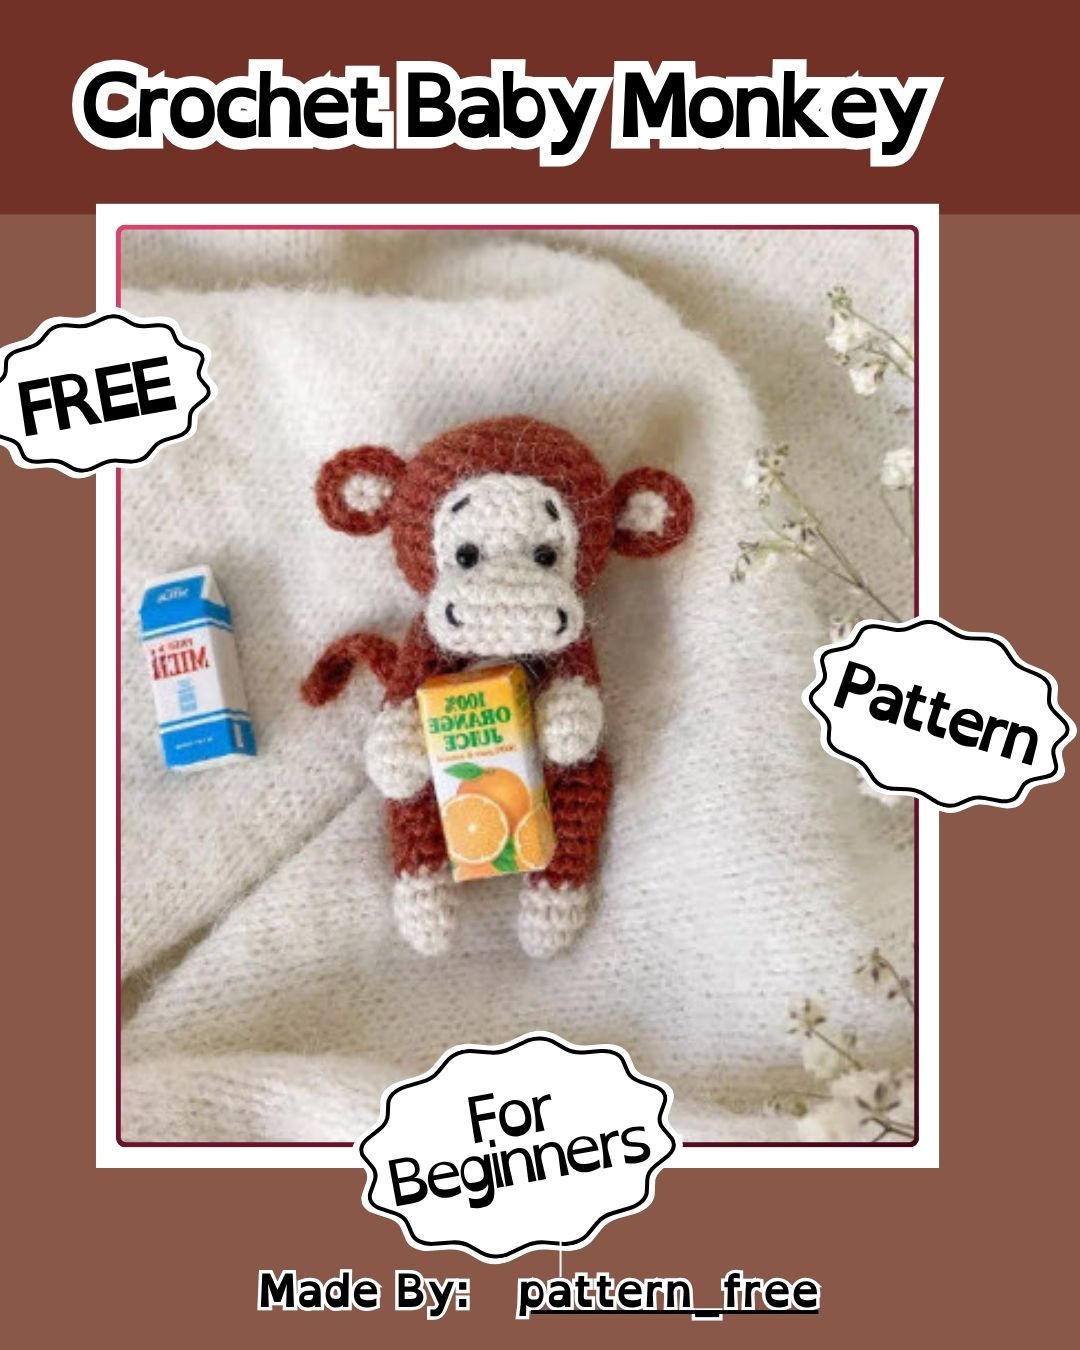
Crochet Baby Monkey Amigurumi Pattern for Handmade Gifts
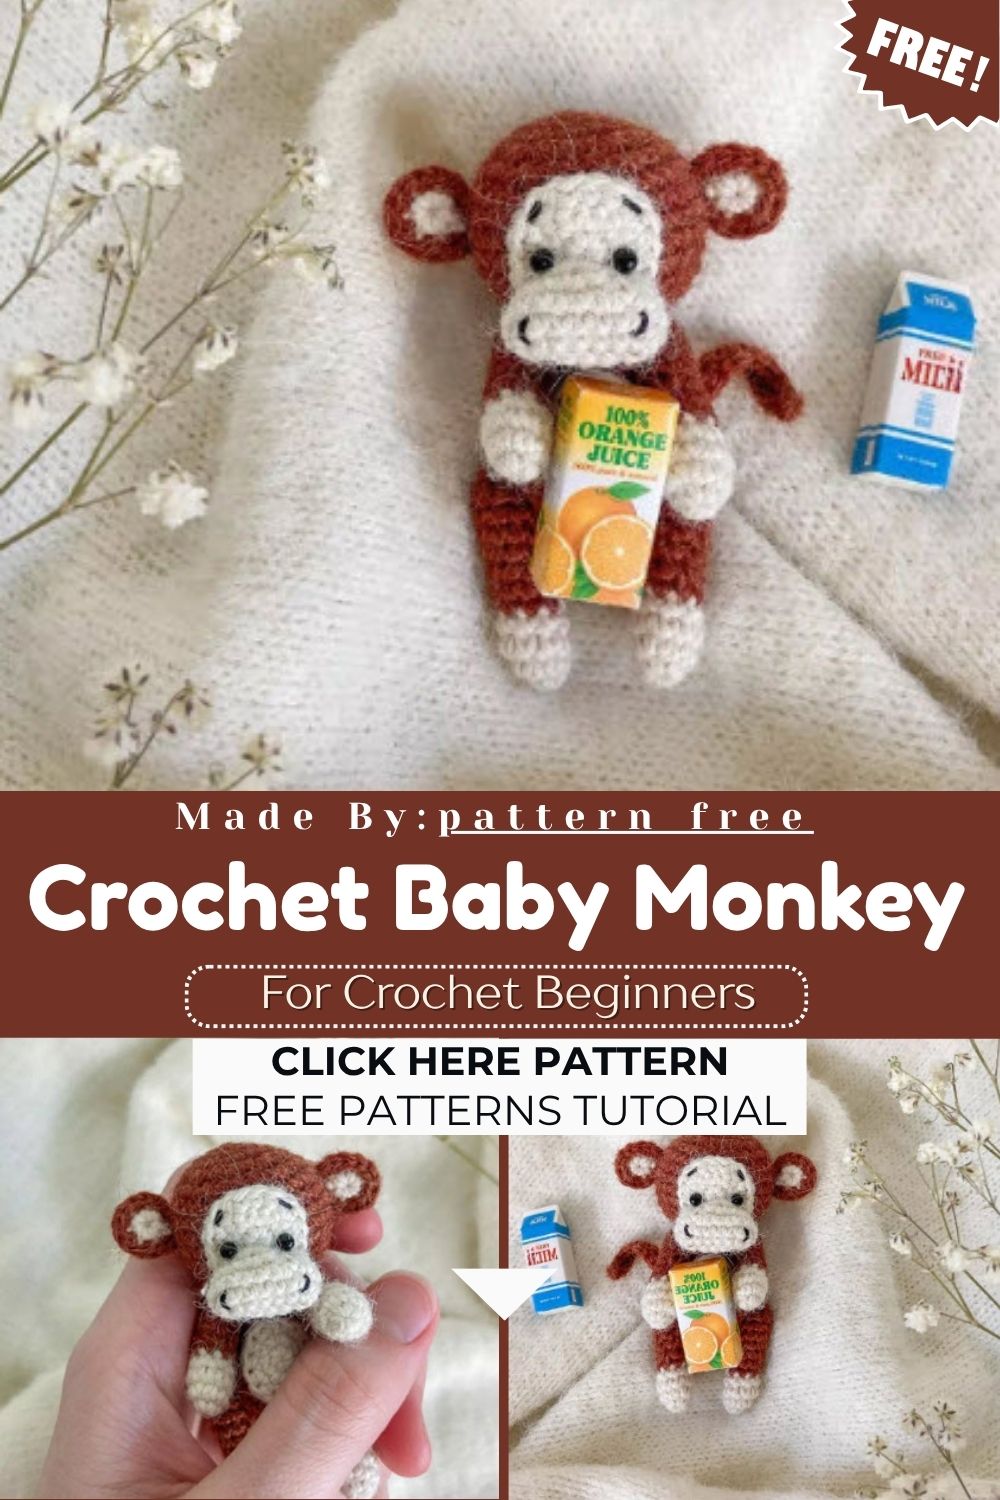
Innocent little faces make some amigurumi characters instant favorites, and the Crochet Baby Monkey fits right into that beautiful category. Soft yarn and easy construction keep the project short and simple, perfect for monkey lovers, handmade gift enthusiasts, and anyone drawn to unique amigurumi designs.
Skill Level
Beginner crocheters can truly handle this pattern easily and confidently. It only requires single crochet, magic rings, increases, and decreases, making it perfect practice before attempting complex amigurumi designs.
Materials
- Yarn – Vita Brilliant (380 m in 100 g)
- Crochet hook 1.5 mm or 1.75 mm
- Toy filler
- Plastic eyes, size 3 mm, plus glue
- Needle and scissors
Finished toy height: 8 cm.
Abbreviations
- MR – magic (amigurumi) ring
- sc – single crochet
- ch – chain
- slst – slip stitch
- inc – increase
- dec – decrease
Pattern Instructions
Ears (2 pieces)
1st part of the ear: Make 6 sc in MR with beige yarn, cut off the thread.
2nd part of the ear: Make 6 sc in MR with brown yarn, cut off the thread. Fold the beige circle onto the brown one and crochet 6 increases in a circle, connecting both parts. Leave the thread for sewing. Repeat for the second ear.
Legs and Arms (Beige and Brown)
- 6 sc in MR
- (2 sc, inc) × 2 (8) 3–4. 8 sc (2 rounds)
Change to brown:
5–11. 8 sc (7 rounds)
Stuff the piece, tighten the opening, fasten the thread, and hide it inside.
Tail
Make 20 ch. Starting from the second ch from the hook, work 19 sc. Leave the thread for sewing.
Head
- 6 sc in MR
- 6 inc (12)
- (1 sc, inc) × 6 (18)
- (2 sc, inc) × 6 (24)
- (3 sc, inc) × 6 (30) 6–11. 30 sc (6 rounds)
- (3 sc, dec) × 6 (24)
- (2 sc, dec) × 6 (18)
- (1 sc, dec) × 6 (12)
Fasten the thread, cut it, and hide it inside. Stuff the head firmly before closing.
Belly Pad
- 6 sc in MR
- (2 sc, 3 sc in one stitch) × 2 (10)
- 3 sc, inc, 4 sc, inc, 1 sc, slst
Leave the thread for sewing.
Body
- 6 sc in MR
- 6 inc (12)
- (1 sc, inc) × 6 (18)
- (2 sc, inc) × 6 (24) 5–7. 24 sc (3 rounds)
- 6 dec, (1 sc, dec) × 4 (14) 9–11. 14 sc (3 rounds)
- (5 sc, dec) × 2 (12)
- 12 sc
Leave the thread for sewing and stuff the body.
Muzzle
1st part of muzzle (beige yarn, turning rows):
- 6 sc in MR, do not join in a round, chain 1, turn
- 6 inc, chain 1, turn
- (3 sc, inc) × 3 (15)
Leave the thread for sewing.
2nd part of muzzle:
- Make 6 ch. From the second ch from the hook: inc, 3 sc, 3 sc in one stitch, then work 4 sc on the other side of the chain (12)
- 2 inc, 3 sc, 3 inc, 3 sc, inc (18)
- 18 sc
- (4 sc, dec) × 3 (15)
Leave the thread for sewing.
Assembly
- Sew the ears onto rounds 7–9 on the sides of the head.
- Sew the 1st part of the muzzle from round 6 to round 10. Then sew the 2nd part on top of that semicircle, stuffing it as you go.
- Glue the eyes between the 2nd and 3rd rows of the muzzle. Embroider the eyebrows and nostrils with thin black thread.
- Sew the head to the body.
- Attach the arms one row below the seam between the head and body.
- Attach the legs between the 4th and 5th rows of the body, on the sides.
- Sew the tail onto the back of the toy around row 5.
Customization and Variation
- Swap beige and brown yarn for grey and white to create a completely different monkey breed.
- Add a tiny bow or bandana around the neck for a dressed-up look.
- Use safety eyes instead of plastic eyes for a bolder, more playful expression.
- Crochet the tail longer for a fun, dangling effect on bags or keychains.
- Try a variegated or speckled yarn for the belly pad to add texture.
- Give the ears a slightly larger shape for a more expressive, cartoonish face.
- Swap the plastic eyes for embroidered ones if you prefer a softer, vintage style.
- Crochet the arms in a slightly lighter shade to mimic a specific monkey species.
Common Mistakes
- Skipping stitch markers often leads to losing track of rounds midway through the head.
- Under-stuffing the head causes a lopsided, saggy shape once the toy is finished.
- Gluing the eyes too early makes adjusting their placement nearly impossible later.
- Rushing the muzzle assembly can leave visible gaps between the two parts.
- Forgetting to leave a sewing tail wastes yarn and adds extra knots later.
- Joining rounds unevenly creates a visible spiral line down the belly pad.
- Using a hook that’s too large loosens the stitches and lets stuffing peek through.
- Attaching limbs before checking symmetry can leave the finished monkey looking crooked.
Finishing Tips
- Brush the seams lightly with a pin to blend stitches smoothly together.
- Trim loose yarn ends close to the fabric for a clean, tidy look.
- Steam the finished toy gently to relax any curling edges on the ears.
- Check eye placement from multiple angles before gluing them permanently in place.
- Weave in every thread twice for extra durability during daily play.
- Fluff the stuffing evenly through the belly before closing the final seam.
- Pin the limbs in place first to double-check positioning before sewing them permanently.
- Snip stray fuzz around the muzzle for a neater, more polished finished face.
Where Can You Use This Amigurumi?
This little Crochet Baby Monkey Amigurumi suits nursery decor, keychains, bag charms, and desk companions equally well. Parents often tuck it into diaper bags for road trips and long car rides. Teachers use mini amigurumi pieces as classroom rewards for young students too. Crafters also sell finished pieces at local markets and online handmade shops. Some makers turn the pattern into ornaments for holiday trees or seasonal displays. Others attach a clip to the back and use it as a stroller charm.
Care Instructions
Hand wash the toy gently in cold water using mild soap. Reshape it while still damp and air dry it away from direct sunlight. Avoid machine washing since spinning can damage the stuffing and seams. Store the finished monkey in a dry place to keep the yarn fibers looking fresh. Keep it away from pets that might chew on the plastic eyes or stuffing.
Gifting Ideas
- Pair the Crochet Baby Monkey Amigurumi with a handwritten card for a sweet baby shower gift.
- Attach it to a keychain clip for a fun, portable birthday present.
- Bundle it with other amigurumi animals for a themed handmade toy set.
- Wrap it in eco-friendly paper for a thoughtful housewarming or hostess gift.
- Add a small name tag for a personalized newborn keepsake.
- Include a care card with washing tips for a more polished gift presentation.
- Tuck it into a gift basket alongside baby blankets or soft board books.
- Pin a small ribbon around its neck to match a birthday party’s color theme.
Conclusion
Crocheting this Crochet Baby Monkey Amigurumi delivers a rewarding project for beginners and experienced makers alike. Real talk, the small size makes it quick to finish within a weekend. Keep the pattern handy for future handmade gifts, and enjoy watching this cheerful little monkey come to life.