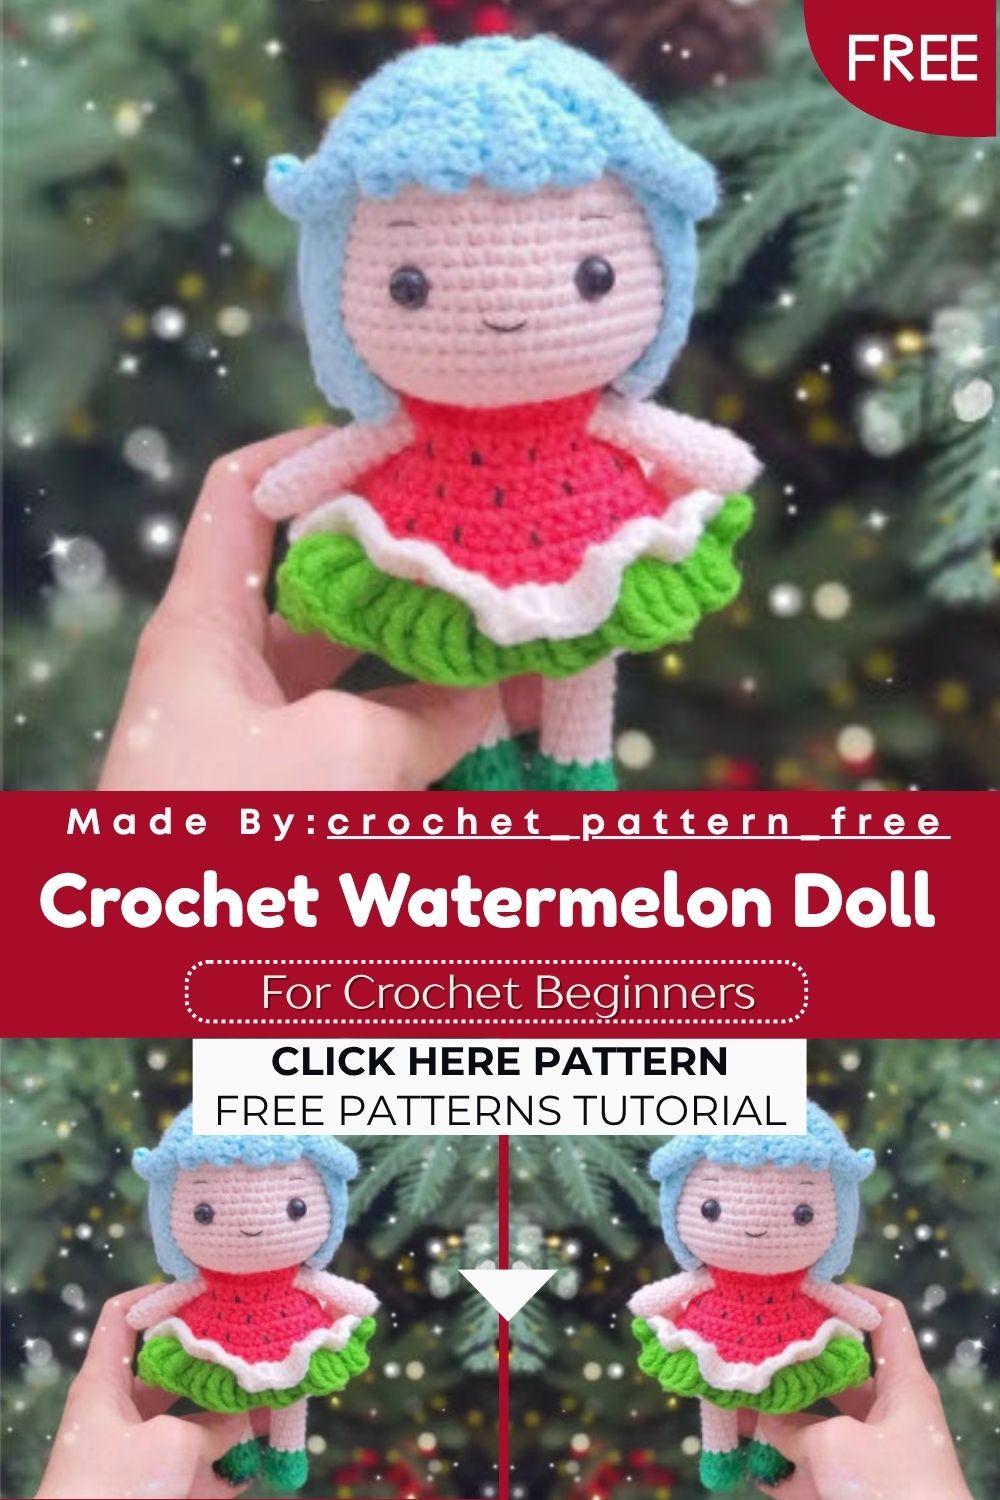
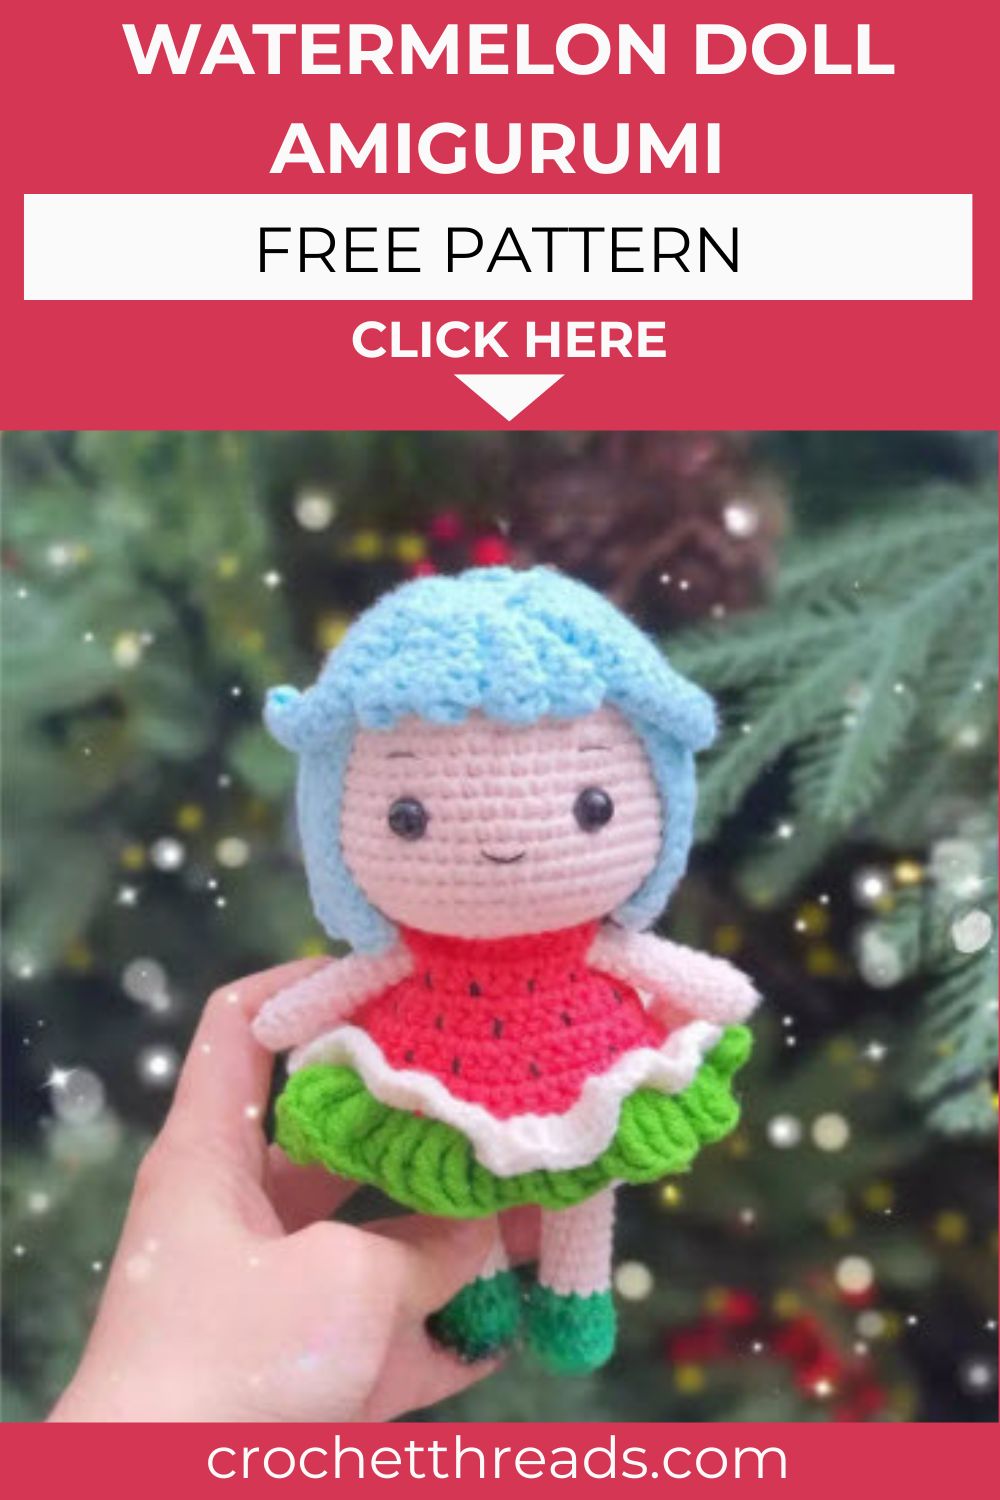
Precious Crochet Watermelon Doll Amigurumi Pattern for Newbie
Watermelon season just got a handmade twist with this cheerful Crochet Watermelon Doll Amigurumi. She mixes fruity colors with soft, huggable charm. It stays quick and beginner-friendly from start to finish. Grab your hooks, and let’s bring this watermelon cutie to life.
Beginners will love how approachable this fruity project really feels. The precious crochet watermelon doll amigurumi pattern for newbie crafters walks you through the arms, dress, head, and hair. Each piece uses simple rounds you can follow with ease. The colors do most of the magic, so even basic stitches look stunning. Real talk, that watermelon dress steals the show. So clear some space and let’s stitch this joyful doll together.
Skill Level
Total newbies can tackle this doll with calm, steady pacing. You only need single crochet, increases, decreases, and basic chains. The dress ruffle adds light fun without much difficulty.
Gather These Supplies
Set everything out before you start so your hooking stays smooth and uninterrupted.
- Red, green, and white yarn for the watermelon dress
- Skin tone yarn for the head and arms
- Yarn for the hair in your chosen shade
- Black thread for the seeds, mouth, and eyebrows
- Safety eyes, size 8mm
- Fiberfill stuffing
- Crochet hook to match your yarn weight
- Scissors and a yarn needle
Stitch Key
- X: single crochet
- A: decrease
- V: increase
- ch: chain
- F: double crochet
- dE: double triple crochet (yarn over 4 times)
- ★: times
- FO: fasten off
- BLO: back loops only
- FLO: front loops only
Quick Pattern Snapshot
Glance over the plan before your hook even touches the yarn. Knowing the layout keeps you confident from the very first round.
- You make four main parts, the arms, dress, head, and hair. Each one comes together on its own before the final assembly.
- The dress carries the watermelon theme with red, green, and white rows. These colors stack up to mimic real watermelon slices.
- A ruffled green and white edge gives the skirt its fruity rind look. That double ruffle is what makes the doll pop.
- The head builds up from a magic ring into a round, friendly shape. Steady increases keep the surface smooth and even.
- Loopy hair strands frame the face for a playful, bouncy finish.
- Safety eyes and stitched details bring her sweet little face alive.
Handy Techniques To Know
Master these few moves and the rest of the doll falls right into place.
- The magic ring starts with the head and arms with a tight center. It keeps the middle closed so no gaps show.
- Working in back loops only shapes the ruffled rind of the dress. This leaves a free loop for the next ruffle layer.
- Front loop only stitches add the second contrasting ruffle layer. Together the two layers form that classic rind edge.
- Long chains plus double crochets create the bouncy hair strands. You can make them longer or shorter to suit your style.
- The double triple crochet builds tall, dramatic edges on the skirt. It adds height and movement to the watermelon hem.
Precious Crochet Watermelon Doll Amigurumi Pattern
Arms
R1: MR, 8X
R2-11: 8X
FO. Leave a long tail for sewing.
Dress
Start with red yarn.
R1: 25ch -> 24X
R2: 4X, 4ch, skip 4, 8X, 4ch, skip 4, 4X
R3: 24X
R4: 6★3XV (30)
R5: 6★4XV (36)
R6-9: 36X
Change to green yarn, crochet BLO.
R10a: BLO 5ch, 1 dE in the same st, then 2dE in each st along. FO.
R10b: with white yarn, FLO, 3ch, 1F in the same st, 3F in the same st, 2F in the same st, 3F in the same st… continue to the end. FO.
Use black thread to sew the seeds.
Head
R1: MR, 6X (6)
R2: 6V (12)
R3: 6★XV (18)
R4: 6★2XV (24)
R5: 6★3XV (30)
R6: 6★4XV (36)
R7: 6★5XV (42)
R8: 6★6XV (48)
R9-13: 48X
R14: 6★7XV (54)
R15-18: 54X
R19: 6★7XA (48)
R20: 48X
R21: 16★XA (32)
R22: 8★2XA (24)
R23: 8★XA (16)
FO.
Hair
MR, 10X, 20ch -> 18F, slst in the same st, 2ch -> 18F, slst next st, 20ch -> 18F, slst in the same st, 29ch -> 18F, slst next st… Continue until you get 14 strings.
Then 14ch -> 12F, slst the same st, 8ch -> 6F, slst next st, 8ch -> 6F, slst in the same st, 8ch -> 6F, slst next st, 8ch -> 6F, slst in the same st, 14ch -> 12F. FO.
Slip-Ups To Sidestep
A few small missteps can throw off the look, so stay alert as you go.
- Filling the arms, which the pattern says to leave flat and empty. Stuffed arms look stiff and sit at odd angles.
- Stuffing the head too softly, which leaves the face wrinkled and uneven. Pack it firm for a smooth, round shape.
- Mixing up back loops and front loops on the dress ruffles. Each ruffle needs its own loop to flare out properly.
- Placing the safety eyes too high, which skews her whole expression. Keep them level and centered for a sweet look.
- Counting the starting chain as a stitch when it should not be. That small slip can shift your entire count.
Bringing It All Together
With every piece done, here is how to finish your doll cleanly.
- Fill the head and body firmly with fiberfill for a smooth shape. Add the stuffing in small bits so it spreads evenly.
- Leave the arms unstuffed, then sew them on with the long tails. Position them at even heights on each side.
- Attach the head securely to the body so it sits upright. Pin it first to check the angle before sewing.
- Sew the hair strands evenly around the top of the head. Spread them out so the scalp stays hidden.
- Add the eyes, then stitch the mouth and eyebrows with black thread. Small, neat stitches give the cleanest face.
Key Things To Remember
Hold on to these notes while you stitch each part of the doll.
- Skip stuffing the arms, just as the pattern clearly notes. Flat arms keep her looking soft and natural.
- Keep your tension even so the dress ruffles lie flat and neat. Loose stitches can make the rind look messy.
- Use 8mm safety eyes for the right balanced face size. Larger or smaller eyes change her whole expression.
- Switch colors exactly where the dress calls for green and white. Clean color changes keep the watermelon looking sharp.
- Sew the black seeds onto the red section for that watermelon touch. Scatter them naturally rather than in a strict line.
Wrapping Up
And just like that, your watermelon doll is ready to brighten any room. She makes a cheerful gift for kids, friends, or fellow crochet lovers. The bright dress and friendly face suit nurseries, desks, and shelves alike. Ngl, that fruity dress turns out cuter than you expect every single time. Try her in different fruit themes once you feel confident with the steps. A lemon or strawberry version works beautifully with the same base. Have fun with the colors, and enjoy each relaxing round. Happy crocheting, friend.