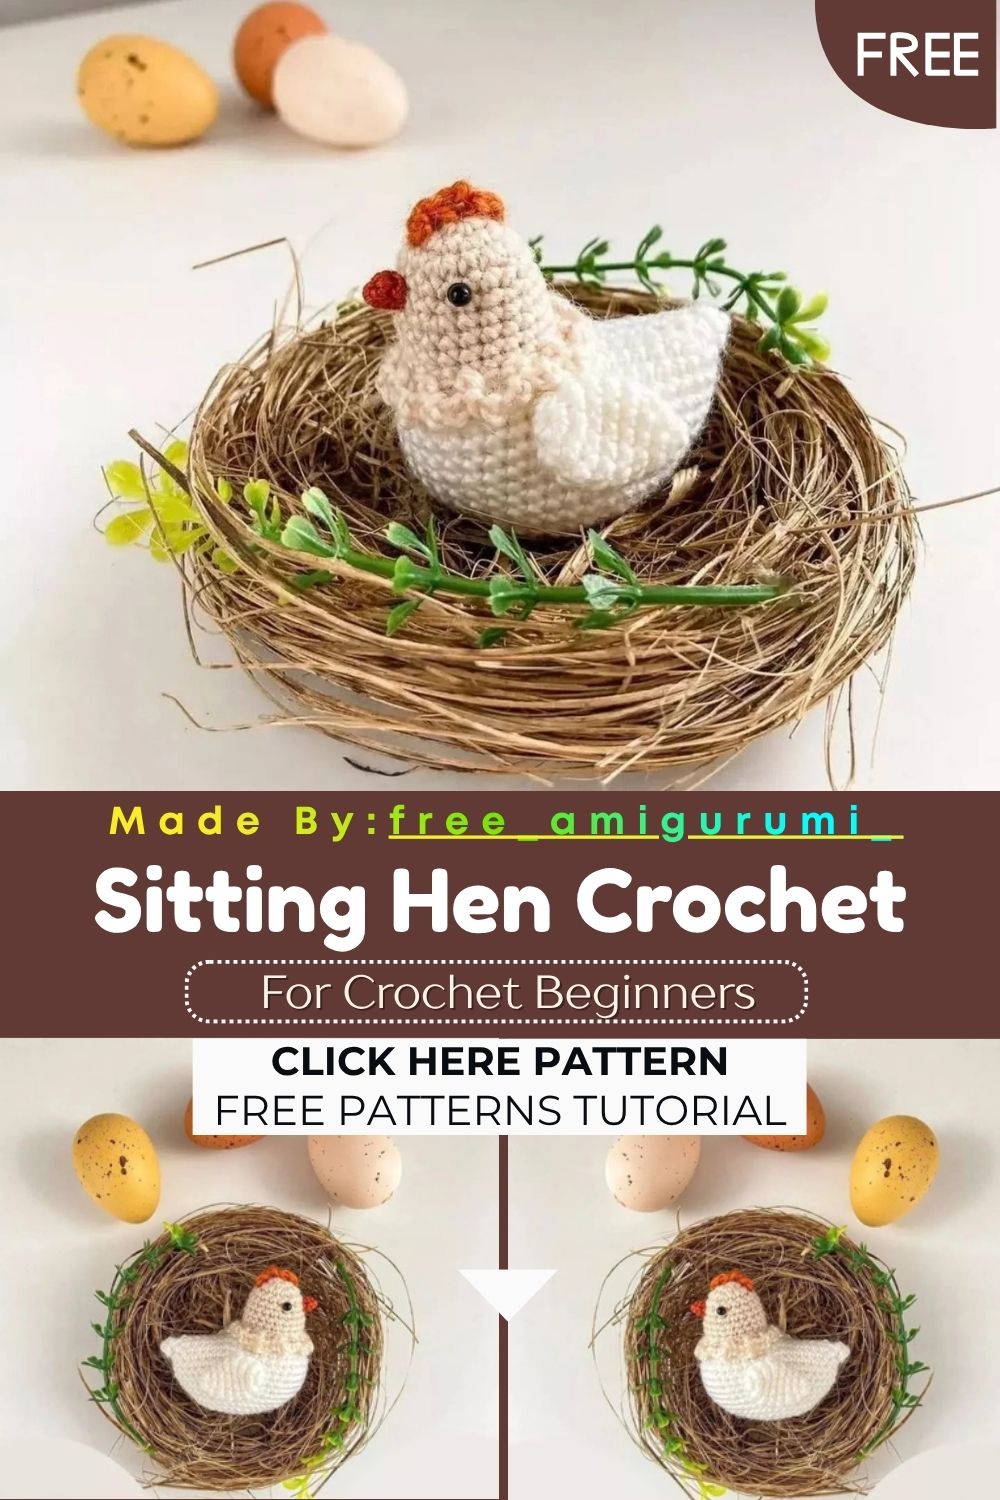
Sitting Hen Crochet Pattern – Free Tutorial
Beige head, white body, a tiny orange beak, and a looped comb worked right from the first round. This little hen sits perfectly and looks absolutely charming doing it!
At just 5 centimeters tall, this hen packs an extraordinary amount of detail into a very small package. The construction is genuinely clever. The beige head and white body are worked as one continuous piece, with a color change at round 10 marking the neck transition. A foundation chain worked in line at round 11 builds out the tail section directly into the body without any separate construction. Meanwhile, the front loop detail at round 9 creates a decorative frilled collar between the head and body using a simple chain-skip technique.
Skill Level
Intermediate. Fine fingering weight yarn at a 1.5mm hook rewards patience with an extremely detailed finished piece. The inline tail chain, the front loop collar detail, and the puff stitch comb are all easy to follow but do require careful reading before starting each section.
Materials You Will Need
Yarn Vita Brilliant (fingering weight, 380m/100g):
- Beige for the head
- White for the body and wings
- A small amount of orange for the beak and comb
Other Supplies:
- Crochet hook — 1.5mm
- Safety eyes — 3mm
- Craft glue
- Polyester fiberfill
- Sewing needle
- Scissors
- Pins
Finished size: Approximately 5cm (1.96 inches).
Abbreviations
- MR — Magic Ring
- CH — Chain
- SC — Single Crochet
- SLST — Slip Stitch
- DC — Double Crochet
- INC — Increase
- DEC — Decrease
Pattern: Head and Body
Starting with beige yarn
R1: 6 sc in MR (6) R2: 6 inc (12) R3: (1sc, inc) x6 (18) R4–5: 18 sc for 2 rounds (18) R6: (5sc, inc) x3 (21) R7–8: 21 sc for 2 rounds (21) R9: (6sc, inc) x3 (24)
Switch to white yarn. Do not cut the beige thread — leave it at the front of the work for the collar detail below.
R10: BLO 24 sc (24)
Front Loop Collar Detail
Return to the beige thread left at the front of the work. Working into the front loops of round 9:
(ch4, skip one stitch, 1 sc in the next stitch) Repeat to the end of the round. Finish with a slst. Cut off the beige thread and weave in the end.
This chain-skip fringe creates a decorative collar ring between the beige head and white body. It looks like a small feathered ruff when the piece is complete.
Tail Section
R11: Make 7 ch, then work along the chain starting from the second stitch: inc, 5 sc, then continue 24 sc around the body, then work 6 sc along the second side of the chain (37).
Place a stitch marker here; this becomes the new round beginning.
R12: 2 inc, 16 sc, 2 inc, 16 sc, inc (42)
R13: 1 sc, then 3 dc with one top in one stitch (puff stitch), 40 sc (42)
The puff stitch in R13 forms the small raised tail detail at the back of the hen.
R14–17: 42 sc for 4 rounds (42)
The following decreases are positioned precisely at the front and back of the hen.
R18: 1sc, dec, 19sc, dec, 18sc (40) R19: (dec, 18sc) x2 (38) R20: (dec, 17sc) x2 (36) R21: (4sc, dec) x6 (30) R22: (3sc, dec) x6 (24)
Stuff at this point.
R23: 12 Dec (12)
Stuff to the end.
R24: 6 dec (6)
Tighten the remaining stitches with a needle. Cut the yarn and weave in the end.
Pattern: Wings Make 2
Using white yarn
R1: 6 sc in MR (6) R2: 6 inc (12) R3–5: 12 sc for 3 rounds (12) R6: (4sc, dec) x2 (10) R7: (3sc, dec) x2 (8) R8: (2sc, dec) x2 (6)
Tighten the remaining stitches with a needle. Cut the yarn and leave a tail for sewing. Do not stuff the wings. Bring the tail thread to the center of the inside of the wing before sewing for the neatest attachment.
Pattern: Beak
Using orange yarn
R1: 4 sc in MR (4) R2: (1sc, inc) x2 (8)
Cut yarn, leaving a tail for sewing. Do not stuff.
Pattern: Comb
The comb is worked directly onto the finished head rather than separately.
Using orange yarn, insert the hook under a stitch of round 2 near the back of the head. Attach the yarn, then work:
3 ch, 1 sc under the next stitch (now in round 1), 3 ch, 1 sc under the following stitch of round 1, 2 ch, 1 sc under a stitch of round 2.
Cut and secure the thread. The looping chain sequence creates three small raised comb points that arch from back to front across the top of the head.
Assembly
Eyes: Glue both 3mm eyes between rounds 4 and 5 of the beige head section with 7 stitches between them. Check alignment from directly in front before pressing firmly to set.
Beak: Sew the beak onto rounds 5 and 6, centered directly between the two eyes.
Wings: Sew both wings to the sides of the body, positioned approximately at rounds 7 to 13, counting from the bottom of the finished piece.
Customization and Variation Ideas
- First, try the same pattern in yellow yarn for a baby chick variation. Swap the orange beak and comb to a brighter yellow and skip the white body section entirely.
- Additionally, make a small flock of three hens in slightly different beak and comb color combinations. The variation in tiny details makes each one feel genuinely individual.
- Moreover, add a tiny crocheted nest beneath the hen using brown yarn in a simple flat oval for a complete farmyard scene display.
- Furthermore, try the comb in red yarn instead of orange for a more traditional rooster-red coloring that gives the hen a bolder, more characterful appearance.
- Also, embroider a small tail fan shape onto the back of the body using orange thread after the puff stitch round for an extra decorative detail.
- Finally, make a matching rooster using the same body base with a taller, more elaborate comb worked in additional chain loops for a companion piece.
Common Mistakes to Avoid
- First, cutting the beige yarn at the color change: The beige thread must be left at the front of the work at round 10 so it can be picked up for the front loop collar detail later. Cutting it here means losing the collar detail entirely.
- Additionally, working R10 in both loops: This round must be BLO only. The front loops saved here are what the beige collar chains attach to; working both loops leaves nothing for the fringe to anchor into.
- Also, losing track of the new round start after R11: The tail chain shifts the round beginning to a new position. Place a stitch marker immediately after completing R11 and move it forward each round.
- Furthermore, stuffing before R22: The closing rounds narrow quickly at this small scale. Begin stuffing at R22 as instructed, rather than waiting for the opening to become too small to add stuffing comfortably after that.
- Moreover, placing eyes without measuring the spacing: 7 stitches between the eyes at this miniature scale makes a very precise difference to the finished expression. Count carefully and mark with pins before applying glue.
- Finally, sewing the comb from front to back rather than back to front: The comb is specifically described as moving from back to beak. Working in the opposite direction places the arch in the wrong orientation on the finished head.
Finishing Tips
- First, when tightening the remaining stitches at rounds 13 and 24, use a tapestry needle threaded with the yarn tail and weave through each stitch twice before pulling tight for the most secure, invisible closure.
- Additionally, bring the wing tail thread to the inside center of each wing before sewing so the first anchor stitch starts from the wing’s deepest point and creates the flattest possible attachment.
- Moreover, press the finished collar fringe gently outward after weaving in the beige end so the chain loops spread evenly around the neck join.
- Furthermore, use a fine embroidery needle for the eye gluing step. A blunt needle can be used to press each eye firmly and evenly without disturbing adjacent stitches.
- Also, when sewing on the wings, check symmetry from directly above the finished hen before tightening the final knot. Both wings should extend to the same height on each side.
- Finally, photograph the finished hen from a slight side angle rather than directly from the front. This viewpoint captures the comb, the collar fringe, the tail puff, and the wing placement all together in one clear image.
Gifting Ideas
- First, place two or three finished hens inside a small wicker basket lined with raffia for an Easter or spring gift that looks like a charming little farm scene.
- Additionally, pair the hen with a tiny crocheted egg using a simple magic ring and a few rounds of yellow yarn for a gift set that feels complete and considered.
- Moreover, these miniature hens make wonderful additions to a dollhouse, a miniature farm setup, or a holiday village display at the appropriate scale.
- Furthermore, make a set of four hens in different beak colors and present them in a small wooden box as a collector set for someone who loves miniature handmade animals.
- Also, gift a finished hen alongside a small card describing the yarn used and the hook size, at 5cm tall. The scale is genuinely impressive, and people always want to know how it was made.
- Finally, these tiny hens sell remarkably well at craft markets where their miniature scale and detailed construction create genuine stopping power from across any display table.
Conclusion
There is something deeply satisfying about working at this tiny scale and ending up with a piece this complete and expressive. The inline tail chain, the front loop collar, the puff stitch, and the directly worked comb all contribute something distinct to the finished hen without overwhelming the construction. Therefore, leave that beige thread when you switch to white, place your stitch marker after round 11, and read the comb instructions once before picking up the orange yarn. In conclusion, this little hen is one of those projects that makes every stitch feel worthwhile.
Happy crocheting! Cannot wait to see your tiny hen sitting somewhere charming.