Crochet Baby Sea Turtle in Egg Amigurumi Pattern for Beginners
Tiny amigurumi creatures tucked inside their own little eggs have a special kind of charm, and this Crochet Baby Sea Turtle in Egg Amigurumi Pattern is no exception. Soft, round, and impossibly cute, it hatches right out of a crocheted shell that doubles as its cozy home. Beginners will love how forgiving the shapes are, while more experienced hookers will appreciate the chance to practice color changes and shaping. Whether it becomes a nursery decoration, a baby shower gift, or a shelf companion, this little hatchling brings warmth to any space.
A plump little turtle with a rounded shell, stubby flippers, and a sweet smiling face, nestled snugly inside a two-piece egg that opens and closes like a tiny treasure box. The proportions are deliberately chunky and huggable, giving the whole piece a soft, toy-like presence rather than a realistic one. That playful roundness is what makes it so approachable for newer crocheters, since there’s plenty of room for small imperfections to disappear into the overall cuteness.
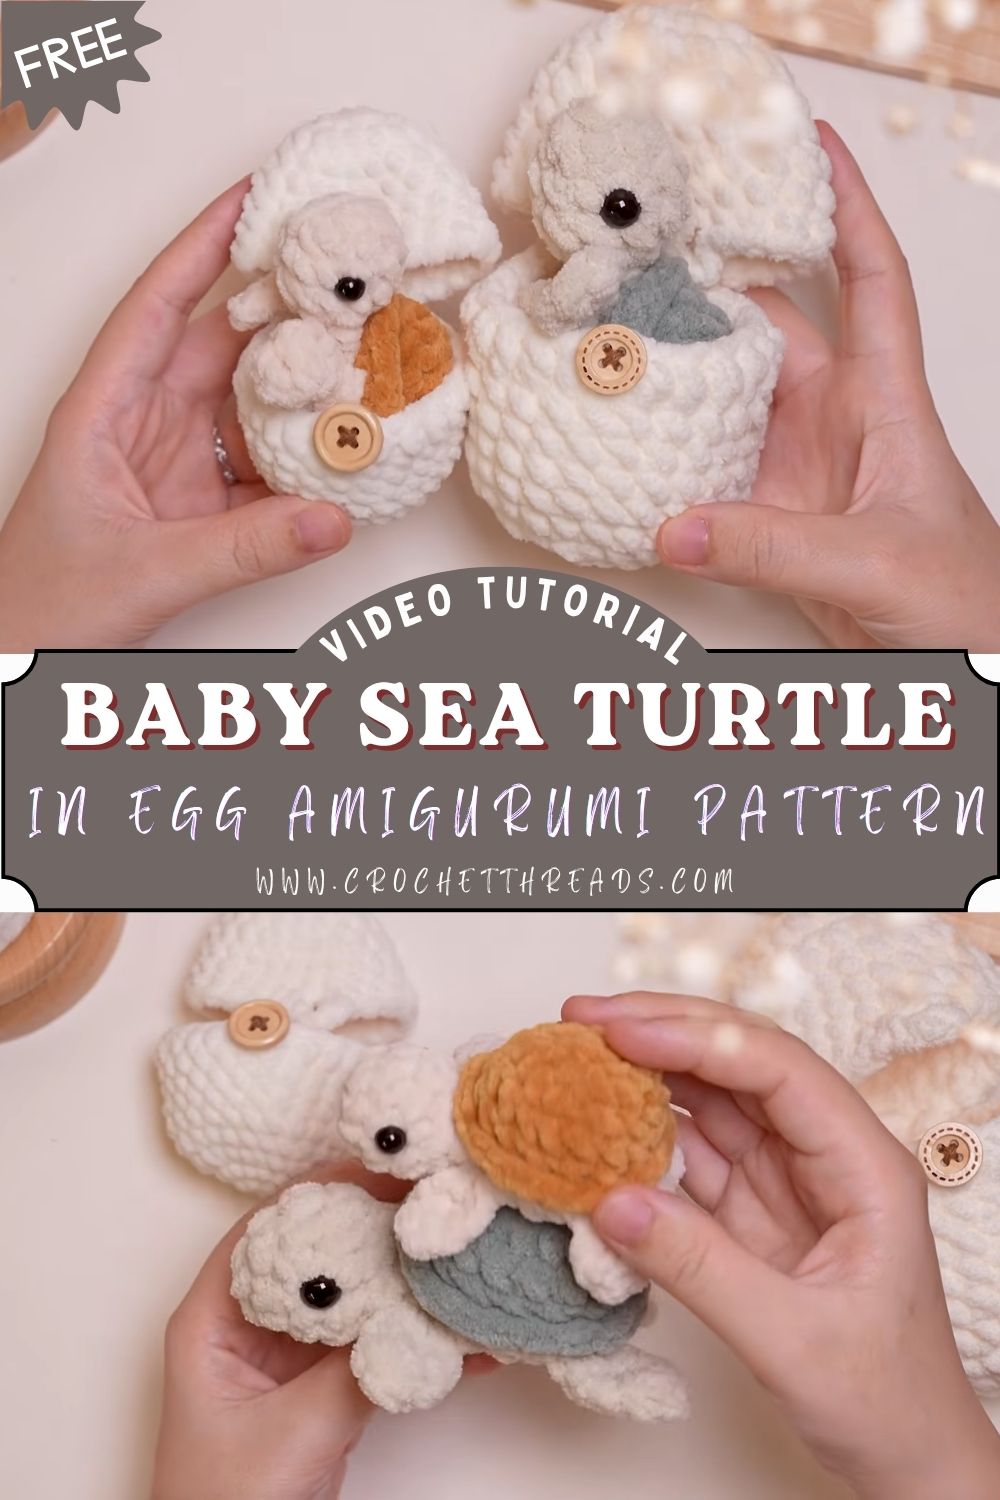
Difficulty-wise, this Crochet Baby Sea Turtle in Egg project sits comfortably in beginner territory, though it does ask for a bit of patience during the shaping rounds. Nothing about the construction is complicated; it simply involves repeating a handful of basic stitches in a specific order. Crafters who have made at least one amigurumi ball or simple animal before will find this pattern especially quick to pick up, and those making their very first amigurumi will still be able to follow along without feeling lost.
Project Details
- Skill Level: Beginner to Advanced Beginner
- Finished Size: Approximately 3.5 inches tall (turtle), egg measures roughly 4 inches when closed
- Estimated Time Required: 3 to 5 hours, depending on experience
- Recommended Yarn Weight: Worsted weight (Medium, #4)
- Crochet Hook Size: 3.5mm (E/4) or size needed to achieve a tight, gap-free gauge
Materials Needed
- Worsted weight yarn in green or teal (turtle body and shell)
- Worsted weight yarn in white or cream (egg exterior)
- Worsted weight yarn in a soft pastel shade, such as mint or peach (egg interior lining)
- Small amount of black yarn or embroidery floss (facial details)
- 6mm safety eyes (optional, or embroider eyes for babies and young children)
- Polyester fiberfill stuffing
- 3.5mm crochet hook
- Tapestry needle for sewing and weaving in ends
- Stitch markers (removable ones work best)
- Sharp scissors
Crochet Stitches & Techniques
This pattern relies on a small set of core amigurumi stitches, so nothing here will feel unfamiliar to anyone who has made a basic crochet animal before.
- Magic Ring (MR)
- Chain Stitch (ch)
- Single Crochet (sc)
- Increase (inc)
- Invisible Decrease (inv dec)
- Slip Stitch (sl st)
- Color Changes
- Fastening Off
- Sewing Pieces Together
Working in a continuous spiral is standard practice throughout, so placing a stitch marker in the first stitch of each round will save a lot of guesswork later.
Pattern Instructions
Creating the Turtle’s Body
Start the body with a magic ring and six single crochets to form the base, then increase evenly around for the next couple of rounds to build a small dome shape. Once the widest point is reached, work several rounds even without increasing, letting the piece grow into a squat, rounded body. Begin decreasing gradually as the top narrows, stuffing firmly along the way rather than waiting until the very end, since it’s much easier to distribute filling evenly in a partially open piece.
Shaping the Shell
The shell sits as a slightly domed overlay attached to the turtle’s back, and it’s where color changes really shine. Working in rounds similar to the body, switch to a contrasting shade partway through to create a two-toned shell, or introduce a third color for a more layered look. Keep tension consistent here, because the shell is the most visible part of the finished turtle and uneven stitches will show more than they would elsewhere.
Making the Head
A small ball shape worked the same way as the body forms the head, just on a smaller scale. Increase to the desired width, work even for one or two rounds, then decrease and stuff before closing it up. Attach safety eyes during the increase rounds, spacing them a few stitches apart so the finished expression looks balanced rather than cross-eyed.
Flippers and Tail
Four small flipper pieces, worked flat or in the round depending on preference, give the turtle its paddle-like limbs. Two front flippers are typically made slightly larger than the two back ones to mimic a real sea turtle’s proportions, though keeping all four the same size works just as well for a simpler build. A tiny pointed tail, formed with a few chain stitches or a mini decrease-only piece, finishes off the back end.
Facial Features
Embroider a gentle curved smile using a few strands of black yarn or floss, positioning it just below and between the eyes. Some crafters like to add tiny nostril dots using French knots for extra personality, though this step is entirely optional. Keep the expression simple, since amigurumi faces tend to look most charming when they’re understated rather than overly detailed.
Joining All Pieces
Pin the shell onto the turtle’s back before sewing, checking that it sits centered and symmetrical from every angle. Attach the head to the front of the body first, followed by the flippers along the sides and the tail at the back, adjusting placement as needed until the proportions look right. A whip stitch worked through both layers, matching yarn colors where possible, keeps the seams nearly invisible.
Building the Egg
The egg comes together as two separate pieces, essentially a top half and a bottom half, each shaped like a rounded cup. Work each half using the same increase pattern as the turtle’s body, stopping the increases once the piece reaches the desired width so it forms a shallow bowl rather than closing into a sphere. Lining the inside with a contrasting pastel color adds a lovely surprise element when the egg opens.
Final Assembly
Nest the finished turtle into the bottom half of the egg to check the fit, adjusting the stuffing level in either piece if things feel too snug or too loose. The two egg halves can be left completely separate for open-and-close play, or joined along one edge with a few stitches to create a hinge. Weave in any remaining loose ends and give the whole piece a gentle shape with your hands before setting it aside to display.
Tips for Success
- Count stitches at the end of every round, especially through increase and decrease sections
- Stuff firmly but gradually rather than cramming filling in all at once
- Use a stitch marker religiously; spirals are easy to lose track of without one
- Match yarn tails to their corresponding color before weaving in ends
- Block the egg halves briefly if they curl inward after stuffing
- Take photos of proportions before final assembly to catch mismatches early
Personalization Ideas
Swapping the classic green shell for pink, purple, or rainbow shades turns this pattern into a completely different character while keeping the same construction. A holiday version with red and white stripes works beautifully for a Christmas ornament, and pastel tones make a sweet Easter-themed gift. Adding a small keychain clasp to the top of the egg transforms the whole project into a portable accessory, while a tiny loop of thread turns it into a hanging ornament. Mini versions worked with a smaller hook and thinner yarn make adorable stocking stuffers, and jumbo versions using bulky yarn create a huggable nursery centerpiece.
Common Mistakes to Avoid
Losing track of the round count tends to happen most often during long stretches of even single crochet, so pausing to recount every few rounds saves a lot of frustration later. Overstuffing the egg halves can cause them to bulge unevenly, so adding filling gradually and checking the shape as you go works far better than stuffing all at once. Attaching the shell before checking its placement often leads to a lopsided turtle, so pinning first really does make a noticeable difference. Skipping the invisible decrease in favor of a regular decrease can leave visible holes at the top of rounded pieces, especially near the head and egg openings.
Frequently Asked Questions
What yarn weight works best for this pattern?
Worsted weight yarn gives the cleanest results and matches the stated finished size, though DK weight can be substituted for a smaller, more delicate version.
Can I make this without safety eyes?
Absolutely. Embroidered eyes are a safer choice for gifts intended for babies or toddlers, since they eliminate any small parts that could come loose.
How long does this project typically take?
Most crocheters finish the turtle and egg together in a single afternoon or across two shorter sessions, depending on how much time is available.
Do the egg halves need to be joined together?
Not necessarily. Leaving them separate allows the egg to open and close freely, which adds a fun interactive element for kids.
What’s the best way to keep my shell rounds even?
Counting stitches after every round and using a stitch marker consistently makes the biggest difference in keeping the shell symmetrical.
Can this Crochet Baby Sea Turtle in Egg pattern be turned into a keychain?
Yes, a small clasp or keyring attached to the top seam of the egg works perfectly for that purpose.
Is this pattern suitable for someone who has never made amigurumi before?
Yes, as long as basic single crochet and increases feel comfortable, this pattern is a gentle and rewarding introduction to amigurumi shaping.
Conclusion
Few projects capture the joy of amigurumi quite like a tiny creature hidden inside its own little egg, and this Crochet Baby Sea Turtle in Egg delivers that magic in a beginner-friendly package. Every stitch builds confidence for tackling more advanced shapes down the road, while the finished piece stays sweet enough to gift again and again. Grab a hook, pick out your favorite colors, and give this pattern a try, then share the finished hatchling with fellow crochet lovers for some well-earned encouragement.