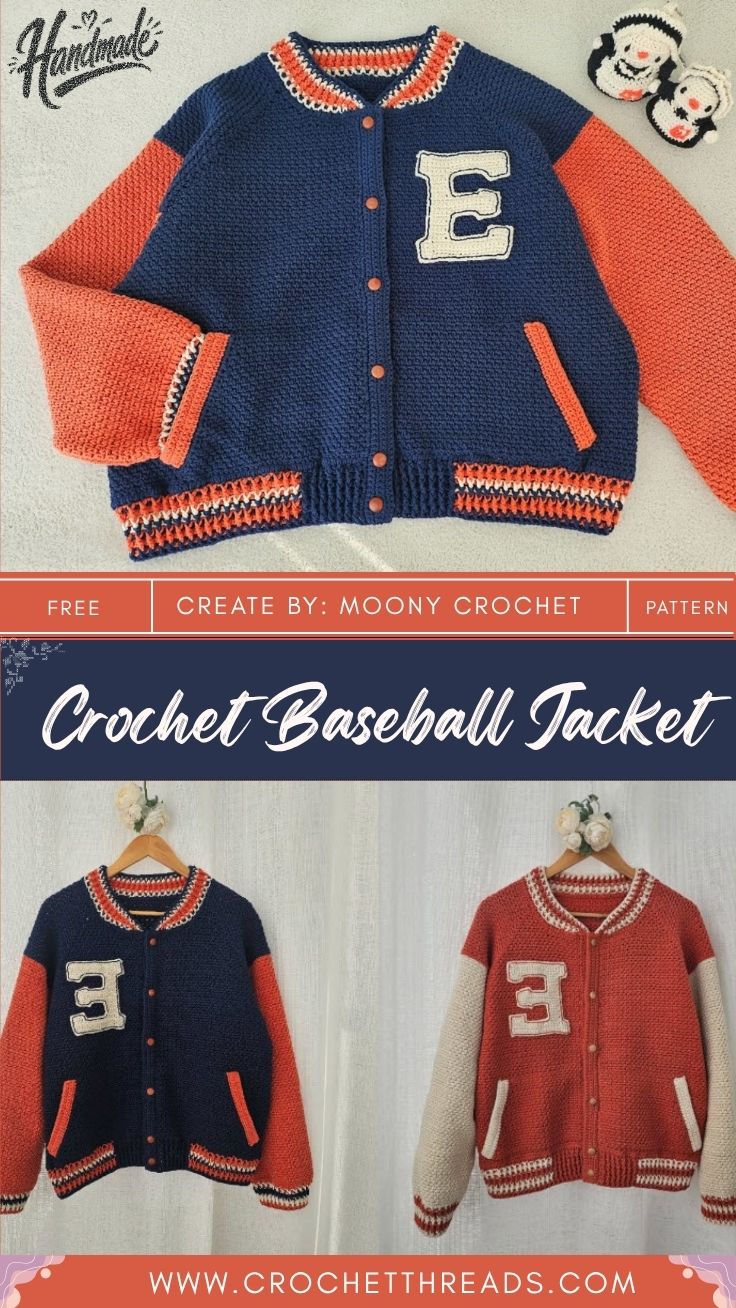
Free Crochet Baseball Jacket Pattern for Stylish Appeal
Warm terracotta yarn, crisp cream stripes, and a cushy texture set the mood for the Free Crochet Baseball Jacket Pattern for Stylish Appeal. Each step is paired with a photo, so crochet tutorial fans can follow along without guessing.
Sports jackets usually mean sewing, but here the whole piece grows from a single crochet pattern and a few stitch markers. What makes the design special is the long band that becomes the hem, with the body climbing upward from its edge before contrast stripes finish the look. It’s a fun easy crochet project for anyone ready to move on from scarves.
Project Overview
The jacket starts with a narrow band worked to the length of your hip measurement. The band is folded into a loop and marked, and the body is stitched upward from one edge. Armhole openings come next, followed by a cream stripe and a neat orange trim.
Seven close-up photos map out the whole journey, so hook position, yarn tension, and marker placement are easy to copy. Nothing gets skipped, and no step leaves you wondering where the hook goes.
Time Box and Skill Level
Skill level: Confident beginner to intermediate. If you can chain, slip stitch, and turn rows evenly, you’re ready.
- Prep: About 30 minutes to measure, swatch, and sort your yarn
- Stitching: Roughly 20 to 30 hours, depending on size and yarn weight
- Finishing: 1 to 2 hours for weaving in ends, blocking, and any closures
Materials and Supplies
Here’s everything to gather before the first chain.
Yarn
- Main color: Terracotta or burnt-orange cotton or cotton-blend yarn in medium weight (worsted, #4). Plan on roughly 900 to 1,400 yards, depending on size.
- Contrast color: Cream or off-white yarn of the same fiber and weight, about 150 to 250 yards for stripes and trim.
Cotton gives crisp stitch definition and a sporty drape. A soft acrylic blend also works if you want a lighter jacket.
Hook Size
A 4.5 mm (US 7) hook suits most medium-weight cotton. Go down a size if your fabric feels floppy, and up a size if it feels stiff. A comfortable ergonomic handle helps a lot over a long project.
Extra Tools
- 6 to 8 stitch markers, ideally in two colors so front, back, and armhole spots are easy to tell apart
- Tapestry needle for weaving in ends
- Sharp scissors
- Measuring tape
- Optional: a separating zipper, snaps, or large buttons for the front closure
Crochet Stitches and Abbreviations
- ch: chain
- sl st: slip stitch
- sc: single crochet
- hdc: half double crochet
- st(s): stitch(es)
- BLO: back loop only
- MC: main color (orange)
- CC: contrast color (cream)
- RS / WS: right side / wrong side
Step-by-Step Crochet Instructions
Step 1: Start the Foundation Chain
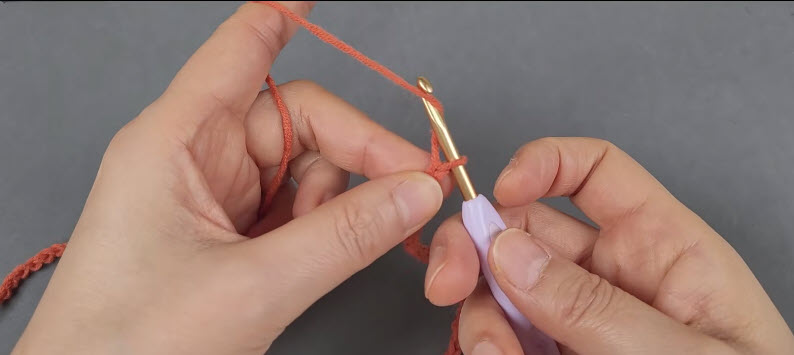
Make a slip knot with your orange yarn and slide it onto the hook. Chain to your desired band width, keeping each chain loose enough for the hook to enter later.
Wrap the working yarn over your left index finger and hold the base of the chain with your thumb and middle finger, as shown in the first photo. Insert the hook into the second chain from the hook and pull up a loop. Work your first row of stitches back along the chain.
Why it matters: relaxed tension at the start keeps the band from puckering and makes every later row easier to read.
Step 2: Build the Long Band
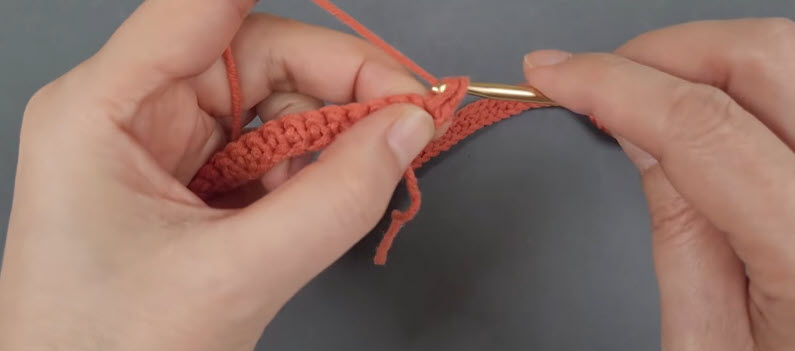
Turn your work and keep repeating the same stitch row after row. The strip will lengthen and show a tidy, braided-looking edge.
Continue until the band wraps comfortably around your hips with a slight stretch. Photo 2 shows the strip curling naturally, which is normal.
Length check: Lay the band around your body before moving on. It should sit snug but not squeeze.
Pro-Tip: Count your rows in small groups of ten and clip a marker at each group. You’ll never lose your place on a long strip.
Step 3: Fold, Mark, and Join the Loop
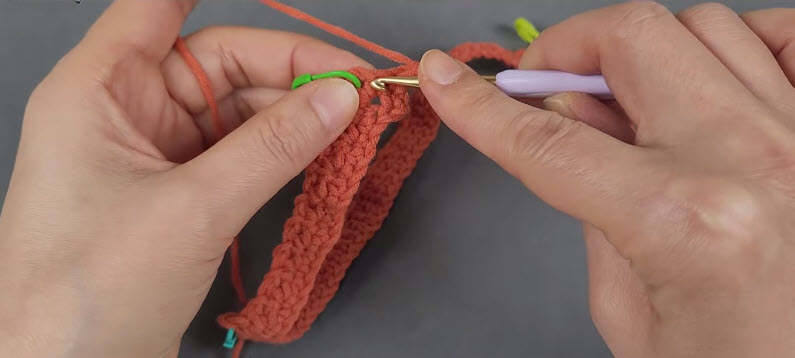
Bring the two short ends together so the band forms a ring. Slide stitch markers onto the fabric at key spots, such as center back, center front, and both sides, as the green markers show in the third photo.
Join the ends with slip stitches through both layers, keeping the seam flat. Check that the strip hasn’t twisted before closing the ring.
Why it matters: marking now means you won’t need to measure again once the body grows taller.
Step 4: Start the Body Along the Band Edge
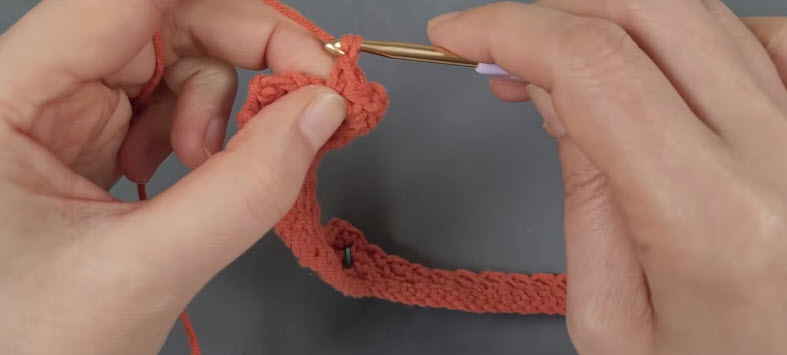
Turn the ring so one long edge faces up. Pull up a loop at the seam and stitch evenly along the edge, placing one stitch into each row end.
Photo 4 shows the fabric beginning to rise and gather around your hand. Keep a marker in the first stitch of each round so you always know where the round begins.
Stitch check: Compare your stitch total to a friend’s size chart or your own notes before working the next round. An uneven count now shows up as waves later.
Step 5: Shape the Armhole Openings
Continue upward until the body reaches your underarm. Locate your side markers, then chain across the gap for each armhole, skipping the same number of stitches on both sides.
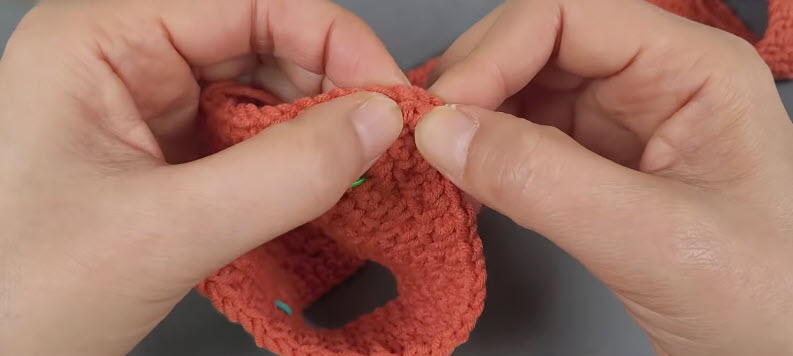
In the next round, stitch into each chain so the opening holds its shape. The fifth photo shows the fabric pinched between the fingers, which is a handy way to feel whether the texture is dense enough.
Fit check: Slip the piece over your shoulders. The armholes should sit comfortably without pulling the body upward.
Pro-Tip: Use a different marker color at the armholes than at the sides. A quick glance tells you which is which.
Step 6: Add the Cream Contrast Stripe
Join the cream yarn with a slip knot at the edge, as the sixth photo shows, and work the stripe using the same stitch as the body. Leave a 6-inch tail before cutting.
Keep the cream tension the same as the orange. A tighter stripe will pull the fabric inward and spoil the sporty look.
Why it matters: contrast bands are the signature of a baseball jacket, and neat color changes make them look store-bought.
Step 7: Return to Orange and Finish the Edge
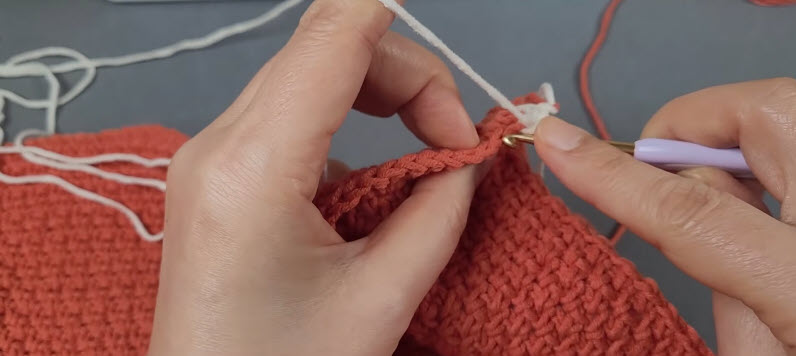
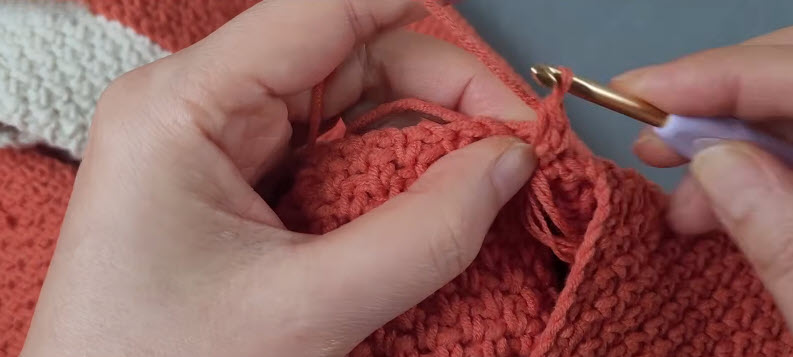
Attach the orange yarn again next to the cream stripe and continue working the edge, as the last photo shows. Small loops sit along the fabric, which is where you’ll pick up stitches for the collar, cuffs, or hem trim.
Work the trim evenly, then fasten off and weave in every tail with the tapestry needle. Steam or wet-block the jacket flat so the stripes sit smooth.
Final check: Turn the jacket inside out and inspect all ends. Loose tails wiggle out after the first wash.
Helpful Beginner Tips
- Make a swatch first. Ten minutes now can save ten hours later.
- Use one hook and one yarn brand throughout for an even fabric.
- Pull the working yarn gently so your stitches look plump, not strangled.
- Keep markers in every round. They’re small but powerful.
- Take breaks. Garment crochet is a marathon, and tired hands make uneven stitches.
- Photograph your progress so you can compare against the tutorial images later.
Common Mistakes and Easy Solutions
Wavy Edges
The stitch count changed somewhere. Recount after every few rows and rip back to the last correct row.
A Twisted Band
If the ring twists when you join it, the body will spiral. Undo the join and lay the band flat before slip stitching again.
Stiff Fabric
Your hook is probably too small or your tension too tight. Switch up one size and re-swatch.
Visible Color Jogs
When switching to cream, some yarn tails peek through. Weave them along the wrong side for several inches in opposite directions.
Uneven Armholes
Skipped stitches didn’t match on each side. Use identical marker positions and count twice before chaining.
Pattern Customization Ideas
Change the Stripe Count
Add two or three thin cream stripes for a vintage varsity feel.
Play With Collar Styles
A ribbed stand-up collar looks sporty, while a folded band feels softer.
Add Pockets
Stitch simple square pockets and sew them on the front for a casual look.
Try Short Sleeves
Stopping the sleeves early creates a lighter jacket for spring evenings.
Add Patches or Numbers
Embroider a number or a tiny crocheted patch on the chest for a team-jersey touch.
Size and Color Suggestions
Measure your bust and hips, then add 2 to 4 inches of ease for a relaxed fit. Kids’ sizes need far less yarn, so buy one extra skein just in case.
Color combinations that work beautifully:
- Terracotta and cream for a warm retro feel
- Navy and white for a classic school-team look
- Forest green and oatmeal for an earthy finish
- Black and light gray for a modern, city-friendly version
- Soft pink and ivory for a gentle, playful jacket
Washing and Care Guide
Cotton jackets prefer a gentle wash. Turn the piece inside out, use cool water, and choose the delicate cycle or hand wash. Press out water with a towel rather than wringing.
Dry it flat, reshaping the hem and sleeves while damp. Hanging a wet crochet jacket stretches the shoulders, so skip the hanger until it’s fully dry.
Frequently Asked Questions
Is the crochet baseball jacket beginner friendly?
Yes, for confident beginners. The stitches are basic, and the photo steps show exactly where the hook goes.
How much yarn do I need?
Most adult sizes need about 900 to 1,400 yards of main color and roughly 150 to 250 yards of contrast. Kids’ sizes need considerably less.
Can I use acrylic yarn?
Absolutely. Acrylic is lighter and dries faster, though cotton gives sharper stitches.
Do I need a zipper?
No. Snaps, buttons, or an open front all work well. A zipper simply adds a more authentic baseball-jacket finish.
How do I make the jacket bigger or smaller?
Adjust the band length first, since the rest of the jacket grows from it. Add or remove rows in the body to match your torso length.
Can I sell items made from the pattern?
Many makers sell finished pieces, but always check the pattern’s usage terms first.
Final Overview
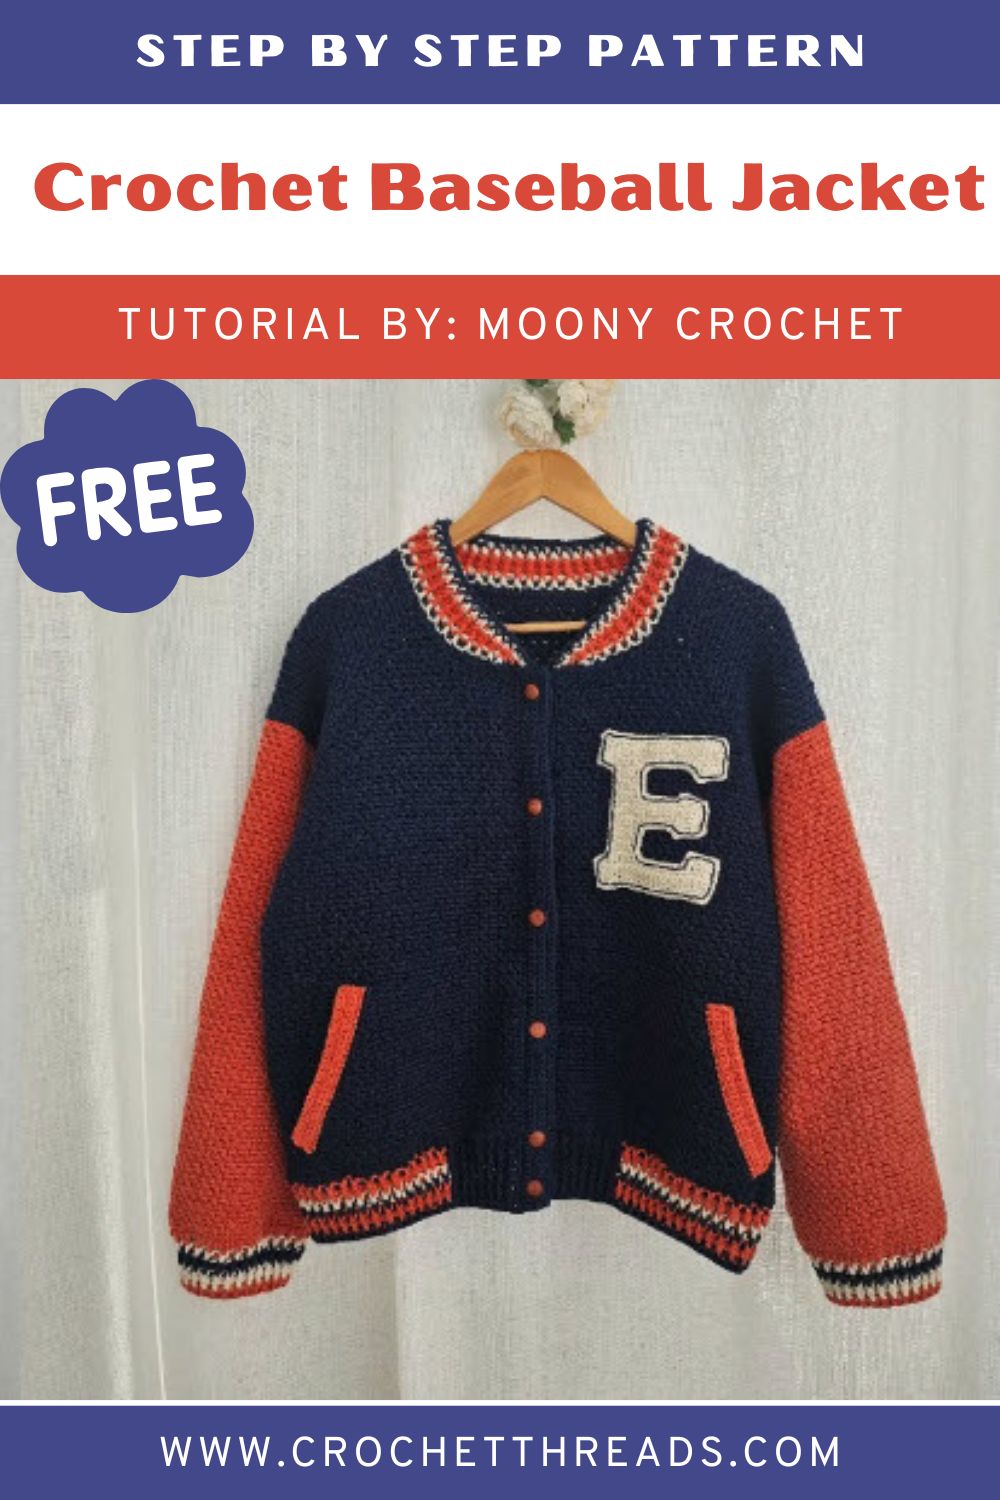
A crochet baseball jacket looks complicated, yet it comes together one careful band, one marked loop, and one stripe at a time. With cozy texture, cream contrast, and photo-guided steps, you end up with a layer that feels handmade in the best way.
Choose your colors, grab a hook, and start the first chain. Your new favorite jacket is only a few evenings of stitching away.