
Crochet Christmas Bracelet Pattern for Colorful Accessories
Crochet Christmas Bracelet Pattern for Colorful Accessories starts with red and green stars sitting on a slim white band. You’ll make the band, stitch the stars, and sew them in place. Each part uses small amounts of yarn.
A crochet Christmas bracelet makes a quick gift, a party favor, or a stocking stuffer. The white band lets the crochet star appliqués stand out. Next, you’ll learn how to build the strip, shape small stars, and space them evenly. You also get fit tips so your holiday bracelet sits well on any wrist.
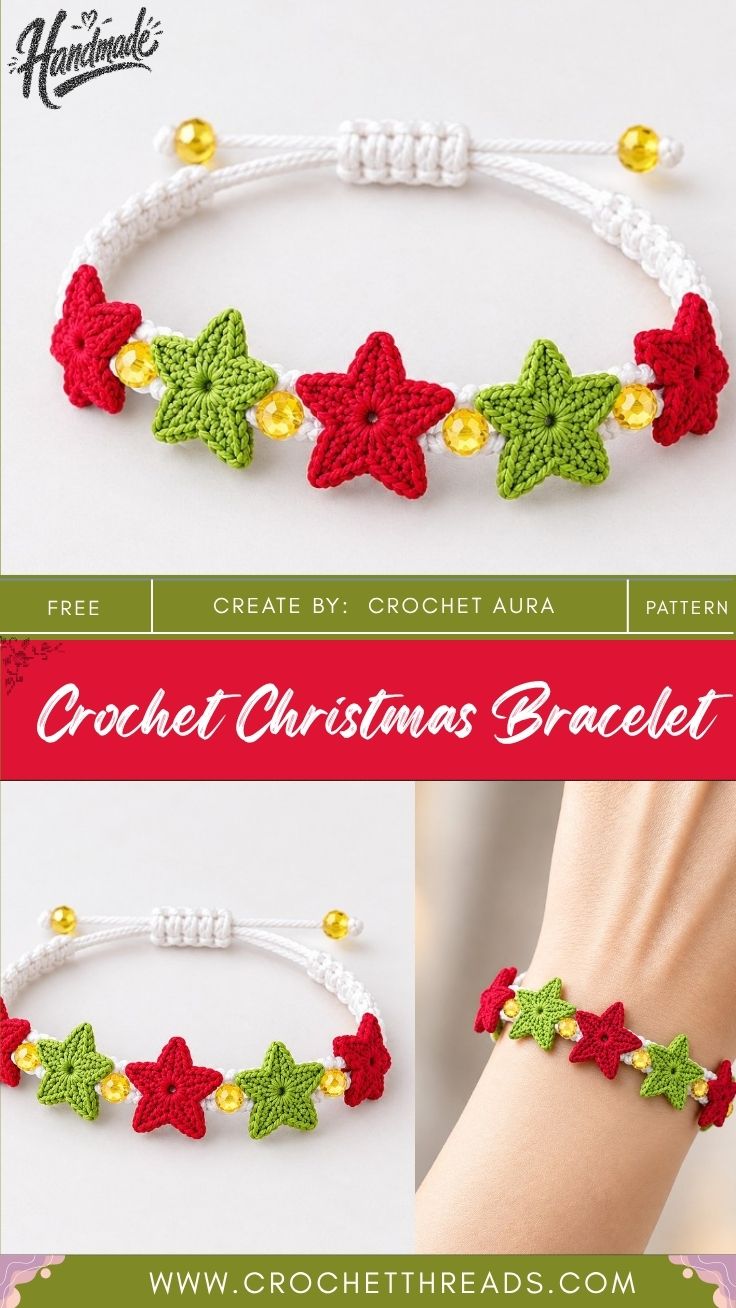
Christmas Bracelet Pattern Overview
The bracelet has two parts. First comes a narrow white band worked in short rows of single crochet. Then you make small five-point stars in green and red and sew them along the top.
You’ll work with sport-weight cotton yarn and a 2.5 mm hook. Each color takes only a few yards, so scraps work well. All stitch names follow US crochet terms.
The stars switch color as they go, so the finished piece reads as a row of green and red. Meanwhile, the white band keeps the look clean and ties both colors together. For more on yarn sizes, check a [Outbound Link: Craft Yarn Council yarn weight guide].
Time Box
- Prep and yarn setup: about 5 minutes
- White band: about 20 to 25 minutes
- Stars: about 5 minutes each
- Sewing and finishing: about 15 minutes
How to Crochet a Christmas Bracelet Step by Step
Step 1: Start the White Band
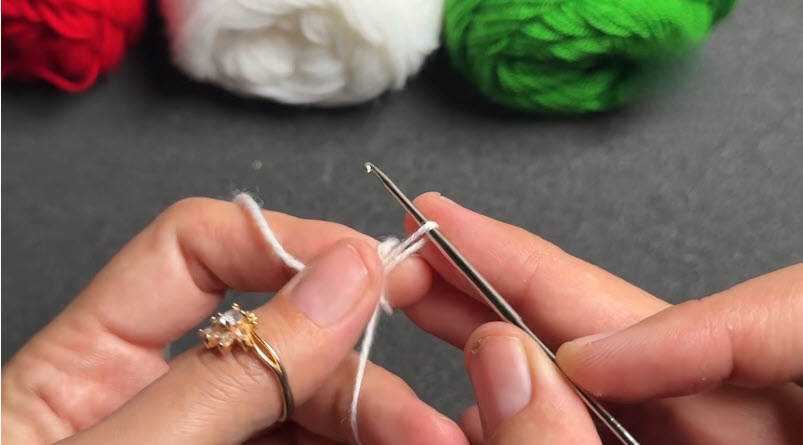
First, make a slip knot with white yarn and place it on your hook. Next, chain 4. Keep the chain loose so the first row is easy to work into.
Hold the working yarn over your finger, as the maker does here. A steady grip keeps each chain the same size.
Step 2: Build the Narrow Strip
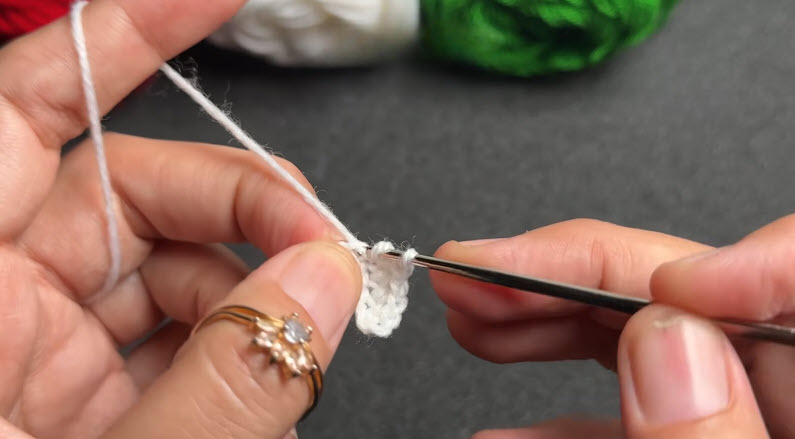
Now work the band in short rows. The strip grows in length, not width.
- Row 1: Sc in 2nd ch from hook and in each ch across. (3 sc)
- Row 2: Ch 1, turn, sc in each st across. (3 sc)
- Rows 3 and on: Repeat Row 2 until the band measures about 6 inches.
Look at both edges after a few rows. They should stay straight and even. If one side slants, count your stitches before you go on.
Pro tip: Clip a marker into the first stitch of each row. It stops you from dropping or adding a stitch at the turn.
Step 3: Check the Fit and Add the Closure
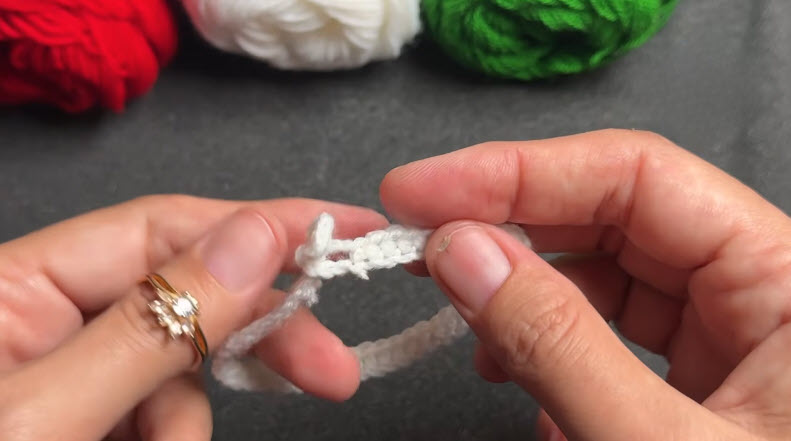
Once the strip feels long enough, wrap it around your wrist. The ends should meet with about half an inch of room. Add or remove rows until it fits.
Here the band curves into a loop, so you can see how it will sit. Once the fit looks right, ch 8 at the end of the last row. Then sl st into the last sc to form a button loop, and fasten off. Finally, sew a small half-inch button to the other end.
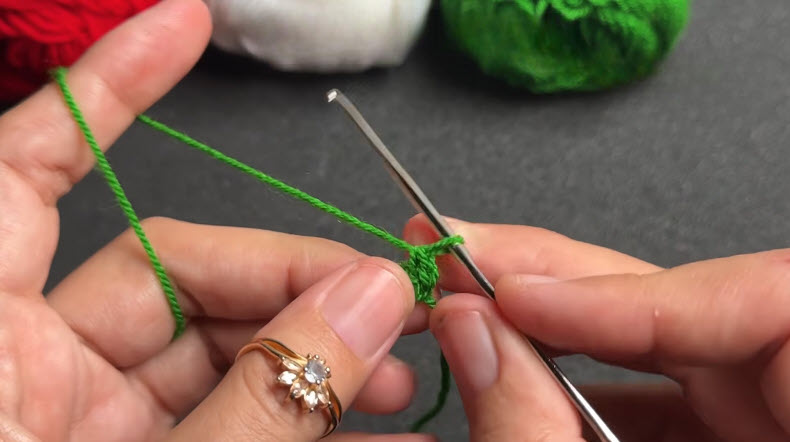
Step 4: Start the Green Star
Next, switch to green yarn. Make a magic ring, ch 1, and work 5 sc into the ring. After that, pull the tail snug and sl st into the first sc. If you need a refresher, see [Internal Link: how to crochet a magic ring].
At this stage, the center is small and tight. Leave a long starting tail, since it helps later when you sew the star down.
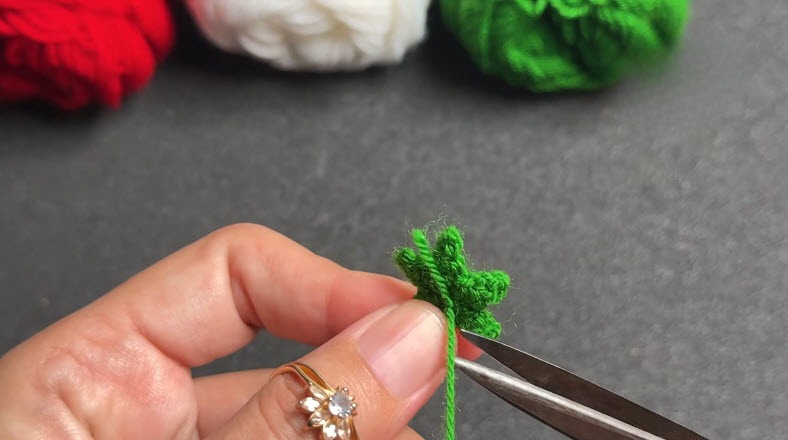
Step 5: Shape the Points and Trim
Then work five points around the center, one from each sc.
- Ch 4.
- Sl st in 2nd ch from hook, sc in next ch, hdc in next ch.
- Sl st into the next sc of the ring.
- Repeat steps 1 to 3 four more times, for five points in total.
Before you cut the short tail, flatten the star with your fingers. Each point should look about the same size. After that, make 2 green stars and 2 red stars in total. For more star shapes,
Step 6: Sew the Stars Onto the Band
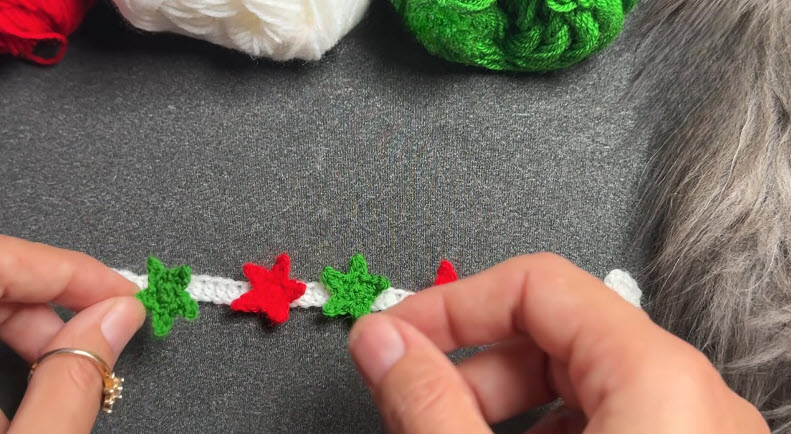
Lay the band flat on a table. Next, set the stars along the center and switch colors each time: green, red, green, red. Leave about half an inch between each star.
Once the spacing looks right, thread a yarn needle with a star tail. Sew through the center and a few points so the star stays flat. Finally, weave in every end on the back of the band.
Common Mistakes With a Crochet Christmas Bracelet
- Tight starting chain. A tight chain makes the first row hard to work and bends the band.
- Uneven stars. Stars of different sizes look off once they sit side by side. Match each one to your first star.
- Pulling the sewing too tight. Tight stitches pucker the band. Instead, sew with light, even tension.
- Cutting tails short. You lose the easy way to sew each star down.
- Mixing yarn weights. A thick star on a thin band droops and twists.
Bonus Section: Sizing It for Kids, Teens, and Adults
Wrist size changes a lot between ages. As a general guide, kids’ wrists often run about 5 to 6 inches. Most adults fall between 6 and 7.5 inches.
To size a bracelet, measure the wrist with a soft tape. Then add about half an inch so it slides on easily. After that, add or remove rows and use 3 to 5 stars to match the length.
For young children, sew every star down firmly and test each one with a gentle tug. Also swap the button for two tie ends on toddler gifts, since buttons can come loose.
Christmas Bracelet FAQs
How long should a Crochet Christmas Bracelet Pattern be?
Match it to the wrist, plus about half an inch. That extra room lets it slide on without slipping off.
Can I use cotton yarn for the band?
Yes, cotton holds its shape well. Just keep the band and stars in the same yarn weight.
How do I wash a Crochet Christmas Bracelet Pattern?
Hand wash it in cool water with mild soap. Then press out the water and lay it flat to dry.
Can a beginner make the stars?
Yes, with a little practice. The first star often takes the longest, but the rest go faster.
Ready to Wear and Share
A few stars and a slim band turn scrap yarn into a small holiday gift. Once you have one done, try new color pairs, like gold and white or blue and silver. Make a handful for friends, and tuck each one into a card.


