Handmade Crochet Cow Plushies Make the Perfect Gift
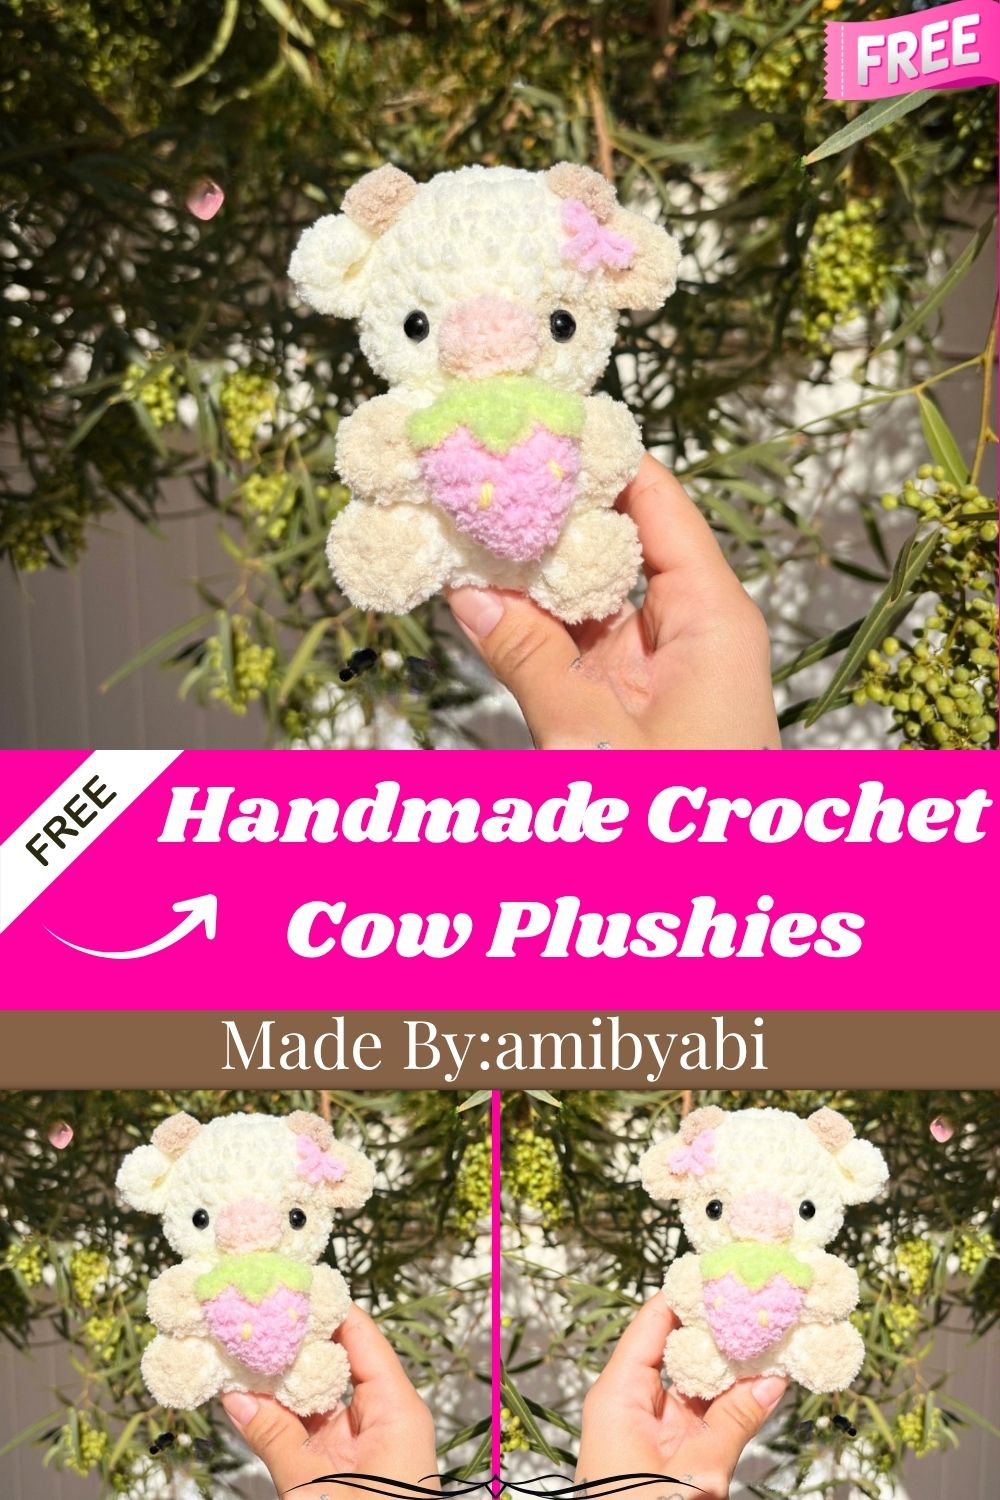
Pattern Overview
- First, a rounded cream head shaped with standard amigurumi increase rounds
- Next, a pink snout made from a flat oval base, sewn on without stuffing
- Also, two brown horns and two ears in contrasting cream and tan yarn
- Then, a cream body worked in continuous rounds and stuffed firmly
- After that, tan arms and legs attached for a sitting or standing pose
- Finally, a tiny pink and green strawberry accessory as a signature detail
- Overall, safety eyes placed between rounds 8 and 9 for a friendly expression
Special Techniques
- To start, magic ring beginnings for a seamless, hole-free center on every piece
- Additionally, invisible increases and decreases to keep stitch counts even and tidy
- Meanwhile, color changes between cream, tan, pink, brown, and green sections
- For the snout, a flat oval base construction using a foundation chain
- Likewise, simple embroidery for the strawberry seeds using straight stitches
- Finally, leaf detailing worked directly from a single starting chain
Skill Level
Beginner to intermediate crocheters can finish this pattern using single crochet, increases, and decreases. However, magic rings and color changes help, and small shapes generally keep this easy for growing skills.
Common Mistakes
- First, skipping the stitch marker and losing track of where each round starts.
- Also, overstuffing the head before attaching the snout, which distorts the shape
- Similarly, placing safety eyes too early, before checking spacing against the snout.t
- In addition, forgetting to leave a long tail on small pieces meant for sewing
- Sometimes, rushing the leg and arm placement, causing the plushie to sit uneven.ly
- Finally, using stitches that are too loose, letting stuffing show through g.aps
Uses & Benefits
Crochet cow plushies offer more than cuteness on a shelf. For instance, handmade toys build fine motor skills in kids and provide a calming sensory texture for nursery play. Moreover, gifting one shows real thought compared to store-bought stuffed animals, and the pattern also doubles as a mindful, relaxing hobby project for the maker. Low-key, working through each round relieves stress too, while producing a lasting keepsake that outlasts typical plush toys, making it a genuinely meaningful, memorable handmade gift overall.
Helpful Beginner Tips
- First, count stitches after every round to catch mistakes before they comp.ound
- Also, keep a small notebook nearby to track which round you finished last
- Similarly, use stitch markers in a contrasting color so they stay easy to spot
- If needed, practice the magic ring separately when it feels tricky at first
- Finally, weave in ends as you go instead of saving them all for later
Materials Needed
- Yarn of your choice (Alize Softy Plus in Cream, Tan, Pink, Brown, and Green works well)
- A 4mm crochet hook
- 7mm safety eyes
- A stitch marker
- A darning needle
- Polyester stuffing
- Fabric glue (optional, for the strawberry leaf)
Abbreviations
- mr – magic ring
- sc – single crochet
- inc – increase
- dec – decrease
- ch – chain
- fo – fasten off
- sl st – slip stitch
Head
Note: the contrast color in each section is underlined in the original chart. To begin, start in cream yarn:
- R1: sc 6 in a mr (6)
- R2: inc x 6 (12)
- R3: (sc, inc) x 6 (18)
- R4: (2 sc, inc) x 6 (24)
- R5-6: sc around, 2 rounds (24)
- R7: sc 14, sc 3, sc 7 (24)
- R8: sc 13, sc 5, sc 6 (24)
- R9: sc 14, sc 3, sc 7 (24)
- R10: sc around (24)
- R11: (2 sc, dec) x 6 (18)
- R12: (sc, dec) x 6. (12) Once finished, fasten off with no need to leave a long tail. Then, stuff the head firmly and attach the safety eyes between rounds 8 and 9, spacing them evenly for a balanced expression.
Snout, Ears & Horns
For the snout, work in pink:
- R1: ch 4 (4)
- R2: starting from the second chain from the hook, sc 3, then sc 3 on the other side of the chain (6)
- R3: sc around (6) Afterward, fasten off, leaving a long tail. Next, sew the snout between rounds 8-10 of the head. No stuffing is needed here, since the flat oval shape sits directly on the face.
For the horns, work in brown and make two:
- R1: sc 4 in a mr (4)
- R2: sc around (4.) Then, fasten off, leaving a long tail for sewing. Sew the horns just above the ears, near the top of the head.
For the ears, make two, one in cream and one in tan:
- R1: sc 4 in a mr (4)
- R2: inc x 4 (8)
- R3: sc around (.8) Finally, fasten off, leaving a long tail, and sew each ear around rounds 4-5 of the head, on opposite sides.
Body
Next, work the body in cream yarn:
- R1: sc 6 in a mr (6)
- R2: inc x 6 (12)
- R3: (sc, inc) x 6 (18)
- R4: (2 sc, inc) x 6 (24)
- R5-7: sc around, 3 rounds (24)
- R8: (2 sc, dec) x 6 (18)
- R9-10: sc around, 2 rounds (18)
- R11: (sc, dec) x 6 (.12). Once the shape is complete, stuff the body firmly, then fasten off, leaving a long tail. After that, sew the head to the body, matching the front of the head with the front of the body so the snout faces forward.
Legs & Arms
For the legs, work in tan yarn and make two:
- R1: sc 4 in a mr (4)
- R2: inc x 4 (8)
- R3-4: sc around, 2 rounds. (8) Then, fasten off, leaving a long tail. Stuff lightly, and sew the legs between rounds 5-7 of the body, spacing them about 3 stitches apart so the plushie can sit upright.
For the arms, work in tan yarn and make two:
- R1: sc 6 in a mr (6)
- R2-3: sc around, 2 rounds (6)
- R4-5: sc around, 2 rounds (6) Finally, fasten off, leaving a long tail. Stuff lightly, and sew the arms between rounds 9-11 of the body, spacing them about 2 stitches apart on either side.
Strawberry
For the berry, work in pink yarn:
- R1: sc 4 in a mr (4)
- R2: (sc, inc) x 2 (6)
- R3: (sc, inc) x 3 (9)
- R4: sc around (9)
- R5: (sc, inc) x 4, 1 sc (13)
- R6-7: sc around, 2 rounds (13)
- R8: (sc, dec) x 4, 1 sc (9). Once complete, fasten off, leaving a long tail. Then, stuff the berry and sew the opening shut, and embroider small seed marks across the surface using straight stitches in a contrasting color.
For the leaf, work in green yarn: sc 5 in a mr, then ch 3. Starting from the second chain from the hook, sc 2 and slip stitch into the same stitch you started the chain from, then sc into the next stitch. Repeat this four more times for a total of five leaf points. Finally, leave a long tail and sew the finished leaf onto the top of the strawberry, or secure it with a small dot of fabric glue.
Where Can You Use This Case?
- For instance, nursery decor or shelf display for a farmhouse-themed room
- Also, a handmade baby shower or birthday gift with lasting sentimental value
- Similarly, a soft toy for toddlers who enjoy plush farm animal companions
- In addition, a craft fair or Etsy shop item that stands out from mass-produced toys
- Finally, a cozy addition to a themed photo shoot or seasonal home display
Why Beginners Will Enjoy This Pattern
No joke, beginners tend to love this pattern because every part stays small and manageable, so no single piece feels overwhelming. Furthermore, clear round-by-round counts make it easy to check progress, and as a result, the payoff, a full plushie with personality, arrives faster than most amigurumi animal patterns of similar size.
Tips and Tricks for Success
- First, block finished pieces gently to even out stitch tension before sewing
- Also, match yarn weight to a 4mm hook for consistently snug stitches
- Then, pin pieces in place before sewing to check proportions look balanced
- Additionally, save leftover yarn scraps for small details like the strawberry leaves
- Finally, photograph each stage so future projects go faster with less guesswork
Why This Crochet Pattern Is Trending
Farm animal amigurumi keeps climbing search trends as cottagecore and farmhouse decor stay popular across Pinterest and home styling boards. Real talk, cow-themed toys pair nostalgic charm with a modern soft-color palette that fits nurseries, dorm rooms, and gift shops alike, and as a result, this pattern stays in constant demand.
- Overall, cottagecore and farmhouse aesthetics remain highly searched on Pinterest and home blogs
- Additionally, soft-color amigurumi photographs well for social media and shop listings
- Furthermore, farm animal toys appeal to both children and adult collectors, widening the gift market
Conclusion
For real, this crochet cow plushie pattern proves that simple shapes and a little patience can produce a genuinely heartfelt gift. Overall, whether it sits on a nursery shelf or travels home in a birthday gift bag, this little cow, complete with its tiny strawberry friend, brings handmade warmth that store-bought toys simply cannot match.