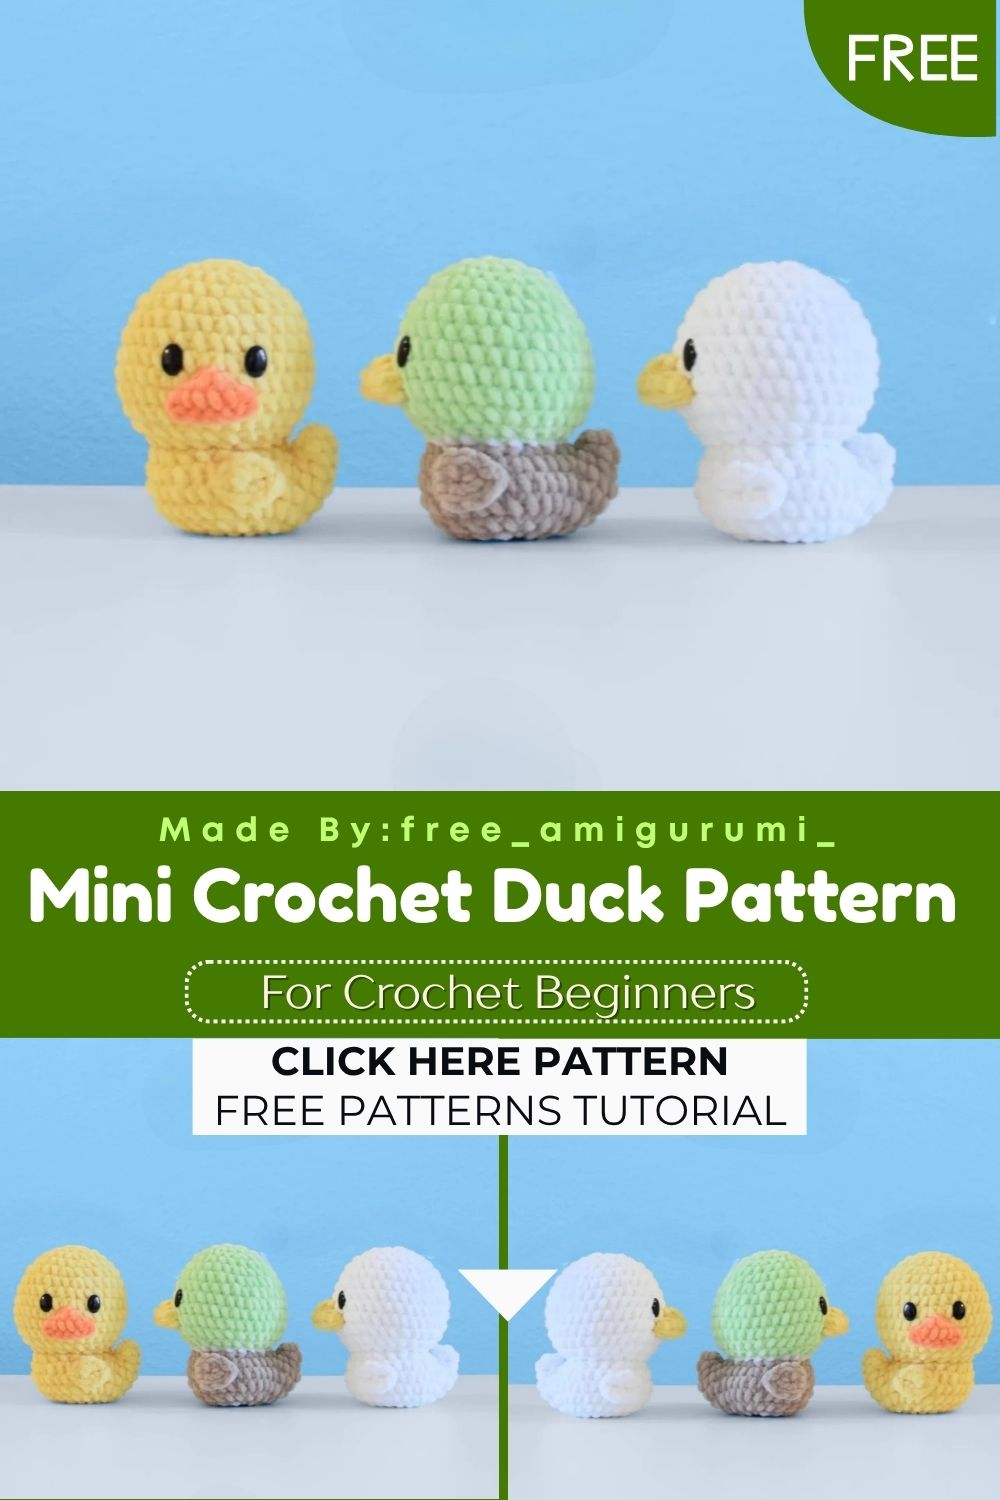
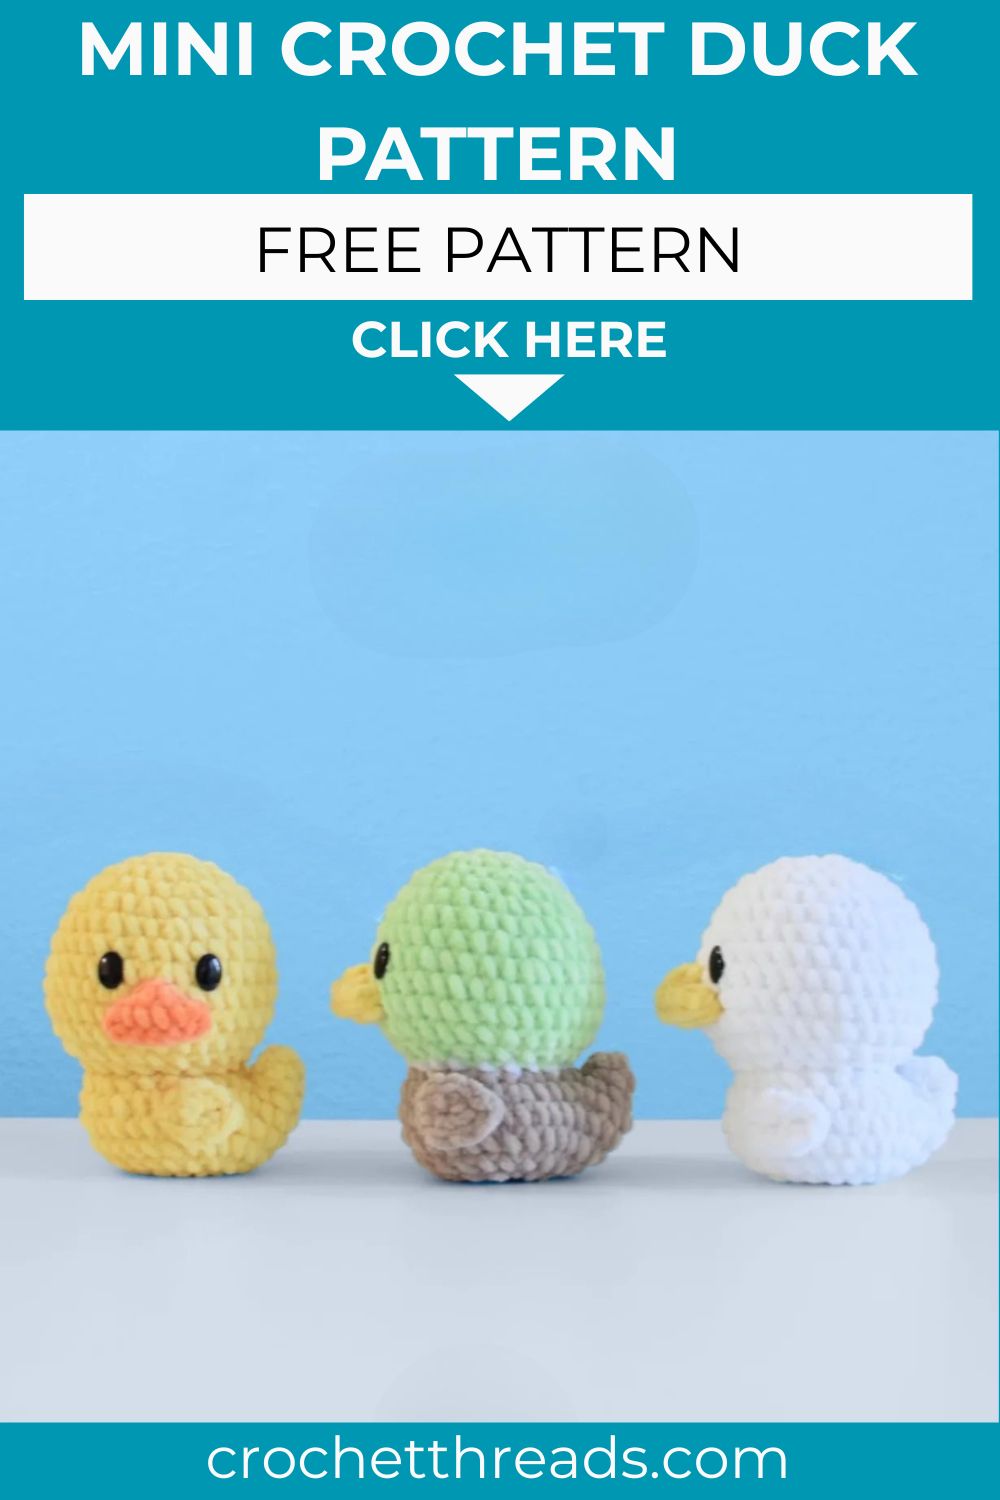
Mini Crochet Duck Pattern – Free and Beginner Friendly
Yellow, squishy, and finished in an afternoon, this little duck is the kind of beginner amigurumi that makes you want to crochet an entire flock!
Super bulky chenille yarn and a 4.5mm hook make this duck surprisingly fast to work up. Furthermore, the head and body are crocheted as one continuous piece. As a result, there is very little sewing involved at the end. A front loop only slip stitch row at round 14 creates a clean visual dividing line between head and body. Additionally, the tail integrates directly into the body at round 15, which means no separate sewing for that part either.
Skill Level
Beginner-friendly. Every piece uses basic single crochet in continuous rounds. The front loop only dividing round and the mid-body tail integration are the only moments that need a little extra attention. Both are easy to follow once read through carefully.
Materials You Will Need
Yarn Premier Parfait Chunky (Super Bulky Weight 6):
- Yellow for the head, body, wings, and tail
- Tangerine for the bill
Other Supplies:
- Crochet hook — 4.5mm
- Yarn needle
- Polyfill fiberfill stuffing
- Safety eyes or felt eyes — 0.6 inch
- Glue for felt (if using felt eyes)
- Scissors
- Sewing pins
Abbreviations
- SC — Single Crochet
- CH — Chain
- HDC — Half Double Crochet
- TR — Treble Crochet
- INC — Increase (2 sc in same stitch)
- DEC — Decrease
- RND(S) — Round(s)
- FLO — Front Loops Only
- SLST — Slip Stitch
- () x # — Repeat the stated number of times
Pattern: Wings — Make 2
Using yellow yarn
Rnd 1: Work inside a magic ring: 4 sc, 1 tr, 4 sc. Join with 1 slst (9)
Fasten off and leave a long tail for sewing. The treble crochet creates a subtle pointed tip. As a result, the wing has a natural feather-like silhouette without any extra shaping.
Pattern: Bill
Using tangerine yarn
Rnd 1: Ch 7 (7)
Rnd 2: Skip the first chain, 6 sc. Continue on the other side of the chain, 6 sc (12)
Rnd 3: 2 sc, 2 hdc, 8 sc (12)
Fasten off and leave a long tail. Do not stuff the bill. It should sit flat and naturally against the face.
Pattern: Tail
Using yellow yarn
Rnd 1: 6 sc in MR (6)
Fasten off and leave a long tail. Set aside — the tail integrates directly into the body at Rnd 15.
Pattern: Head
Using yellow yarn
Rnd 1: 10 sc in MR (10) Rnd 2: (1sc, inc) x5 (15) Rnd 3: 1sc, inc, (2sc, inc) x4, 1sc (20) Rnd 4: (3sc, inc) x5 (25) Rnd 5: 2sc, inc, (4sc, inc) x4, 2sc (30) Rnd 6: 7sc, inc, 14sc, inc, 7sc (32) Rnd 7: (15sc, inc) x2 (34) Rnd 8: 8sc, inc, 16sc, inc, 8sc (36) Rnd 9–10: sc around for 2 rounds (36) Rnd 11: 2sc, dec, (4sc, dec) x5, 2sc (30) Rnd 12: (3sc, dec) x6 (24) Rnd 13: 1sc, dec, (2sc, dec) x5, 1sc (18)
Rnd 14: FLO — 1 slst in each stitch around (18)
This front loop only round creates a clean ridge. It separates the head from the body below. Moreover, it adds a decorative detail that makes a big difference to the finished look.
Place safety eyes between rounds 8 and 9. Leave 5 stitches between them. For felt eyes, place them just below round 7 instead.
Pattern: Body
Continuing directly from the head
Rnd 15: 1 sc, ch1, work 6 sc across the tail piece, ch1, continue into the next body stitch. Then work (3sc, inc) x4, 1sc (30)
This round connects the tail seamlessly. Therefore, no sewing is needed for that part later.
Rnd 16: 2sc, inc, (4sc, inc) x5, 2sc (36) Rnd 17: sc around (36) Rnd 18: 2sc, dec, (4sc, dec) x5, 2sc (30) Rnd 19: (3sc, dec) x6 (24) Rnd 20: 1sc, dec, (2sc, dec) x5, 1sc (18) Rnd 21: (1sc, dec) x6 (12)
Stuff the body firmly before closing. Then fasten off. Thread the tail through the front loop of each remaining stitch and pull tight to close. Finally, use the tail yarn to sew the small gap between the body and tail join.
Assembly
Bill Placement
Position the bill above round 10. Sew it around round 9. Additionally, sew the peak of the bill — the two hdc stitches — just above round 8.
Eye Placement
Safety eyes go between rounds 8 and 9. Felt eyes sit just below round 7. In both cases, leave 5 stitches between each eye.
Wing Placement
Sew both wings between rounds 16 and 17. For a forward-facing head, leave 8 stitches between the wings. However, for a head turned to one side, leave 15 stitches instead.
Customization and Variation Ideas
- First, swap yellow for soft white and tangerine for pale orange. This creates a classic white duck variation using the same construction.
- Additionally, make a flock in different yellow shades — lemon, golden, and butter. Each duck will look naturally unique beside the others.
- Moreover, add a tiny crocheted bow around the neck using scrap ribbon yarn. This takes under five minutes and makes the duck instantly gift-ready.
- Furthermore, try the head-turned version alongside a small mirror for a charming display pose.
- Also, use variegated yellow yarn for a natural gradient effect without any color changes needed.
- Finally, embroider closed sleepy eyes instead of safety eyes for a softer, dreamier expression.
Common Mistakes to Avoid
- First, working Rnd 14 in both loops: This round must be FLO only. Otherwise, the head-to-body ridge disappears completely.
- Additionally, missing the tail integration at Rnd 15: Count carefully and use stitch markers to track each chain gap position before starting this round.
- Also, stuffing after closing: Always stuff fully before pulling the final round tight. Adding stuffing through a closed hole is nearly impossible with chunky yarn.
- Furthermore, sewing the bill too low: Count rounds downward from the top of the head carefully. A bill placed below round 9 sits in the neck area instead of the face.
- Moreover, leaving the magic ring open on the wings: Pull the ring fully closed before sewing. A loose center creates a visible hole against the flat yellow surface.
- Finally, choosing the wrong wing spacing: Decide on the head orientation first. Then choose either the 8-stitch or 15-stitch spacing before pinning anything permanently.
Finishing Tips
- First, after integrating the tail at Rnd 15, pull the connecting chains inward gently. This closes any visible gap before continuing the body rounds.
- Additionally, pin the bill in position and check from directly in front before sewing. This ensures the placement looks centered and balanced.
- Moreover, use matching yellow yarn for all joining stitches. As a result, every seam disappears naturally into the chunky surface.
- Furthermore, reshape the duck by hand immediately after closing. This settles the stuffing evenly before it sets permanently.
- Also, photograph from slightly above at eye level. This captures both the rounded body shape and the tiny face details together.
- Finally, make two ducks — one facing forward and one to the side. Displayed together, they create a naturally dynamic and engaging pair.
Gifting Ideas
- First, tuck the finished duck inside a small wicker basket with yellow tissue paper. This creates an Easter gift that feels thoughtfully put together.
- Additionally, make three ducks in different sizes and present them as a complete duck family collection.
- Moreover, these make wonderful baby shower gifts. The chunky chenille is soft against skin and the size suits small hands perfectly.
- Furthermore, pair with a small rubber duck for a playful “spot the difference” gift that always makes people smile.
- Also, attach a keyring loop to a duck made in finer yarn for a miniature bag charm version.
- Finally, these sell well at spring and Easter craft markets. The bright yellow color draws attention from across any table display.
Conclusion
This little duck pattern is smooth and logical all the way through. Furthermore, the continuous head-to-body construction keeps everything moving at a satisfying pace. Therefore, work the FLO round carefully at Rnd 14. Also, count the bill placement downward from the top of the head. Additionally, decide on wing spacing before pinning anything. In conclusion, this cheerful little duck is ready to waddle its way into someone’s hands and stay there for a very long time.
Happy crocheting! Cannot wait to see your little duck come to life.