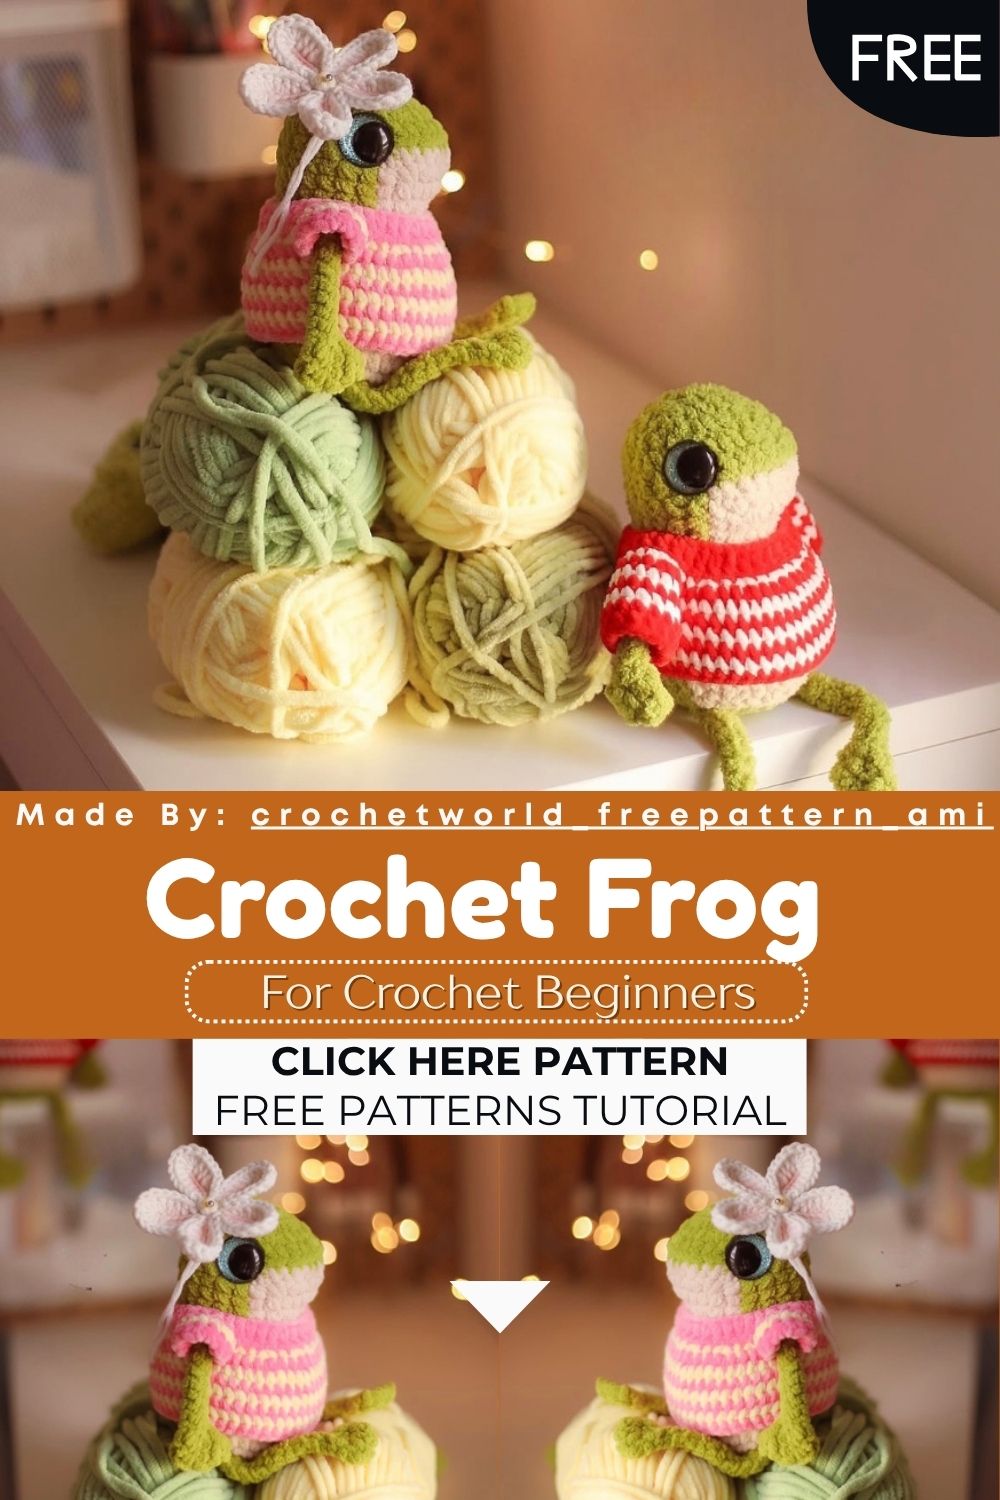
Free Crochet Frog Amigurumi Pattern – Cute Frog in Sweater Plushie
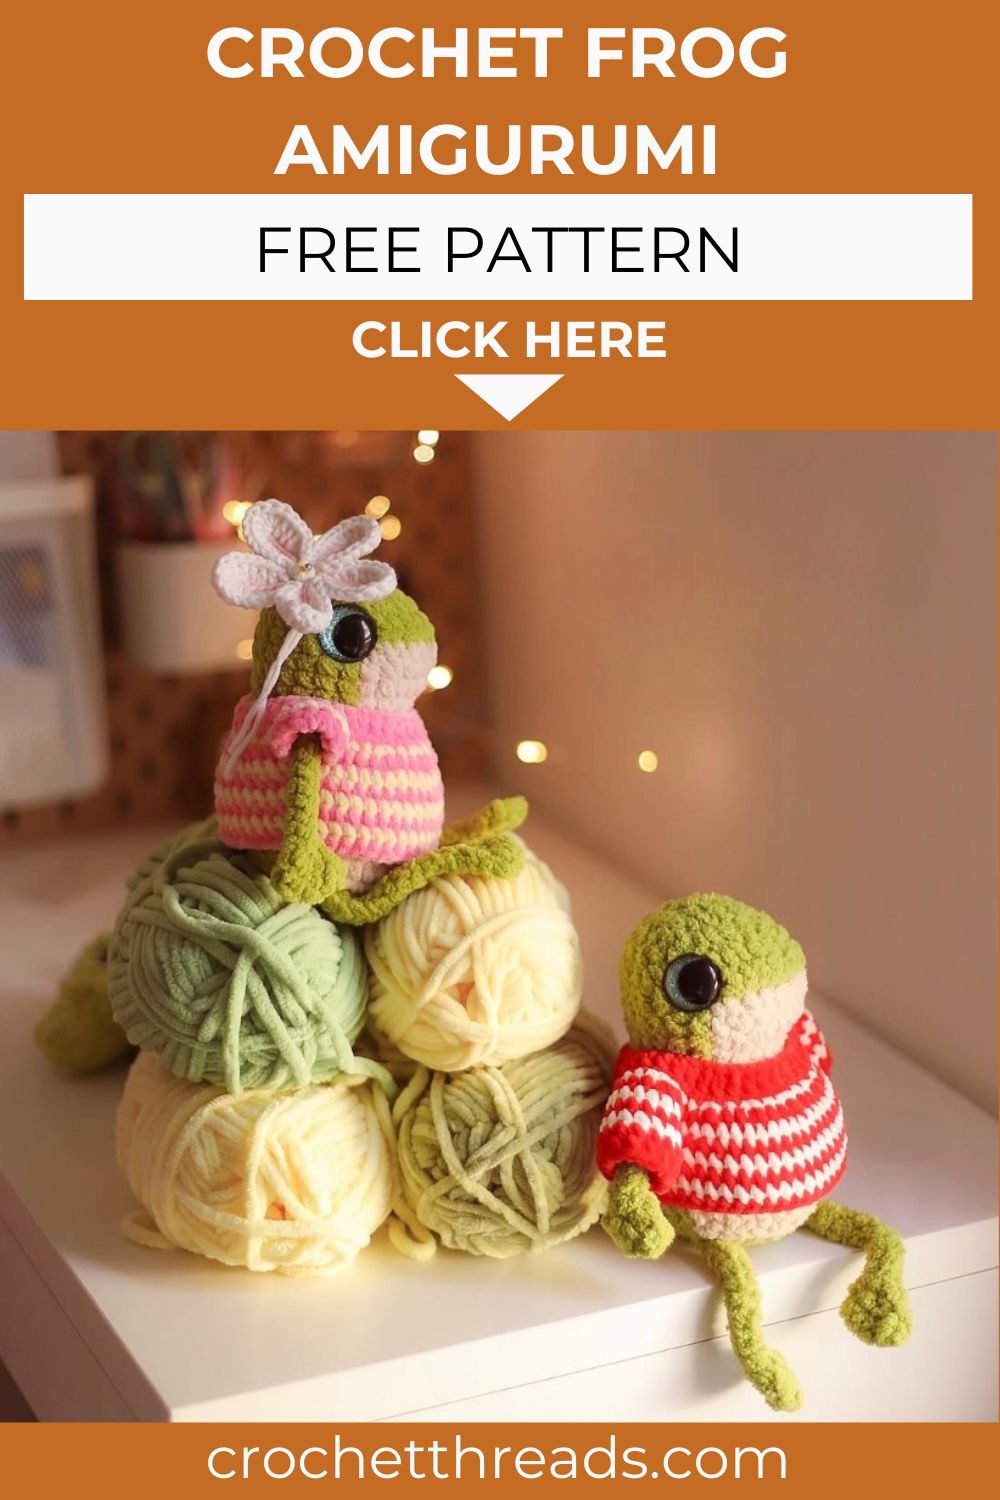
This delicate white crochet flower with its painted petals is the perfect handmade finishing touch for any kawaii plush, including a cute frog in a sweater!
A small handmade flower can completely transform a finished amigurumi. This delicate white flower pattern uses a clever petal base technique that creates raised, dimensional petals worked entirely from the back loops of each base chain. Furthermore, the addition of dry pastel, acrylic paint, or makeup blush at the finishing stage gives each petal a soft, naturally shaded look that mimics real flowers in a way that plain yarn alone cannot achieve. In addition, this flower comes in two sizes depending on your hook choice, making it perfect as a tiny accessory on a frog’s sweater, a bow alternative, or a standalone decorative piece. Whether you attach this flower to a crochet frog wearing a cozy sweater, use it as a hair clip embellishment, or simply make a small collection of flowers in different sizes, this pattern is quick to work up and adds a genuinely beautiful, artistic detail to any handmade project.
Skill Level
Beginner to intermediate. Basic single crochet, half double crochet, and double crochet are used throughout. Additionally, working into the back loops only of a foundation chain introduces a satisfying new technique that creates the raised petal effect.
Materials You Will Need
Yarn:
- YarnArt Jeans yarn in white for the small flower
- YarnArt Jeans Plus yarn for the large flower
Other Supplies:
- Crochet hook — 2.0mm for the small flower
- Crochet hook — 3.0mm for the large flower
- Scissors
- Dry pastel, acrylic paint, or makeup blush for shading
- Small paintbrush
Abbreviations
- MR — Magic Ring
- CH — Chain Stitch
- SC — Single Crochet
- HDC — Half Double Crochet
- DC — Double Crochet
- SLST — Slip Stitch
- RND — Round
Pattern: Middle of the Flower
Using white yarn
Rnd 1: 5 sc in MR (5)
Pattern: Petal Bases
Crochet 5 petal bases total. Each base is worked from one of the 5 sc stitches in the middle of the flower.
For each petal base: Chain 6. Starting from the second chain from the hook, work 5 slst back down the chain. Then slip stitch into the next sc of the middle to anchor the base.
Repeat this process for each of the 5 petal bases, moving to the next sc stitch of the middle each time.
Pattern: Petals
Once all 5 petal bases are complete, work around each base individually using the back loops only of the chain.
For each petal: Work sc, hdc, 3 dc, then 6 dc into the top stitch of the petal base (the furthest point from the center). Continue along the other side of the petal base: 3 dc, hdc, sc, then slip stitch back into the base to close the petal.
Repeat this process for all 5 petals around their respective bases.
After completing the final petal, fasten off and hide the end securely.
Adding Color and Shading
This step transforms the flower from a simple white shape into something that looks genuinely painted by hand. Use yellow dry pastel, acrylic paint, or yellow makeup blush to shade the center of the flower. Apply gently with a small paintbrush, building up color gradually rather than all at once.
Then add a soft touch of pink or peach blush to the base of each petal where it meets the center. This subtle shading mimics the natural gradient seen in real flowers and gives the finished piece a watercolor-like quality.
Allow the color to set completely before handling the flower further. Your flower is now ready to attach to your frog sweater plushie or any other project.
Customization and Variation Ideas
- First, make several flowers in different sizes using both the small and large hook recommendations. A cluster of flowers in varying sizes creates a beautiful, naturalistic arrangement on any sweater or accessory.
- Additionally, try shading the petals in pink, lavender, or peach instead of the suggested yellow and pink combination for a completely different flower variety using the same construction.
- Moreover, work the flower in a pale pastel yarn instead of white as a base color, then add even more dramatic shading on top for a richer, more saturated finished look.
- Furthermore, attach a small green crocheted leaf behind the flower using simple chain and slip stitch construction for a more complete botanical motif.
- Also, sew a small button or bead in the center of the flower instead of painting it for a sparkling, jeweled center that catches the light beautifully.
- Finally, make a tiny version using the smallest hook size your yarn allows for delicate flower earrings or miniature decorations that fit on the smallest amigurumi accessories.
Common Mistakes to Avoid
- First, working into both loops of the petal base chain: This pattern specifically requires back loops only for the raised petal effect. Working both loops creates a flat petal that loses the dimensional, sculptural quality entirely.
- Additionally, making petal bases of inconsistent length: Each base must be a chain 6 with 5 slst worked back down. Inconsistent chain lengths create uneven petals that disrupt the overall symmetry of the finished flower.
- Also, applying paint or pastel too heavily: Build up color gradually in thin layers. Heavy application can stiffen the yarn fibers and create an unnatural, overly saturated look that does not match the delicate aesthetic of the flower.
- Furthermore, rushing the petal construction: The 6 dc worked into the top stitch of each petal base is what creates the rounded tip of the petal. Skipping stitches or working too loosely here flattens the petal tip.
- Moreover, forgetting to anchor each petal base into the middle: Each base must be slip stitched into a separate sc of the middle round. Anchoring multiple bases into the same stitch creates uneven spacing between petals.
- Finally, handling the flower before the paint or pastel sets: Allow shading to dry or set completely before attaching the flower to any project. Premature handling can smudge the color and transfer pigment onto the surrounding yarn.
Finishing Tips
- First, after completing all 5 petals, gently shape each one with your fingers to curve slightly outward. This creates a more natural, blooming appearance rather than a flat, rigid shape.
- Additionally, when applying blush or pastel, use a dry brush technique with very little product on the brush at a time. This allows for better control and more natural-looking gradients.
- Moreover, if using acrylic paint, dilute it slightly with water before application. Undiluted paint can be too opaque and may crack once dry on the flexible yarn surface.
- Furthermore, weave in the fastening-off tail through the back of the center round so it remains completely hidden when the flower is viewed from the front.
- Also, store finished flowers flat in a small box until ready to attach. This prevents the petals from being crushed or distorted before they are sewn onto a project.
- Finally, when attaching this flower to a frog sweater or any other plush, sew through the center round only. This keeps the petals free to move naturally and maintains the dimensional shape of the finished flower.
Gifting Ideas
- First, attach a finished flower to a small crocheted frog wearing a sweater for an adorable spring-themed plush that combines two different handmade techniques into one charming gift.
- Additionally, make a set of three flowers in different sizes and colors and attach them to a plain hair clip for a handmade accessory that feels personal and beautifully crafted.
- Moreover, these flowers make wonderful additions to handmade greeting cards. Sew or glue a finished flower onto a folded card for a three-dimensional touch that elevates a simple card into a keepsake.
- Furthermore, attach a flower to the front of a small drawstring bag or pouch for a botanical detail that makes a simple handmade gift feel complete and considered.
- Also, gift a small collection of unattached flowers in a tiny labeled box along with a note suggesting creative ways to use them. Crafters love receiving beautiful components they can incorporate into their own projects.
- Finally, these flowers sell well as add-on items at craft markets. Displaying a small basket of finished flowers beside larger plush items gives customers an affordable way to personalize their purchase.
Conclusion
This delicate white flower pattern proves that the smallest details can carry the most charm. The raised petal construction technique creates genuine dimension with just a handful of stitches per petal. Furthermore, the painted shading step is what truly elevates this flower from a simple crochet shape into something that looks like it was picked from a garden. Therefore, take your time with each petal base, work carefully in the back loops only, and apply your shading gradually for the most natural result. In addition, do not be afraid to experiment with color combinations; every shading choice creates a slightly different flower with its own personality. In conclusion, whether this flower ends up on a frog’s sweater, a hair clip, or simply displayed on its own, it carries a level of handmade artistry that store-bought embellishments simply cannot match.
Happy crocheting! Cannot wait to see your beautiful little flower bloom.